Author |
Message |
Martin Moser
|
|
|
|
M. Adair Orr
|
Posted: Mon 25 Apr, 2016 10:34 am Post subject: |
|
|
Great work so far. I love the brass inserts.
-A.
|
|
|
|
Juan Federico Gonzalez
|
Posted: Wed 27 Apr, 2016 12:52 pm Post subject: Nice! |
|
|
That's looking really good.
One of the most horrible features of war is that all the war-propaganda, all the screaming and lies and hatred, comes invariably from people who are not fighting.
George Orwell - Homage to Catalonia
|
|
|
|
Martin Moser
|
|
|
|
Julien M
|
Posted: Tue 03 May, 2016 6:22 am Post subject: |
|
|
Not a single comment?
This is great work, especially for an amateur (I remember your previous projects well). Keep it up, and keep documenting this!
Cheers,
J
|
|
|
|
M. Adair Orr
|
Posted: Tue 03 May, 2016 7:39 am Post subject: |
|
|
Again, excellent work.
I'm curious about a couple details. You've cut out the profile of the grip in wood, but the image shows a faily large pommel. Is that pommel solid or a cap? Similar question about the brass bands that you have prepped for inlay into the wood grip; on the original are they set into the flat of the grip only, or do they collar the entire perimeter?
I can't wait to see this grip in someones hand. The design looks like such an ungainly thing to hold, but I know there is good logic to it. Hopefully you can provide a photo when you are done.
-Adair
|
|
|
|
Martin Moser
|
Posted: Tue 03 May, 2016 12:48 pm Post subject: |
|
|
Thanks for the comments :-)
M. Adair Orr wrote: | I'm curious about a couple details. You've cut out the profile of the grip in wood, but the image shows a faily large pommel. Is that pommel solid or a cap? |
I *think* it is a sort of cap from what I can make out of the pics I have, but after a bit of experimenting (and because of lack of time, need to finally get this one ready) I decided to do it solid. Which means I will need to cut back the end of the pommel. Material is blackish horn btw. as with the original.
Quote: | Similar question about the brass bands that you have prepped for inlay into the wood grip; on the original are they set into the flat of the grip only, or do they collar the entire perimeter? |
They are set in only. At the moment they are oversized and will be cut/filed back considerably along with the shaping of the horn hilt plates
Quote: | I can't wait to see this grip in someones hand. The design looks like such an ungainly thing to hold, but I know there is good logic to it. Hopefully you can provide a photo when you are done. |
Well observed and my opinion as well. It also is fairly small, I measured the original and its proportions repeatedly and that's what is really is. And yes, I'll provide more updates over the next few days!
Cheers,
Martin
https://www.facebook.com/leatherworkthroughtheages/
|
|
|
|
Gregg Sobocinski
|
Posted: Wed 04 May, 2016 7:16 pm Post subject: |
|
|
I'm waiting for the completion of this project. The simple blade attracts me more than the more common, multi-fullered blades. Could end up being a new favorite look for the type!
|
|
|
|
Martin Moser
|
Posted: Thu 05 May, 2016 11:44 am Post subject: |
|
|
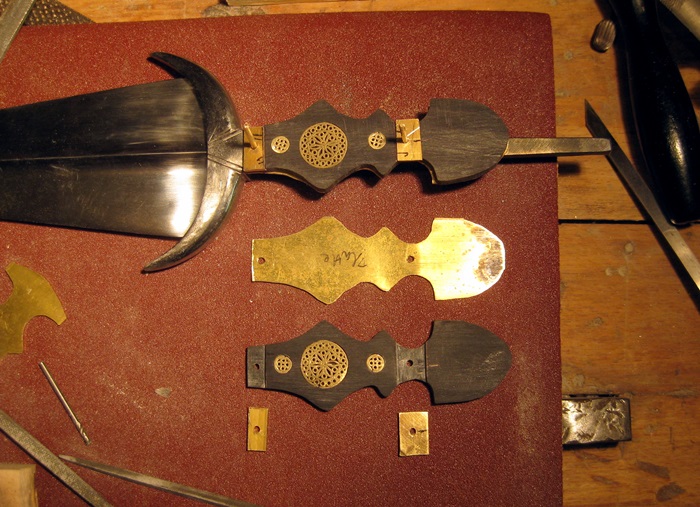
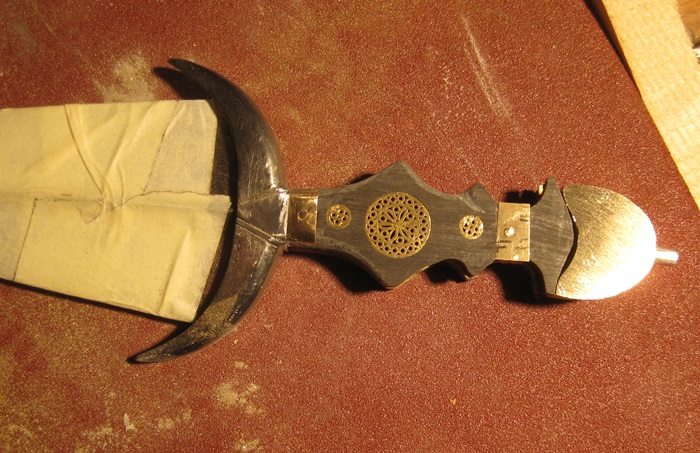
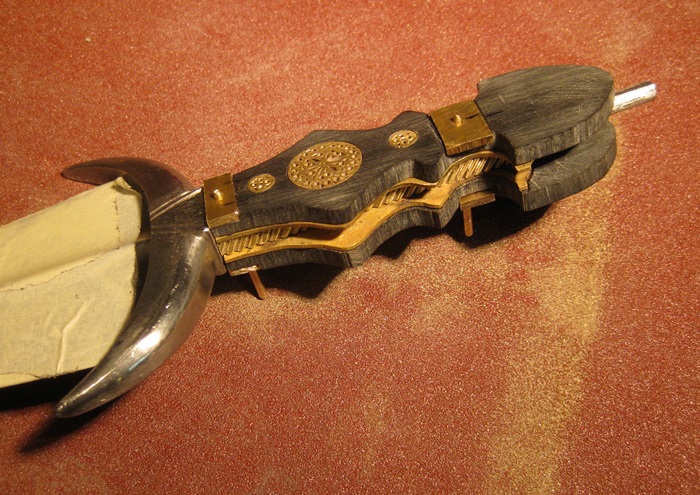
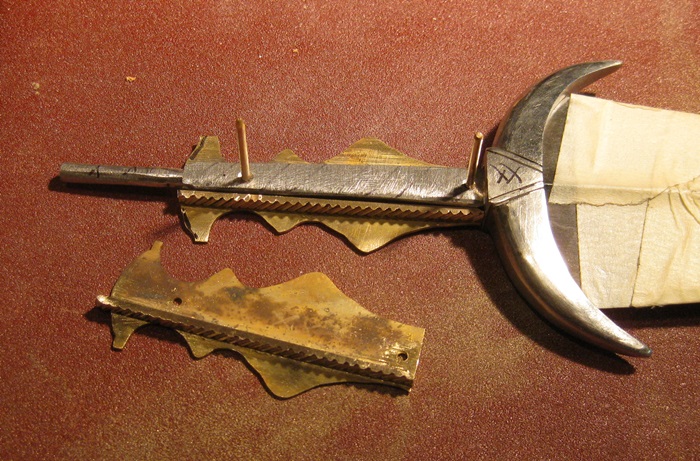
Some progress, I'm hoping to get the Cinquedea completed (without scabbard) this weekend. The side view shots give a view of the hilt construction, which is interesting IMHO in that it is kind of only semi-filled between the hilt plates.
Attachment: 167.14 KB
Attachment: 185.92 KB
Attachment: 177.27 KB
Cheers,
Martin
https://www.facebook.com/leatherworkthroughtheages/
|
|
|
|
Martin Moser
|
Posted: Sat 07 May, 2016 12:41 pm Post subject: |
|
|
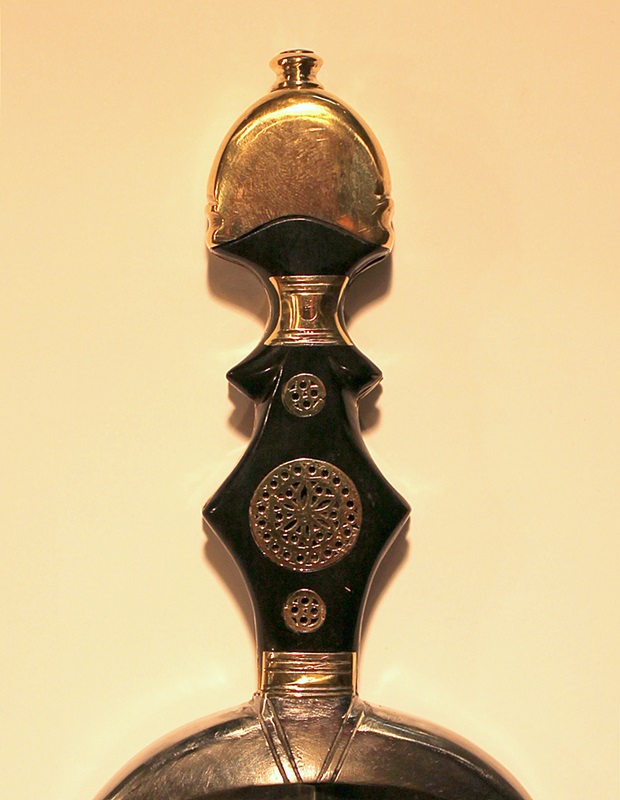
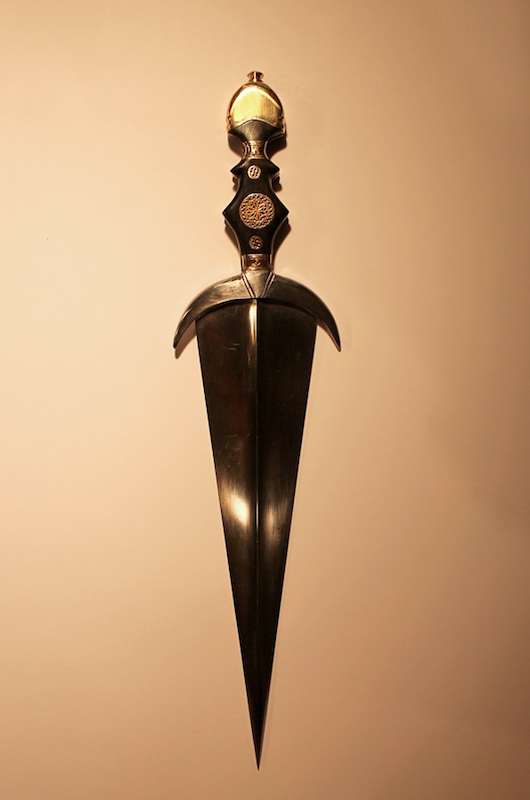
Hours of filing, sanding, cursing and sweating later ... almost ready except for the engraving of the pommel. I'm very much in love with the shape and proportions of this weapon. And, like the originals it is modelled after, those little asymmetries and imperfections make it very lively - plus it puts it into my skill range ;-)
(why is it that some pics show up, while others only appear as a downloadable attachment?)
Attachment: 114.45 KB
Attachment: 64.29 KB
Cheers,
Martin
https://www.facebook.com/leatherworkthroughtheages/
Last edited by Martin Moser on Tue 10 May, 2016 6:09 am; edited 1 time in total
|
|
|
|
Jeffrey Hildebrandt
Industry Professional
|
|
|
|
Juan Federico Gonzalez
|
Posted: Sun 08 May, 2016 8:34 pm Post subject: |
|
|
That is looking really really nice
One of the most horrible features of war is that all the war-propaganda, all the screaming and lies and hatred, comes invariably from people who are not fighting.
George Orwell - Homage to Catalonia
|
|
|
|
Julien M
|
Posted: Mon 09 May, 2016 3:21 am Post subject: |
|
|
Very very impressed by your work on this piece - you made the all process look as easy as a walk in the park.
What kind of équipement do you have to silver solder? Looking Forward to see the scabbard too (most cinquedea scabbards I've seen in museum had exquisite leather carved renaissance motives - daunting!)
Thx,
Julien
|
|
|
|
Martin Moser
|
Posted: Mon 09 May, 2016 10:41 pm Post subject: |
|
|
Thanks for the encouraging comments all :-)
Julien M wrote: | you made the all process look as easy as a walk in the park. |
Be assured it did cost me a few nerves :-P
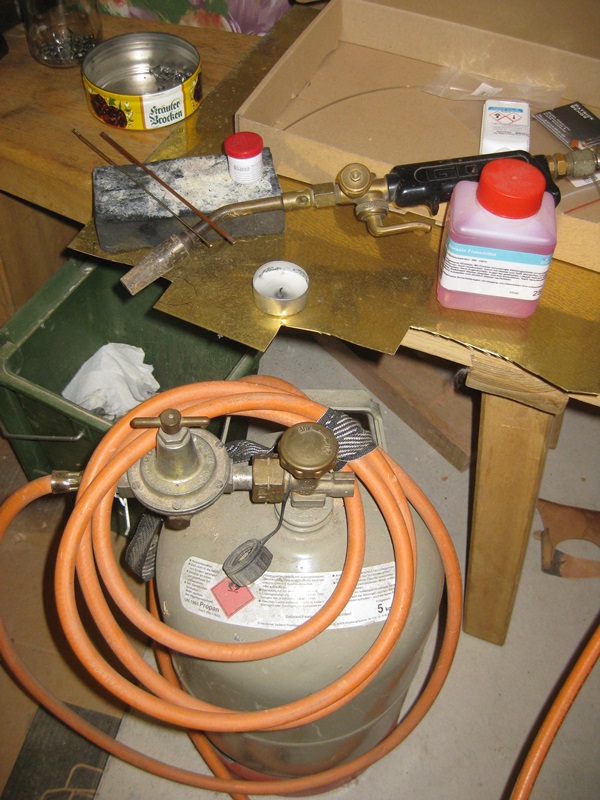
Quote: | What kind of équipement do you have to silver solder? |
Nothing special (see pic) except for one thing perhaps, which is a greyish silversolder paste I only recently discovered exists (http://www.bengs-modellbau.de/werkzeug/loetzubehoer/silberlotpaste-zum-hartloeten). Works pretty much like the pastes available for tinning if you know those. I found this very helpful brazing the rosettes that have almost 40 smallish pieces to it that I brazed to a bottom plate in one go. Since the actual solder is in the paste it can be applied very precisely. Worked really well for me.
Quote: | Looking Forward to see the scabbard too (most cinquedea scabbards I've seen in museum had exquisite leather carved renaissance motives - daunting!) |
Indeed - will go to the State Library in Munich today to do some research on that, actually. In the meantime it's back to shoemaking ...
Attachment: 184.24 KB
Cheers,
Martin
https://www.facebook.com/leatherworkthroughtheages/
|
|
|
|
Leo Todeschini
Industry Professional
|
|
|
|
Nathan Robinson
myArmoury Admin
|
|
|
|
Martin Moser
|
Posted: Tue 10 May, 2016 6:11 am Post subject: |
|
|
Thanks for the kind words, Tod, all the more as they come from such an expert maker! :-)
Nathan - thanks for the pointer, that's the info I was looing for but was somehow too blind to find :-P 800x800 max, got it now!
Cheers,
Martin
https://www.facebook.com/leatherworkthroughtheages/
|
|
|
|
Gregg Sobocinski
|
Posted: Tue 17 May, 2016 7:09 pm Post subject: |
|
|
I really like this sword! Nicely done! There is something about the adornments on the handle, paired with the simpler, single-rib blade that really works!
|
|
|
|
Martin Moser
|
Posted: Wed 29 Jun, 2016 1:18 pm Post subject: |
|
|
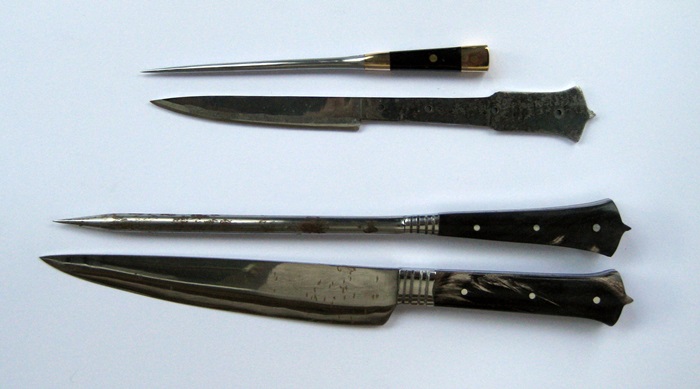
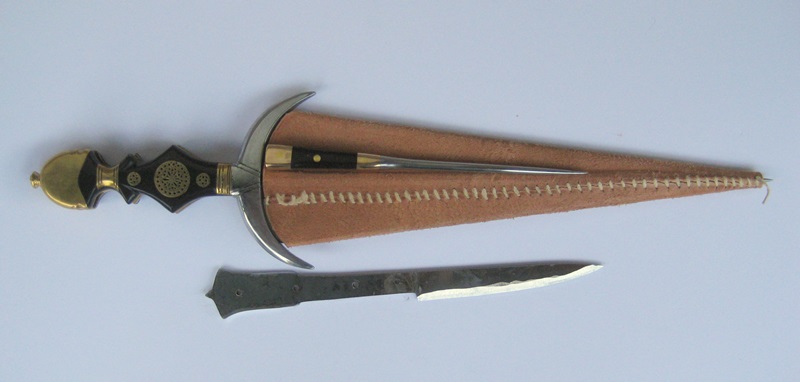
Picking it up again, I have decided on what type of scabbard to make for this cinquedea - I'm going to go with a scabbard from Armi Bianchi Italiane that has 2 by-knives, see below at bottom. The scabbard will not have the metal band at the top, which apparently is a modern addition.
I have prepared the inner layer of the scabbard and am now working on the by-knives. The pick is done, started cutting and grinding the shape of the knife . For these I'm repurposing one of a few sets of cheap and very large knife and pick I bought years ago, see the before-after pics and how they are going to be placed on the scabbard.
Attachment: 58.06 KB
Attachment: 70.91 KB
Attachment: 62.58 KB
Cheers,
Martin
https://www.facebook.com/leatherworkthroughtheages/
|
|
|
|
Martin Moser
|
Posted: Mon 04 Jul, 2016 1:08 pm Post subject: |
|
|
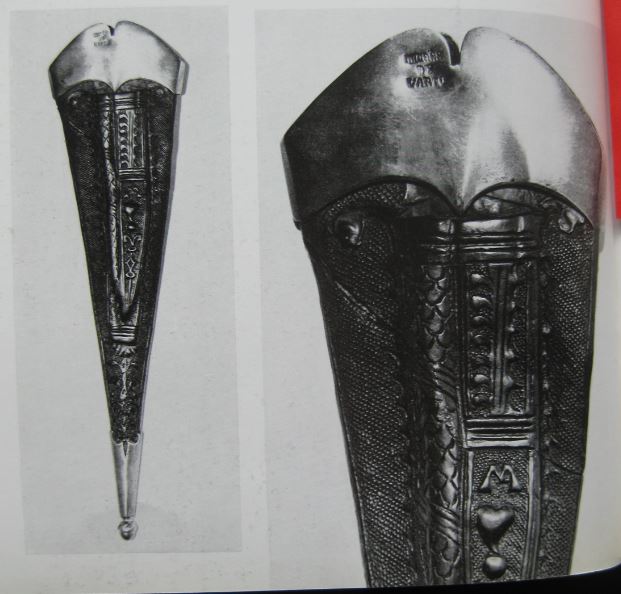
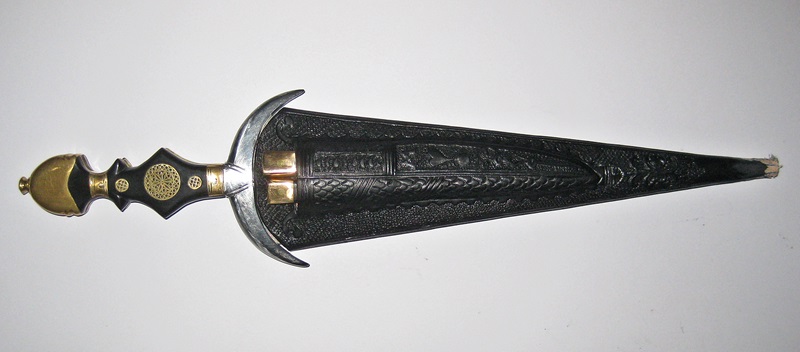
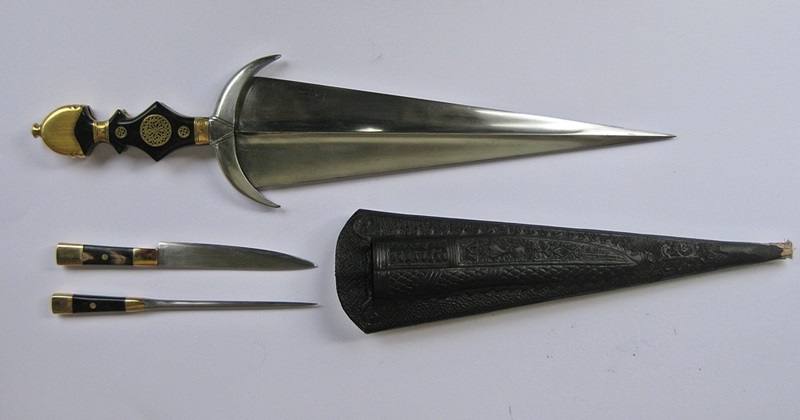
And another step ahead on the weekend - completed the sheath. 2 layer construction with stamping after a surviving original only slightly larger than mine. Next is the chape and then, finally engraving the pommel to finish the whole project off eventually.
Attachment: 82.06 KB
Attachment: 75.5 KB
Cheers,
Martin
https://www.facebook.com/leatherworkthroughtheages/
|
|
|
|
|