| Author |
Message |
Greyson Brown

|
 Posted: Thu 26 Apr, 2007 9:59 am Post subject: Posted: Thu 26 Apr, 2007 9:59 am Post subject: |
 |
|
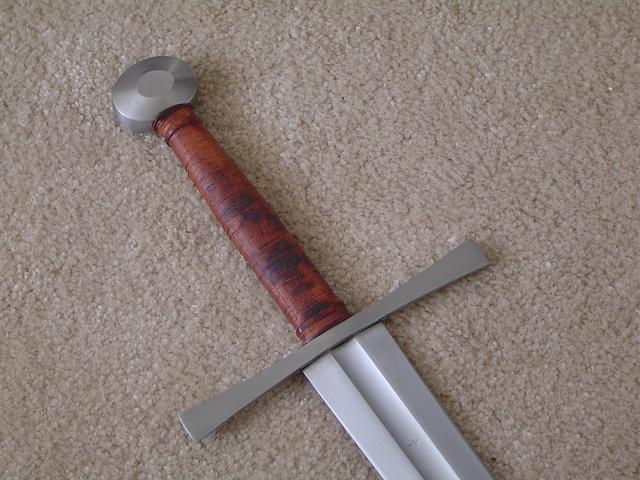
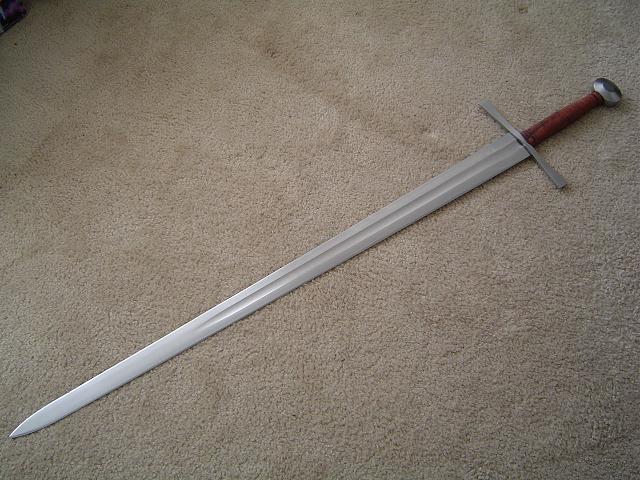
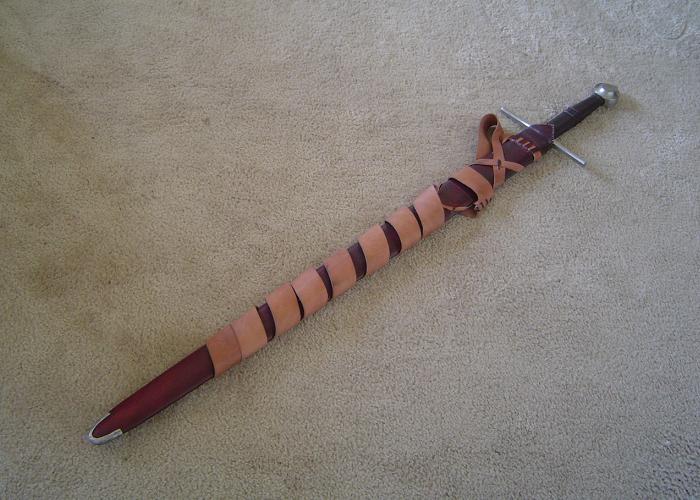
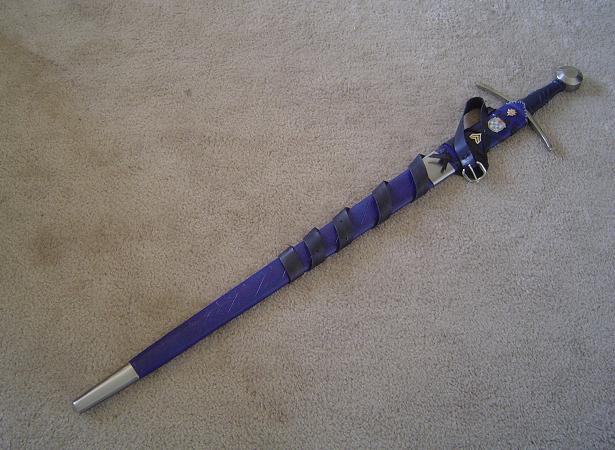
I recently purchased a used Albion Squire Line Greatsword that had some surface rust on it (the seller was up-front about that, so no big deal). Since I had intended to redo the grip anyway, I went ahead and did that while I was cleaning it up. I also sharpened the sword, as it was purchased blunt.
I wanted a light brown grip for this sword, so I left the leather undyed and put a light coat of oil on it. I also did something slightly different with this one in that I used a coat of mink oil rather than the beeswax that I had previously used to finish my grips. The mink oil covers the leather more easily, and seems to be doing a good job of protecting the grip, so I am inclined to recommend it to anyone doing these kinds of projects.
Let me know what you think.
-Grey
 Attachment: 57.76 KB Attachment: 57.76 KB
Attachment: 65.38 KB
"So long as I can keep the path of honor I am well content."
-Sir Arthur Conan Doyle, The White Company
Last edited by Greyson Brown on Thu 26 Apr, 2007 1:23 pm; edited 1 time in total
|
|
  |
 |
|
J. Bedell
|
| Posted: Thu 26 Apr, 2007 10:06 am Post subject: |
|
|
It looks great Greyson, you've done a nice job! I was wondering if we could get a photo of the edge to see the edge geometry? I would like to see, if you don't mind, how it looks after being sharpened. Is there a very noticable secondary bevel or did you blend it into the blade?
It looks awesome!
-James
P.S. Would you like to sell it? 
The pen may be mighter, but the sword is much more fun.
|
|
  |
|
|
David Sutton
|
| Posted: Thu 26 Apr, 2007 12:00 pm Post subject: |
|
|
I think you did a great job on the SL Great Sword. The grip re-wrap looks good, really sets off the rest of the sword, suits it better than the origional. All that featureless expanse of leather looks a little too austere to my eye on the sword as sold by Albion. Did you use a cord under-wrap or just an over-wrap to texture the leather?
'Reserve your right to think, for even to think wrongly is better than not to think at all'
'To teach superstitions as truth is a most terrible thing'
Hypatia of Alexandria, c400AD
|
|
|
|
|
Max von Bargen

|
| Posted: Thu 26 Apr, 2007 12:15 pm Post subject: |
|
|
Wow! That looks really nice. I like your take on the SL great sword. I would also be interested in seeing the edge geometry if possible.
Max
|
|
|
|
|
Greyson Brown
|
| Posted: Thu 26 Apr, 2007 1:22 pm Post subject: |
|
|
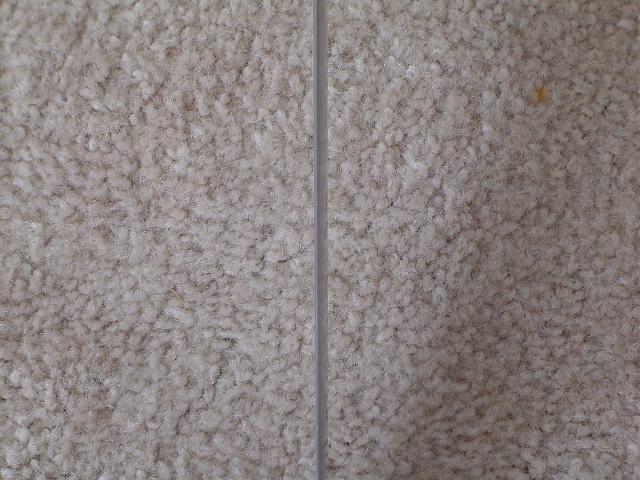
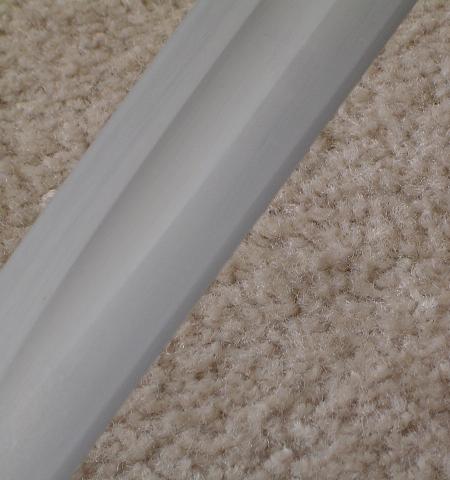
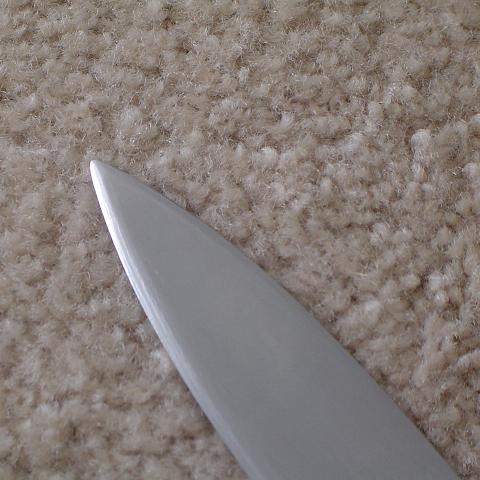
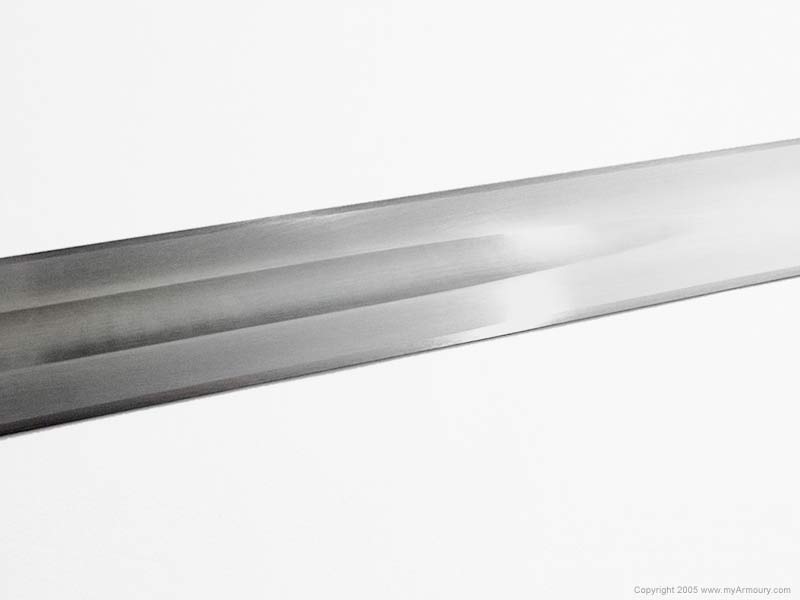
Okay, hopefully the attached images give you some idea of the edge geometry. Failing that, they do give you a nice close up of my carpet. I could have done a lot more to blend the edge, and I may still go back and do that at some point. As it is, the bevel is pretty obvious, but no more so than if I had ordered the sword sharpened from Albion.
I did not use cord under the leather except to form the risers. I really like full cord under leather, but it is not required to get a good texture and this keeps it in line with the rest of my Next Gens.
As for selling it, maybe somewhere in the future, but not any time soon.
-Grey
Attachment: 62.76 KB
Attachment: 27.5 KB
Attachment: 37.06 KB
"So long as I can keep the path of honor I am well content."
-Sir Arthur Conan Doyle, The White Company
|
|
|
|
|
|
J. Bedell
|
| Posted: Thu 26 Apr, 2007 1:37 pm Post subject: |
|
|
Thanks for those shots Greyson! The bevel is obvious but it isn't ugly and certaintly doesn't affect the piece in any negative way. Excellent work! 
If you do decide to part with it sometime, let me know! 
-James
The pen may be mighter, but the sword is much more fun.
|
|
|
|
|
Robin Smith

|
| Posted: Thu 26 Apr, 2007 1:54 pm Post subject: |
|
|
Awesome job G... So when are you going professional?
A furore Normannorum libera nos, Domine
|
|
 |
|
Chad Arnow
myArmoury Team


|
| Posted: Thu 26 Apr, 2007 3:06 pm Post subject: |
|
|
| J. Bedell wrote: | Thanks for those shots Greyson! The bevel is obvious but it isn't ugly and certaintly doesn't affect the piece in any negative way. Excellent work!
If you do decide to part with it sometime, let me know!
-James |
From the review I did of this sword (a sharpened version):

ChadA
http://chadarnow.com/
|
|
 |
|
Greyson Brown
|
| Posted: Thu 26 Apr, 2007 4:59 pm Post subject: |
|
|
Thanks, Chad. Your lighting was slightly better, so it probably makes the bevel stand out a bit more. My bevel is perhaps slightly less obvious than it would be from Albion, but nothing to go bragging about. And Albion's work is more consistent than mine. Neither one, at lest in my opinion, has a huge effect on the appearance or affectiveness of the sword.
| Robin Smith wrote: | | Awesome job G... So when are you going professional? |
I'm always willing to entertain the possibility of this kind of work, be it grips, or scabbards, or what have you, but I haven't been serious enough about any of it to really go advertising myself, either. So to answer your question, when people ask me to, I guess.
-Grey
"So long as I can keep the path of honor I am well content."
-Sir Arthur Conan Doyle, The White Company
|
|
|
|
|
Greyson Brown
|
| Posted: Mon 04 Jun, 2007 8:19 am Post subject: |
|
|
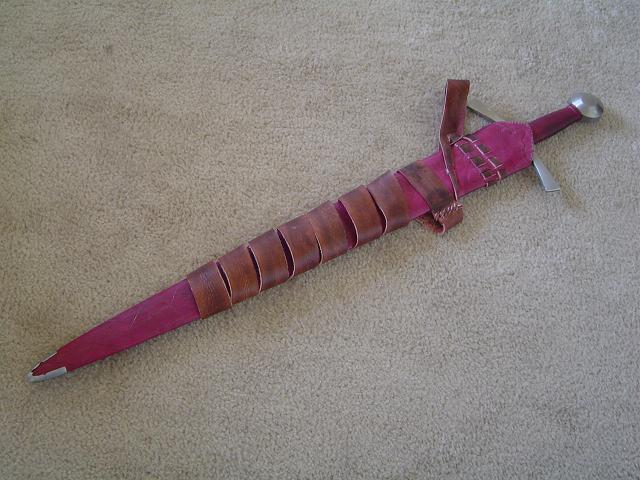
I spent this weekend blacksmithing and working on scabbard projects. I started early on by burning myself pretty good, but that seems to have placated Murphy somehow, and the rest of my projects went fairly well.
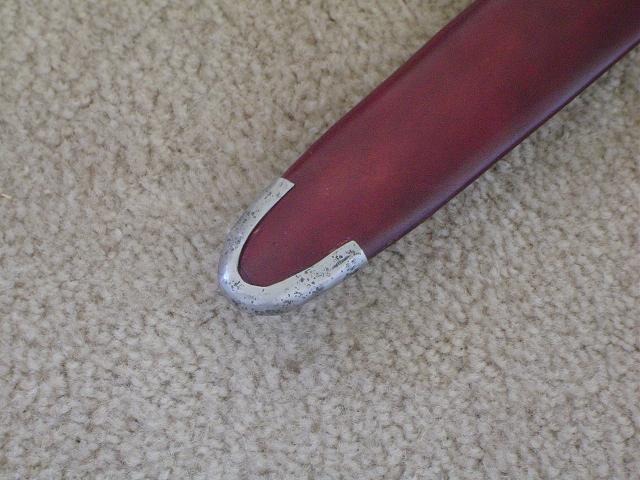
I started by making a chape for my Steward scabbard. It is just a simple U shaped chape, and I left it with some of the pitting from the forge to give it a slightly rugged appearance. I'm happy with this one, though I possibly should have made the sides longer.
The next order of business was to make a buckle. Unfortunately, I have not done any blacksmithing in four years, and a well made buckle really requires that the ring be welded. This makes it stronger and avoids gaps that will interfer with the movement of the tongue. I never claimed to be an expert forge welder, but I used to be fairly comfortable with it. Having not kept up with it, though, I only had one successful weld out of three attempts. It's not a very pretty buckle in the end, but it works. Since the buckles were going to be for me, and not a customer, I decided not beat my head against the wall. One buckle is good enough for now (though I am still debating whether or not I will actually use it), and I will work more on buckle making in the near future.
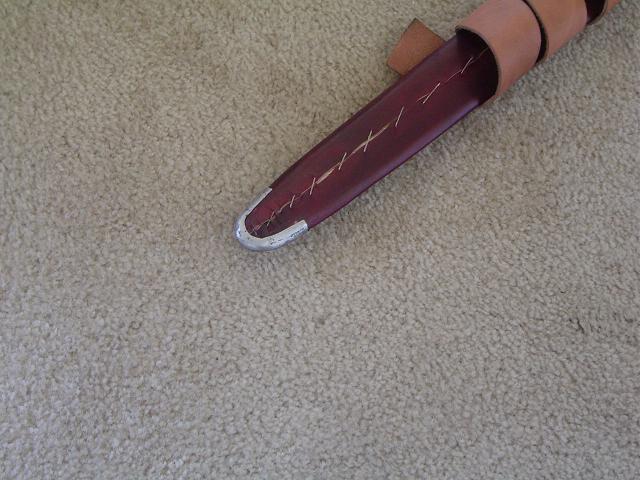
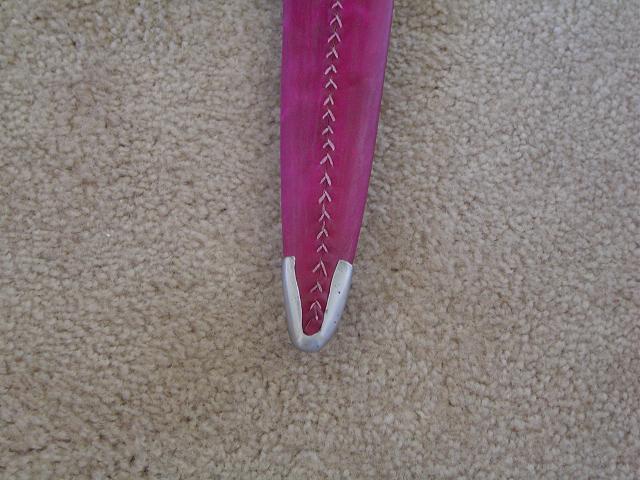
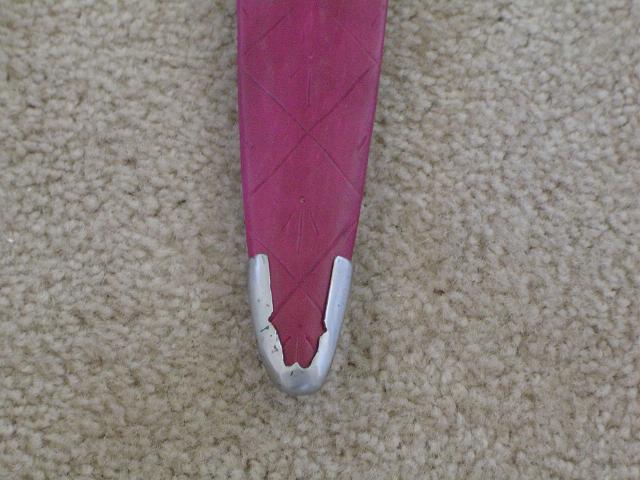
I also made a chape for my Sherriff scabbard. It turned out fairly nice, and I set to work cleaning it up. I wanted to remove all of the pits, but in the proccess I filed through a portion on the front left side. The material I was using came from the local salvage place and was, I think, a piece of metal edging used in landscaping. Unfortunately, it had been sitting outside and had rather noticable rust pits. That, in addition to the material lost to scale and hammering, meant filing out all of the pits could be rather risky work. Still, I got most of them out and then welded a patch onto the spot that I filed through. In cleaning up my weld, I discovered that I still have several thin spots, so I decided to compromise and left several pits in the chape. I also had one thin spot on the edge of the chape that was causing me problems. I tried to do a little decorative file work to remove it (and mirrored it on the other side, of course), but I don't think it looks very good. The little point filed into the end was deliberate, was planned from the begining, and turned out decent, so I would say that I am about 75% happy with this chape.
That's all I got done on my scabbards this weekend, but at least I have a couple that are closer to completion.
-Grey
Attachment: 67.16 KB
Attachment: 58.99 KB
Attachment: 55.04 KB
Attachment: 15.98 KB

Attachment: 60.99 KB
Attachment: 58.55 KB
Attachment: 52.83 KB
"So long as I can keep the path of honor I am well content."
-Sir Arthur Conan Doyle, The White Company
|
|
|
|
|
Greyson Brown
|
| Posted: Mon 04 Jun, 2007 8:38 am Post subject: |
|
|
Almost forgot! I also put a buckle on my 101 MI scabbard. This is just an economy buckle from Tandy Leather, so it's nothing really special, but this one is finally complete and wearable.
-Grey
Attachment: 57.05 KB
"So long as I can keep the path of honor I am well content."
-Sir Arthur Conan Doyle, The White Company
|
|
|
|
|
|
|
You cannot post new topics in this forum
You cannot reply to topics in this forum
You cannot edit your posts in this forum
You cannot delete your posts in this forum
You cannot vote in polls in this forum
You cannot attach files in this forum
You can download files in this forum
|
All contents © Copyright 2003-2024 myArmoury.com — All rights reserved
Discussion forums powered by phpBB © The phpBB Group
Switch to the Basic Low-bandwidth Version of the forum
|

