Greyson ~ You're so creative! I always love seeing what you come up with next. :D
Hello all!
Greyson,
I like the look of the incised details on the scabbards. Nice touch.
I'm amazed at how the MRL European Sword looks so much different with a different grip. They usually do look better with a nicer grip, don't they? ;)
(I've changed the grip-wrap on just about every MRL sword I own.)
Keep up the good work, and keep sharing photos!
Stay safe!
Great job, Grey! Very cool the way you brought the old and the new together. Sweet job on the incising - I can imagine how cramped your hands must have been by the time you finsihed that, HA! Keep up the good work, amigo.
-Greg
-Greg
Greyson- How do you do it!?!? All of your work has been absolutely stunning! Really great job on the newest one, I love the decoration, and the fact that it is so personal makes it that much better. Keep up the amazing work (and keep posting pictures of it! :D )
-James
-James
That's the best one yet! I love your use of the different design elements, that's a very creative combination. I also love the period look of the incising on the scabbard, that's very cool.
Greyson is indeed talented; I am fortunate in that I am about to own one of his splendid scabbards.
I'm sorry it took me so long (my internet access has been limited of late), but I just wanted to "say thank" you for everyone's support. I enjoy making these scabbards, but sharing them is probably the best part of the deal. Pretty soon, I should be done with the one Josh mentioned, and then I will post some pictures of that.
-Grey
-Grey
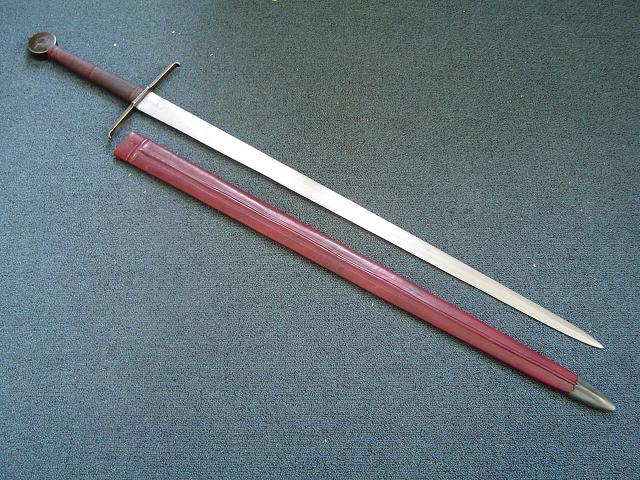
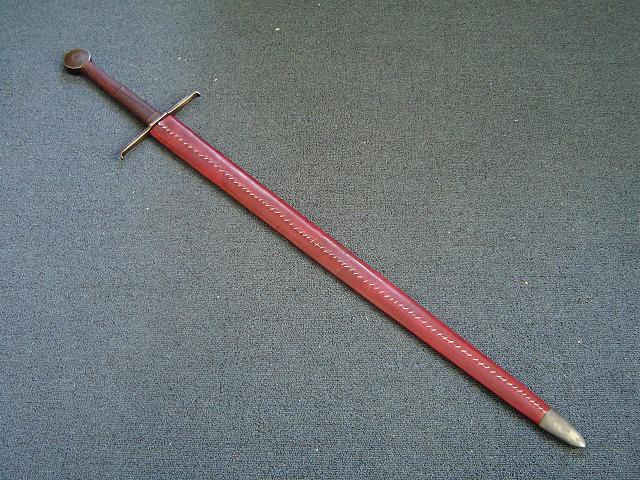
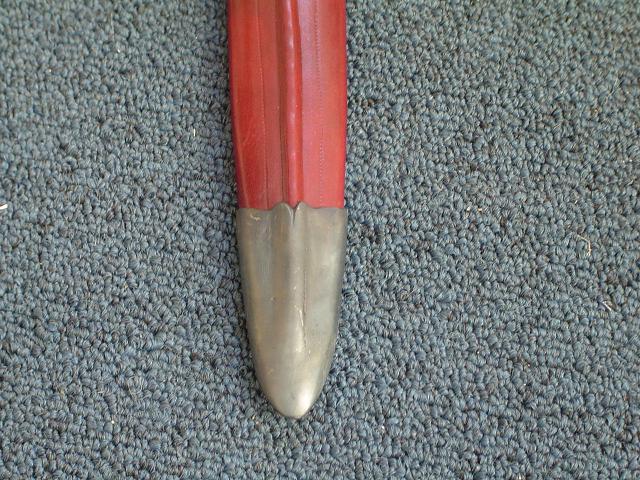
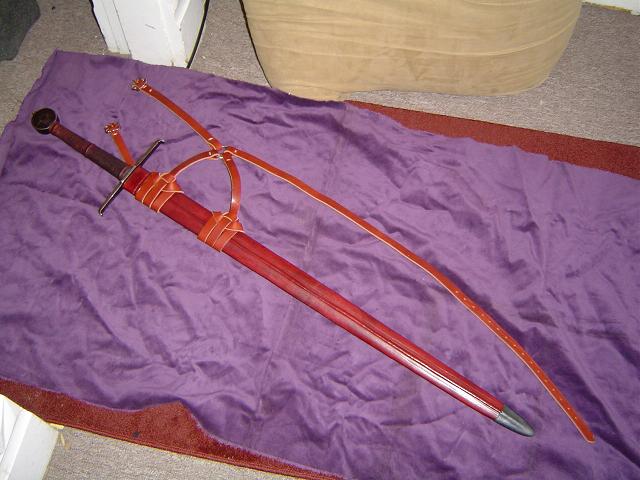
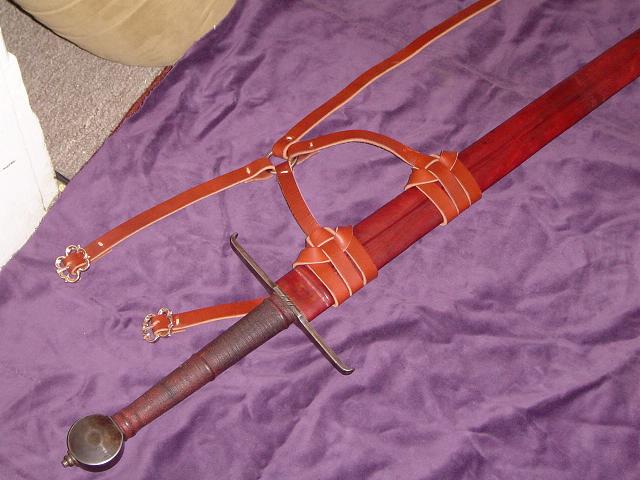
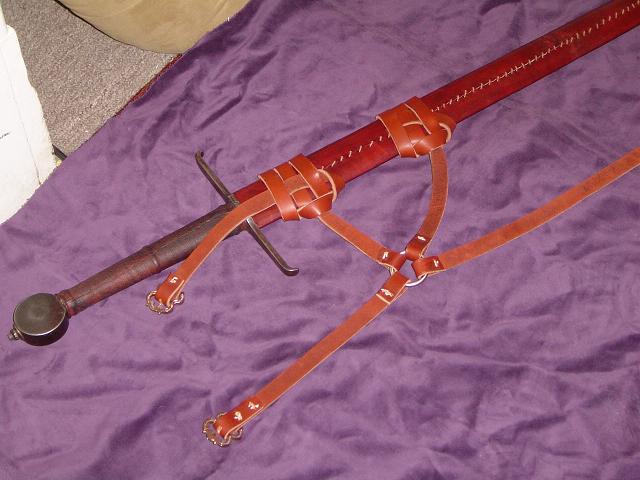
I finished Josh's scabbard the other night. This projects has been in the works for a while, and it feels really good to get it finished. Josh specified that he wanted a red-brown 15th century scabbard with the knotted suspension that is typical of the period. Other than that, he let me do pretty much what I wanted. It took the oppurtunity to incorporate a mid-rib along the length of the scabbard front; something I had wanted to do for a while, but which is less fitting for most of my pieces. If I do that again, I will use a cord with a more consistant thickness. I also got to do what I wanted with the chape, and I am really happy with the way the file work on the top turned out.
Attaching the suspension straps to the main belt gave us a little trouble. We could not find any definitive info on how it was done historically (usually that portion of the belt is hidden on effigies). We both liked the idea of using a hook such as can be seen on rapier hangers, but I did not have an oportunity to fabricate those parts. Instead, we went with the speculative approach of attaching the straps to a ring. I think it still looks quite nice, even if it isn't as adjustable. The buckles were purchased from Raymond's Quiet Press.
I also did some work on the sword, to include rewrapping the grip and sharpening the blade.
-Grey
 Attachment: 88.16 KB
 Attachment: 94.19 KB
 Attachment: 95.56 KB
 Attachment: 14.95 KB
 Attachment: 48.89 KB
 Attachment: 46.29 KB
 Attachment: 44.6 KB
 Attachment: 41.3 KB
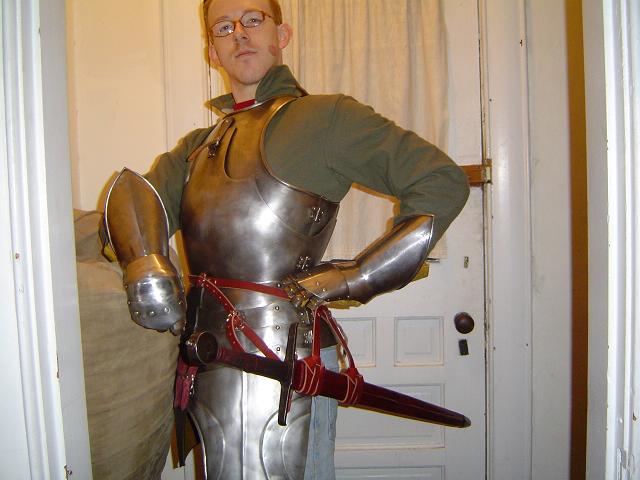
Attaching the suspension straps to the main belt gave us a little trouble. We could not find any definitive info on how it was done historically (usually that portion of the belt is hidden on effigies). We both liked the idea of using a hook such as can be seen on rapier hangers, but I did not have an oportunity to fabricate those parts. Instead, we went with the speculative approach of attaching the straps to a ring. I think it still looks quite nice, even if it isn't as adjustable. The buckles were purchased from Raymond's Quiet Press.
I also did some work on the sword, to include rewrapping the grip and sharpening the blade.
-Grey


Thanks for sharing your pics and info, its been interesting and educational to follow, especially as I am currently working on a scabbard of my own.
I have some questions for you pertaining to my own project, which are : do you use only flat chisels to shape the inside of the scabbard? How do you get a smooth and even finish which conforms to the blades distal taper and edge geometry and how do you measure the depth of the carved out part at different points along its length? I have been working carefully as I want it to be a nice and snug fit without the blade being loose inside the scabbard, but am having some small difficulties ascertaining exactly where and how much material still needs to be taken off. As I said, I want to avoid making it too loose and would like to keep it an even fit along the entire length, matching the distal taper and edge geometry of the blade as well as possible.
I suspect that my difficulties with this project are due largely to my ineptitude and inexperience as a craftsman, and I apologise in advance if my questions appear foolish.
Cheers, Adam S.
Looking gooooood Grey! Great job overall, and the chape turned out extremely nice. Bet this one took a wee bit more work than the last couple.:} Congrats on a very nice piece.
-Greg
-Greg
| Adam Simmonds wrote: |
| Thanks for sharing your pics and info, its been interesting and educational to follow, especially as I am currently working on a scabbard of my own. |
No problem; half the fun of this stuff is getting to share it.
| Quote: |
| I have some questions for you pertaining to my own project, which are : do you use only flat chisels to shape the inside of the scabbard? |
I have done all of my scabbards so far with flat chisels only. I got various shaped chisels for Christmas, and may begin using those for future projects if I see the need. For the most part, though, a few different sizes of flat chisel (I use the 1/4, 1/2, and 3/4 inch the most) can do most of what you need.
| Quote: |
| How do you get a smooth and even finish which conforms to the blades distal taper and edge geometry and how do you measure the depth of the carved out part at different points along its length? |
One of my other Christmas presents was a set of three small hobby planes. I intend to use those quite a bit, but up to this point I have had to be content with a block of wood, a couple different grits of sandpaper, and patience.
| Quote: |
| I have been working carefully as I want it to be a nice and snug fit without the blade being loose inside the scabbard, but am having some small difficulties ascertaining exactly where and how much material still needs to be taken off. As I said, I want to avoid making it too loose and would like to keep it an even fit along the entire length, matching the distal taper and edge geometry of the blade as well as possible. |
I use calipers to measure the thickness of the blade, and then mark that measurement on the wood, so that I know how deep to carve. I can eyeball it pretty well now, but when I think I am close, I measure the depth of my carving my placing a scrap board across the flat of the core board (so that it forms a straight edge even with the surface that will be glued to the other half of the core), and measure from the bottom side of the scrap board to the bottom of the scabbard hollow. Even doing this carefully, you will probably have some spots that don't fit quite right. I clamp the two halves of the core together and test fit the blade. When you unclamp the boards, there will probably be shiny spots where the blade compressed the wood a bit. If you are not seeing anything, a light coat of oil on the blade may help these areas show up. An extreme solution (just because of the clean up involved), would be to smoke the sword blade, as is done when fitting shotgun and rifle actions. Don't heat the blade, just hold it well above an oil lamp (which works best, as you can lengthen the wick to get more smoke) or candle, so that the smoke blackens the blade.
| Quote: |
| I suspect that my difficulties with this project are due largely to my ineptitude and inexperience as a craftsman, and I apologise in advance if my questions appear foolish. |
They are all problems that I had to work out, so I am glad to be able to help someone else out. I am always learning new things and tricks.
| Greg Griggs wrote: |
| Looking gooooood Grey! Great job overall, and the chape turned out extremely nice. Bet this one took a wee bit more work than the last couple.:} Congrats on a very nice piece.
-Greg |
I am extremely happy with that chape, especially since it is only the second one I've made. This is the one that I said was fighting with me when you posted your Gallowglass scabbard pictures. If I do a central ridge like the one on this scabbard again, it will stop short of the chape, as I had a hard time trying to get the metal formed to the shape of that rib, and still fitting tightly everywhere else. I am also really proud of the filework along the top. I had a pretty definitve picture of that in my mind, and it turned out exactly as I envisioned. Josh wanted it black to match the hilt furniture, but I really didn't like the thought of using gun blueing/blackening solution on it. Instead I fire blackened it and hit it with the wire brush real quick. Much better, I think.
This was a time consuming project, but a large portion of that was waiting because I didn't order everything at the outset. Since Josh lives nearby, it was nice to be able to show him the scabbard as it progressed and discuss aspects such as chape design and buckle selection. By not ordering things upfront, I was able to be a little more fluid with the design, and I think that made for a nicer piece in the end.
I really glad the suspension worked out. I was awfully nervous about that part, and Josh was sitting right there, so I couldn't have hidden any mistakes very easily. :\
-Grey
Last edited by Greyson Brown on Fri 02 Feb, 2007 8:54 am; edited 2 times in total
No worries, Greyson; I had faith in you.
You did an excellent job, and I am eternally thankful to you.
I had forgotten that my wife's lipstick-print was on my cheek for that photo. :blush:
You did an excellent job, and I am eternally thankful to you.
I had forgotten that my wife's lipstick-print was on my cheek for that photo. :blush:
Last edited by Josh Warren on Thu 01 Feb, 2007 4:14 pm; edited 1 time in total
Thanks again for the info and tips.
Cheers, Adam S.
Cheers, Adam S.
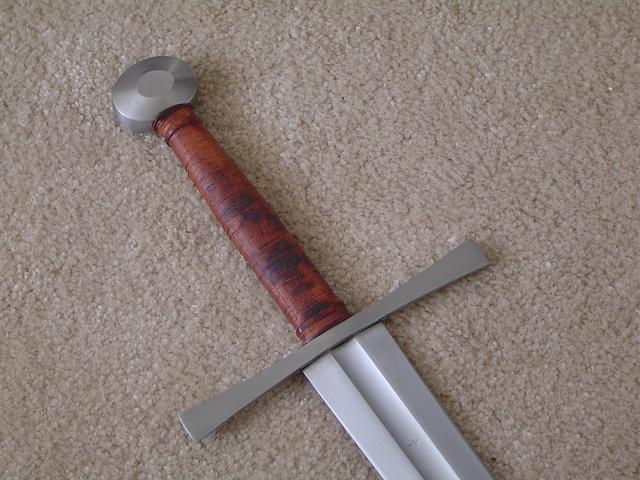
I recently purchased a used Albion Squire Line Greatsword that had some surface rust on it (the seller was up-front about that, so no big deal). Since I had intended to redo the grip anyway, I went ahead and did that while I was cleaning it up. I also sharpened the sword, as it was purchased blunt.
I wanted a light brown grip for this sword, so I left the leather undyed and put a light coat of oil on it. I also did something slightly different with this one in that I used a coat of mink oil rather than the beeswax that I had previously used to finish my grips. The mink oil covers the leather more easily, and seems to be doing a good job of protecting the grip, so I am inclined to recommend it to anyone doing these kinds of projects.
Let me know what you think.
-Grey
 Attachment: 57.76 KB
 Attachment: 65.38 KB
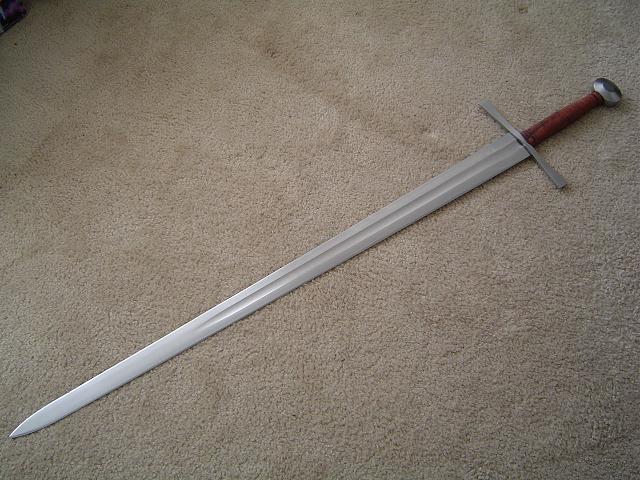
I wanted a light brown grip for this sword, so I left the leather undyed and put a light coat of oil on it. I also did something slightly different with this one in that I used a coat of mink oil rather than the beeswax that I had previously used to finish my grips. The mink oil covers the leather more easily, and seems to be doing a good job of protecting the grip, so I am inclined to recommend it to anyone doing these kinds of projects.
Let me know what you think.
-Grey


Last edited by Greyson Brown on Thu 26 Apr, 2007 12:23 pm; edited 1 time in total
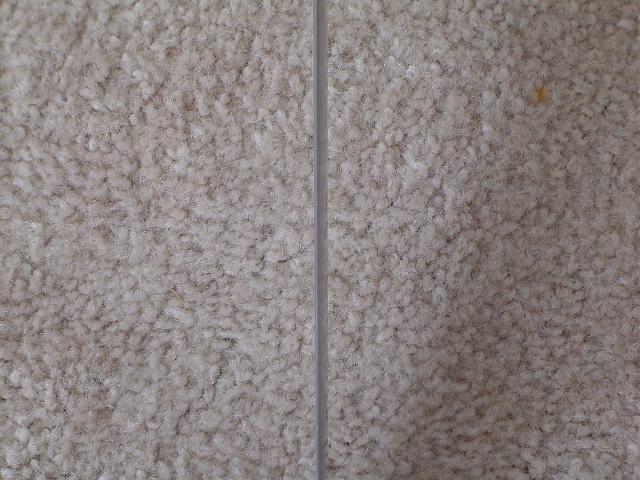
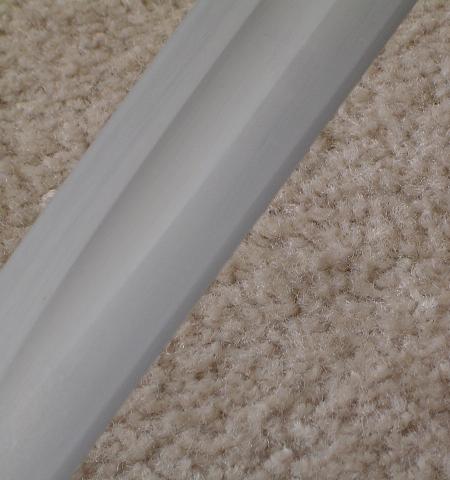
It looks great Greyson, you've done a nice job! I was wondering if we could get a photo of the edge to see the edge geometry? I would like to see, if you don't mind, how it looks after being sharpened. Is there a very noticable secondary bevel or did you blend it into the blade?
It looks awesome!
-James
P.S. Would you like to sell it? :D
It looks awesome!
-James
P.S. Would you like to sell it? :D
I think you did a great job on the SL Great Sword. The grip re-wrap looks good, really sets off the rest of the sword, suits it better than the origional. All that featureless expanse of leather looks a little too austere to my eye on the sword as sold by Albion. Did you use a cord under-wrap or just an over-wrap to texture the leather?
Wow! That looks really nice. I like your take on the SL great sword. I would also be interested in seeing the edge geometry if possible.
Max
Max
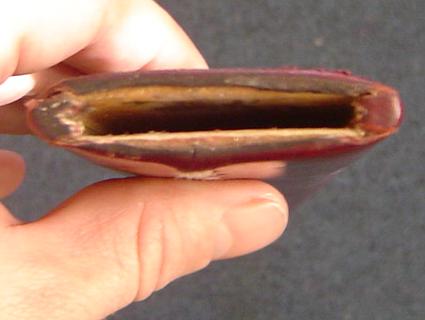
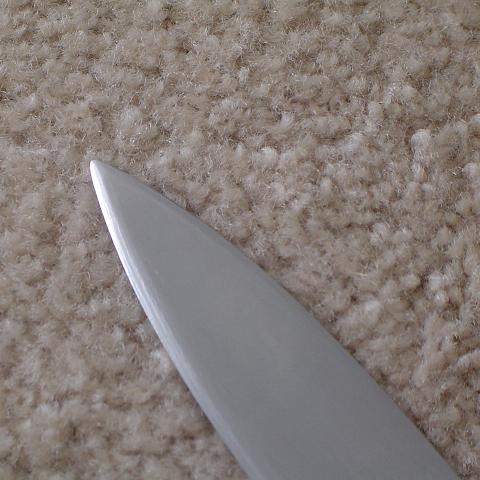
Okay, hopefully the attached images give you some idea of the edge geometry. Failing that, they do give you a nice close up of my carpet. :D I could have done a lot more to blend the edge, and I may still go back and do that at some point. As it is, the bevel is pretty obvious, but no more so than if I had ordered the sword sharpened from Albion.
I did not use cord under the leather except to form the risers. I really like full cord under leather, but it is not required to get a good texture and this keeps it in line with the rest of my Next Gens.
As for selling it, maybe somewhere in the future, but not any time soon.
-Grey
 Attachment: 62.76 KB
 Attachment: 27.5 KB
 Attachment: 37.06 KB
I did not use cord under the leather except to form the risers. I really like full cord under leather, but it is not required to get a good texture and this keeps it in line with the rest of my Next Gens.
As for selling it, maybe somewhere in the future, but not any time soon.
-Grey


Thanks for those shots Greyson! The bevel is obvious but it isn't ugly and certaintly doesn't affect the piece in any negative way. Excellent work! :eek:
If you do decide to part with it sometime, let me know! :lol: :D
-James
If you do decide to part with it sometime, let me know! :lol: :D
-James
Awesome job G... So when are you going professional? :lol:
Page 3 of 4
You cannot post new topics in this forumYou cannot reply to topics in this forum
You cannot edit your posts in this forum
You cannot delete your posts in this forum
You cannot vote in polls in this forum
You cannot attach files in this forum
You can download files in this forum
All contents © Copyright 2003-2006 myArmoury.com — All rights reserved
Discussion forums powered by phpBB © The phpBB Group
Switch to the Full-featured Version of the forum
Discussion forums powered by phpBB © The phpBB Group
Switch to the Full-featured Version of the forum