| Author |
Message |
|
Alexander Ostacchini
Location: Berkshire, UK Joined: 21 Sep 2019
Posts: 7
|
 Posted: Wed 01 Jul, 2020 3:04 pm Post subject: DIY 16thC Messer Build- Pic Heavy! Posted: Wed 01 Jul, 2020 3:04 pm Post subject: DIY 16thC Messer Build- Pic Heavy! |
 |
|
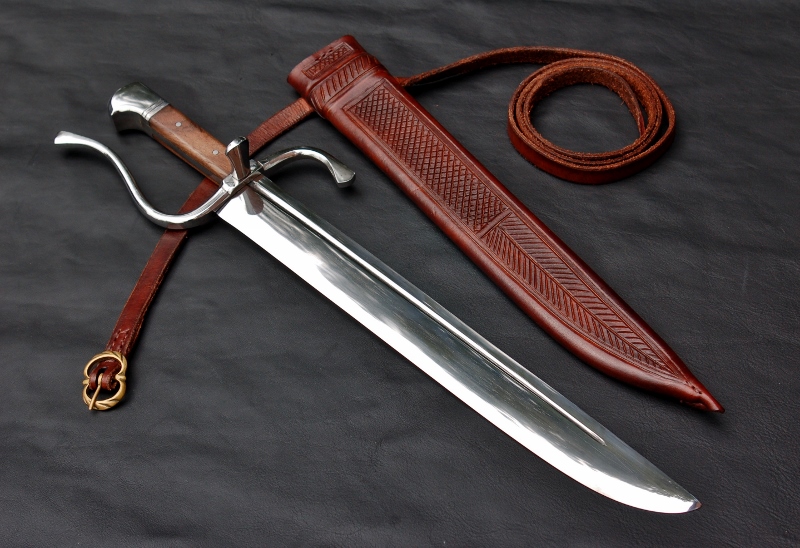
Hi all,
Just finished another lockdown project which I thought I would share, following on from the bauernwehr a few weeks back, though took some process pictures this time.
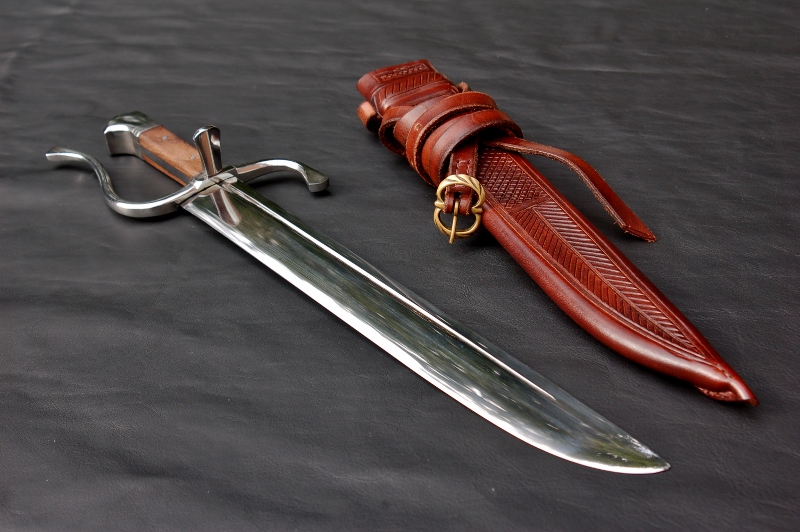
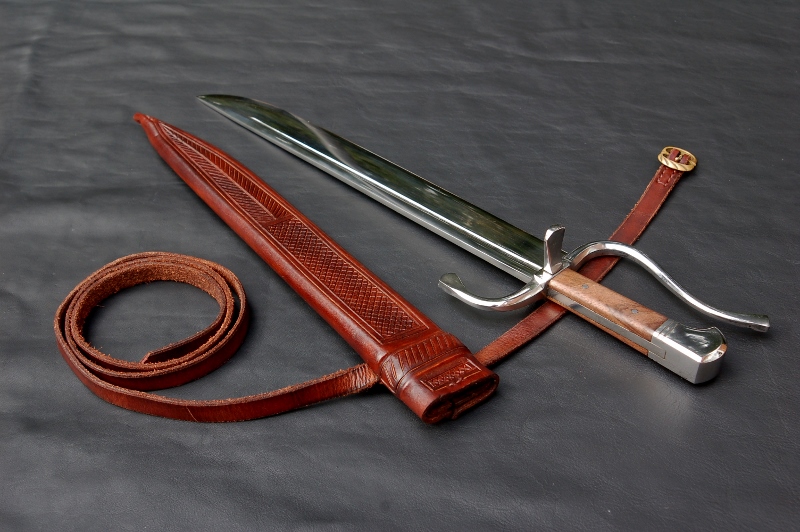
This is my interpretation of a 15th/16th century messer. I really like the Breughal inspired pieces that Tod and others have replicated and so this was the main influence. The Wakefield falchions were another, though these are bigger and a little earlier, but smash those two designs together and you get something a bit like this maybe. Hopefully it looks historically plausable...
This looks bigger in the photos than reality I think, only 43cm long, but looking at the knives in 'Peasant Wedding' they don't seem to be much different. I was mostly limited by the size of the quench tank and what could fit in the oven really. The blade is forged from 1075+cr, tapering from 6mm at the guard down to 3ish at the tip. fittings are all mild steel, and the handle is walnut.
Anyway I hope you like it! I'll follow this with a couple of WIP replies if anyone is interested in how it was made. I have a photo of 9 year old me at a reenactment event holding one of these and it's stuck with me since. 15 years later and I finally have my own, so quite a special project for me, and a nice big tick on the bucket list.
Any comments or critiques welcome, lots of you are much better at this stuff than me so always happy to learn something new
Cheers!
Alex
 Attachment: 297.46 KB Attachment: 297.46 KB
Attachment: 311.77 KB
Attachment: 259.66 KB
Attachment: 268.31 KB
Attachment: 276.37 KB
Attachment: 210.29 KB
Attachment: 250.68 KB
Attachment: 275.82 KB
|
|
  |
 |
|
Alexander Ostacchini
Location: Berkshire, UK Joined: 21 Sep 2019
Posts: 7
|
| Posted: Wed 01 Jul, 2020 3:08 pm Post subject: |
|
|
Process Part 1
The first step for this was making the blade- unfortunately I have no pictures of this stage but to start with it was roughed out with a gas forge. I am no blacksmith and the main work really was shaping the tang and the tip, I don't have the skills to draw out nice bevels.
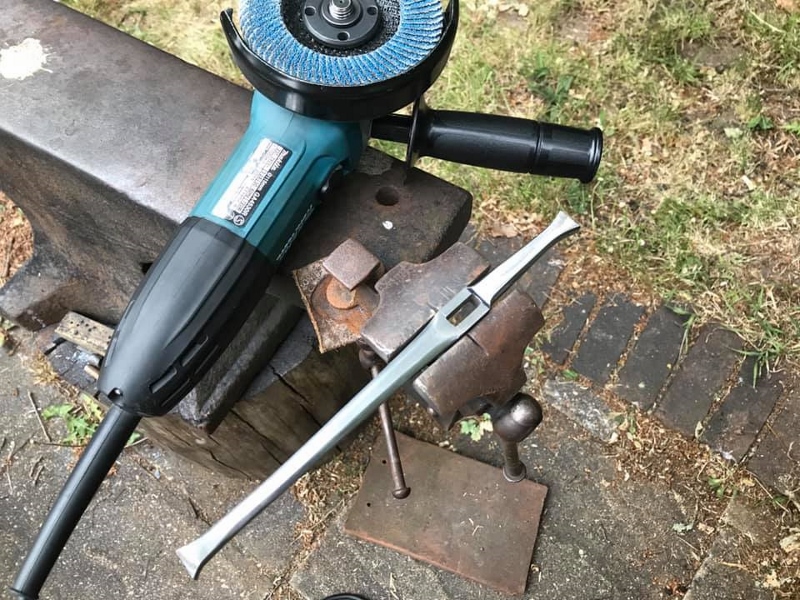
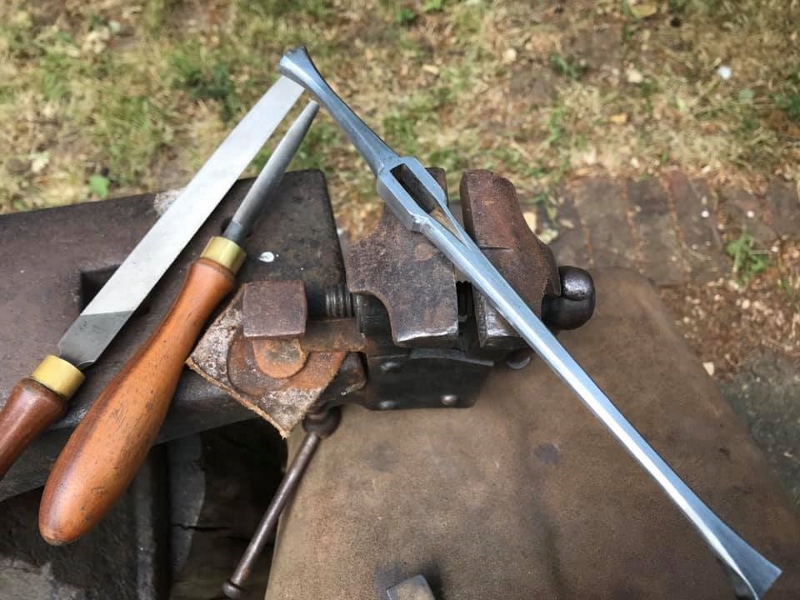
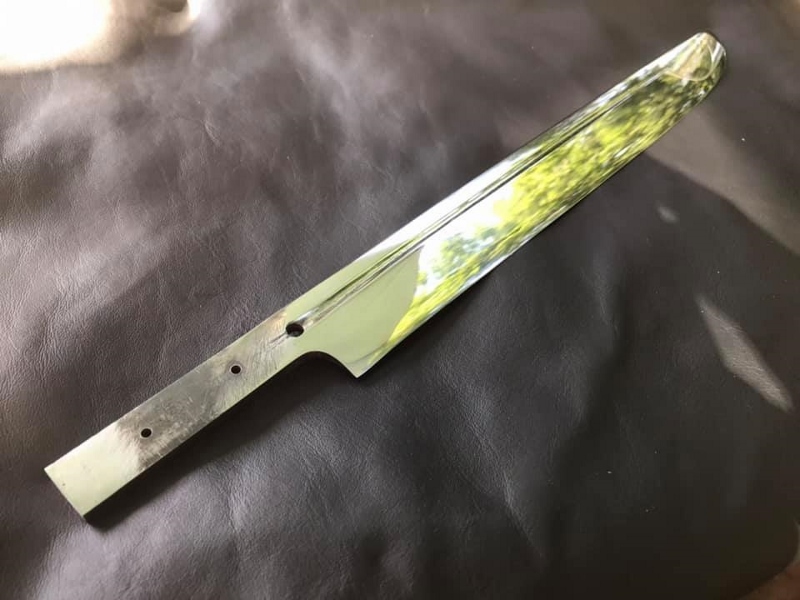
Once I had the basic outline I ground in the distal taper. This starts at the base of the blade, the tang itself is parallel so that the guard can slide on nicely. I don't have a belt grinder suitable for this so I used an aggressive flap disc on my angle grinder for the bulk of the work, and used a small belt to true everything up at the end. The edge bevels were done in much the same way.
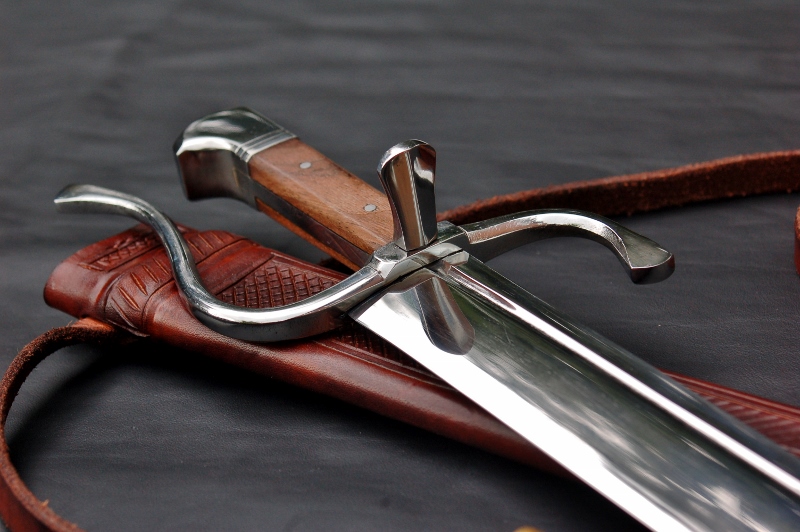
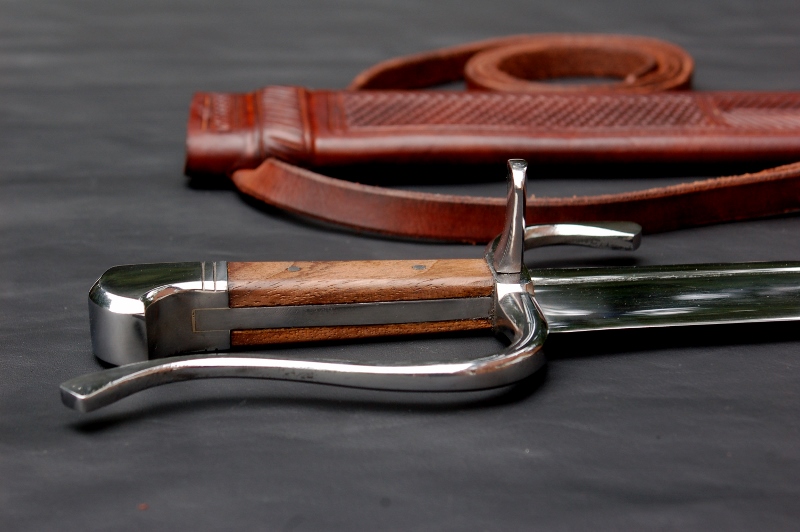
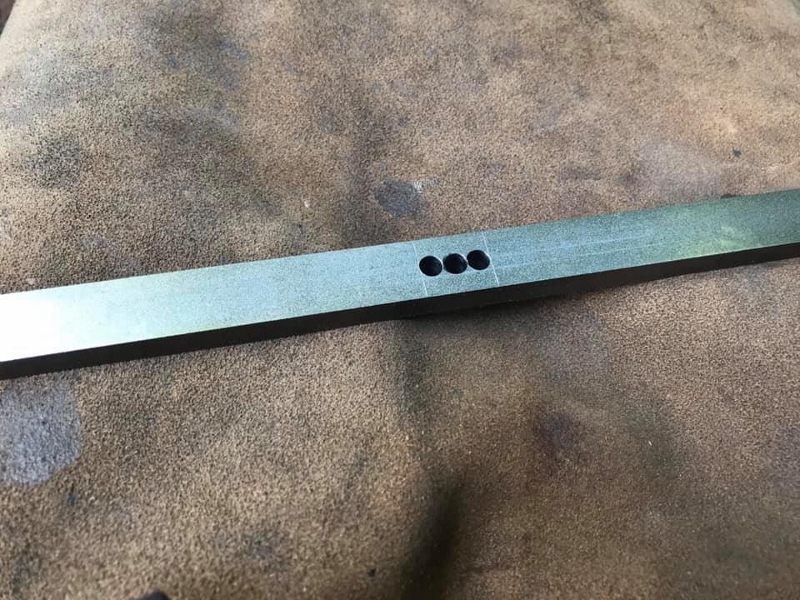
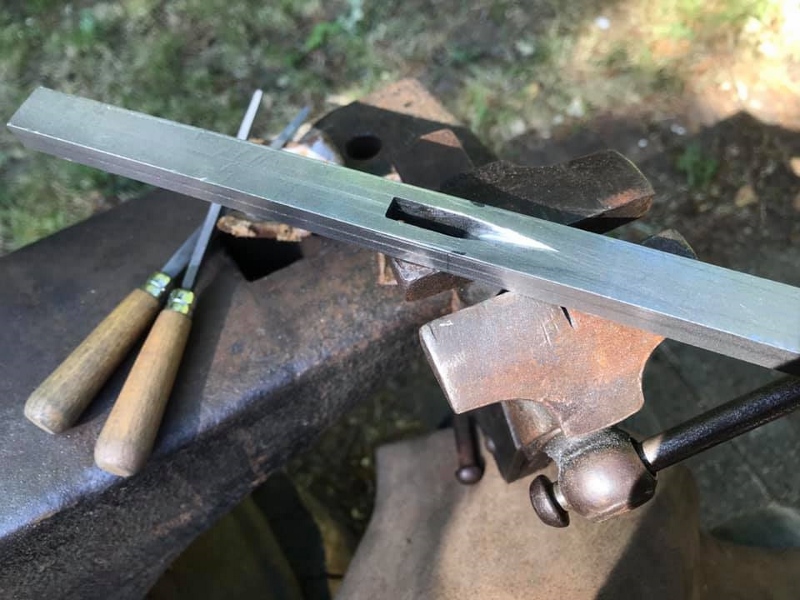
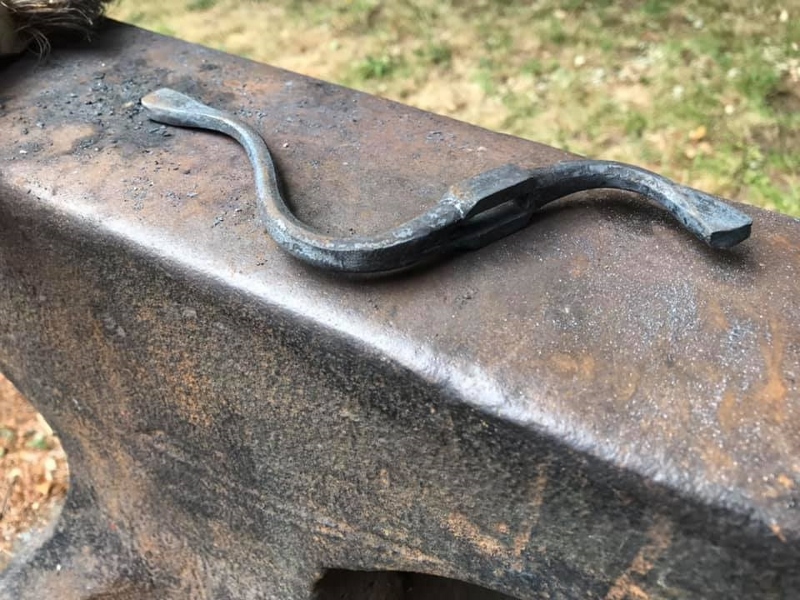
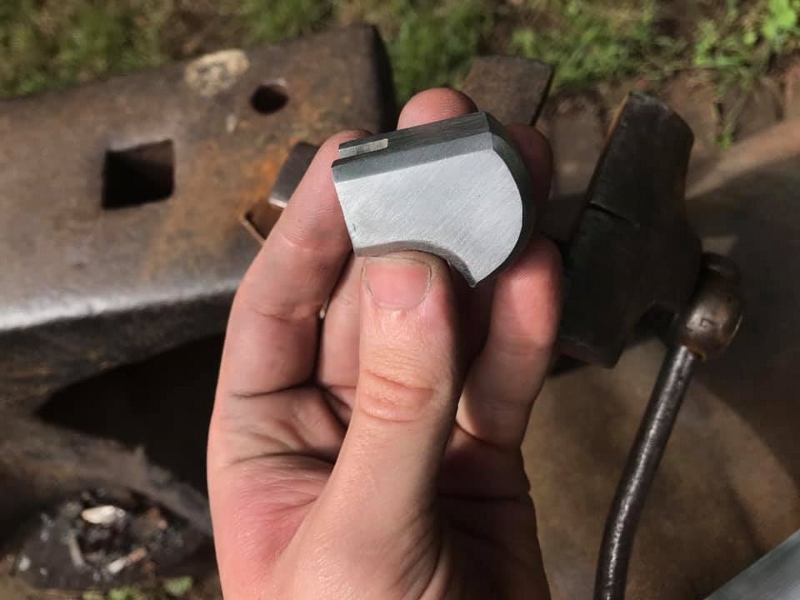
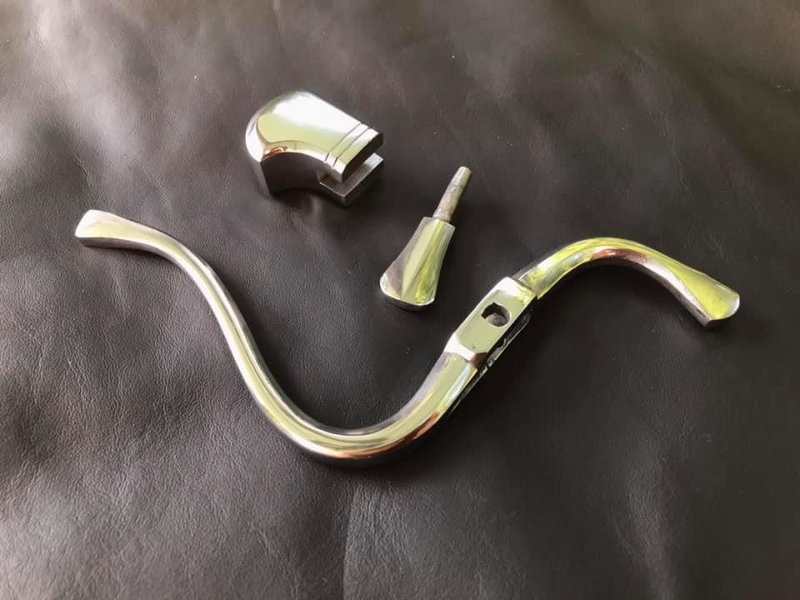
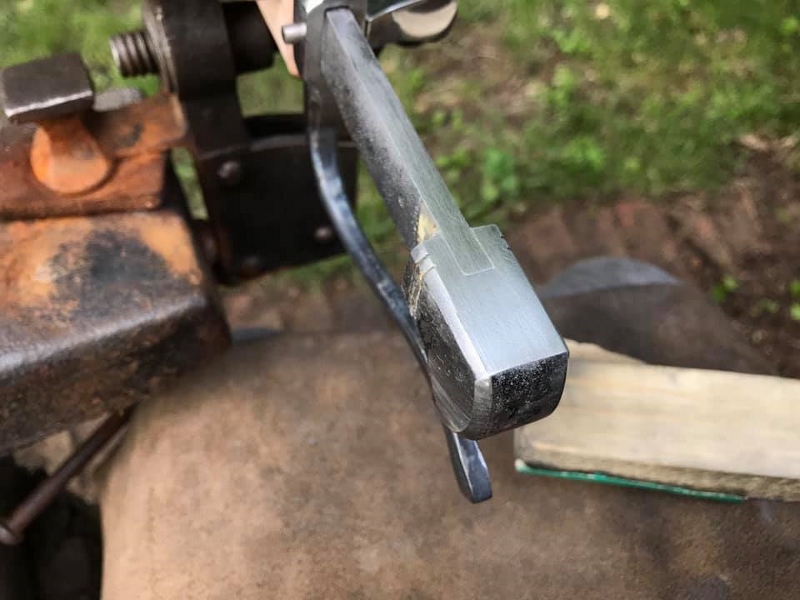
For the guard I started with a bar of mild steel as close to the final dimensions as I could find. The slot was drilled out and then simply filed until it fitted. Tedious stuff and lots of checking, filing, checking again etc. Once it fitted I ground in the facets and then it was back in the forge for putting in the bends and hammering down the swells on each end.
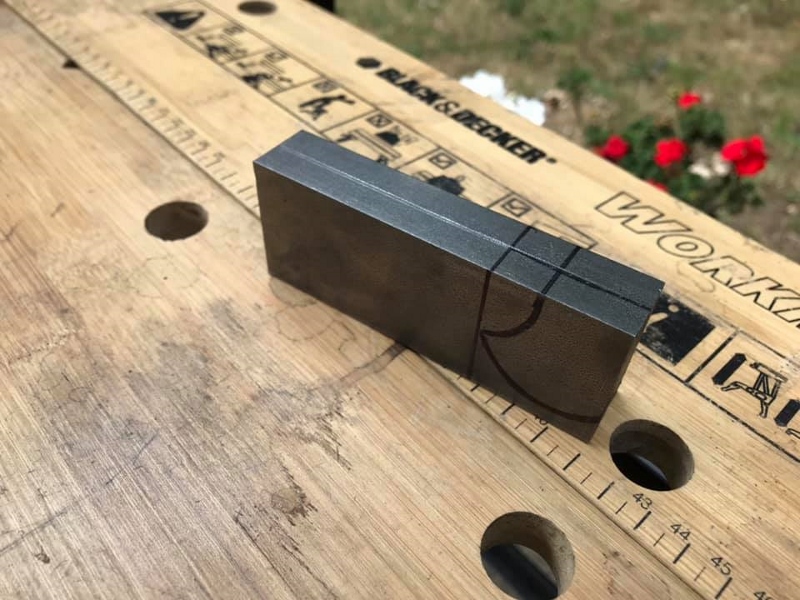
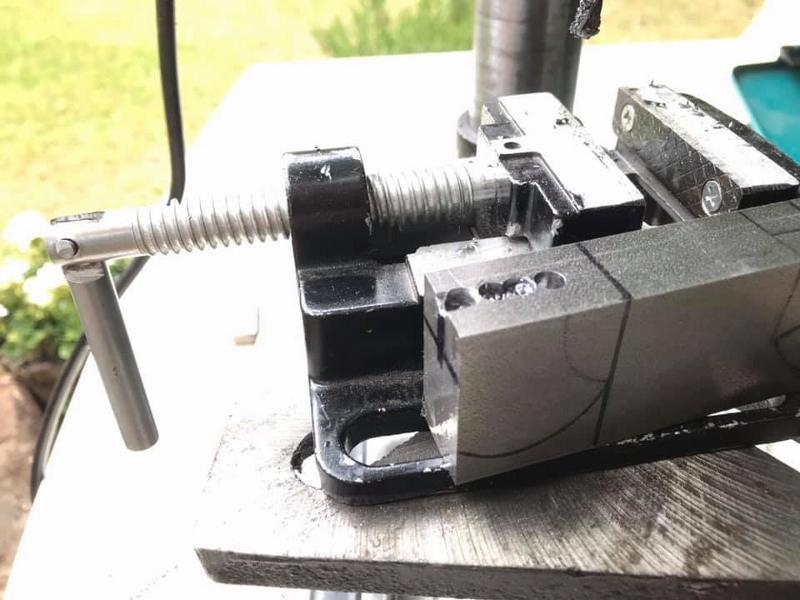
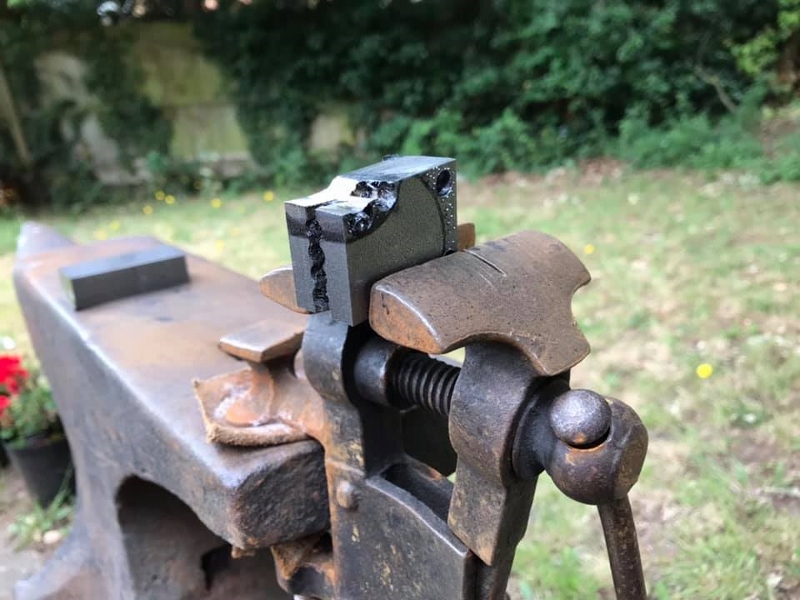
The pommel started off as a big block of mild steel. I saw a video of one of Tod's messers where the pommel was slotted over the tang and brazed, and wanted to try something similar. I began by drilling out the slot, which was filed until it was a reasonably tight fit onto the tang. The bulk of the shaping was then done with the trusty old angle grinder, and tidied up with files. No photos of the nagel but much the same process really.
I like nice shiny metalwork so all three hilt components were then hand sanded up to 1200 grit and polished on a buffing wheel, ready to be fitted.
Attachment: 336.6 KB
Attachment: 224.28 KB
Attachment: 358.29 KB
Attachment: 255.57 KB
Attachment: 294.76 KB
Attachment: 253.42 KB
Attachment: 195.77 KB
Attachment: 220.98 KB
Attachment: 169.04 KB
Attachment: 195.65 KB
|
|
|
|
|
|
Alexander Ostacchini
Location: Berkshire, UK Joined: 21 Sep 2019
Posts: 7
|
| Posted: Wed 01 Jul, 2020 3:13 pm Post subject: |
|
|
Process Part 2
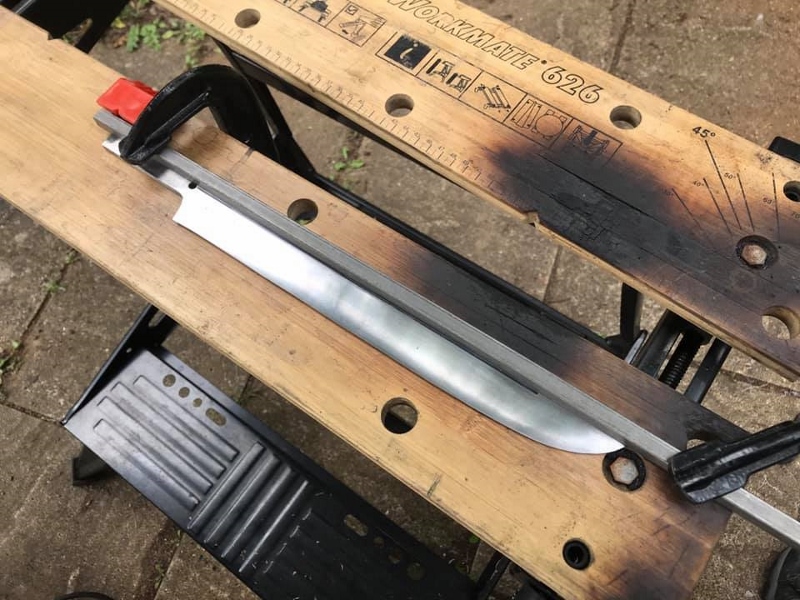
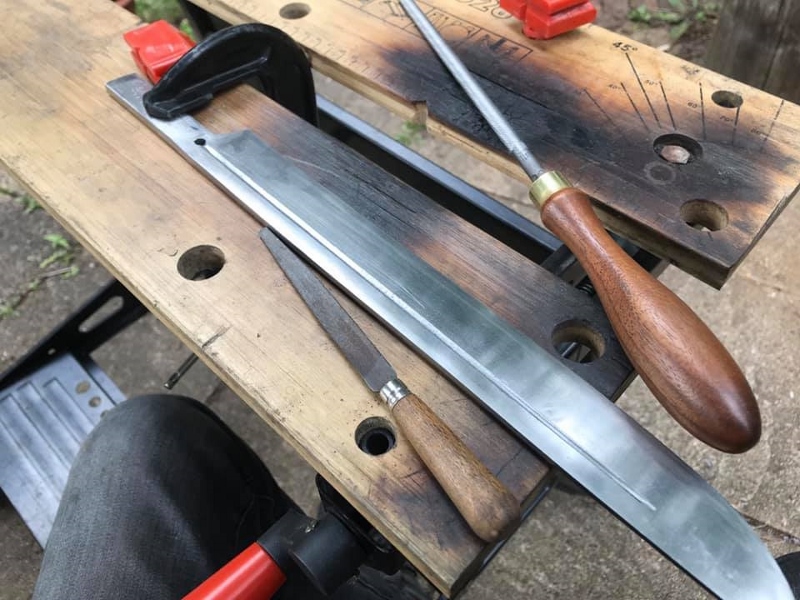
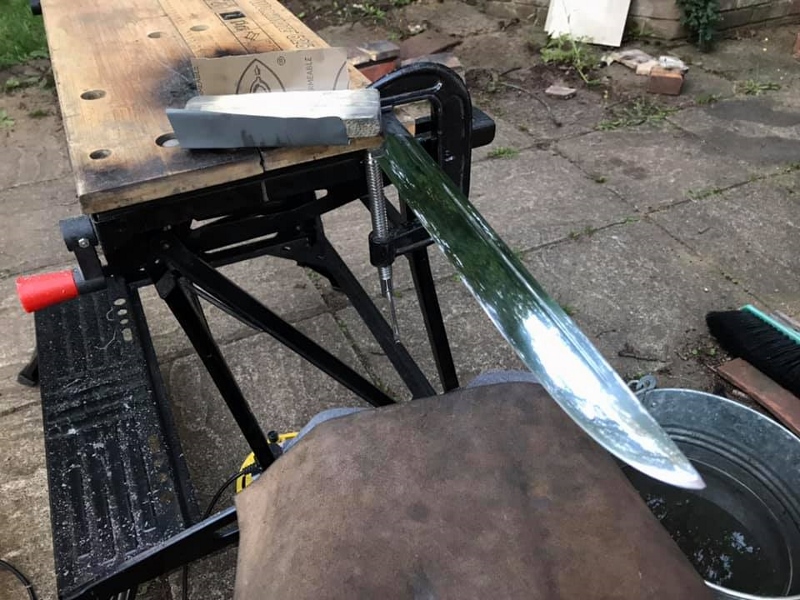
I decided late on that a fuller might be nice, but no belt grinder contact wheels to do this so had to look up alternatives.The solution ended up being clamping a bar of steel over the blade and using this as a guide for an angle grinder cut off wheel. Once there was a shallow cut I could use this as a file guide. Not at all perfect and not quick by anyones standards but did the job I think. The blade was then sanded to 240 grit, tang holes drilled, and heat treated. Once it was out it was sanded up to 2500 and buffed.
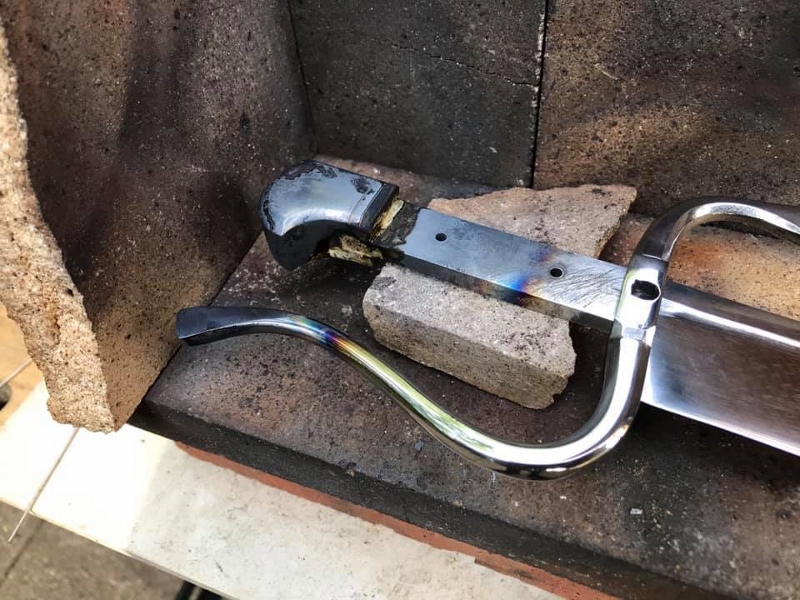
With the individual components finished it was time for assembly. First the pommel went on and the join was silver soldered, with lots of care taken not to draw the heat up the blade and ruin the temper. All went well and the join was nice and strong, although everything then needed filing flush and polishing again, with the added perk of having the guard in the way. Hours of fun.
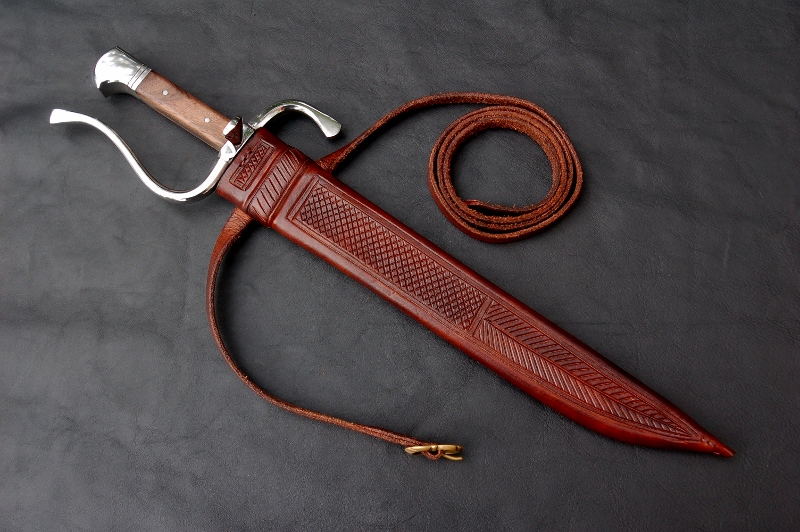
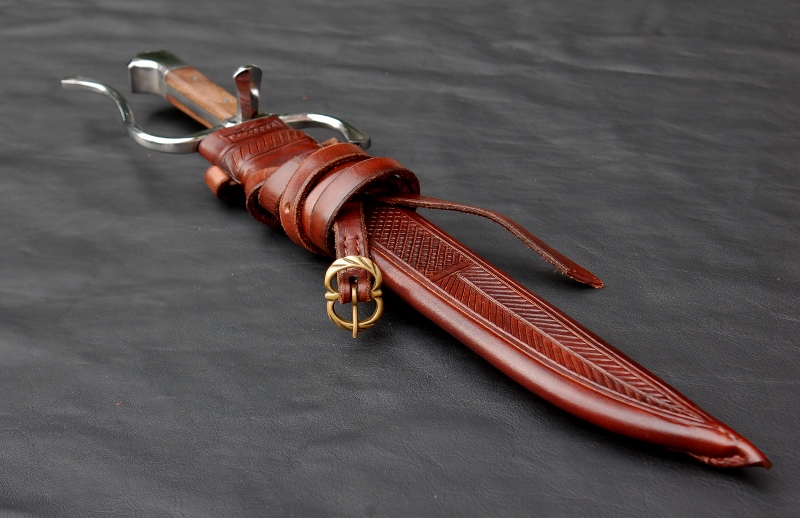
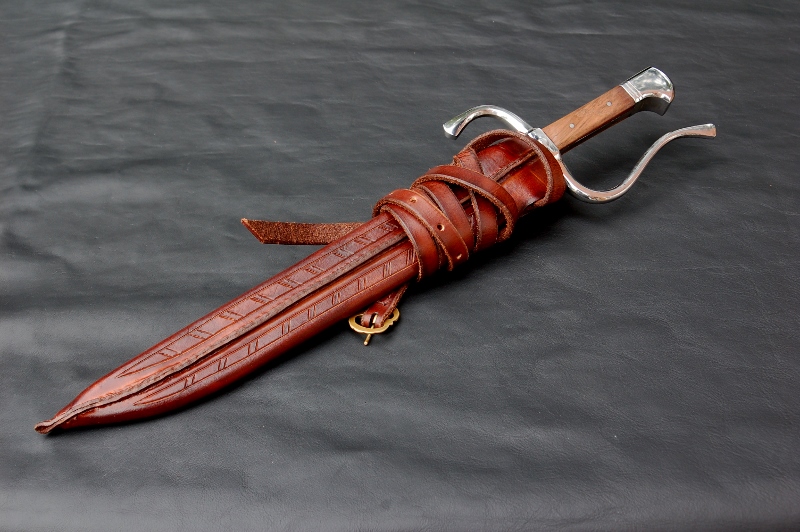
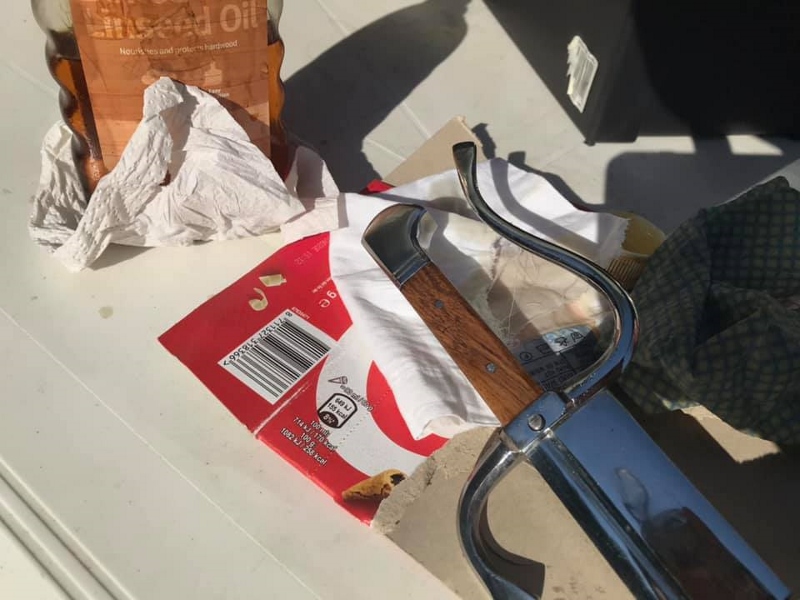
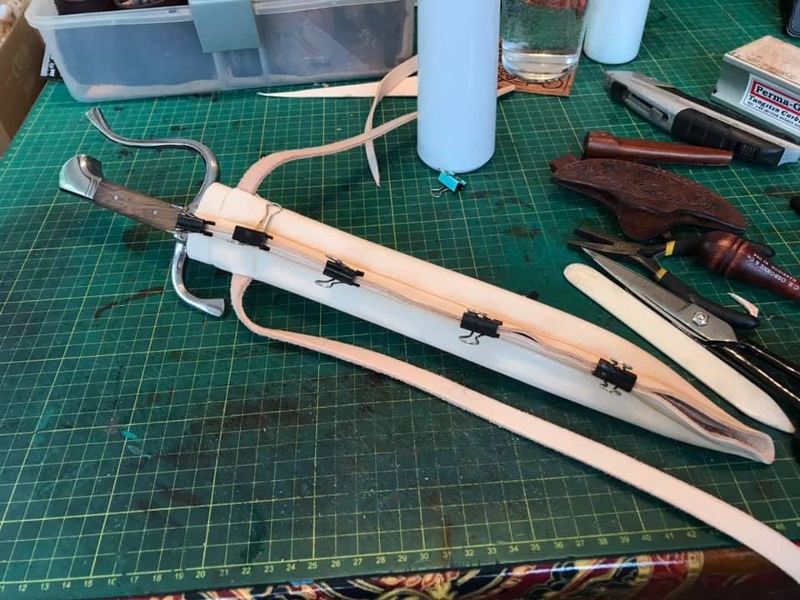
Finally the grip scales were made, pinned in place, and finished with linseed oil. The nagel was riveted on and the messer was finished, hooray, onto the sheath.
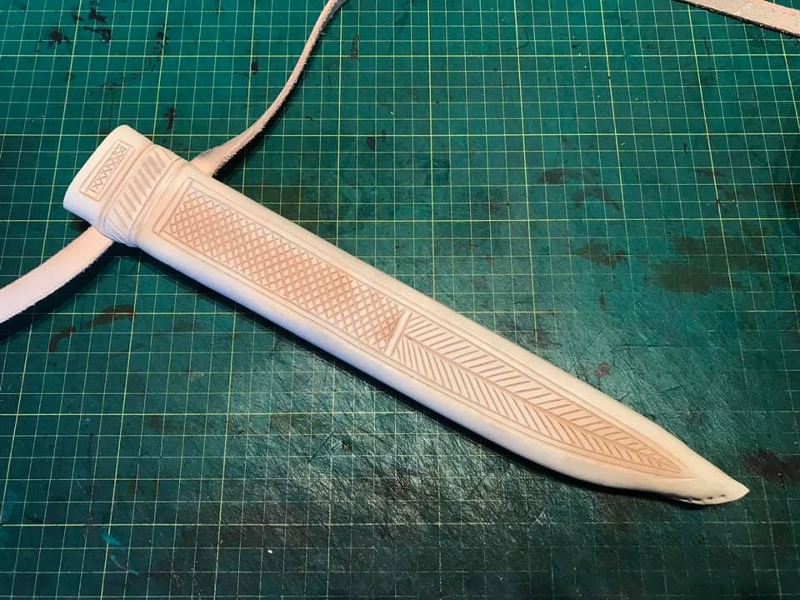
The sheath was double layered and started as 2mm veg tan. The blade was clingfilmed to stop rust, and then used as a former, with the top grain facing in. I wanted an integrated belt so this was glued in place to stop everything moving around, and the second leather layer formed over the top, with slits cut in for the belt to pass through. My job is mostly as a leatherworker really and it's always interesting to throw all of my modern techniques out of the window to make things look medieval. As a low status piece I thought some basic cross hatching might be appropriate, so carved in the lines freehand and opened then up a little with a modelling tool. This was dyed, waxed, buckle sewn on, and the piece was finished.
Attachment: 285 KB
Attachment: 264.4 KB
Attachment: 280.18 KB
Attachment: 183.82 KB
Attachment: 296.22 KB
Attachment: 189.87 KB
Attachment: 267.85 KB

Attachment: 201.95 KB
Attachment: 303.07 KB
Attachment: 320.96 KB
|
|
|
|
|
|
Radovan Geist
|
| Posted: Wed 01 Jul, 2020 11:50 pm Post subject: |
|
|
|
Oh man, let me tell you that this was one of the neatest DYI projects I have seen in a long time. A highly professional execution IMHO.
|
|
|
|
|
Julien M

|
| Posted: Sat 12 Sep, 2020 9:59 am Post subject: |
|
|
Agree with Radovan, hugely impressed with your work on both the knife set and now the Bauernwehr!
Your set up also mirror mine when I was in the UK, bunch of files, angle grinder on a portable workbench next to the garden shed  Your progress pics certainly make the case that you can go all the way and achieve great results with very little tools. Your progress pics certainly make the case that you can go all the way and achieve great results with very little tools.
Your metal work is especially impressive for someone who thinks of himself primarily as a leathercraft man.
Based on your comments you did the heat treating at home with a home set up - in your oven? How do you go about that?
Lastly I'd probably opt for a thin wood core on the scabbard - or thinner leather layers to reduce the overall thickness of the piece but that's an observation & not a critic - the pieces I've seen or handled in museum were all incredibly thin.
Very very inspiring - keep this coming!
|
|
|
|
|
|
Alexander Ostacchini
Location: Berkshire, UK Joined: 21 Sep 2019
Posts: 7
|
| Posted: Sun 13 Sep, 2020 4:39 am Post subject: |
|
|
Thanks for the kind words
| Quote: | | Based on your comments you did the heat treating at home with a home set up - in your oven? How do you go about that? |
This was heated in the forge to non magnetic and quenched in oil, and then tempered in my kitchen oven. Two one hour cycles at 200degrees C. The size of the piece was dictated by the quenching tank really and anything bigger than this I would have to outsource.
Also thanks for the scabbard suggestions, hadn't considered a wooden core but I've just had a read through your own recent projects and would love to give this a go. I think you are correct that thinner leather may have been more suitable for this. Likewise on the inspiration front and I always have a browse through here for tips before making anything
|
|
|
|
|
Julien M
|
| Posted: Sun 13 Sep, 2020 7:52 am Post subject: |
|
|
| Alexander Ostacchini wrote: | | hadn't considered a wooden core but I've just had a read through your own recent projects and would love to give this a go. I think you are correct that thinner leather may have been more suitable for this. Likewise on the inspiration front and I always have a browse through here for tips before making anything |
Yes grab some thin plywood - this is by far the easiest way to go - historically most knifes sets would have a sandwich leather core, larger pieces would get additional support from a wood core but as always generalisations have to be taken with a grain of salt and it's not too hard to find exceptions.
The difference would be subtle , but you would get thinner edges as you can mold the leather on the solid core, and also more freedom to carve away with thinner veg tan. Also consider butting the seam at the back, allowing for the piece to rest flat on the hips. Looking forward to see what you come up with next!
|
|
|
|
|
Ian Hutchison

Location: Louisiana / Nordrhein-Westholland Joined: 27 Nov 2007
Posts: 626
|
| Posted: Sun 13 Sep, 2020 4:07 pm Post subject: |
|
|
I'm always amazed at how professional your 'hobby' builds look. Great work!
'We are told that the pen is mightier than the sword, but I know which of these weapons I would choose.' - Adrian Carton de Wiart
|
|
|
|
|
|
|
You cannot post new topics in this forum
You cannot reply to topics in this forum
You cannot edit your posts in this forum
You cannot delete your posts in this forum
You cannot vote in polls in this forum
You cannot attach files in this forum
You can download files in this forum
|
All contents © Copyright 2003-2026 myArmoury.com — All rights reserved
Discussion forums powered by phpBB © The phpBB Group
Switch to the Basic Low-bandwidth Version of the forum
|

