| Author |
Message |
Julien M

|
 Posted: Sun 16 Oct, 2016 7:14 am Post subject: Scabbard for Tod's A479 reproduction Posted: Sun 16 Oct, 2016 7:14 am Post subject: Scabbard for Tod's A479 reproduction |
 |
|
Hi all,
Recently got this magnificent reproduction fo the Wallace collection A479, courtesy of Tod (can be seen here: http://myArmoury.com/talk/viewtopic.php?t=34061).
Now I have to make a scabbard worthy of it - which won't be a walk in the park 
Anyway, I went through the familiar motions, using the material I have at hand (which is 1 cm thick and 3 inches wide poplar planks). The blade has a very pronounced central spine, so ending up with a thin core is a challenge. To carve the core, anything goes for me, as long as it doesn't take ages...this is for me the dull part of scabbard making, so I used my dremel router, chisels, powerfile, even my angle grinder. All these tools can help, but none are speeding things up considerably as you need to check for fit constantly. Once I was able to draw the sword with the two halves clamped, I proceed to shape the outer core. I took my workmate outside, and went at it my hand held belt grinder. It took ages to thin it down, the side of my shed white with dust (and so was I)...thinning down a 2 cm poplar sandwich is no fun, and though my local timber merchant could provide me with slats as thin as 6mm, I've decided It's the last time I'm using the carving technique. I am now experimenting with forming steamed wooden slats for my A&A durer upgrade project. I don't think there is a better way to achieve such a thin an even core within spending a day on it...though you can have other issues (like getting a decent hold on the blade, or getting your blade corroded while leaving the slats to dry with steel inside (been there, and I'm slightly nervous about the durer blade drying up between 2 slats of wet wood for the past 2 days).
Anyway, I lost patience, and in the end, I sanded too much (pic below). Gaps appeared at the junction of the slats, and when squeezing the core gently, it was collapsing. Too much time invested to throw it away, I soaked cloth in hide glue and applied on the damaged area. Once dry I sanded flat...early glass fiber I guess, but the result (below) is rock hard - a great way to fix the problem. Interestingly enough, the slat method also uses this historically (the slats are held together by a double wrap of linen soaked in glue).
The completed core + leather below, with the opening for the thumb guard on the side (I tried to go thin enough to go under, and that's how I messed it up )
The overall design below, with an early XVI century shape. I have to play around with it, as applied with the same proportion, the shape would end up enormous (the A479 is very wide at the base). Here is a photoshop impression - I'm keen to have you feedback (I've transform to size, reorganized the design to fit). Now that I am posting, I see that the fake fabric fold at the bottom needs to be reduced...). Anyway, Is the all thing still overly massive? What do you guys think?
messed up core and fix

finished core + leather

throad opening for thumb guard (in need of a bit of hobby knife clean up...)

photoshop mockup

 Attachment: 69.54 KB Attachment: 69.54 KB

|
|
  |
 |
Leo Todeschini
Industry Professional

|
| Posted: Sun 16 Oct, 2016 11:41 pm Post subject: |
|
|
I think that would look great.
If there is one thing about Landsknechts is that 'massive' was not a thing they had problems with. many of their weapons and clothes were grossly decorated, both in size and of course layer upon layer of detail, so I think there is no fear of it being 'too much'.
I would extend the plain section at the top of the locket so that the heavy rope detail comes beneath the finger ring and make it simply as an enlarged version of the original as best you can, messing about with sizes and proportions and I have no doubt you will make a great job of it.
Good luck.
Tod
www.todsworkshop.com
www.todcutler.com
www.instagram.com/todsworkshop
https://www.facebook.com/TodsWorkshop
www.youtube.com/user/todsstuff1
|
|
 |
|
Nathan Robinson
myArmoury Admin


|
|
 |
|
Julien M
|
| Posted: Mon 05 Jun, 2017 5:29 am Post subject: |
|
|
| Nathan Robinson wrote: | Hey Julien-
You've been busy with a number of projects lately, but I'm curious if this has had any progress made. If not, have you fully decided on a direction? |
Hey Nathan - In short. no.
I've not been idle though, but working with no order nor logic. 4 scabbard cores, mounting 2 swords a dagger some leather work here and there.
I will come back to this one, but I will build another core from scratch, using the wet formed slat method which I've improved along the way. I don't think the current one does the sword justice.
I will definitely go heavily carved leather and by knives. No metal brackets.
J
|
|
|
|
|
Julien M
|
| Posted: Mon 05 Jun, 2017 5:58 am Post subject: |
|
|
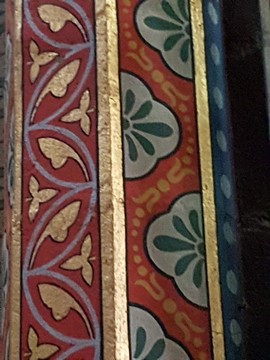
Actually I'm back from Toulouse (france) were I've seen Carcassonne and the Cathars castles - seen some beautiful meridional churches. This is a trip I can only recommend to all of you medieval heads here.
Every inch of stone hand painted. Magnificent. I don't know yet for which scabbard I will use this (probably not this one) but I'm definitely going to experiment with pigments.
An example of pattern/color combination below, that would work beautifully on a scabbard.
Attachment: 33.83 KB
|
|
|
|
|
|
|
You cannot post new topics in this forum
You cannot reply to topics in this forum
You cannot edit your posts in this forum
You cannot delete your posts in this forum
You cannot vote in polls in this forum
You cannot attach files in this forum
You can download files in this forum
|
All contents © Copyright 2003-2026 myArmoury.com — All rights reserved
Discussion forums powered by phpBB © The phpBB Group
Switch to the Basic Low-bandwidth Version of the forum
|


