| Author |
Message |
Harry Marinakis

|
 Posted: Sun 10 Aug, 2014 9:43 am Post subject: DIY reproduction Viking sword restoration Posted: Sun 10 Aug, 2014 9:43 am Post subject: DIY reproduction Viking sword restoration |
 |
|
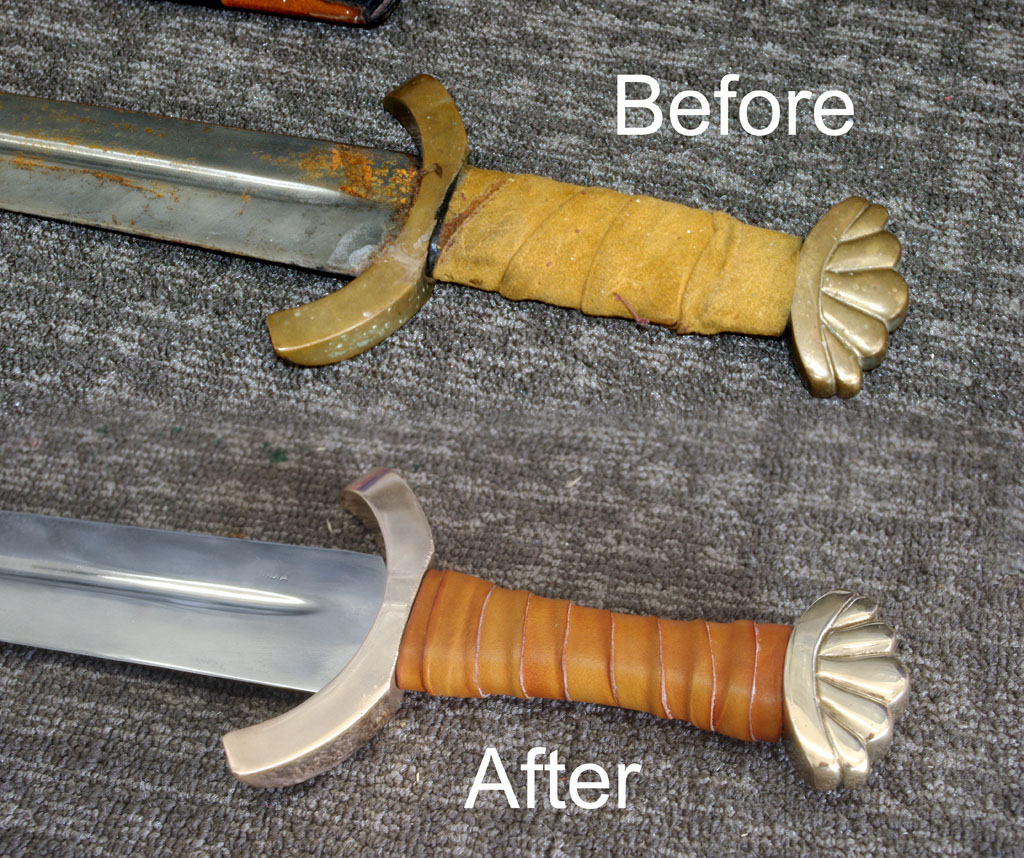
This is nothing to get excited about - it's a restoration of an old, cheap reproduction Viking sword that was made in India. But it came out rather nice, so I thought that I'd share. A friend of mine asked to see what I could do for this old, rusty, pitted sword. I didn't want to spend a lot of time working on it, but I wanted to give back to my friend something that he would like. Before and after pictures are shown below.
 Attachment: 278.91 KB Attachment: 278.91 KB
[ Download ]
Attachment: 219.98 KB
[ Download ]
Attachment: 321.71 KB
[ Download ]
|
|
  |
 |
|
Lin Robinson
|
| Posted: Sun 10 Aug, 2014 10:19 am Post subject: Re: DIY reproduction Viking sword restoration |
|
|
You did an excellent job of turning a genuine sow's ear into a silk purse. Very nice work!
Lin Robinson
"The best thing in life is to crush your enemies, see them driven before you and hear the lamentation of their women." Conan the Barbarian, 1982
|
|
|
|
|
Dean F. Marino

Location: Midland MI USA Joined: 24 Aug 2011
Posts: 229
|
| Posted: Sun 10 Aug, 2014 1:03 pm Post subject: |
|
|
I disagree with "nothing to get excited about".... you did a GREAT job cleaning up, and refining this sword. It's not so much about "this sword" - it's FAR more about you, and YOU having the guts to clean up & refine a commercial offering  . .
Welcome to the "I'm gonna fix this sword dammit" club .
In edhil, hai edhil. In edain, hai edain.
|
|
|
|
|
Harry Marinakis
|
| Posted: Sun 10 Aug, 2014 3:43 pm Post subject: |
|
|
Thanks for the feedback!
The best part of this little project was the experience and practice I got doing it.
|
|
|
|
|
|
Ryan McLaurin
Location: California Joined: 12 May 2008
Posts: 42
|
| Posted: Sun 10 Aug, 2014 4:40 pm Post subject: |
|
|
Wow! The difference is like night and day. Very good job. Now tell your friend to keep it oiled 
|
|
|
|
|
|
Mark Moore
|
| Posted: Mon 11 Aug, 2014 10:13 am Post subject: |
|
|
Dang............I've got a couple of turds propped up in the corner that you'd love to get hold of.  Great job!....McM Great job!....McM
''Life is like a box of chocolates...'' --- F. Gump
|
|
|
|
|
Harry Marinakis
|
| Posted: Wed 13 Aug, 2014 8:29 am Post subject: |
|
|
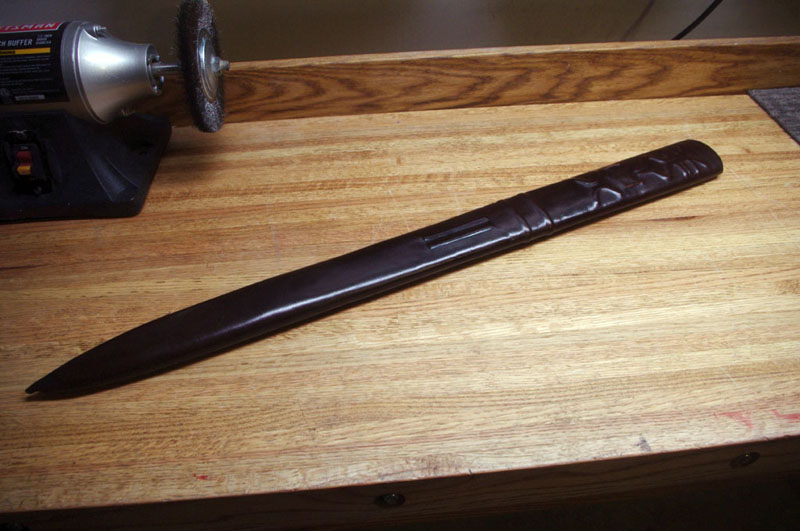
Here's an update... I decided to turn this whole project into a skill-building and learning session. So I made a scabbard and three-way ring suspension based on a hybrid of the Ballateare and the Cronk Moar scabbard from the Isle of Man.
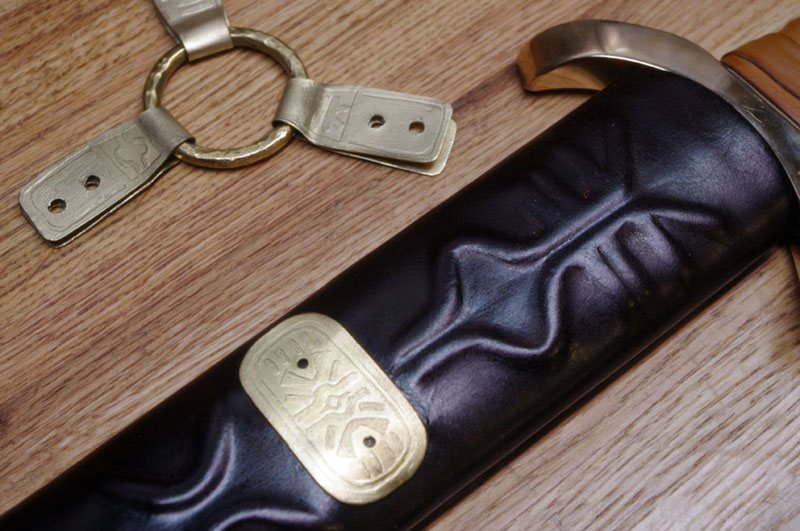
I have never done any metal work, so I bought a brass bowl from a metal salvage yard, cut it up, and started tinkering around with some hardware for the suspension. It's not "Tod's Stuff" quality, but here's what I've made so far.
I am still trying to figure out how the Vikings tacked on the upper fixing plate, given than the scabbard wood core is so thin.
Attachment: 119.58 KB
Attachment: 90.72 KB
Attachment: 135.46 KB
|
|
|
|
|
Jean Thibodeau

|
| Posted: Wed 13 Aug, 2014 7:47 pm Post subject: |
|
|
Seems like you are using your imagination learning to use various tools and methods and doing a very good job improvising techniques that seem to give good results.
Plus a good sense of visual design with the scabbard and scabbard furniture.
You can easily give up your freedom. You have to fight hard to get it back!
|
|
|
|
|
Harry Marinakis
|
| Posted: Thu 14 Aug, 2014 5:55 am Post subject: |
|
|
Thanks Jean.
Anyone have a suggestion on how to place rivets in the scabbard, given that it's only 1/8" to 3/16" thick? Looking at the old Ballateare scabbard, the suspension plates were riveted to the scabbard, and they bore the full weight of the scabbard.
|
|
|
|
|
|
Mark Moore
|
| Posted: Thu 14 Aug, 2014 10:49 am Post subject: |
|
|
Harry....that looks fan-damn-tastic. You keep up the good work. You've inspired me to enter into a few new projects! All the best to you...........McM
''Life is like a box of chocolates...'' --- F. Gump
|
|
|
|
|
|
Greg Ballantyne
|
| Posted: Sat 16 Aug, 2014 7:58 pm Post subject: |
|
|
|
Not sure the blade deserves the scabbard........
|
|
|
|
|
Harry Marinakis
|
| Posted: Sun 17 Aug, 2014 7:04 am Post subject: |
|
|
| Greg Ballantyne wrote: | | Not sure the blade deserves the scabbard........ |
Yeah, but I learned a lot going through this whole process, so it was worth it to me!
|
|
|
|
|
|
Jeffrey Faulk
|
| Posted: Sun 17 Aug, 2014 8:44 am Post subject: |
|
|
|
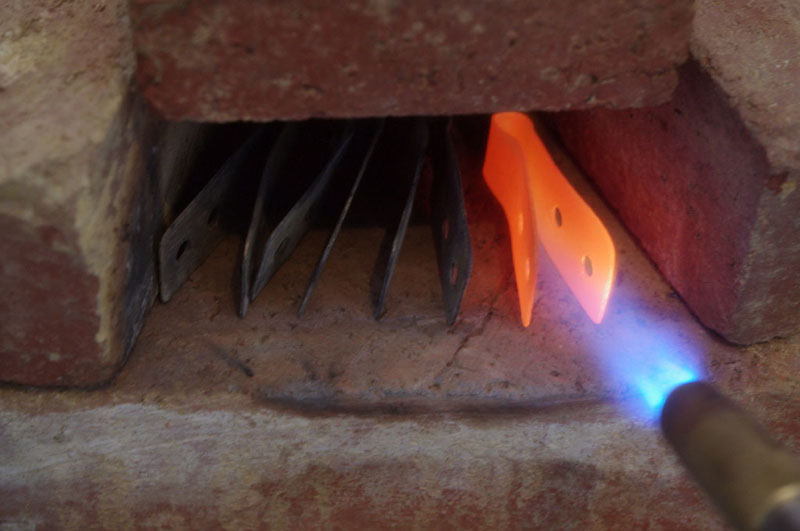
Rather historically inaccurate but you could try 'pop' rivets. It's either that or anneal some small brass nails, slide a flat piece of steel down the scabbard, and try to 'clench' the nails by hammering them against the steel to turn them around into the wood of the scabbard.
|
|
|
|
|
Harry Marinakis
|
| Posted: Sun 17 Aug, 2014 9:17 am Post subject: |
|
|
| Jeffrey Faulk wrote: | | Rather historically inaccurate but you could try 'pop' rivets. It's either that or anneal some small brass nails, slide a flat piece of steel down the scabbard, and try to 'clench' the nails by hammering them against the steel to turn them around into the wood of the scabbard. |
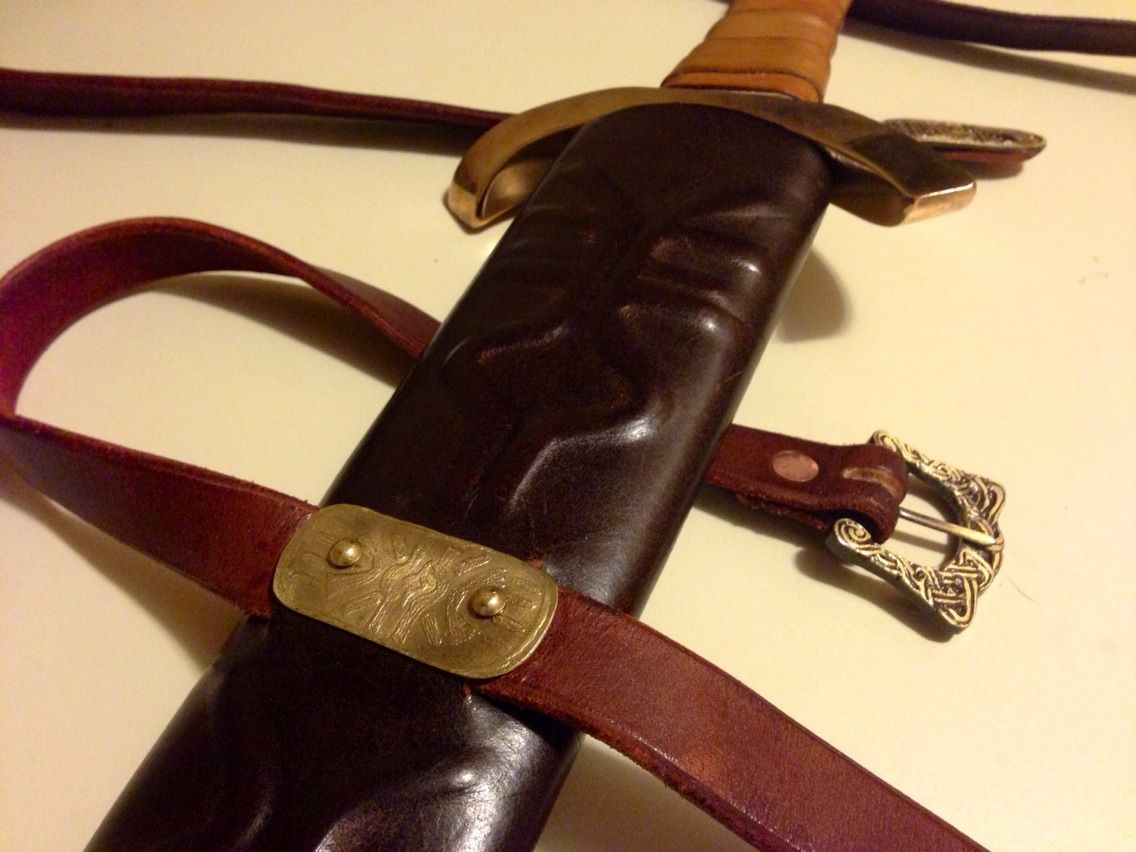
Here's what I did to rivet the upper fixing plate to the scabbard:
1. Carefully measured the thickness of the fixing plate, strap, leather cover and wood core wall = 7mm
2. Carefully drilled two rivet holes 6mm deep
3. Cut and sanded two rivets so that the shanks were 6mm long
4. Plastered the back of the fixing plate and the rivets holes with super epoxy and glued the damn stuff into place
Attachment: 111.18 KB
[ Download ]
|
|
|
|
|
Dean F. Marino
Location: Midland MI USA Joined: 24 Aug 2011
Posts: 229
|
| Posted: Sun 17 Aug, 2014 12:55 pm Post subject: |
|
|
| Harry Marinakis wrote: | | Jeffrey Faulk wrote: | | Rather historically inaccurate but you could try 'pop' rivets. It's either that or anneal some small brass nails, slide a flat piece of steel down the scabbard, and try to 'clench' the nails by hammering them against the steel to turn them around into the wood of the scabbard. |
Here's what I did to rivet the upper fixing plate to the scabbard:
1. Carefully measured the thickness of the fixing plate, strap, leather cover and wood core wall = 7mm
2. Carefully drilled two rivet holes 6mm deep
3. Cut and sanded two rivets so that the shanks were 6mm long
4. Plastered the back of the fixing plate and the rivets holes with super epoxy and glued the damn stuff into place
 |
Pretty much what I would have done... toss in epoxy, insert rivets, flip scabbard upside down (gravity allowing epoxy to flow AWAY from blade channel). Run the blade in several times, then have a little acetone handy to remove any wet epoxy from the blade. Walk away for 24 hours.
....and I'm going to be really surprised if this was your FIRST scabbard . VERY GOOD job
In edhil, hai edhil. In edain, hai edain.
|
|
|
|
|
Harry Marinakis
|
| Posted: Sun 17 Aug, 2014 3:41 pm Post subject: |
|
|
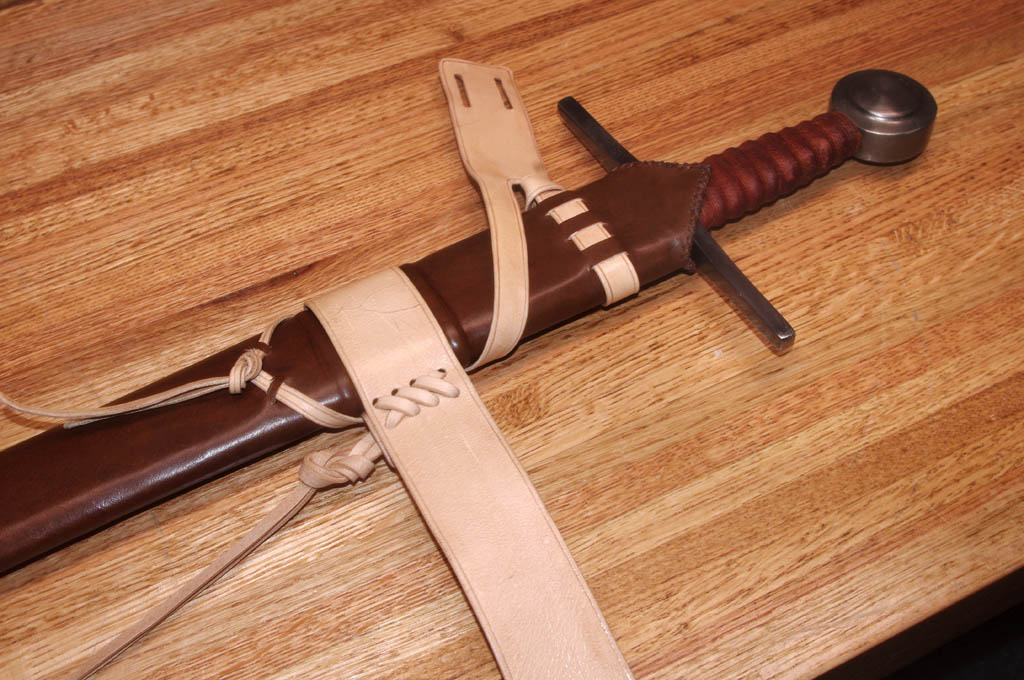
Thanks Dean! Actually the Viking scabbard was the 2nd sword scabbard that I made.
Here is the first scabbard that I ever made:
|
|
|
|
|
|
|

