| Author |
Message |
Julien M

|
 Posted: Mon 05 May, 2014 3:54 am Post subject: A&A Durer upgrade Posted: Mon 05 May, 2014 3:54 am Post subject: A&A Durer upgrade |
 |
|
Taking on a new project. I traded a couple of swords against a dismounted Durer a while back. I've always loved this sword as the "Knight, Death and the Devil " as been in every room or studies I've had since I was a teenager, long before I got interested in sword making/collecting.
But when I got the sword "kit", I thought little of it (probably because the A&A version features a grip that is too rough and thick for my taste). In any case, the extend of my ambition here was to grip, wrap with leather, peen and sell to finance other endeavors.
Little did I know. I made a poplar grip core for it and as the very top of the tang is threaded I can pre assemble the sword with a nut (I'll peen it later of course)...in other word have a feel for the sword at the very beginning of the project which is uncommon...and my problem is that, well, I'm completely taken by it.
So I will: make a very slender Bayerisches Nationalmuseum type XVIIIb grip style for it, as well as a leather rain guard. I'm unsure how close I want to stick to the original. the tubular rain guard is not my favorite design, always preferred the semi circular or more elaborate and baroque leaves or shell forms. In any case, this is the perfect excuse for hours of leather carving 
I will re grind the tip, from round to pointy needle.
I *might* Carve the roping pattern and chisel O MARIA BIT WIR UNS, or look into etching to achieve a similar result. This is another skill set to acquire first.
I doubt that this sword is going anywhere for a few years 
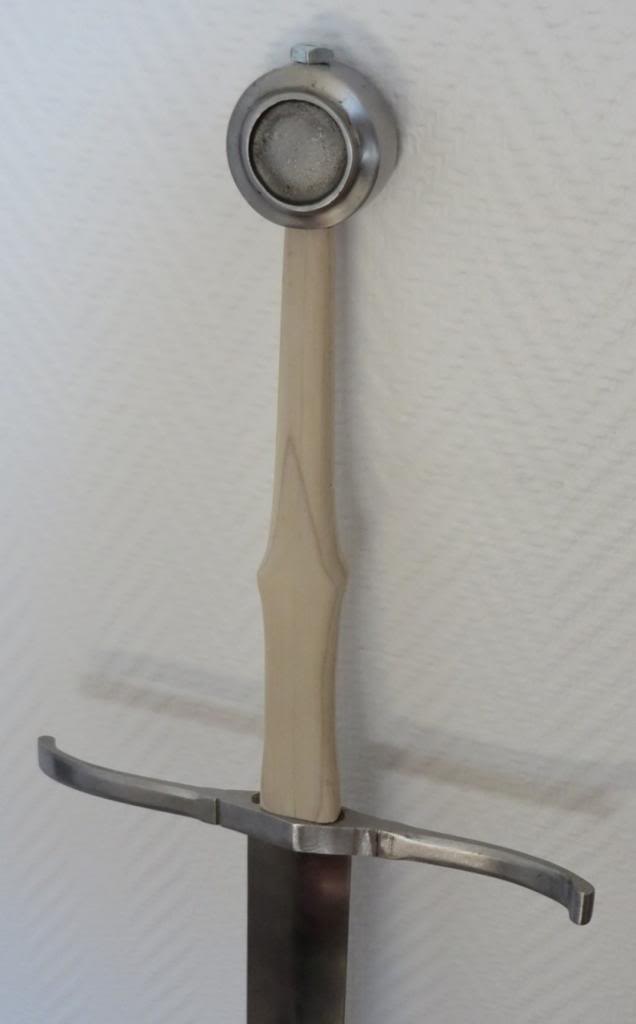
Below the grip after a few hours of shaping. It will need to go dangerously thin below the pommel.
|
|
  |
 |
|
Lukas MG
Industry Professional
|
 Posted: Mon 05 May, 2014 4:02 am Post subject: Posted: Mon 05 May, 2014 4:02 am Post subject: |
 |
|
As I'm in the process of making a sword with pretty much exactly the same grip shape, I'll be watching this one closely.
How thin and narrow are you going below the pommel? How wide and thick at the guard?
|
|
   |
 |
Julien M

|
 Posted: Mon 05 May, 2014 5:17 am Post subject: Posted: Mon 05 May, 2014 5:17 am Post subject: |
 |
|
| Lukas MG wrote: | | How thin and narrow are you going below the pommel? How wide and thick at the guard? |
Hi Lukas,
The overall shape of this grip is more subtle that it seems, and it is rectangular in section rather than rounded so I went forward with caution. Another challenge was that the tang of the Durer is way shorter than the Munich one, so I had to proportion and adapt accordingly to ensure enough room for a comfortable grip at the lower section yet keep enough grip for the upper section to be slightly longer, which is to me the most attractive feature of this grip. You won't have that issue, I noticed the tang on your project is huge.
I'm done now with the removal.
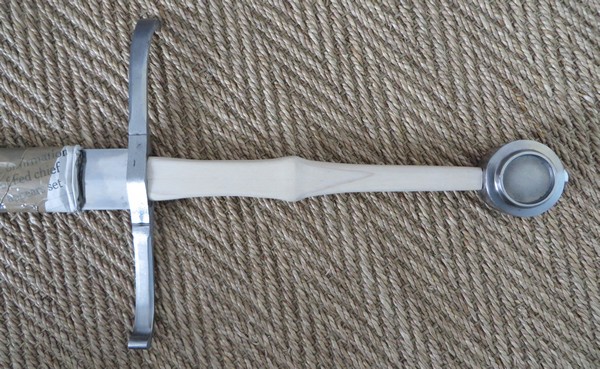
Below the pommel : 1.5cm wide, 1.1 thick
mid section: 3cm wide, 2cm thick
Guard: 3cm wide 1.5 thick
There is very little wood now left on this grip. I will consider adding a cord under-wrap for added solidity.
Couple of pics of the finished wood work.

|
|
  |
 |
|
Radovan Geist
|
 Posted: Mon 05 May, 2014 6:47 am Post subject: Posted: Mon 05 May, 2014 6:47 am Post subject: |
 |
|
I love that grip - it´s very elegant. I kind of dislike bulky grips that you often find on standard replicas.
Julien, did you work on it with rasp and sand paper? Or was it a belt grinder?
|
|
  |
 |
Julien M

|
 Posted: Mon 05 May, 2014 7:23 am Post subject: Posted: Mon 05 May, 2014 7:23 am Post subject: |
 |
|
| Radovan Geist wrote: | | did you work on it with rasp and sand paper? Or was it a belt grinder? |
All of the above: belt grinder for the rough shaping (and I came very close to mess it up) rasp and I find that files covered with 60 grit sandpaper works very well with poplar.
I need to test leather thickness. That's the critical part. None of the leather I have is suited for this (I need a leather thick enough to be carved, yet very thin or this grip is going to be very ugly...).
|
|
  |
 |
Julien M

|
 Posted: Mon 05 May, 2014 10:14 am Post subject: Posted: Mon 05 May, 2014 10:14 am Post subject: |
 |
|
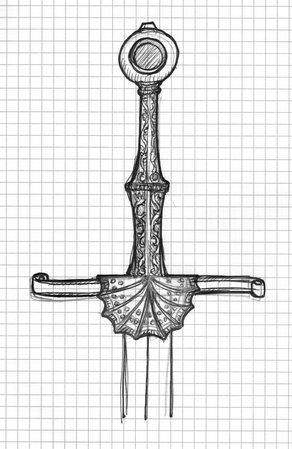
That's what I have in mind for now, forgive the rough sketch but you get the idea.
A mix of the munich and two swords from Armi Bianche Italiane - I'll post sources later.
|
|
  |
 |
|
Tim Lison
|
 Posted: Mon 05 May, 2014 10:17 am Post subject: Posted: Mon 05 May, 2014 10:17 am Post subject: |
 |
|
|
Love the clamshell rainguard! This will be a nice piece when it's all done. I look forward to watching it progress...
|
|
  |
 |
|
Lukas MG
Industry Professional
|
 Posted: Mon 05 May, 2014 12:27 pm Post subject: Posted: Mon 05 May, 2014 12:27 pm Post subject: |
 |
|
That's looking great!! I have actually decided on very similar dimensions. The grip will be 3.5cm wide in the middle rather than 3cm but the other stats are the same. Maybe I'll end up changing it a bit once I shape the grip, it's impossible to be sure of things like that during the planning stage.
Yeah, I went with a very long (and still slightly too broad tang) to have enough material to work with. Won't lose much length though, the entire hilt length will be 30cm, more or less.
I will do a strengthening cord wrap on the wooden core (always do it) and would absolutely recommend you do the same.
|
|
   |
 |
Julien M

|
 Posted: Tue 06 May, 2014 4:34 am Post subject: Posted: Tue 06 May, 2014 4:34 am Post subject: |
 |
|
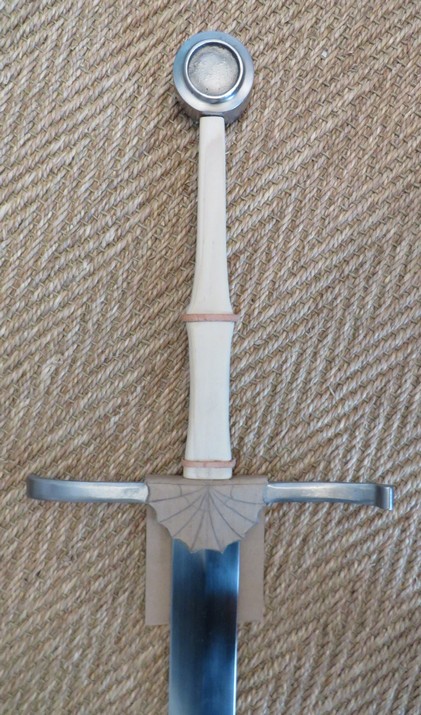
WIP.
Steps are mostly self explanatory:
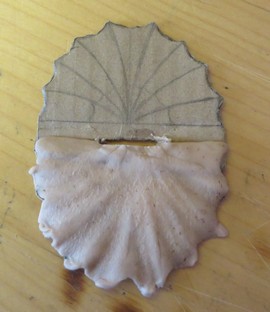
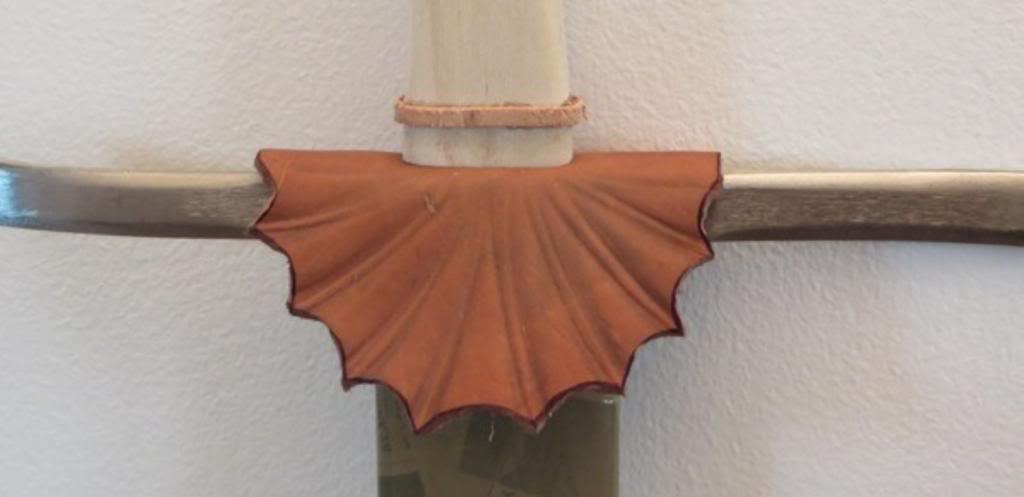
cardboard template, then the same template with soft Super Sculpey on to form the leather. That rain guard is shaping up nicely I think.
Need to do the other side, refine the cuts on the edges, and then I will harden the leather with pork cartilage glue (in other words, cooking gelatin) and add decoration. I hope the hardening process is effective, otherwise I'll have an issue with getting that piece of leather to remain close along the blade.
Looks like it can be pulled off after all (I had doubts after sticking the cut piece of leather on the sword itself, looked pretty ridiculous until it was formed a bit).
|
|
  |
 |
Julien M

|
 Posted: Tue 06 May, 2014 9:36 am Post subject: Posted: Tue 06 May, 2014 9:36 am Post subject: |
 |
|
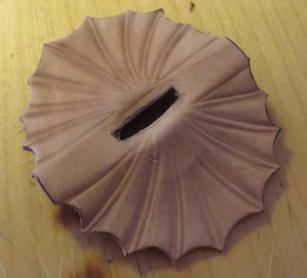
Almost done with the basic shaping. Tomorrow, time to try "cuir bouilli" and decorate a bit.
|
|
  |
 |
Dean F. Marino

Location: Midland MI USA Joined: 24 Aug 2011
Posts: 229
|
 Posted: Tue 06 May, 2014 3:55 pm Post subject: Posted: Tue 06 May, 2014 3:55 pm Post subject: |
 |
|
Oh, I LIKE that grip core  . VERY well formed, and as YOU made it? Likely VERY sound. Being fairly narrow.... how does it "feel" to you with a little 2 oz. leather draped over it? History is lovely - but does the grip fit YOU, and your hands? My hands are thin, but I have long fingers .... the grip might be a bit thin, for ME. But if it fits YOU? Perfect job . VERY well formed, and as YOU made it? Likely VERY sound. Being fairly narrow.... how does it "feel" to you with a little 2 oz. leather draped over it? History is lovely - but does the grip fit YOU, and your hands? My hands are thin, but I have long fingers .... the grip might be a bit thin, for ME. But if it fits YOU? Perfect job  . .
In edhil, hai edhil. In edain, hai edain.
|
|
  |
 |
Brian K.
Industry Professional

Location: Salt Lake City, Utah Joined: 01 Jan 2008
Posts: 727
|
 Posted: Tue 06 May, 2014 4:54 pm Post subject: Posted: Tue 06 May, 2014 4:54 pm Post subject: |
 |
|
Julien,
I don't say it enough, but your work is truly inspirational and admirable. You do exceptional work, and you are an invaluable asset to the community. Thank you for your frequent contributions and sharing your projects for all to see! I look forward to more progress pictures and your input.

Brian Kunz
www.dbkcustomswords.com
|
|
   |
 |
Jimi Edmonds

|
 Posted: Tue 06 May, 2014 8:45 pm Post subject: Posted: Tue 06 May, 2014 8:45 pm Post subject: |
 |
|
Looking forward to seeing the final pictures of your sword, I also like the Durer, but have the same affliction with the size of the grip, well the size of A&A grips in general.
How did you get the leather to make the raised shapes? Do you soak it and work it? Do you wax harden it afterwards?
Cheers.
|
|
  |
 |
|
Matthew P. Adams
|
 Posted: Wed 07 May, 2014 8:17 am Post subject: Posted: Wed 07 May, 2014 8:17 am Post subject: |
 |
|
Have you thought about a thread wrap? If you use a heavy thread instead of cord you would have the same reinforcement with far less thickness. It would take a while though.
"We do not rise to the level of our expectations. We fall to the level of our training" Archilochus, Greek Soldier, Poet, c. 650 BC
|
|
  |
 |
Julien M

|
 Posted: Wed 07 May, 2014 8:50 am Post subject: Posted: Wed 07 May, 2014 8:50 am Post subject: |
 |
|
Thanks guys for your kind words, really motivating to hear such feedback.
I find this grip to be very comfortable and well suited to the sword. The lower end close to the guard has standard thickness with the leather on, and provides a safe and sound grip of the sword (To A&A credit the sword is extremely well balanced and easy on the hand in terms of felt weight). I'm no martial artist, but the upper and thinner part seems well suited to help maneuvering the sword and providing additional leverage when needed, so when swinging the sword around I don't feel the need for an overly tight grip there, it's not supporting the weight of the sword itself. Choosing the Munich as reference was a drastic choice, it's the thinnest grip of the type I know of (a sister sword in Paris has a similar grip, but more meaty).
I might not go down to using thread, but thin cotton cord soaked in glue should do.
J
|
|
  |
 |
Julien M

|
 Posted: Sat 10 May, 2014 11:16 am Post subject: Posted: Sat 10 May, 2014 11:16 am Post subject: |
 |
|
Removed the raisers and wraped in cord, then applied diluted wood glue on with a paintbrush.
It now feels much stronger, yet the thickness is still minimal.
I've slightly modified the cross (it's diamond shaped and would create a bulge under the rain guard, while I want it flat).
Grip below - adding raisers tomorrow, then will soak the rain guard in pork glue, and finalize the shaping and decoration of the rain guard. I've cut and pre formed the grip leather, and practiced carving on a strip of spare leather, so that I have a process that works on this very thin leather. I'm missing something to create a decent background (usually a punch making tiny circles...I've asked my butcher for beef bones and will see what tools I can make of that).
Wrapped grip below.

|
|
  |
 |
Dean F. Marino

Location: Midland MI USA Joined: 24 Aug 2011
Posts: 229
|
 Posted: Sat 10 May, 2014 12:34 pm Post subject: Posted: Sat 10 May, 2014 12:34 pm Post subject: |
 |
|
NICE cord wrap  . And the diluted wood glue overcoat was a very good call - I do this with all my grips, and it really hardens the cord & knocks down the cord "fuzz" that can result in a lump under the leather overwrap. . And the diluted wood glue overcoat was a very good call - I do this with all my grips, and it really hardens the cord & knocks down the cord "fuzz" that can result in a lump under the leather overwrap.
In edhil, hai edhil. In edain, hai edain.
|
|
  |
 |
|
G.L. Williamson
|
 Posted: Sat 10 May, 2014 10:24 pm Post subject: Posted: Sat 10 May, 2014 10:24 pm Post subject: |
 |
|
That is great progress and what looks like it'll end up fantastic! I quite enjoy reading your updates, and sincerely appreciate the information. 
Now, if I can ever actually get enough of my other projects finished to the point I can start doing such things myself...lol
_________
l'audace...
|
|
  |
 |
Julien M

|
 Posted: Wed 14 May, 2014 3:57 am Post subject: Posted: Wed 14 May, 2014 3:57 am Post subject: |
 |
|
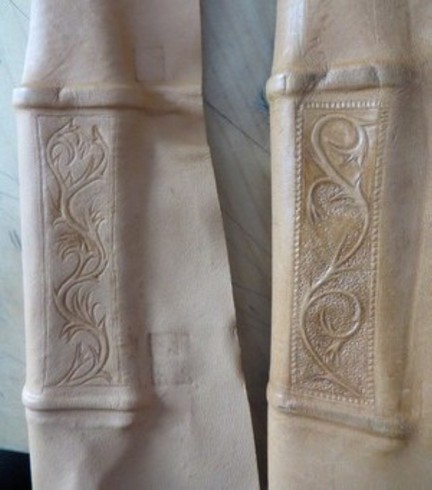
Trying out carving methods.
I wish I would use a paper template and stick to it...instead of cutting right on and be dissatisfied with the result.
I got a nice bone femur from my butcher, I will carve embossing tools and stamps out of that. Bone is beautiful when finished, but the smell is horrendous when sawing through or sanding.
Two attempts below, I like neither. I've used these dots too many times for the background. I don't think they look particularily true to period so I will find something else.
|
|
  |
 |
Daniel Wallace

Location: Pennsylvania USA Joined: 07 Aug 2011
Posts: 580
|
 Posted: Wed 14 May, 2014 9:37 am Post subject: Posted: Wed 14 May, 2014 9:37 am Post subject: |
 |
|
|
I'm liking this project all around, leather work is something I would like to attempt sometime in the future. I like the tooling on the one pictured on the right.
|
|
  |
 |
|
|

