| Author |
Message |
|
Chris Mann
Location: california Joined: 02 Mar 2011
Posts: 7
|
 Posted: Wed 03 Aug, 2011 10:18 pm Post subject: Attaching a Spring Catch or Pin to Helmet Posted: Wed 03 Aug, 2011 10:18 pm Post subject: Attaching a Spring Catch or Pin to Helmet |
 |
|
|
Hey guys, I have GDFB Sallet and I was concerned about the inability to either keep the visor raised or kept in the down position. I was thinking of solutions and the only thing that I could think of was to add either a spring pin or catch to the helmet but I was wondering if any of you out there have either done this yourself or know of someone who has with success? It would be much appreciated. Thank you
|
|
  |
 |
Michael B.
Industry Professional

Location: Seattle, WA Joined: 18 Oct 2007
Posts: 367
|
| Posted: Wed 03 Aug, 2011 11:42 pm Post subject: |
|
|
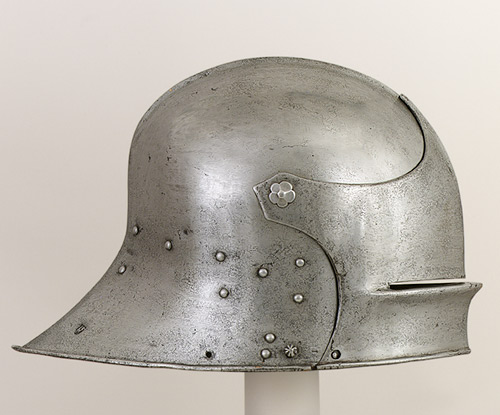
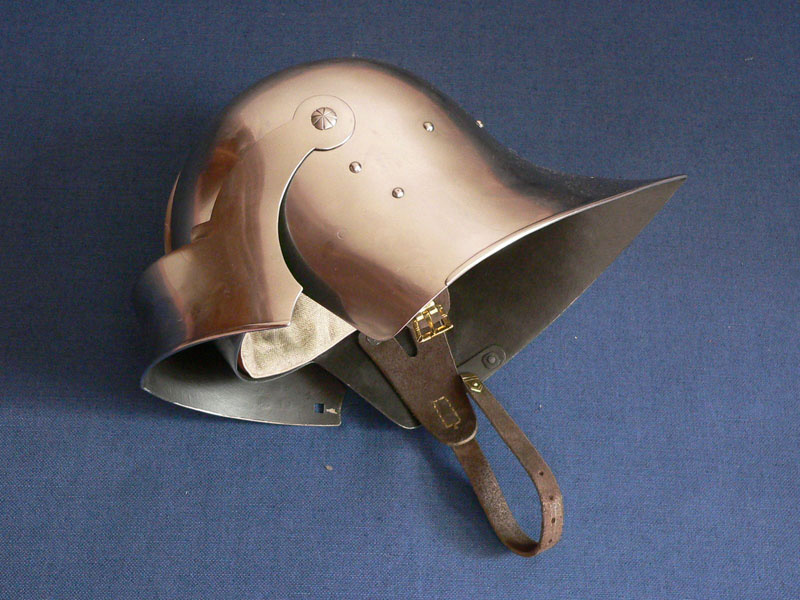
This is the latch on my sallet. The latch is beveled to the visor can slip down, there's a this piece of steel that connects to the "button" to release the latch. It works great and can actually undo it myself when wearing all my steel. I could drum of some more photos tomorrow night if you'd like.

www.bearmountainforge.com
Michael Bergstrom
|
|
 |
|
|
Chris Mann
Location: california Joined: 02 Mar 2011
Posts: 7
|
| Posted: Thu 04 Aug, 2011 12:14 am Post subject: |
|
|
|
ya, I would really appreciate more pics. I'm gonna be doing it myself most likely and that way seems to be the most common. I really appreciate it
|
|
|
|
|
Sean Flynt

|
|
|
|
|
|
Colt Reeves
|
| Posted: Thu 04 Aug, 2011 6:22 am Post subject: |
|
|
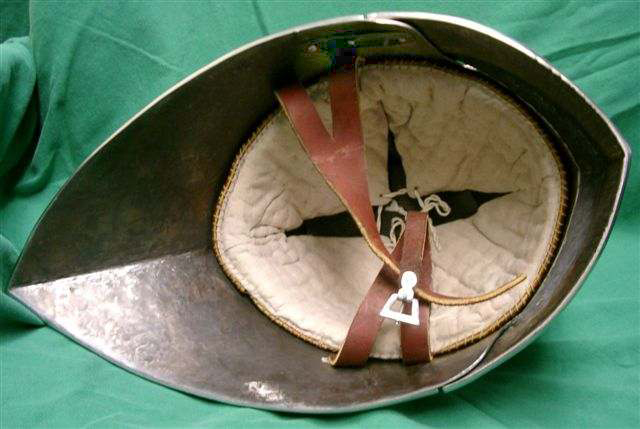
I think I know what is being done, but could someone post a picture of the catch inside the helmet so I know how it works for sure?
"Tears are for the craven, prayers are for the clown.
Halters for the silly neck that cannot keep a crown.
As my loss is grievous, so my hope is small.
For Iron, Cold Iron, must be master of men all..."
-Cold Iron, Rudyard Kipling
|
|
|
|
|
Sean Flynt
|
|
|
|
|
Michael B.
Industry Professional
Location: Seattle, WA Joined: 18 Oct 2007
Posts: 367
|
|
|
|
|
|
Chris Mann
Location: california Joined: 02 Mar 2011
Posts: 7
|
| Posted: Thu 04 Aug, 2011 1:48 pm Post subject: |
|
|
|
Wow, that really helps. Thank you. It looks like some nice work on your part, how long did it take you to complete, if I might ask?
|
|
|
|
|
|
Colt Reeves
|
| Posted: Thu 04 Aug, 2011 8:00 pm Post subject: |
|
|
Thanks guys. That's pretty much how I thought it was put together, but wanted to know for sure.
"Tears are for the craven, prayers are for the clown.
Halters for the silly neck that cannot keep a crown.
As my loss is grievous, so my hope is small.
For Iron, Cold Iron, must be master of men all..."
-Cold Iron, Rudyard Kipling
|
|
|
|
|
Sean Flynt
|
|
|
|
|
Jean Thibodeau

|
| Posted: Fri 05 Aug, 2011 8:50 pm Post subject: |
|
|
| Sean Flynt wrote: | | I happened to have a sallet spring for my project. If you don't have one and don't want to make one from scratch you might experiment with a narrow saw blade. Seems like one should be able to just cut to length, grind the teeth flat and drill for the rivets/pins. No heat treatment needed. |
Good idea since a mild steel one may have enough spring but can deform easily if overstressed and don't have much strength for a positive lockup.
I guessing you are thinking of a hacksaw blade cut to length.
Should be easy to shape using a dremel cut off wheel.
One could use a section and do a destructive test on it to see if it's too brittle or not ? If a bit too hard and brittle I would polish it bright and then put it on the electric element on my stove and heat it up until it turned blue: This should soften a hardened steel from 60 R.C. + down to the 45/50 R.C. of a spring temper.
Not very expensive to cut up a saw blade and experiment until one has the right amount of springiness versus hardness.
You can easily give up your freedom. You have to fight hard to get it back!
|
|
|
|
|
Sean Flynt
|
|
|
|
|
Jean Thibodeau
|
| Posted: Sat 06 Aug, 2011 9:18 pm Post subject: |
|
|
| Sean Flynt wrote: | | Appalachian folks made knives the same way, breaking blades out of worn or broken saw blades. |
Used a file to make a long spear point a long time ago but since I didn't lower it's harness a bit, it broke on a wood stump when I tested it with a light tap.  The next one I put in the kitchen oven set at around 600 degrees F. for a while and let it cool slowly ! Anyway, a little trick to soften too hard steel without doing a full re-heat treat. The next one I put in the kitchen oven set at around 600 degrees F. for a while and let it cool slowly ! Anyway, a little trick to soften too hard steel without doing a full re-heat treat.
This was a long long time ago so I don't remember the exact technical details and I think I " chickened out " and didn't test that second spear point on the log.  
I did do a full eat treat once in Shop Class too many decades ago to mention and we where shown how to control the hardness using the colour changes of the steel: A straw colour for very very hard ( 60/62 R.C. ) and deep blue for ( 52/55 R.C. )
The stove top trick or oven trick is to soften a too hard blade by heating it a bit higher than it was when originally tempered as a very hard file. Depending on the steel this might work well or cause stresses to the steel ? More knowledgeable people would have to give us their opinion on this and how successful or not it might be.  
You can easily give up your freedom. You have to fight hard to get it back!
|
|
|
|
|
|
|