| Author |
Message |
Kevin Reeds

Location: Maryland USA Joined: 07 May 2009
Posts: 3
|
 Posted: Thu 07 May, 2009 9:12 am Post subject: What is the best method to attach a spear head Posted: Thu 07 May, 2009 9:12 am Post subject: What is the best method to attach a spear head |
 |
|
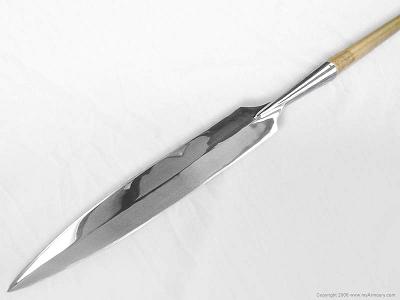
I recently acquired a Windlass “Hewing” spear head on a blow out sale. I don’t know much about Viking spears, needless to say nothing about a “Hewing” spear. I purchased an 8’ ash pole for this and put a taper on the end. I don’t know how to best attach this. I would like to be able to use this for some light practice so I want it to be attached securely. The socket has two holes through its base; the holes are inline with each other. Should I use a heavy duty epoxy in addition to a screw, rivet or pin though the holes? If anyone can help I would be grateful. Also, what would be a good pole length for such a large bladed spear?
Thanks - K.R.
 Attachment: 8.45 KB Attachment: 8.45 KB
"You bring a pen to a sword fight...?!?"
|
|
  |
 |
|
Matthew Amt
|
| Posted: Thu 07 May, 2009 9:34 am Post subject: |
|
|
Right, a rivet or pin goes through the holes. (Please don't use screws!) If there are already 2 holes in the socket, it's a little dicey because you have to drill through the wood from one to the other, and not miss! Or you could simply drive in a short nail from each side, no drilling necessary. For any nail you use, sand or file the head first to remove any galvanization and modern appearance. I think my spears tend to have only one hole, come to think of it--not sure if that was more common than 2 holes or not! If I were putting a pin or rivet all the way through, I would assume that it should be peened at both ends to prevent it coming loose. But I just heard of a bit from a Norse saga in which a warrior deliberately removes the pin before throwing his spear, so that the head will come off and prevent it from being thrown back! No idea how far to trust that. In any case, his spearhead fell off before he threw it--oops...
You can use glue or epoxy if you like, though I think it would be redundant. Definitely a good idea if the head does not fit tightly on the shaft! However you do it, before drilling any holes for a pin, stand on solid paving with the spear held vertically, point upwards, and rap the butt very firmly on the ground a couple times. This should seat the head as solidly as it's going to go. Then you can drill or nail as you prefer.
Yay, spears!
Matthew
|
|
 |
|
R D Moore

|
| Posted: Thu 07 May, 2009 9:35 am Post subject: |
|
|
I guess my concern about using epoxy would be the difficulty in re-hafting if the spearhead was broken off. I guess if the haft broke, you could cut the wood level with the end of the socket then drill out the remaining wood using progressively smaller drill bits. But I would want to pin the haft to the socket using a plain old steel nail the same diameter as the holes in the socket. Cut off the nail head and enough of the rest of it to leave about 1mm excess past each side of the socket, then use a ball peen hammer to peen over the edges of the new "pin". Nails are cheap so practice this till you feel confident. This way you can cut off the pin head, knock it out, re-haft and re-pin and your back in action. And as others have mentioned here, you're mileage may vary.
Have fun!
PS
Here's a link to a thread you may find helpful:
http://www.myArmoury.com/talk/viewtopic.php?t...=spearhead
Also, there's a thread in which Sean Flynt creates his usual work of art using a Hanwei throwing spearhead. Several others contributed, too. I can't give it to you here because I don't have access to my bookmarks, but you should be able to find it using the search function.
"No man is entitled to the blessings of freedom unless he be vigilant in its preservation" ...Gen. Douglas Macarthur
|
|
 |
|
|
Ken Nelson
|
| Posted: Thu 07 May, 2009 11:01 am Post subject: |
|
|
If you take care to taper the shaft so that it fits snugly, with little to no wiggle, you will have a great start at keeping the head on the shaft. Then drill and pin the head to the shaft, peining over the ends of the pin to hold it in place. the taper needs to be tight as it will take the force of a thrust, and a side cut, the pin will only be there to help you withdraw it from a target.
A good way to make sure that you drill so that you hit both holes is to use a drill press and a centering tool. you can purchase a cone that fits the hole in the center of the drill press table, or you can make one(not quite as accurate, but sufficient for this purpose) by taking a framing spike that is about 1/4in diameter, cutting off about 1" of the tip and welding it to a plate that can be clamped to the table of the drill press. Chuck up the drill bit, and advance it at least the diameter of the shaft plus about 1/4in for clearance. set the centering tool so that the tip touches teh tip of the drill bit, and then tighten the table or clamp down the tool so it will not move. With the head in place, set it on the tool, so that the hole is over the tool anod drill in about halfway. then flip it over and place the hole on the tool. when you drill the rest of the way, you should hit your previous hole. going halfway with each will keep the bit from hitting the tool,and ruining it.
If you do chose to epoxy the head to the shaft, there is an easy way to get it off, heat. Use a clear epoxy, not a filled one like JB weld. when it comes time to remove the head, wrap the blade in a wet towel, and heat the socket with a torch. You should only have to bring up the socket to 300 deg or so, not enough to ruin the temper, the towel is just in case you get a little too exited. Most epoxies will break down at high temperatures, but the filled ones take more heat. Once the shaft is out of the head, let the head cool down, and then clean it with a wire brush and acetone to get rid of any remaining epoxy and start a new shaft.
Good luck
Ken Nelson
Iron Wolf Forge
"Live and learn, or you don't live long" L. Long
|
|
|
|
|
Douglas S

|
| Posted: Thu 07 May, 2009 12:03 pm Post subject: |
|
|
You don't need a really wide pin. Think: any hole you drill into the shaft will weaken it.
The pin only has to keep the head from pulling off.
I usually use something similar to a carpet tack.
|
|
|
|
|
Sean Flynt

|
|
|
|
|
Jeff A. Arbogast

|
| Posted: Fri 08 May, 2009 6:09 pm Post subject: |
|
|
I have a 12th century spear from Arms & Armor, and I asked them before I purchased it how it was secured. They said it was press-fit without ANY nails or screws. I asked them if that would not be very secure. They said no, that it was very snugly fitted to the shaft and it would probably take putting the spearhead in a vise and then having about three burly guys pulling on it to remove the shaft from the head. I can assure you it ain't coming off. The reason they gave for not securing it with nails or some such was that wood expands and contracts, and if the wood shrank, the spearhead would loosen and be hard to retighten, whereas a press-fit head could be held as the butt was rapped hard on a solid surface to seat it again. It made sense to me, and I would not hesitate to brace it in the ground against a cavalry charge, press-fit head and all, if I was unfortunate enough to be in that position (I did have them add a spike to the butt). I guess the trick is to seat the spearhead onto the shaft securely enough though.
A man's nose is his castle-and his finger is a mighty sword that he may wield UNHINDERED!
|
|
|
|
|
Louis Cyfer

Location: arcadia Joined: 20 Mar 2011
Posts: 2
|
| Posted: Sun 20 Mar, 2011 12:13 am Post subject: |
|
|
| Jeff A. Arbogast wrote: | | I have a 12th century spear from Arms & Armor, and I asked them before I purchased it how it was secured. They said it was press-fit without ANY nails or screws. I asked them if that would not be very secure. They said no, that it was very snugly fitted to the shaft and it would probably take putting the spearhead in a vise and then having about three burly guys pulling on it to remove the shaft from the head. I can assure you it ain't coming off. The reason they gave for not securing it with nails or some such was that wood expands and contracts, and if the wood shrank, the spearhead would loosen and be hard to retighten, whereas a press-fit head could be held as the butt was rapped hard on a solid surface to seat it again. It made sense to me, and I would not hesitate to brace it in the ground against a cavalry charge, press-fit head and all, if I was unfortunate enough to be in that position (I did have them add a spike to the butt). I guess the trick is to seat the spearhead onto the shaft securely enough though. |
finally someone has a decent answer. i have a maasai spear that i got as a gift. i was told to use something like leather to press fit the handle into the spearhead. i am trying to confirm this. or any other advice on how to do it best. i guess originally they use some wax, but i can't find any info on it. any help would be greatly appreciated. again, only pressfit, no pins, or rivets.
|
|
|
|
|
Elling Polden

|
| Posted: Sun 20 Mar, 2011 12:24 pm Post subject: |
|
|
Methods depend on time and place, but riveting seems to have been by far the most common. Norwegian laws from th 1270s state that the spearhead should be secured by one rivet going all the way throug the shaft, or two that goes at least half way. The same seems to have been the norm in the viking age.
Pressing a spearhead in place will work very nicely, untill you start to use the weapon. With time, changes in humidity, and use, the wood will invariably deform, causing the spearhead to become rickety.
If the head is riveted in place, this is not really a problem. The weapons still works.
In any case, removing the old shaft from a broken spear can be a real pain, even with a riveted head that has broke at the socket. We generally throw them in the fire and burn the wood out, but this would probably ruin the MRL spear.
We have a number of these, converted for reemactment combat use. these are riveted, though I'm not quite sure if they are glued as well.
8 ft. is quite long for a cutting polearm; Due to principles of leverage, the transition between the socket and the pole recieves a lot of tension when striking, making it woulnerable to breakage, especially with a long, pointy head. This is presumably the reason glaives where invented, and certainly why later striking poiearms have long langnets along the shaft.
The Atgeir mentioned in the sagas where presumably rather short, with the Kesje being a longer variety. If you have the time and inclination, I would recomend experimenting with different shaft lenghts.
"this [fight] looks curious, almost like a game. See, they are looking around them before they fall, to find a dry spot to fall on, or they are falling on their shields. Can you see blood on their cloths and weapons? No. This must be trickery."
-Reidar Sendeman, from King Sverre's Saga, 1201
|
|
 |
|
Louis Cyfer
Location: arcadia Joined: 20 Mar 2011
Posts: 2
|
| Posted: Sun 20 Mar, 2011 1:37 pm Post subject: |
|
|
|
there is no place on a maasai spear to do a pin or rivet. the handle itself is less than 3 feet. they kill lions with these, so falling off is not an issue when used, one of the last actually used weapons of its kind. trying to find out how to attach the handle, it had to be taken apart to be brought back from africa.
|
|
|
|
|
|
|
You cannot post new topics in this forum
You cannot reply to topics in this forum
You cannot edit your posts in this forum
You cannot delete your posts in this forum
You cannot vote in polls in this forum
You cannot attach files in this forum
You can download files in this forum
|
All contents © Copyright 2003-2026 myArmoury.com — All rights reserved
Discussion forums powered by phpBB © The phpBB Group
Switch to the Basic Low-bandwidth Version of the forum
|

