| Author |
Message |
Kirk Lee Spencer

|
 Posted: Sun 26 Apr, 2009 8:30 pm Post subject: My First Gladius Redone (Again!) Posted: Sun 26 Apr, 2009 8:30 pm Post subject: My First Gladius Redone (Again!) |
 |
|
Hi all…
Over the last year or so I have been reworking the first sword I ever owned. It is a Roman gladius and this is the second time it has been redone.
After the movie “Gladiator,” I saw a cheap replica of a gladius in a mail order catalogues and made the off-hand comment to my wife that I wouldn’t mind having one of those for my office. Well my wife got it for my next birthday. (Little did she know what events she had set in order.)
About a week after my birthday, I grew dissatisfied with the look of the sword. It didn’t look like what I had seen in the movie Gladiator. So I took it to my grand dad’s garage and began cutting and grinding. I still remember my wife’s face when she discovered what I was doing. I told her to have a little faith and I would get it all back together.
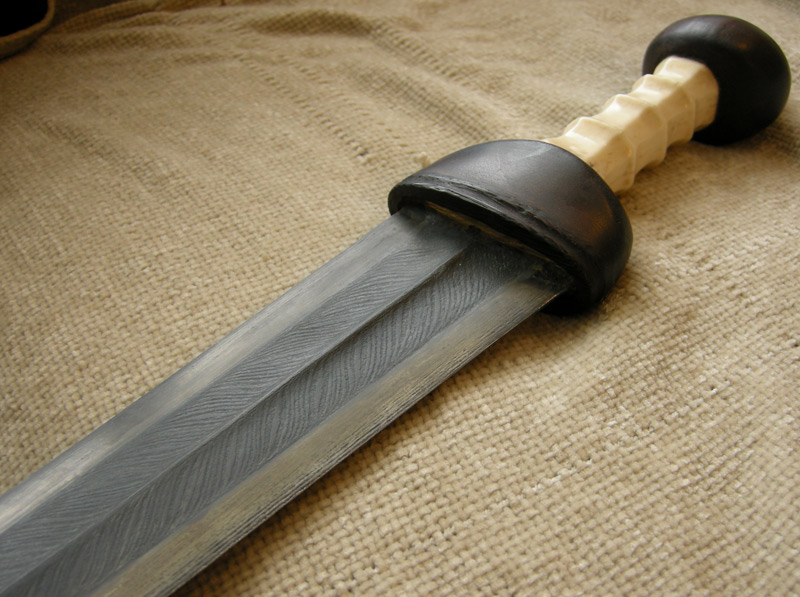
I replaced the heavy solid brass grip with a nice carved bone grip using a section of clean dense cow bone I found at the local pet store. I reshaped the wood of the guard from a circle to an oval. Using my dremel tool, I cut the back off a brass door-knocker as a guard plate. I then filled the parts with “gorilla glue” and put it all back together, making sure that the grip guard and pommel were all perfectly aligned. The reason I used “gorilla glue” is because it is an expanding glue and I figured it would expand and fill the hollow part of the bone grip nicely. It did. I remember seeing a small bead of glue extruding from one of the ligament holes. The one problem with this idea is that as the glue expanded it pushed the grip ever so slightly out of line and opened a hairline crack on one side. So… not so sure I would do that again.
 Attachment: 70.64 KB Attachment: 70.64 KB
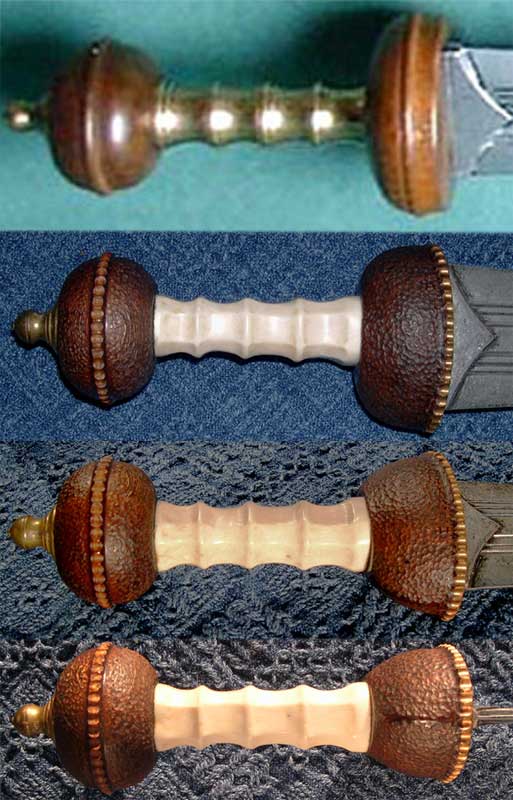
The top picture is what the sword looked like orginally. The others images are after the first redo
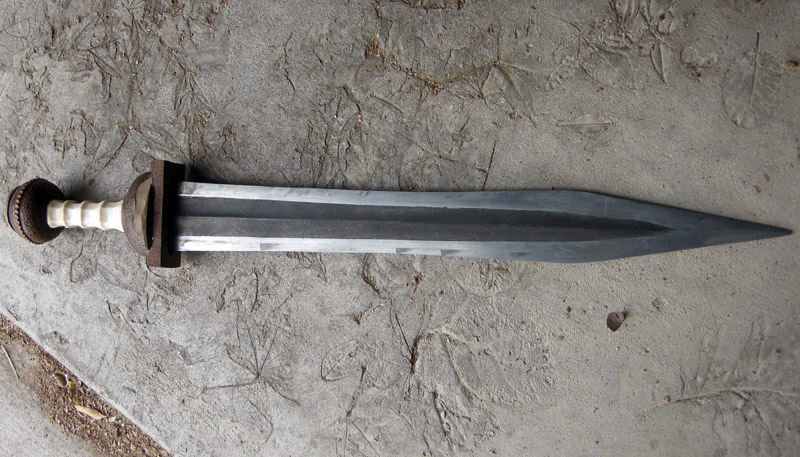
Attachment: 147.69 KB
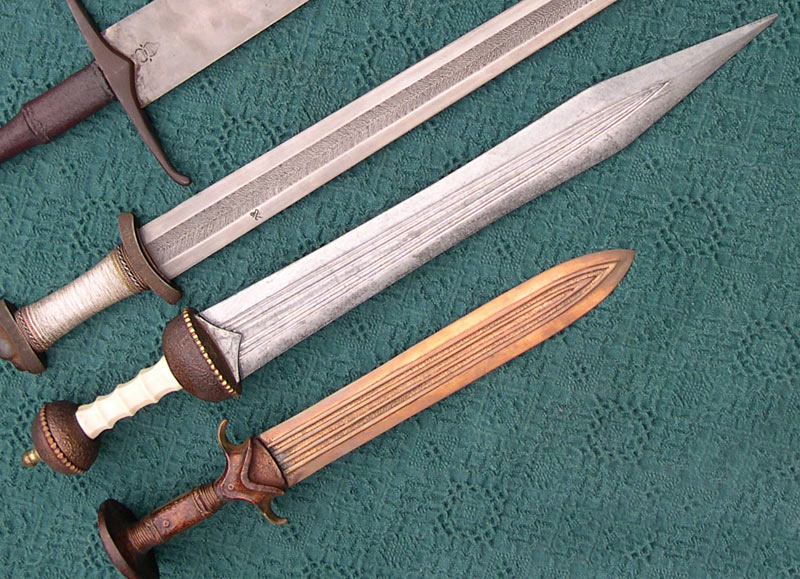
Here is a full picture of the gladius after the first reworking.
Two swords
Lit in Eden’s flame
One of iron and one of ink
To place within a bloody hand
One of God or one of man
Our souls to one of
Two eternities
|
|
  |
 |
Kirk Lee Spencer
|
| Posted: Sun 26 Apr, 2009 8:36 pm Post subject: |
|
|
I have kept this first redone version in my office for about 8 years. I use it in my classes along with the rest of my teaching collection. I used it to demonstrate what a gladius may have looked like. I have gotten tired of telling the students that “though a gladius may have looked something like this, the blade is too thick, the guard’s all wrong and the balance is way to blade heavy.” So, about a year ago I thought about selling it or giving it away, but it is my first sword and so my sentimental side would not let me get rid of it.
So… It would need to be redone again.
The first thing I did was to cut the large oval brass guard plate down to a reasonable size. While there are instances of gladii with such decorative grooves (common on pugio), I wanted the more common plain blade. And I was going to have to reduce the weight of the blade, anyway, to achive a more period balance to the sword. So I began grinding and filing the blade down.
Attachment: 144.2 KB
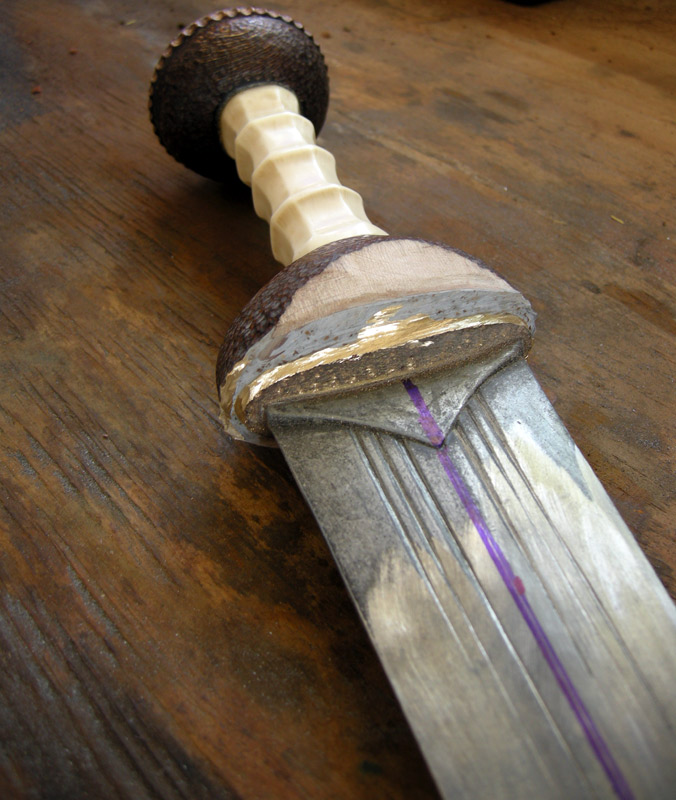
Brass plate cut down to size. Median line drawn for blade shaping
Attachment: 146.3 KB
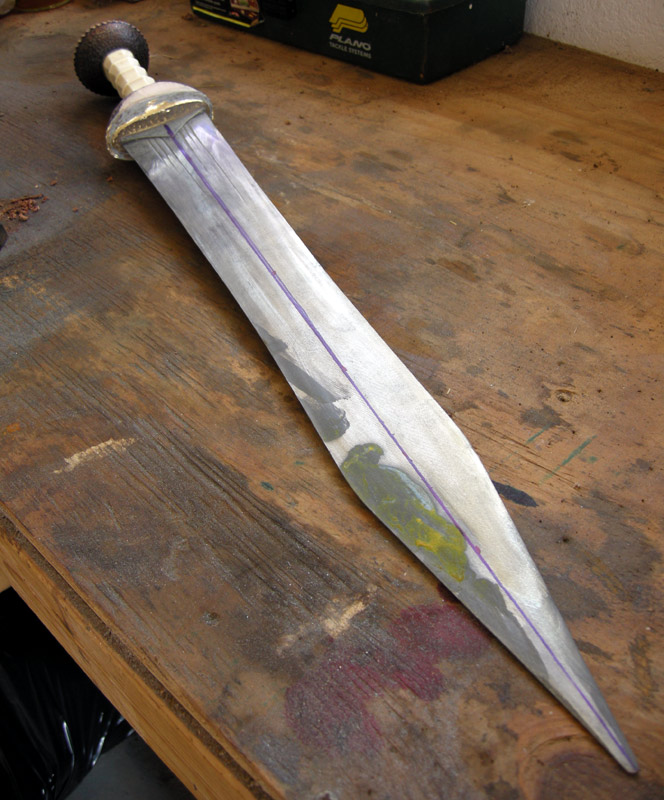
Progress shot of grinding the blade to a new shape. Line drawn for median ridge.
Two swords
Lit in Eden’s flame
One of iron and one of ink
To place within a bloody hand
One of God or one of man
Our souls to one of
Two eternities
|
|
|
|
|
Kirk Lee Spencer
|
| Posted: Sun 26 Apr, 2009 8:42 pm Post subject: |
|
|
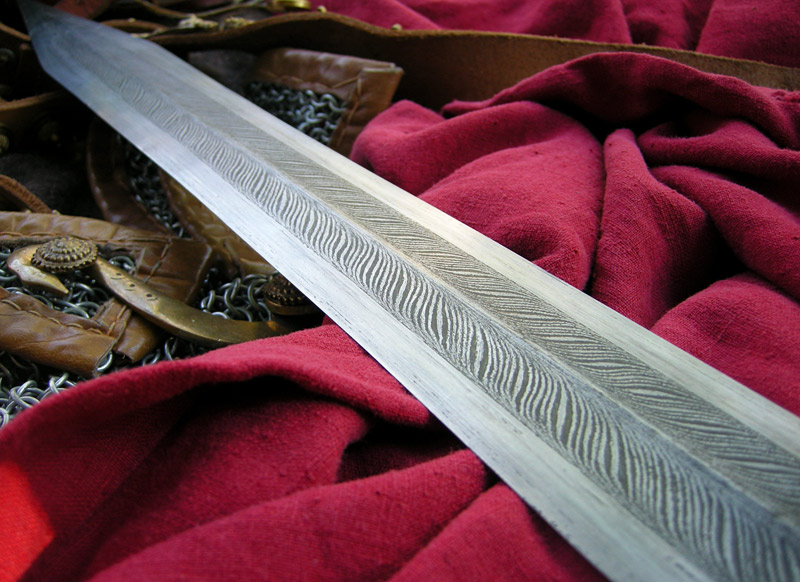
As I was filing the blade to reduce the mass, I also made the leaf form slightly more subtle. It was during this work, that I began to consider the idea of a torsion pattern-welded core on a leaf blade. I have seen one pugio with a leaf blade and a torsion pattern welded core. I really liked the look. If the Romans could make a leaf-blade pugio with a pattern welded core… I did not see a reason they could not have done it with a leaf-bladed gladius. So once the blade was filed to shape and polished, I began experimenting with etching a pattern welding onto the blade surface similar to the torsion pattern I had seen on the pugio.
First I drew a line with a sharpie down the center of the blade and measured equal distance from this centerline along the blade on each side. I then connected the dots very lightly in pencil to see if it was what I wanted. If it didn’t look right, I would take find sand paper and sand the pencil marks (did not use eraser because I was going to be etching). Once I had the lateral lines for the pattern weld core, I inked it with the extra fine tip sharpie. I placed scotch tape along this outside lateral line and the median line to isolate what would be a billet in the core. I began drawing in the pattern with a sharpie to act as a resist to the etchant. If you make a mistake with the sharpie you can take any sharp steel pointed (or edged) object and scrape it. This is especially easy if you do it right away before the ink sets. Let the ink dry at least overnight and then go back over the lines again to make sure the resist is thick enough to give a relatively sharp edge during the etch.
Attachment: 61.64 KB
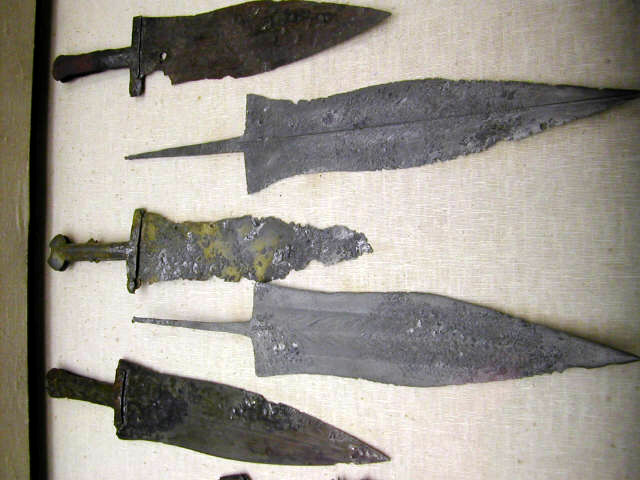
Pugio blade with torsion pattern welded core
Attachment: 143.75 KB

Blade taped and pattern inked in resist
Attachment: 145.75 KB

Close up of inked pattern
Two swords
Lit in Eden’s flame
One of iron and one of ink
To place within a bloody hand
One of God or one of man
Our souls to one of
Two eternities
|
|
|
|
|
Kirk Lee Spencer
|
| Posted: Sun 26 Apr, 2009 8:45 pm Post subject: |
|
|
To prepare the ferric chloride for the etch, I found a small glass candleholder we had laying around the house. I went to Wallmart and bought a small porcelain bowl for about 50 cents. I put water in the porcelain and Radio Shack ferric chloride in the candleholder. I borrowed my wife’s meat thermometer to place in the water to measure the temperature and put the whole thing on a hotplate.
Attachment: 138.69 KB
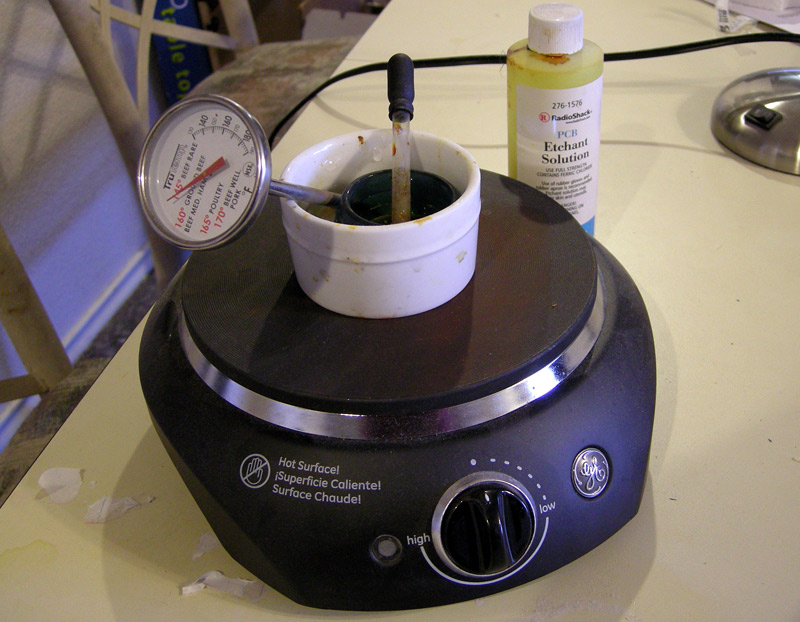
Etchant heating setup
Two swords
Lit in Eden’s flame
One of iron and one of ink
To place within a bloody hand
One of God or one of man
Our souls to one of
Two eternities
|
|
|
|
|
Kirk Lee Spencer
|
| Posted: Sun 26 Apr, 2009 8:47 pm Post subject: |
|
|
I tried to apply the etchant at a temperature between 105 and 120 degrees Fahrenheit. With a cheap eye dropper, I put the etchant on rather quickly from guard to tip. I would rub the end of the dropper along the blade as I added the etchant. This kept the etchant agitated and I could feel the ridges begin to form as the etchant worked. I let the etchant work for about 15 minutes and then washed the blade in water and washed it down with windex and scoured it lightly with a green scouring pad. I then put on some baking soda… seems like I heard that this helps neutralize everything (not sure this is necessary.)
The first attempt failed, for two reasons. First, when I was rubbing the blade with the tip of the dropper I was dislodging some of the resist and this left etched streaks along the blade. Second, and more importantly, I left the etchant on the blade too long. 15 minutes may be okay for hardened steel but with this soft blade, it was too long. In the second attempt, after I had sanded the blade down again and redrawn the pattern, I got much better results with only 5 minutes of etching.
Attachment: 147.44 KB
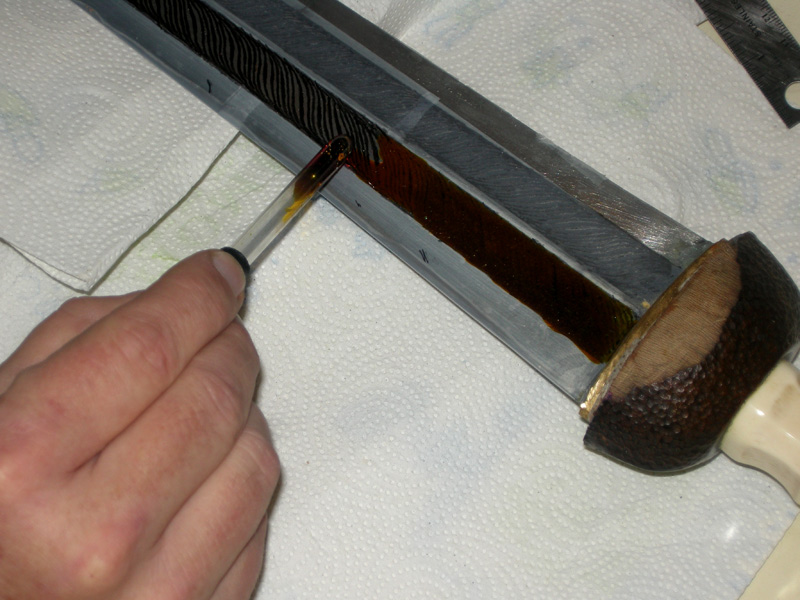
Applying Etchant
Attachment: 131.13 KB
Etchant on full "billet" section
Two swords
Lit in Eden’s flame
One of iron and one of ink
To place within a bloody hand
One of God or one of man
Our souls to one of
Two eternities
|
|
|
|
|
Kirk Lee Spencer
|
| Posted: Sun 26 Apr, 2009 8:55 pm Post subject: |
|
|
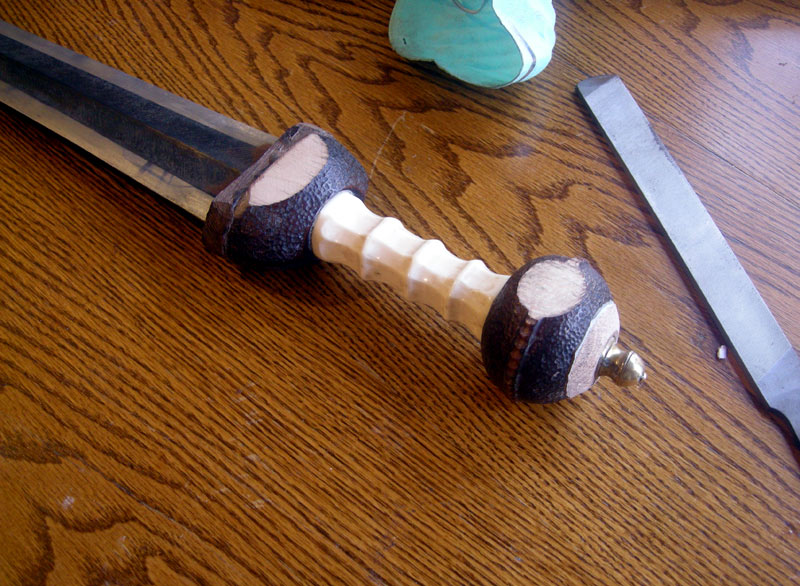
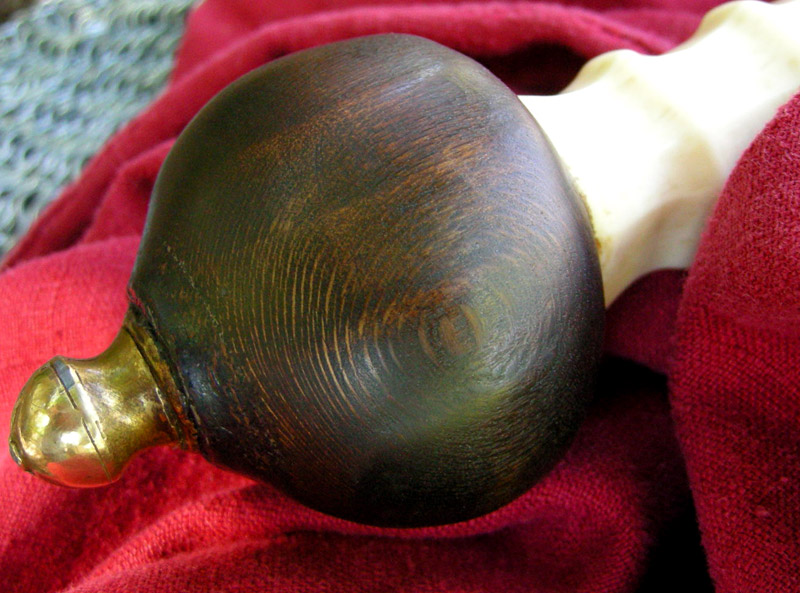
Once I was satisfied with the etching on both sides of the blade, I began to build up the wood around the guard plate and to try and to add a wood extension to the pommel, so it could be shaped into a tear drop shape. I had some scrap wood around the garage. I used wendge around the guard plate and black mesquite to extend the pommel. (I should have been more selective to find wood that matched a little better.)
These scraps were rough cut and epoxied into place. Note to self: When using old epoxy, test a little over night to see if it still good. The epoxy on the guard piece never set up. In the end I had to take it off, scrape off the stuff (my hands still feel sticky) and redo the whole mess again.
Attachment: 144.88 KB
Wood parts applied. Blade etched and left dark.
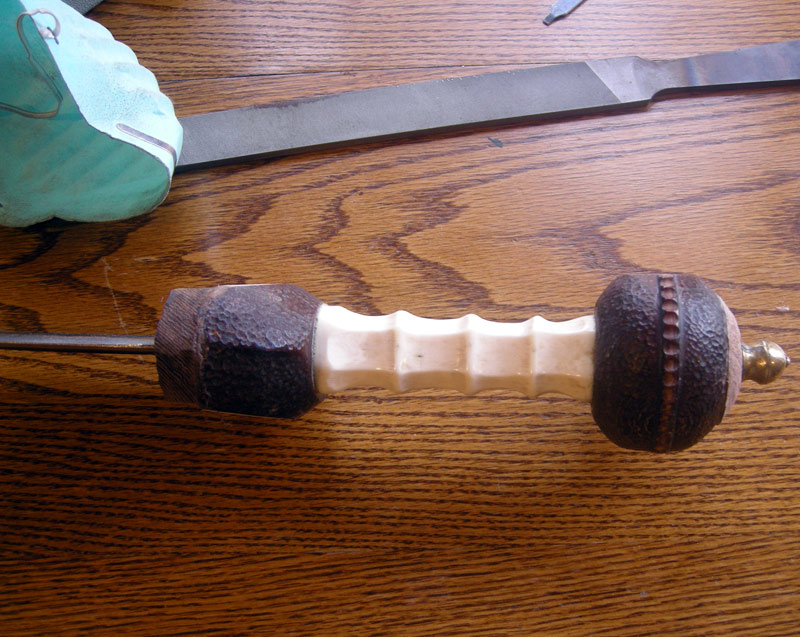
Attachment: 147.86 KB
Wood extensions added and left rough
Attachment: 141.65 KB

Wood extensions.
Two swords
Lit in Eden’s flame
One of iron and one of ink
To place within a bloody hand
One of God or one of man
Our souls to one of
Two eternities
|
|
|
|
|
Kirk Lee Spencer
|
| Posted: Sun 26 Apr, 2009 9:02 pm Post subject: |
|
|
After the wood extensions were in place, I used the course sanding drum on the dremel to shape them. This I did as I reshaped the pommel and guard as a whole.
I used a pen to draw in the contours before I ground and filed the wooden extensions into shape. However, the center median ridge-look, I was working for did not work well and so it eventually disappeared.
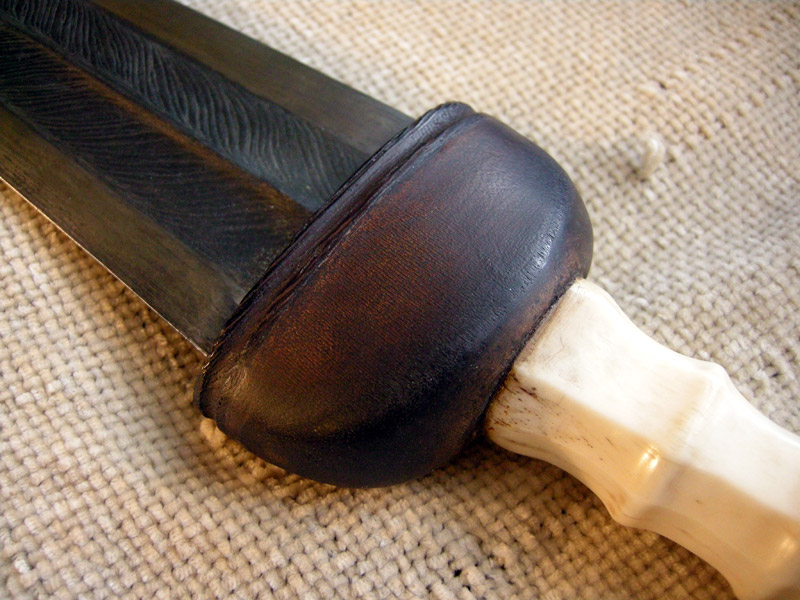
It was at this point that I could not ignore that the wendge used around the guard was going to contrast with the wood below the guard and that the gap was going to be noticeable. So I decided to use a rat tail file and file a groove around the outside of the wood, around the guard plate. I have seen this feature on several late period gladii. I was really pleased with the result.
Attachment: 148.9 KB
Grinding down wood extensions
Attachment: 147.13 KB
Edge view of wood extension showing rough outline developing
Attachment: 144.51 KB

Drawing of central ridge on guard. Note wood extension removed to re-expoxy it with good epoxy.
Attachment: 145.86 KB
Guards central ridge ground away
Two swords
Lit in Eden’s flame
One of iron and one of ink
To place within a bloody hand
One of God or one of man
Our souls to one of
Two eternities
|
|
|
|
|
Kirk Lee Spencer
|
| Posted: Sun 26 Apr, 2009 9:07 pm Post subject: |
|
|
Once I sanded the wood to final shape, the next step was to burn the wood to darken it and bring out some contour to the grain. The first step was to protect the blade and grip from the flame. To do this, I covered them in a damp paper towel and covered this with aluminum foil and used scotch tape to hold it all together. I discovered that scotch tape is quite flammable. I passed the flame of a propane torch over the wooden areas until they were a nice “medium well” charred black. I then took a small brass wire brush and brushed vigorously with the grain to remove the char and bring out the grain.
Attachment: 143.04 KB
Burning wood to bring out grain
Attachment: 128.74 KB
Burned wood showing wet paper towel and foil protection
Two swords
Lit in Eden’s flame
One of iron and one of ink
To place within a bloody hand
One of God or one of man
Our souls to one of
Two eternities
|
|
|
|
|
Kirk Lee Spencer
|
| Posted: Sun 26 Apr, 2009 9:10 pm Post subject: |
|
|
When the wood of the pommel was burned and brushed it made the edge between the original wood and the parts I added very visible. So I decided to add a filed groove to this section also. I cut the original groove with a cutting bit on the dremel and then finished it with the rat tail file. I could never make this work, so I ended up sanding it smooth and masking the joint by darkening the wood.
Attachment: 146.83 KB
Charred wood with joint visible
Attachment: 142.25 KB
Attempt to cover joint with groove.
Two swords
Lit in Eden’s flame
One of iron and one of ink
To place within a bloody hand
One of God or one of man
Our souls to one of
Two eternities
|
|
|
|
|
Kirk Lee Spencer
|
| Posted: Sun 26 Apr, 2009 9:16 pm Post subject: |
|
|
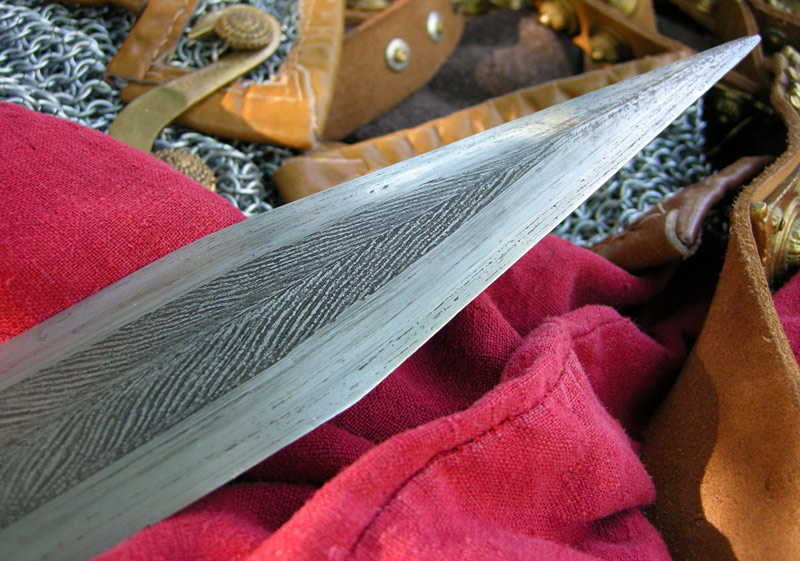
Because the pattern welded etch worked so well, I wanted to try and give the edges a piled appearance. So I taped over the patterned etching in the middle of the blade and used the sharpie to draw in some very fine piled structure just at the edge. I found that it helped me to draw a straight line if I took some very course sand paper and sanded one or two times along the edge cutting deep into the metal. When I used the very fine tipped sharpie it would follow these sand paper cuts. Also using a fine awl to clean up the edges would also follow these cuts. After doing the edge all the way around I covered the rest of the exposed blade in ink with the sharpie and put scotch tape along the edges on the underside to create barrier to hold the etchant along the edges.
Attachment: 134.85 KB
Set up to etch edge to look like a piled structure
Attachment: 137.29 KB
After piled structure etched into edges
Attachment: 137.81 KB
Close-up of piled structure etched into edge
Two swords
Lit in Eden’s flame
One of iron and one of ink
To place within a bloody hand
One of God or one of man
Our souls to one of
Two eternities
|
|
|
|
|
Kirk Lee Spencer
|
| Posted: Sun 26 Apr, 2009 9:18 pm Post subject: |
|
|
I used very fine sand paper to take down the center portion of the wooden parts to bare wood, leaving the edges charred. A little “red oak” stain was rubbed in to the wood to add color.
Attachment: 149.51 KB
Attachment: 147.27 KB
Two swords
Lit in Eden’s flame
One of iron and one of ink
To place within a bloody hand
One of God or one of man
Our souls to one of
Two eternities
|
|
|
|
|
Kirk Lee Spencer
|
| Posted: Sun 26 Apr, 2009 9:22 pm Post subject: |
|
|
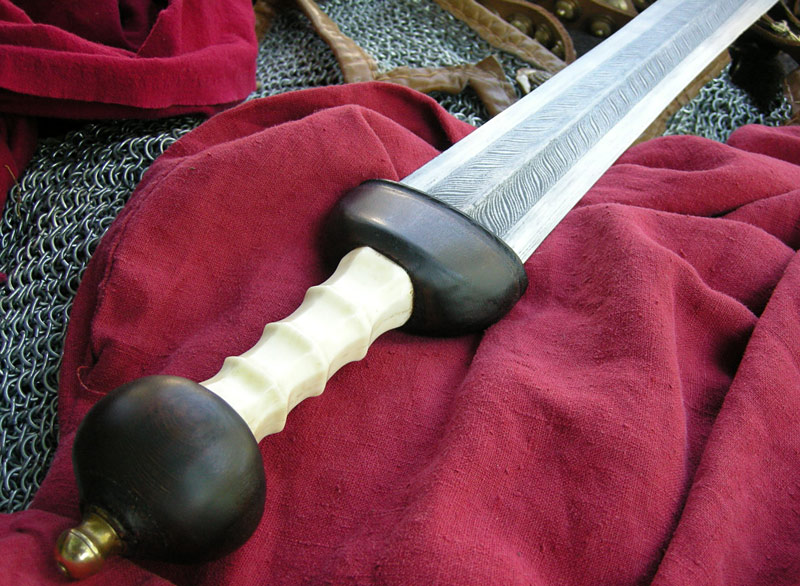
The last step was to observe where the pommel would be gripped when worn and how the sword might rub up against the body as it moved in the scabbard. I then took steel wool and polished these areas, especially the outer edges of the guard and the placement of thumb and forefinger gripping the pommel. Worn very fine sandpaper was used to carefully polish the blade to brighten the higher parts of the pattern weld and to sand down the outer part of the blade to make it highlight the piled appearance along the edges. Finally the wood was rubbed with one thin coat of boiled linseed oil, each day for a few days.
Attachment: 146.26 KB
Attachment: 146.8 KB
Attachment: 140.66 KB
Attachment: 142.9 KB
Attachment: 148.39 KB
Attachment: 145.3 KB
Attachment: 121.33 KB
Two swords
Lit in Eden’s flame
One of iron and one of ink
To place within a bloody hand
One of God or one of man
Our souls to one of
Two eternities
Last edited by Kirk Lee Spencer on Sun 26 Apr, 2009 9:29 pm; edited 1 time in total
|
|
|
|
|
Kirk Lee Spencer
|
| Posted: Sun 26 Apr, 2009 9:28 pm Post subject: |
|
|
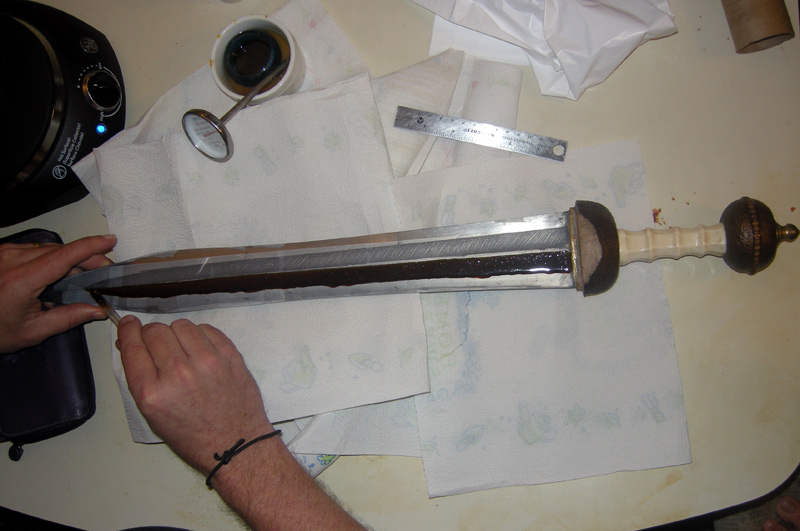
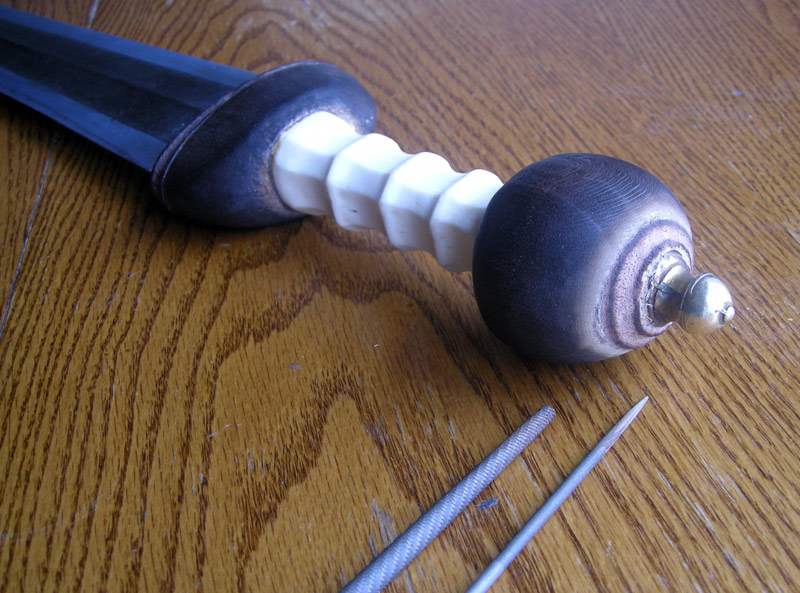
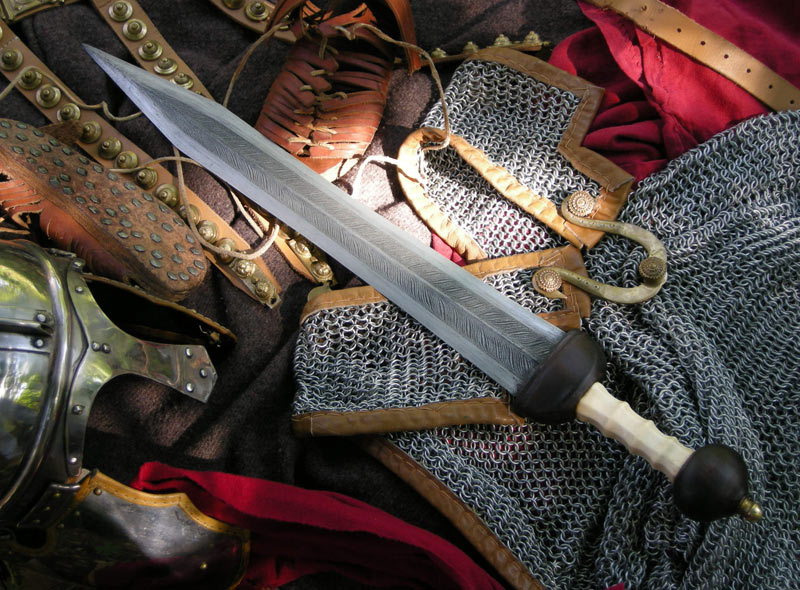
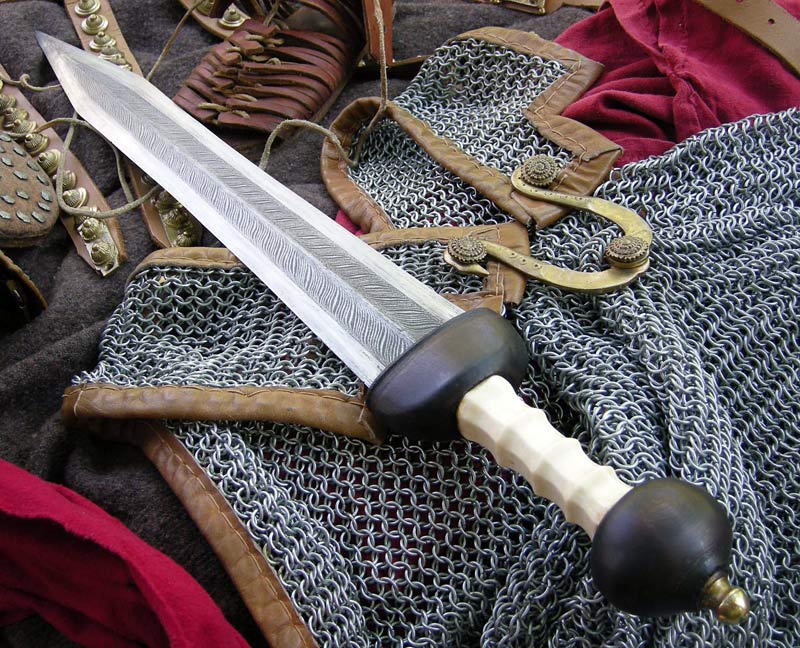
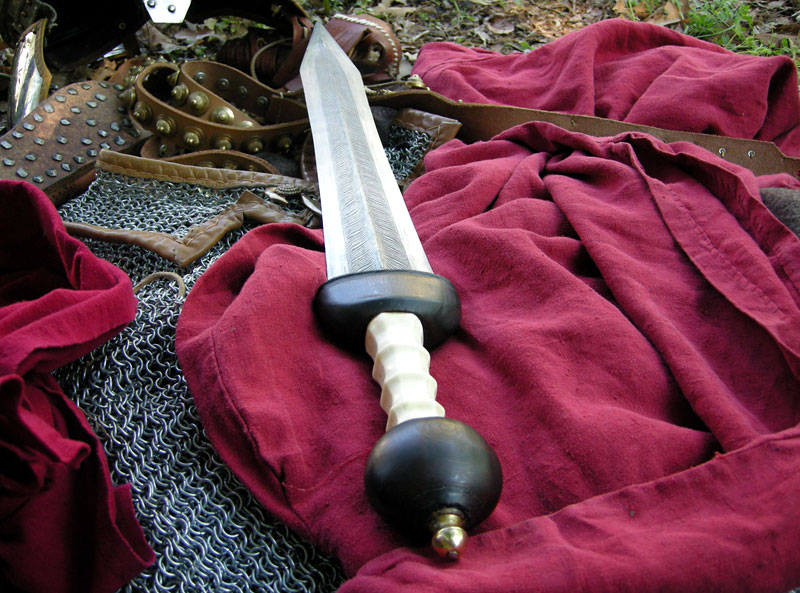
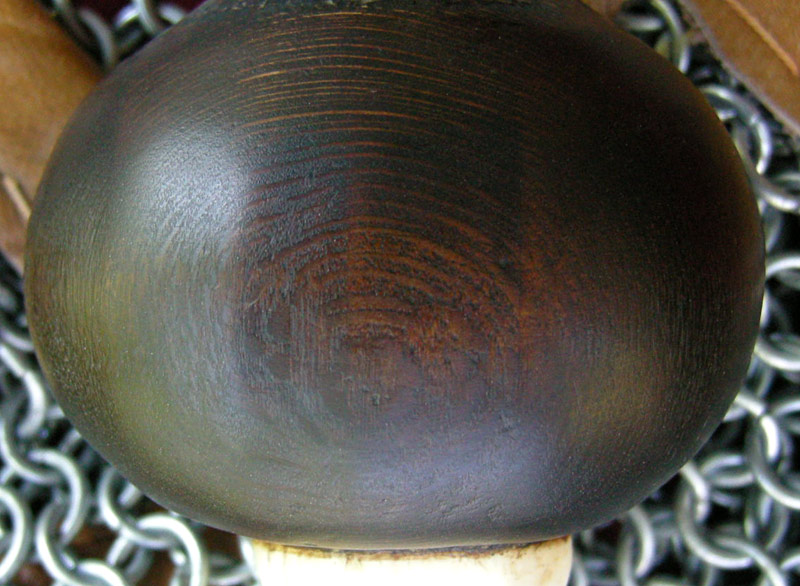
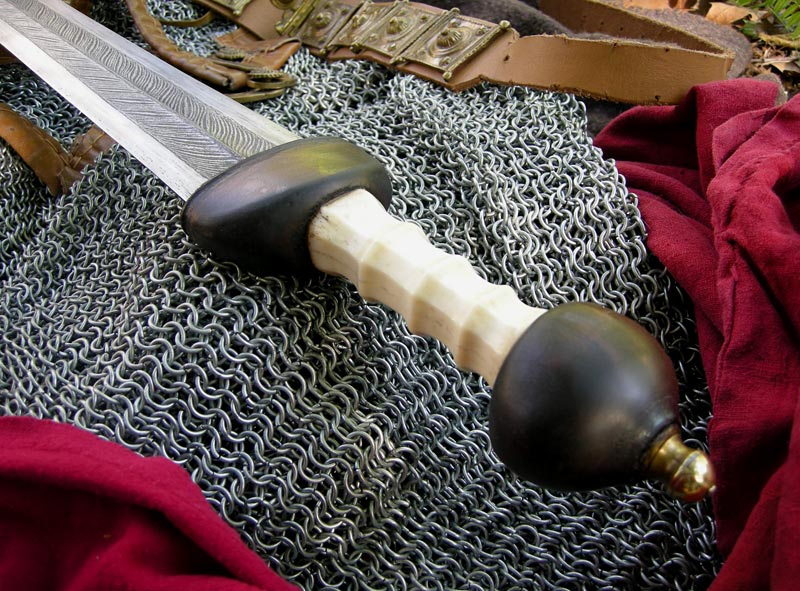
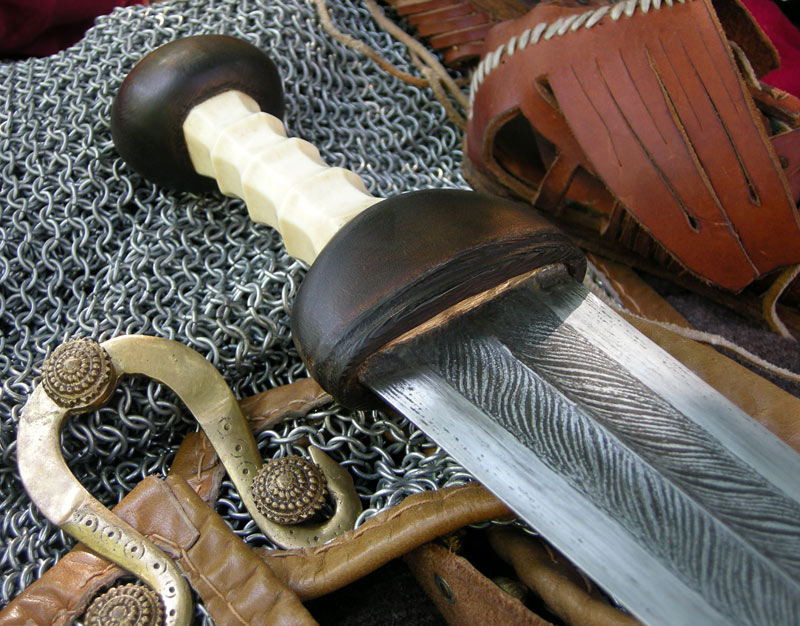
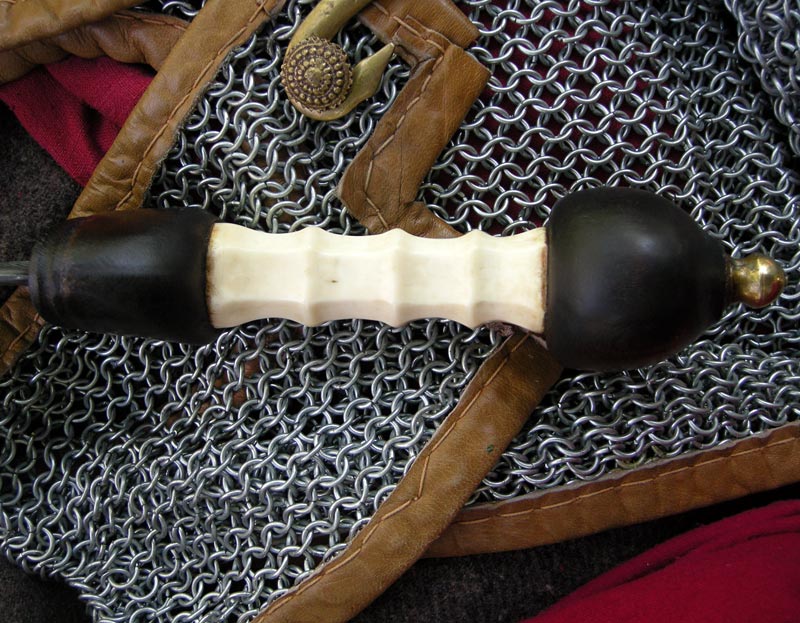
Finished total weight a little over 1.5 pounds.
It balances about 4.3 inches from guard.
Total length 27.5 inches.
The weight is about half of what the original replica. And the balance is much better. When I hand this sword to my students, I believe the look and feel will be much closer to that of an original Roman gladius.
take care
ks
Attachment: 140.65 KB
Attachment: 146.08 KB
Attachment: 134.96 KB
Attachment: 132.82 KB
Attachment: 148.36 KB
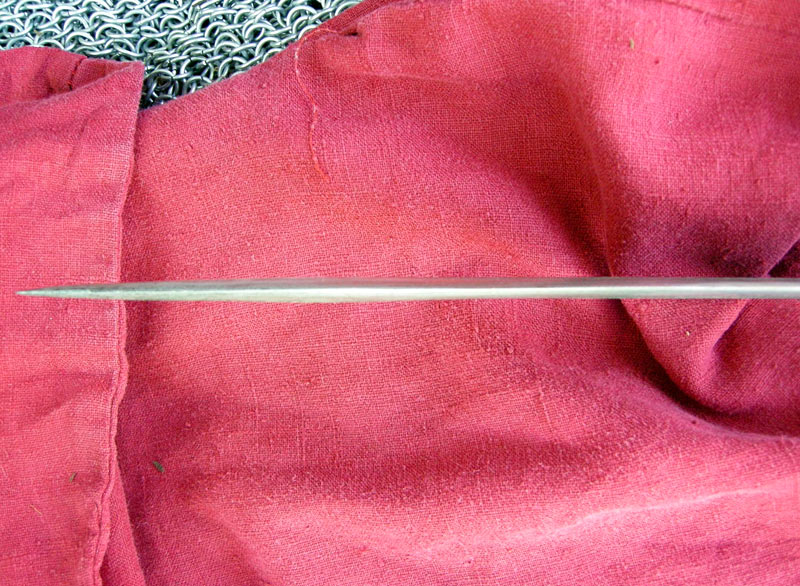
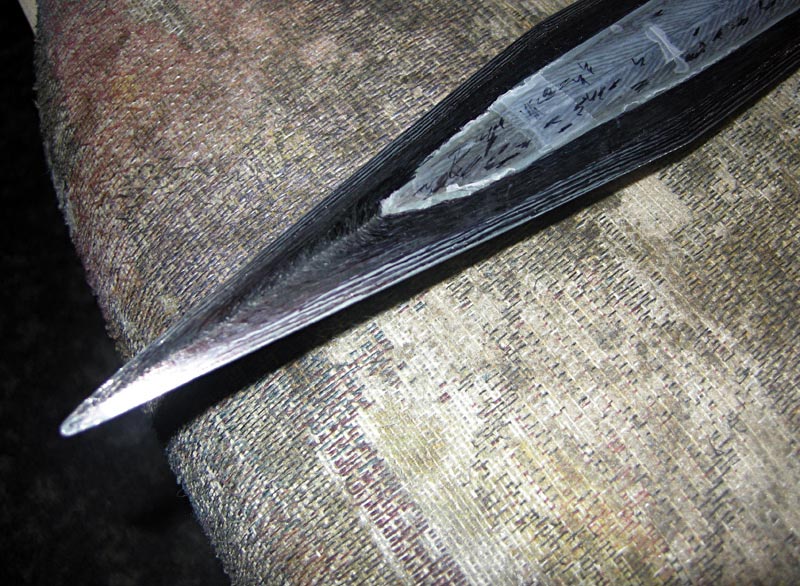
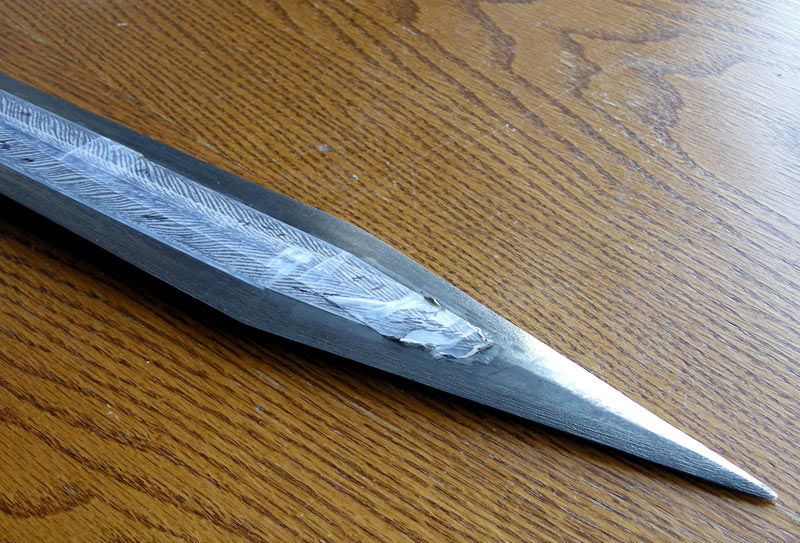
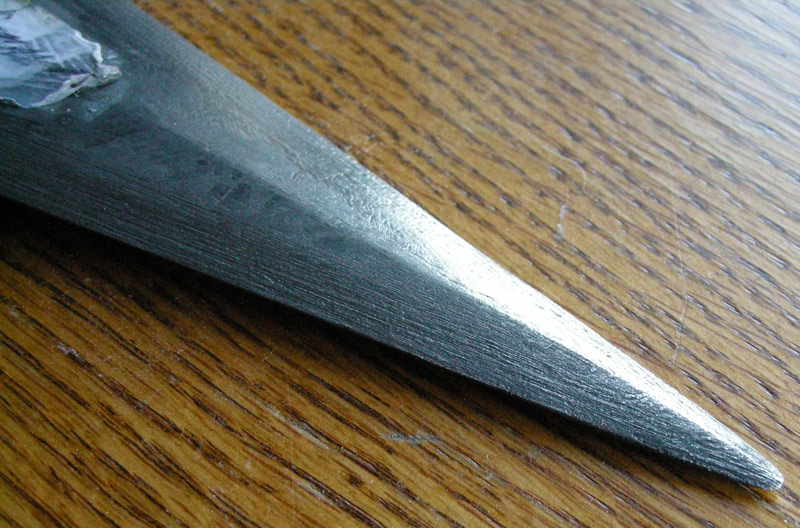
Tried to reinforce the tip just a little bit.
Attachment: 146.6 KB
Attachment: 141.87 KB
Two swords
Lit in Eden’s flame
One of iron and one of ink
To place within a bloody hand
One of God or one of man
Our souls to one of
Two eternities
|
|
|
|
|
|
Patrick Kelly
|
| Posted: Sun 26 Apr, 2009 11:03 pm Post subject: |
|
|
Kirk,
Your work on these projects never ceases to impress me. you have a real gift for turning something substandard into something unique and interesting.
|
|
 |
|
Artis Aboltins

|
| Posted: Sun 26 Apr, 2009 11:25 pm Post subject: |
|
|
|
I am no way an expert in Roman blades, so can not say anything worthy about it's historical accuracy, but with regards to craftmanship, extremely fine job!
|
|
|
|
|
Julien M

|
| Posted: Mon 27 Apr, 2009 5:49 am Post subject: |
|
|
Hi Kirk,
That's a very impressive makeover to say the least, quiet radical and bold too (hilt, blade...basically everything was improved).
I'm very impressed by the clean carving of your bone grip and by the etched pattern welding.
A bone handle is also something I contemplate to try on a replica falchion one of these days. Is bone hard to shape and what tools did you use? Is the bone hollow inside and did you use epoxy or something to fill in the gap around the tang? Did you slit two halves and sandwich the tang afterwards? I'm very intrigued!
Cheers,
J
|
|
|
|
|
M. Eversberg II

|
| Posted: Mon 27 Apr, 2009 6:12 am Post subject: |
|
|
Ten thousand times better. Someone get this man a cookie.
M.
This space for rent or lease.
|
|
   |
|
Matthew D G

|
| Posted: Mon 27 Apr, 2009 7:20 am Post subject: |
|
|
From a cheap sword to a piece of art. Kinda makes we want a gladius now lol
"I thought what I'd do was, I'd pretend to be one of those deaf-mutes."
|
|
|
|
|
Kirk Lee Spencer
|
| Posted: Mon 27 Apr, 2009 2:39 pm Post subject: |
|
|
Hey Guys...
Thanks so much for your kindness. 
Your words are very encouraging
ks
Two swords
Lit in Eden’s flame
One of iron and one of ink
To place within a bloody hand
One of God or one of man
Our souls to one of
Two eternities
|
|
|
|
|
Kirk Lee Spencer
|
| Posted: Mon 27 Apr, 2009 3:36 pm Post subject: |
|
|
| Julien M wrote: | Hi Kirk,
...A bone handle is also something I contemplate to try on a replica falchion one of these days. Is bone hard to shape and what tools did you use? Is the bone hollow inside and did you use epoxy or something to fill in the gap around the tang? Did you slit two halves and sandwich the tang afterwards? I'm very intrigued!
Cheers,
J |
Hi Julien...
I found the bone at a pet store. They had some bones that had been cut for dogs to chew on, probably cow bone. They were all together in one box. I just went through them until I found one that would work. The first pet store did not have any that would work. However the second store did have one that was just right.
It was about five inches long and had thick dense bone in the walls with a hollow center that widened a little at each of the cut ends. When ever I am in a pet store I look through the "bone box" to find some for future projects... and I have yet to find another one like that. So I was probably lucky to find one so quickly.
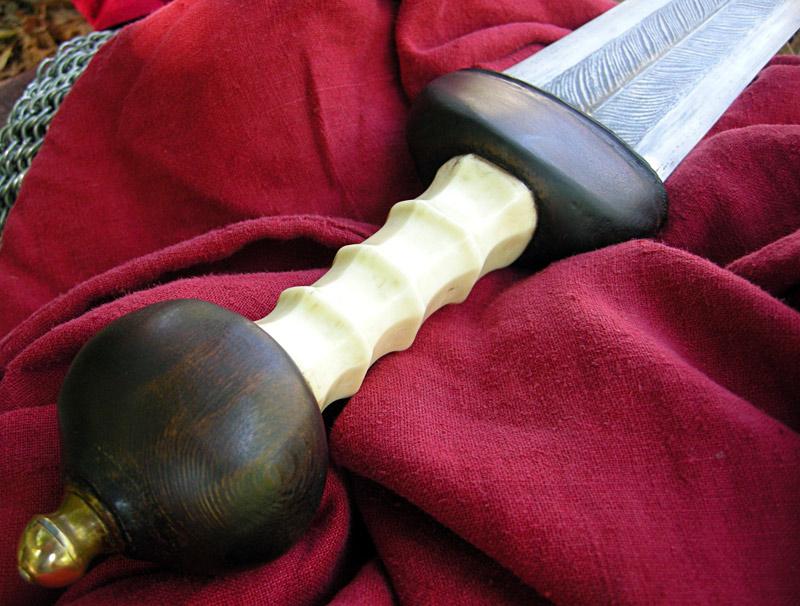
I found bone very easy to work with. I first cut off the ends to give me a section that fit my hand. I then took a wood rasp and rasp the sides into a hexagonal section. I then took a pencil and marked the gaps between my fingers as I held it as a grip. I drew lines around the grip at these marks. Then I took the large course sanding drum for my dremel tool and began grinding the indentions for the fingers on each of the eight sides.
You should wear a dust mask when you do this because the fine bone dust can be harmful to your lungs. You probably want to do it outside or you may hear some complaining about the strong "bone meal" or burned bone smell.
Once the shape is roughed out you can take off the edges with course sandpaper and then polish it with fine sand paper. Soon after working the bone appears white, but will eventually take on a light yellow patina.
I took a small rat tail file to open up the hollow marrow area in the inside of the bone to take the tang of the sword. As I said earlier, I used "gorilla glue" to fill up the hollow center. I put the glue into the hollow and immediately put the sword together. This glue expands so, as it expanded, it filled the hollow parts in the grip. Next time I will just fill it with J.B. Weld as I ususally do. The expanding glue moved the grip slightly and may have caused the bone to crack a little.
I think that you could probably take two bone halves and cut out the place for the tang and glue them together like a sandwich. There is even a Viking sword in Oakeshottes "Archeology of Weapons" that has a very thin horn or bone grip that looks like this is how it was done.
I love the feel of the bone. To me it feels slighty tacky (especially when slightly wet) that seems to provide a more secure purchase when holding the grip.
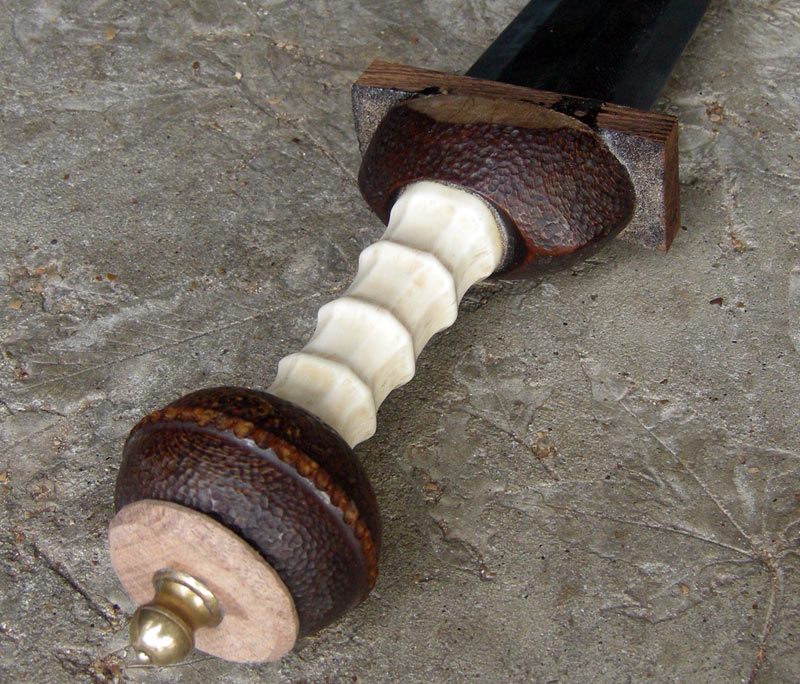
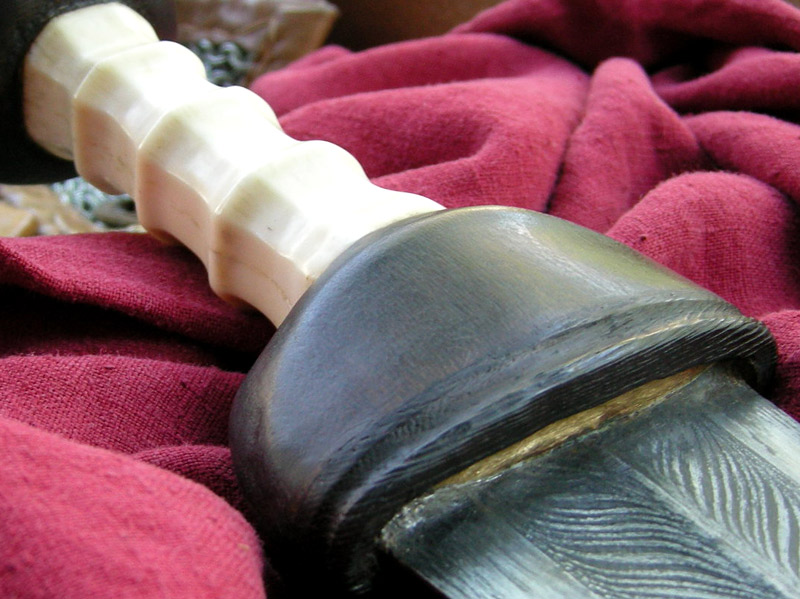
I didn't mention it in the post above... however I did change the shape of the grip very slightly where it connects to the pommel and guard. I noticed an all the original wood and bone grips I had seen the end grooves of the grip seem to flow into the guard and pommel rather than having the level areas. I have posted and image from:
http://www.romancoins.info/MilitaryEquipment-Attack.html#sword
that shows this feature very well.
I took a small triangular file and blended the end grooves as per the original finds. It was a minor change but it make the grip feel significantly better in hand.
Hope this helps...
ks
Attachment: 68.49 KB
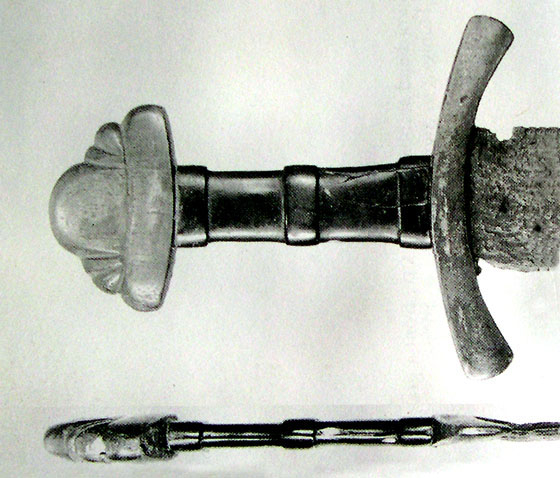
River Scheldt Find Image from Oakeshottes "Archeology of Weapons."
Attachment: 141.64 KB
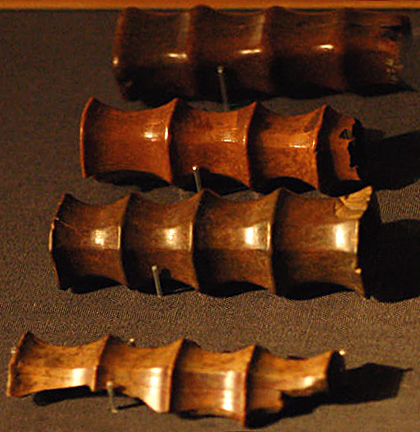
Image from Roman Legions Website.
Two swords
Lit in Eden’s flame
One of iron and one of ink
To place within a bloody hand
One of God or one of man
Our souls to one of
Two eternities
|
|
|
|
|
|
|

