Author |
Message |
Bill Grandy
myArmoury Team
|
Posted: Thu 13 May, 2004 10:13 am Post subject: My "new" pierced Gustav Vasa |
|
|
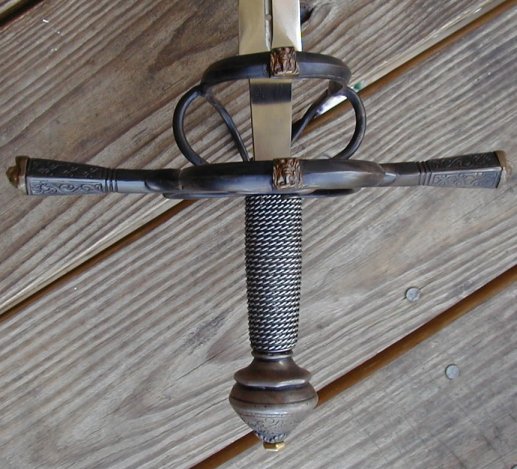
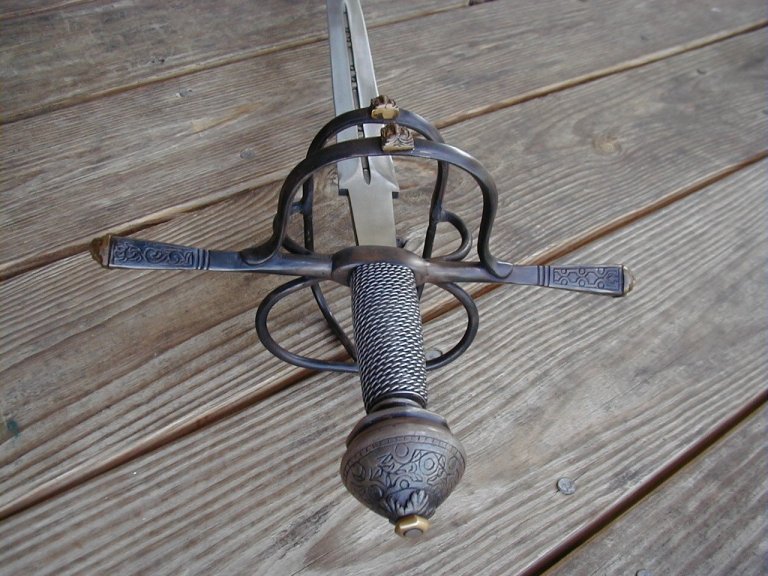
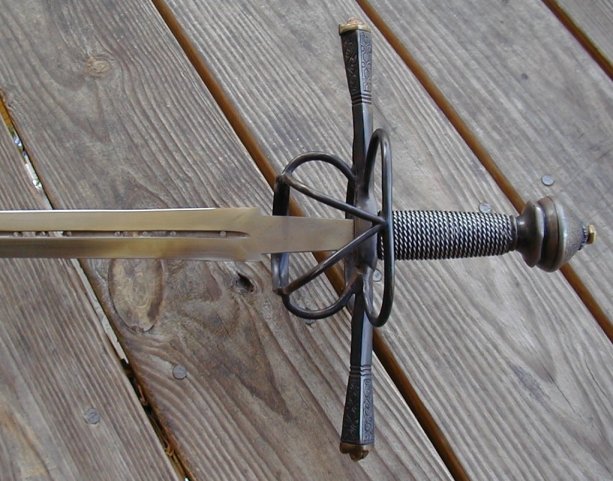
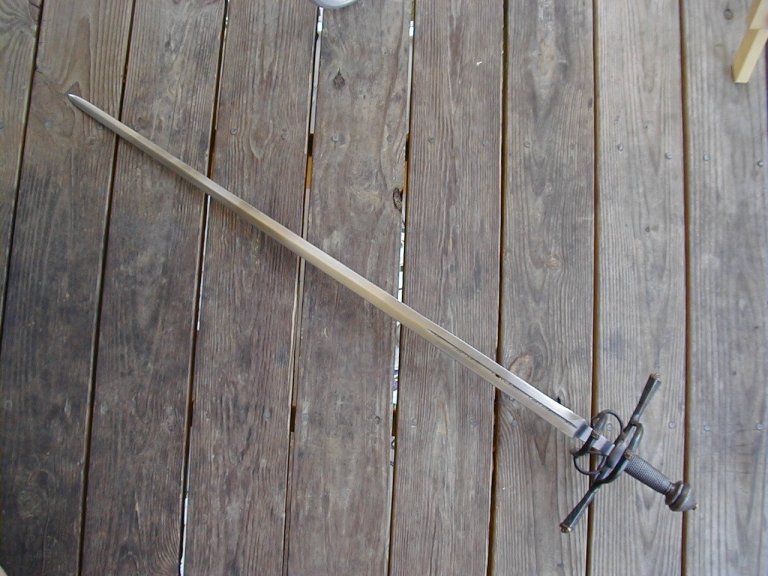
I just recently traded my A&A Italian 3 ring rapier to James Aldrich for an older version of the A&A Gustav Vasa rapier. It's kind of interesting to see how the guys at A&A have improved over the years. James said this sword was purchased at least 11 years ago, and could have been as old as 20 years.
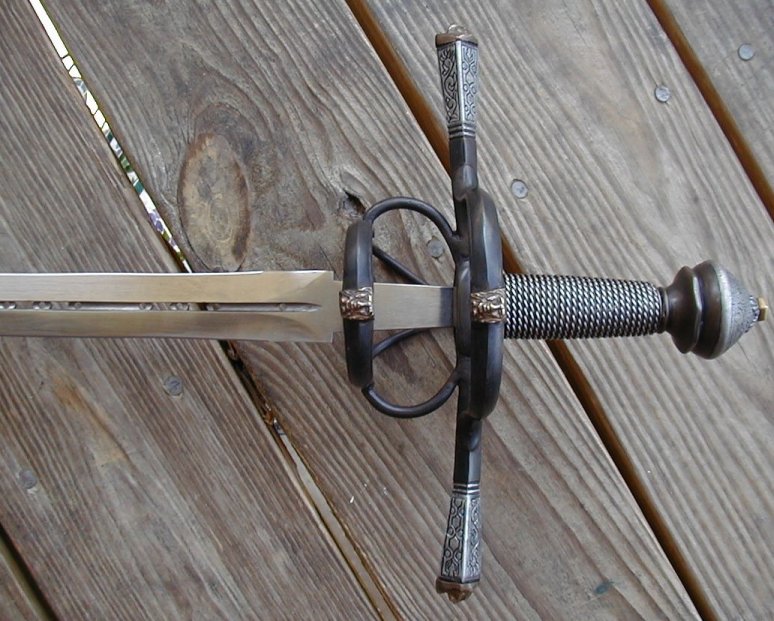
A friend of mine owns a new Gustav Vasa, and I have long considered buying one for practicing Bolognese sidesword. So when I had the opportunity to get this one, I was pretty excited. I just received it yesterday, and it's a pretty stunning piece of work. This one had the added bonus of a pierced fuller, which is absolutely gorgeous. But having seen the current version of this piece first slightly took away from the "wow" factor of this sword, mainly in terms of finish. Don't get me wrong: It's a great sword aesthetically and functionally. But the hilt, when compared to the new version, is a little rough, and the detail work isn't quite as clean. Also, the decorations are slightly different: The medusa heads are the only parts that are not blued steel (unlike the current version which also has the bottom of the pommel and the ends of the quillons silver, as seen in Nathan's photos: http://www.myArmoury.com/review_aa_vasa.html ), and the heads are made of either brass or bronze (which is slightly closer aesthically to the original, which had gold plating... see Bjorn's excellent article: http://www.myArmoury.com/feature_vasa.html ).
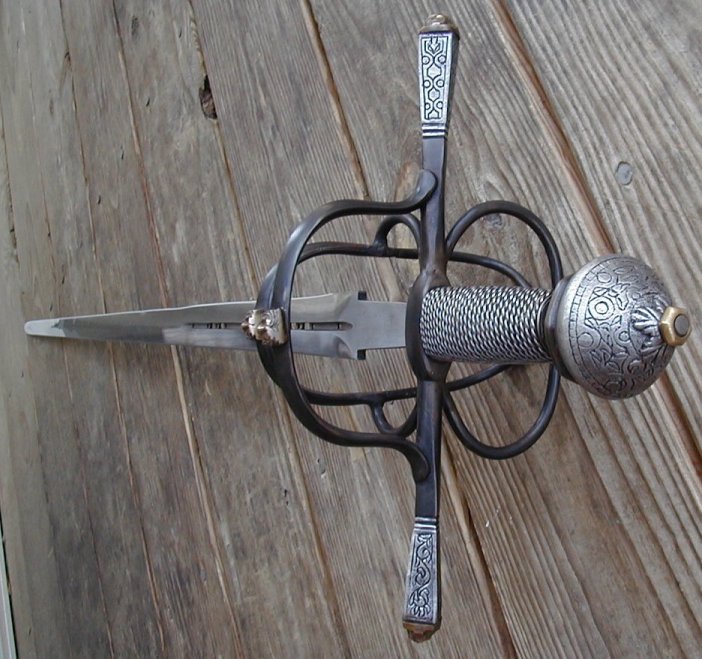
The blueing was a little worn out from years of handling, so certain areas needed some touch up. A little bit of Birch Casey's gun blueing paste fixed that right up. The brass heads were very dark from patination, and I wanted to bring back some of the shine while still preserving the slightly aged look, so I buffed them up a bit. But I still really, really liked the silver of the current model, so I decided to break out the paints and do a little bit if judicial silver touch up. I'm very pleased with the results. I'll stick the touched up pictures in the next post.
Attachment: 90.42 KB
Attachment: 61.08 KB
Attachment: 102.91 KB
Attachment: 71.96 KB
Attachment: 79.44 KB
[ Download ]
|
|
|
|
Bill Grandy
myArmoury Team
|
Posted: Thu 13 May, 2004 10:15 am Post subject: |
|
|
And here is the touched up version.
Attachment: 101.91 KB
Attachment: 112.2 KB
|
|
|
|
Bill Grandy
myArmoury Team
|
Posted: Thu 13 May, 2004 10:25 am Post subject: |
|
|
I should also point out that the newer grip is thinner and better shaped than the old one, which by itself was already good enough. The wire wrap on the current version, as you can see in Nathan's pics, is a lot finer, too.
Every once and a while I hear people say something like, "I wish I'd bought one of A&A's pieces before they raised their prices." It seems, though, that their prices weren't raised just because of the economy, they raised because the actual quality of the weapons raised, meaning that you really are getting more with that extra bit of cash.
|
|
|
|
Sean Flynt
|
|
|
|
Russ Ellis
Industry Professional
|
Posted: Thu 13 May, 2004 12:01 pm Post subject: |
|
|
Speaking for myself I can say that every piece I do is better then the one before. I learn something new practically every time. Many times those improvements involve a lot more work. For example I've recently bought some tools to make the tips of the scabbards fit to the blad better. This will involve more handwork then I've done in the past. In theory my prices should go up but probably won't at least in the near term. I suspect that the guys at A&A find themselves in the same spot.
TRITONWORKS Custom Scabbards
|
|
|
|
Stephen A. Fisher
Location: Kentucky USA Joined: 17 Oct 2003
Posts: 455
|
|
|
|
Kirk Lee Spencer
|
Posted: Thu 13 May, 2004 4:21 pm Post subject: |
|
|
Bill,
Very, very nice work...
As you might expect, I like your slightly weathered version better.
ks
Two swords
Lit in Eden’s flame
One of iron and one of ink
To place within a bloody hand
One of God or one of man
Our souls to one of
Two eternities
|
|
|
|
Bill Grandy
myArmoury Team
|
Posted: Fri 14 May, 2004 10:20 am Post subject: |
|
|
Someone asked me how I managed to keep the detail when I painted over the engraved areas, so I figured I'd share publically, It's pretty easy. There' s a technique called "dry brushing" that's used to paint miniatures and such, which a long time ago I used to do. I took some paint called "aged metal", dipped my brush in, and lightly brushed it back and forth over a paper towel, which removed the majority of the excess paint. Then I lightly brushed it over the areas I wanted colored, and the paint only touches the raised areas, leaving the crevices of the engravings dark. After I got the look I wanted, I did this again with bright silver paint. It's really easy, and not only did it not obscure the relief work, but it enhanced it.
|
|
|
|
|
You cannot post new topics in this forum You cannot reply to topics in this forum You cannot edit your posts in this forum You cannot delete your posts in this forum You cannot vote in polls in this forum You cannot attach files in this forum You can download files in this forum
|
All contents © Copyright 2003-2024 myArmoury.com All rights reserved
Discussion forums powered by phpBB © The phpBB Group
Switch to the Basic Low-bandwidth Version of the forum
|