Author |
Message |
M. Adair Orr
|
Posted: Sun 25 Oct, 2015 6:22 pm Post subject: Finger ring hilt - work in progress |
|
|
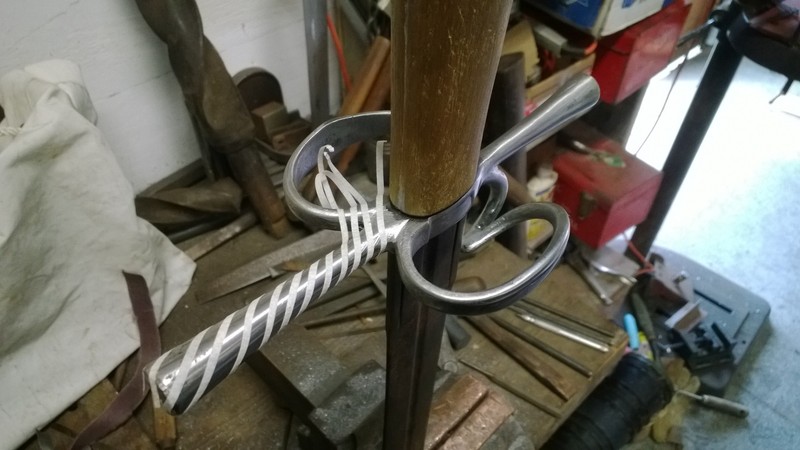
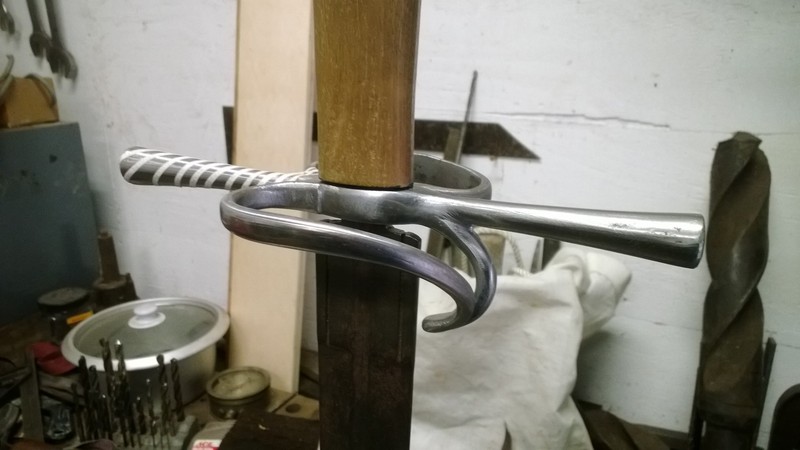
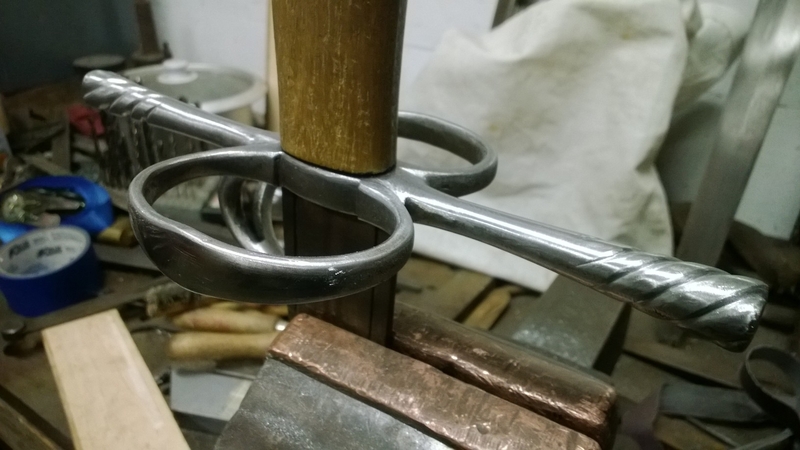
I thought I would share this furniture for comments. I know little of handling a sword. I'm interested only in trying to capture the flavor of swords from the first half of the 16th century. I've made this piece for a windlass blade from the 15th century longsword.
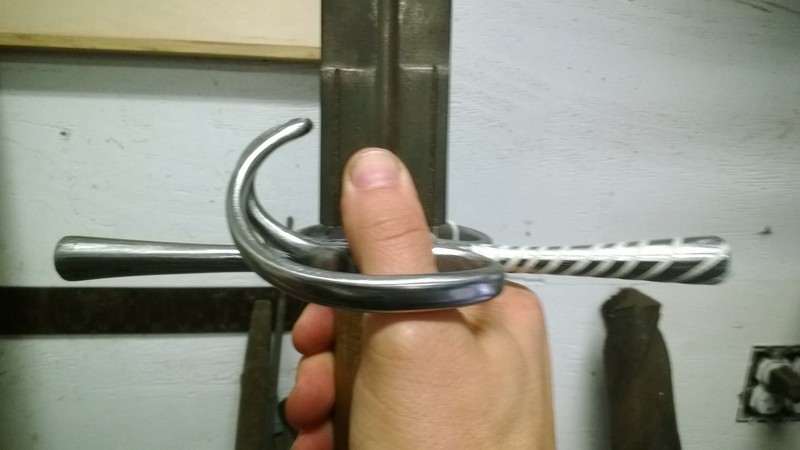
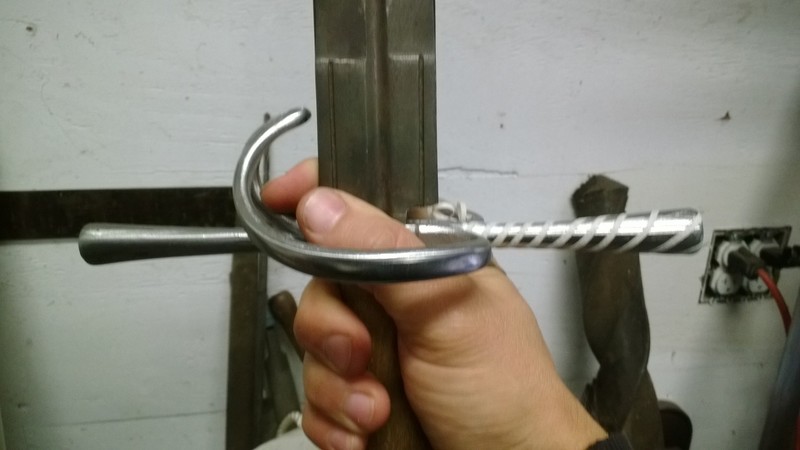
I've included two photos of my hand gripping the sword. I have no idea if my grasp represents anything near a historical posture. I've always been curious about the function of the 'inboard' falling side ring than joins the finger ring. I realized that in order to make this properly, one must understand the function better than I do. I don't see a lot of consistency in original pieces, but this angle is a very difficult thing to see in most photographs. I have seen many examples in museums, but not since deciding to create an example.
I suspect it has a very specific function particular to a school of swordsmanship. Winding moves or what have you. I would appreciate an explanation of this simple development from the double side ring. I'd also appreciate any critique of the contour that I have chosen. It may or may not be too late to change it. This piece is still in a rough file stage and there is a long ways to go. A little bit of heat might be able to correct anything I've done that is grievously wrong.
Cheers,
Adair
|
|
|
|
Shahril Dzulkifli
|
Posted: Mon 26 Oct, 2015 5:55 pm Post subject: Finger ring hilt - work in progress |
|
|
Are those white lines tapes?
|
|
|
|
M. Adair Orr
|
Posted: Mon 26 Oct, 2015 6:33 pm Post subject: |
|
|
Yes, I've been trying to lay out the lines for filing in helical roping. The tape is a helpful guide. I just realized how visually distracting that might be to someone else eyes.
-Adair
|
|
|
|
Ian Hutchison
Location: Louisiana / Nordrhein-Westholland Joined: 27 Nov 2007
Posts: 626
|
Posted: Mon 26 Oct, 2015 6:50 pm Post subject: |
|
|
Looks great, looking forward to seeing the complete sword!
'We are told that the pen is mightier than the sword, but I know which of these weapons I would choose.' - Adrian Carton de Wiart
|
|
|
|
Andrew Gill
|
Posted: Tue 27 Oct, 2015 5:28 am Post subject: |
|
|
There is a finger-ring above the cross on the alexandria sword in the Royal Armouries, and that is from about 1432 (so somebody had been wrapping their index finger over the cross and wanted to avoid losing it, 100 years before your sword's period of use). Winding is specific to the Lichtenauer tradition from Germany, and the finger-ring in its various forms is seen on italian swords too (that is, swords from areas where the various italian schools predominated). I suspect that it mainly just provides slightly better blade control, particularly in thrusts. I presume that you already know that thumbing the blade (as you are doing) is used in certain recognised techniques from that period, and that the side-rings also very effectively stop the opponent's blade from cutting your fingers when you parry (particularly if, like me, you keep moving your hands too high up the grip towards the cross.
Regarding the spiral groove you want to cut into the cross: when I've done this sort of thing, I usually just marked a few points at regular intervals to give an idea of the pitch, and did it freehand with needle files. I managed to get a pretty even-pitched spiral this way (although that was on a quillon of more or less constant cross-section, which makes matters much easier, and perhaps I'm also not enough of a perfectionist).
|
|
|
|
M. Adair Orr
|
Posted: Thu 05 Nov, 2015 2:23 pm Post subject: |
|
|
I've not had much time to work on this over the past couple weeks. I did manage to decide how I wanted the spiral roping to look and have roughted that in. I realize I need a new set of riffler files to finish this off. I have discovered that nice riffler files will cost me dearly.
-Adair
|
|
|
|
Shahril Dzulkifli
|
Posted: Fri 27 Nov, 2015 4:36 pm Post subject: Finger ring hilt - work in progress |
|
|
I wonder if this finger ring hilt is complete by now.
“You have power over your mind - not outside events. Realize this, and you will find strength”
- Marcus Aurelius
|
|
|
|
M. Adair Orr
|
Posted: Sun 24 Apr, 2016 7:21 pm Post subject: |
|
|
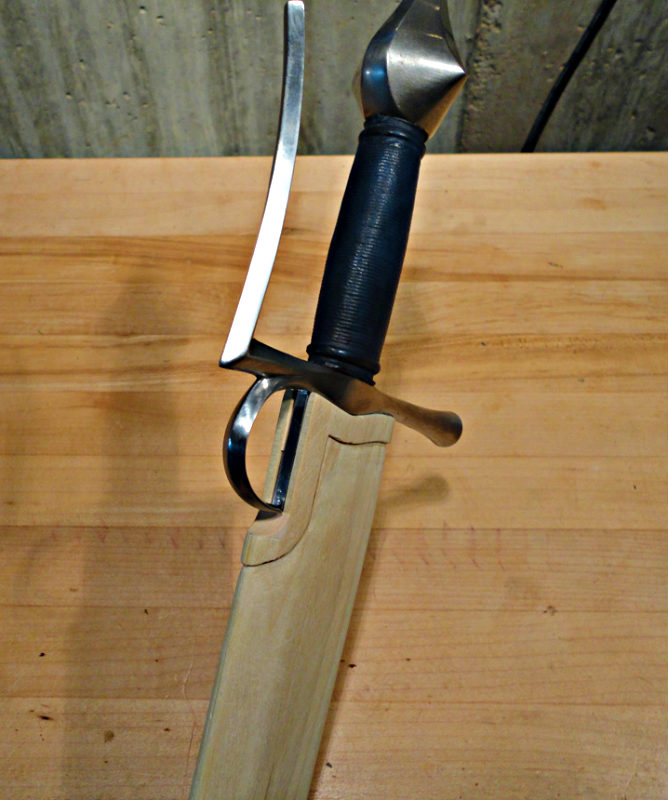
This project has sat for some time. I made the pommel recently (have shared that process on a concurrent thread). I'm pleased with how the furniture looks together. I have to make a new wood grip and I absolutely dread doing the leather for the grip. That is not a skill I'm interested in learning. Anyway, I thought I would update the status and maybe six months from now this will be done. I'm debating how to finish the steel. I'd like an antiqued look, but I'll have to experiment some.
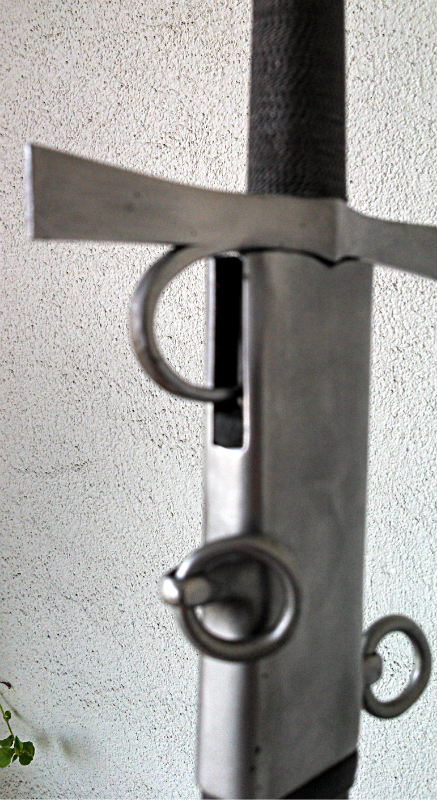
On a side topic: how does one fit a scabbard to a sword like this. I'd never be able to fit the scabbard under the finger ring.
-A.
Attachment: 185.89 KB
[ Download ]
Attachment: 181.39 KB
[ Download ]
|
|
|
|
Roger Hooper
|
Posted: Sun 24 Apr, 2016 7:50 pm Post subject: |
|
|
M. Adair Orr wrote: |
On a side topic: how does one fit a scabbard to a sword like this. I'd never be able to fit the scabbard under the finger ring.
-A. |
Here are a couple of scabbards for XIX's with finger rings - not quite the same, as your ring is much wider.
Attachment: 97.64 KB
Albion Doge scabbard
Attachment: 96.9 KB
Armart XIX scabbard
|
|
|
|
M. Adair Orr
|
Posted: Fri 24 Jan, 2020 11:04 am Post subject: |
|
|
Could no longer stand this project hanging out in the shop.
I tried very hard to get some leather folks to do the grip wrap for me but there were no takers. I finally bought what was needed, cleared a worbench and learned to fiddle with leather a bit.
I'm still working out the patina of the steel components, but the grip is on and all hilt components are seated. Here are my takeaways:
[list]
I did not anticipate the right amount of buildup created by an underwrap of hemp twine and leather. I wish I would have skipped the underwrap.
I had trouble with the abrupt waist of the grip. I had to cut a small dart to make it work.
I probably should have soaked the leather longer to make it more plyant.
I folded the leather over at the pommel and crossguard. I think this detail is very nice, but I need a better way to feather the overlap. My solution was just to cut a notch to receive the overlap.
[/list]
Overall I am happy with the results. It's a wall hanger, but I wish very much that the grip were more slender. The wood core felt perfect. The wrapped grip feels like the butt of a large framing hammer and just looks bulky to my eye.
Attachment: 284.22 KB
[ Download ]
Attachment: 325.75 KB
[ Download ]
|
|
|
|
Michael P. Smith
|
Posted: Sat 25 Jan, 2020 12:39 pm Post subject: |
|
|
Wow! Super job there! You seem to figure out the leather work just fine!
|
|
|
|
Leo Todeschini
Industry Professional
|
|
|
|
M. Adair Orr
|
Posted: Tue 28 Jan, 2020 7:11 am Post subject: |
|
|
Thank you both for the compliments. I'll take what I've learned with this and apply it to the next project.
Cheers,
-A.
|
|
|
|
|