| Author |
Message |
|
Will S
Location: Bournemouth, UK Joined: 25 Nov 2013
Posts: 170
|
 Posted: Tue 09 May, 2017 2:52 am Post subject: Replicating Medieval / Tudor arrows Posted: Tue 09 May, 2017 2:52 am Post subject: Replicating Medieval / Tudor arrows |
 |
|
I've not seen any in-depth threads on here about making accurate replicas of medieval / Tudor arrows, so I thought I might stick one up.
These are reproductions of the Westminster Abbey arrow, but the same process is used for Mary Rose arrows, just with a slightly larger arrow shaft.
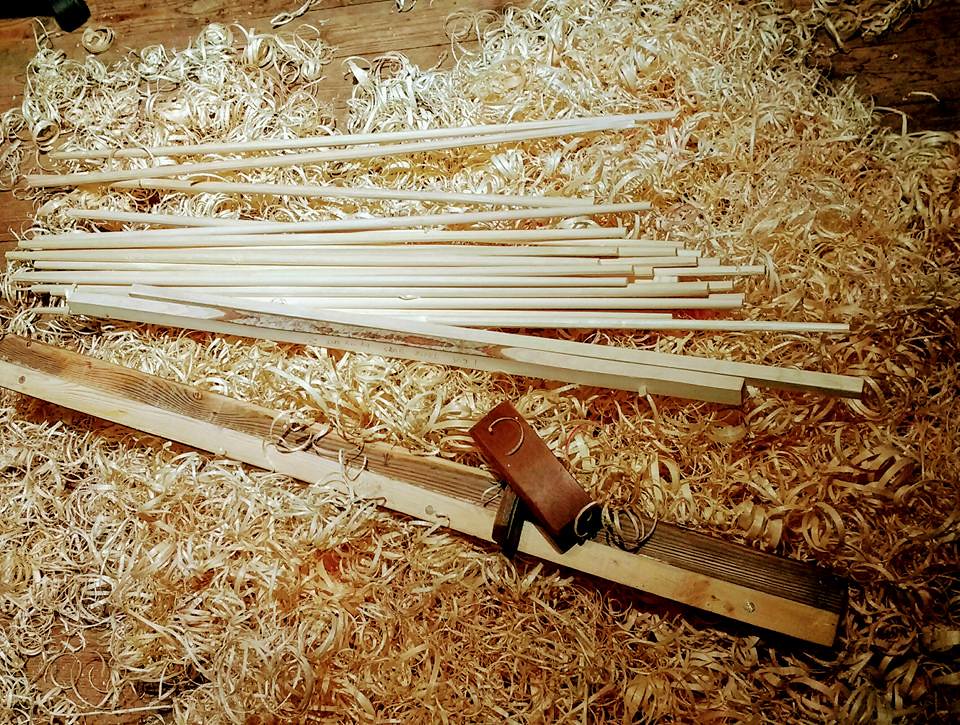
Arrowshafts
The timber used is aspen (populus tremula) not "poplar" which is a modern term for Tulipwood. Confusing and frustrating - there's not a single archery shop that actually sells the real thing, and half of them don't even realise there's a difference so it's an elaborate and lengthy process sourcing and obtaining true historical aspen. I get the timber shipped to me in square blanks, so each shaft needs to be hand planed into dowel form, and the tapers established in the same process.
The Westminster Abbey arrow is somewhat smaller than the Mary Rose arrows - the MR arrows were all roughly 1/2" at the shoulder tapering to just under 3/8" at the nock. The WA arrow is just under 11mm at the shoulder and spreads to just over 11mm at the chest, tapering back down to 8mm at the nock, so these measurements are planed into the shaft as it's rounded.
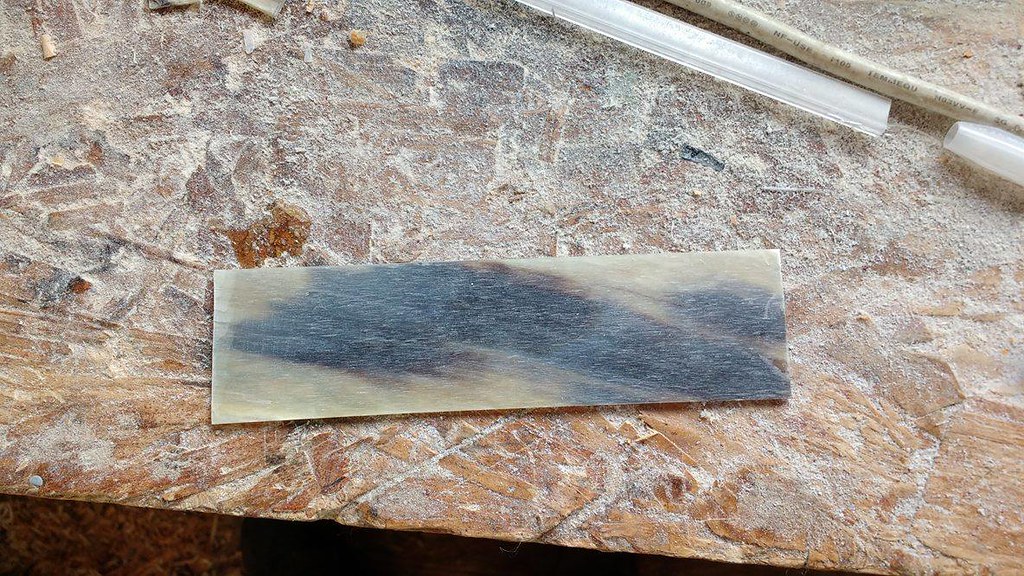
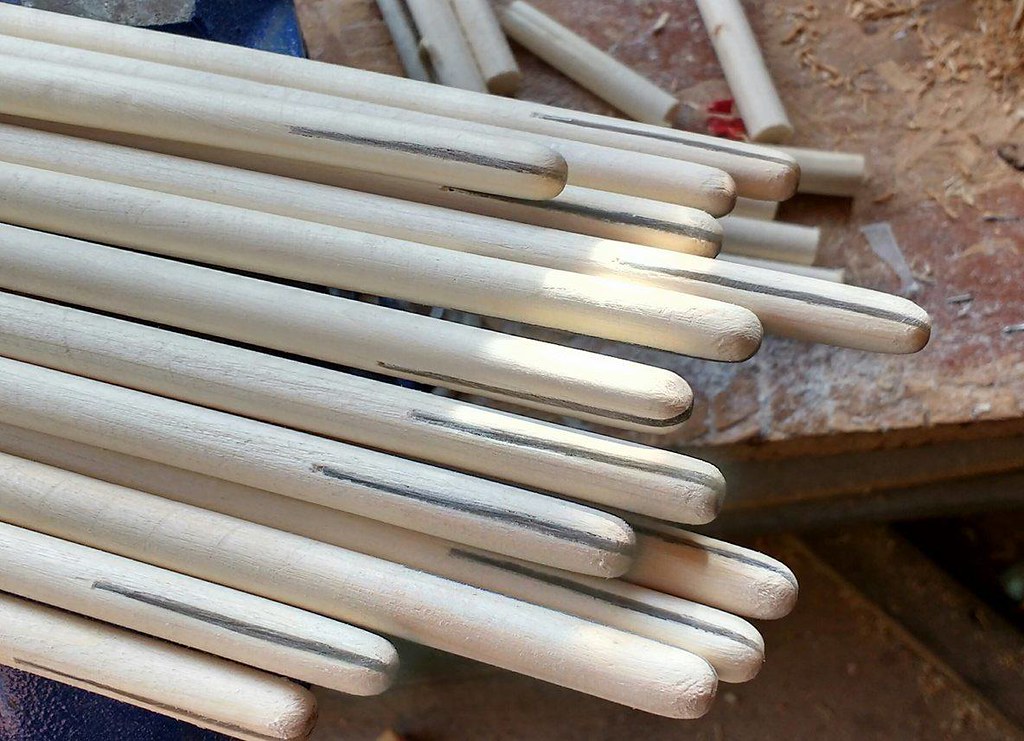
Once the shafts are complete, the nock ends are cut with a very fine saw to open up a 1mm wide, 2" long slot for the horn insert. The cow horn is heated and pressed flat until it will fit the slot perfectly, and glued in place using hide glue.
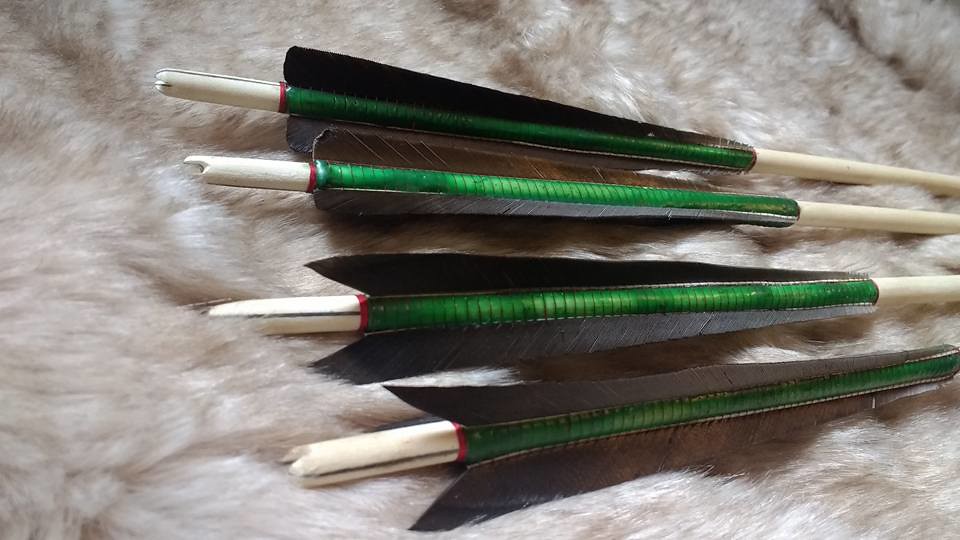
Fletching
At this stage the fletching compound is prepared. There's been a lot of discussion over the years about how they created the verdigris compound, but after extensive research and development I finally arrived at what I think is the most likely method. Based on the chemical analysis of the Mary Rose arrows, it is known that a combination of copper, beeswax and some form of animal triacylglycerides was used, and the easiest, quickest and most successful of my tests with this involve melting beeswax, tallow and pine resin together, and adding a small amount of copper acetate. The wax, fat and resin when combined and allowed to cool create a hard, durable plastic-like coating and the copper acetate colours it a beautiful rich green while also turning the compound into an insecticide and fungicide to protect the fletchings and silk bindings.
The compound is heated up, painted over the arrowshaft and allowed to cool.
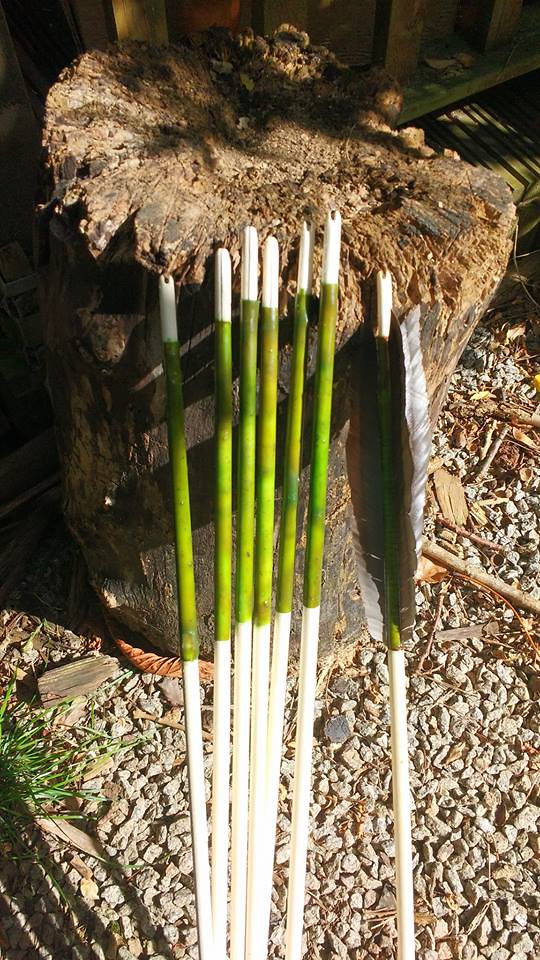
The goose feathers are then stripped from the quill, positioned over the hard compound and bound into it, using pure silk.
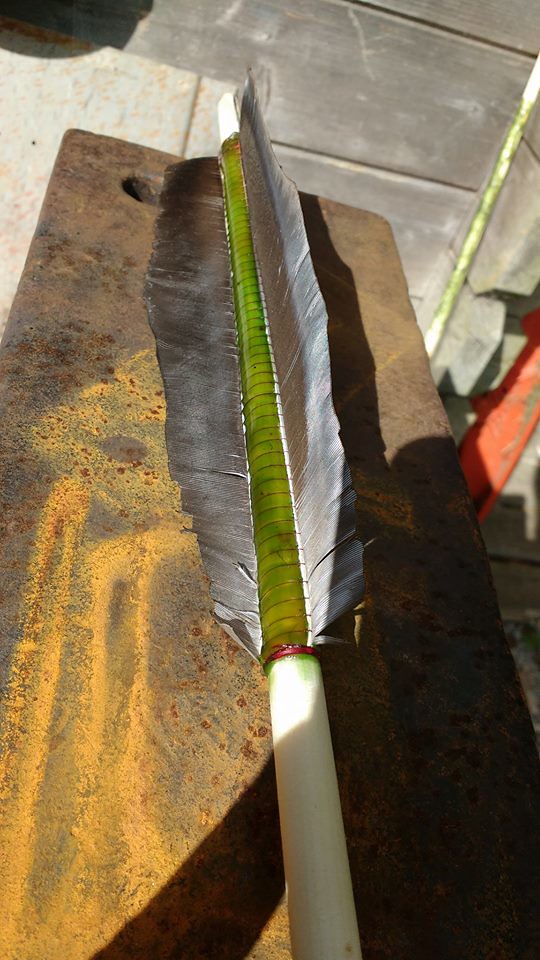
The compound is then heated gently, which causes the mixture to become liquid again, flowing over the bindings and feather bases, sealing everything in place. It hardens nicely again, and you end up with a solid "medieval plastic" encasing the feathers and bindings. The fletchings are then cut to shape.

Heads
For the Westminster Abbey arrow, I forge Type 16 barbed heads

And for the Mary Rose arrows, which are built in exactly the same way except for larger shaft diameters, I make these late medieval swaged heads

|
|
   |
 |
Scott S.

|
| Posted: Tue 09 May, 2017 5:33 am Post subject: |
|
|
|
Wow, tremendous info and images Will, thanks so much for posting. I agree, there's not nearly enough about historic archery here so I hope you can continue to rectify that. Those are some beautiful arrows.
|
|
|
|
|
|
Will S
Location: Bournemouth, UK Joined: 25 Nov 2013
Posts: 170
|
| Posted: Tue 09 May, 2017 6:50 am Post subject: |
|
|
|
Thanks Scott! It would be great if we got some more discussions going on the archery, as there's a wealth of new information that's been discovered and tested in the last few years which answers a great deal of questions that used to pop up on forums a lot.
|
|
|
|
|
Sean Flynt

|
|
 |
|
|
|
You cannot post new topics in this forum
You cannot reply to topics in this forum
You cannot edit your posts in this forum
You cannot delete your posts in this forum
You cannot vote in polls in this forum
You cannot attach files in this forum
You can download files in this forum
|
All contents © Copyright 2003-2026 myArmoury.com — All rights reserved
Discussion forums powered by phpBB © The phpBB Group
Switch to the Basic Low-bandwidth Version of the forum
|

