Jesse Belsky
Industry Professional

|
 Posted: Sun 30 Mar, 2014 8:03 am Post subject: Rapier Scabbard Construction Method Posted: Sun 30 Mar, 2014 8:03 am Post subject: Rapier Scabbard Construction Method |
 |
|
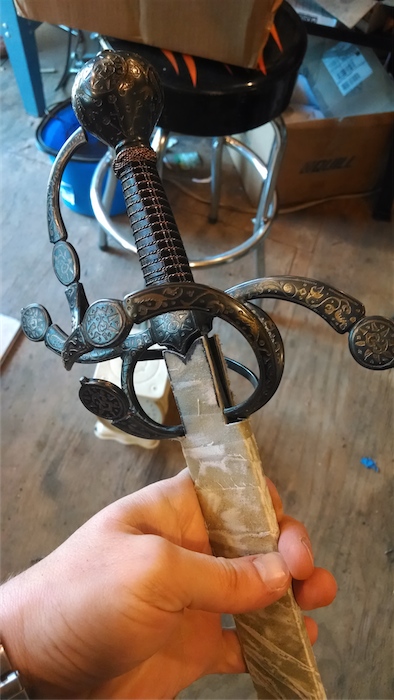
So I thought I would share what I think is a fairly successful method for constructing a rapier scabbard. I've just completed one of these, but it was easier than I thought it might be. My goal was to make a period-looking rapier scabbard that was more rigid and "shaped" than a heavy leather scabbard, but less prone to breakage than one made with very thin wood slats like the originals. I also wanted the tongues that ran up the ricasso inside the guard, a feature often seen on surviving originals.
The method is as follows:
-Trace the blade on .060" kydex sheet. Add about 1/8" to each long side to enlarge the pattern. Ignore the step-in of the ricasso for now. Make the width continuous. Make two of these...these become the "slats", which make the front and back hard surface.
-Score a line down the center of the kydex, matching the ridge line of the blade. Extend this scored line only to the end of the diamond grind, not up onto the part that will cover the ricasso. Don't bend it sharply, and don't bend it back and forth. Kydex will snap along a scored line, so be gentle.
-Gently bend the kydex along the scored line to create a shallow V-shape. The ricasso portion remains flat, so the scabbard transitions from flat at the ricasso to diamond section around the blade. When you put the two v-bend pieces together, you should have a diamond shaped interior to match the blade.
-Cover the blade itself in a layer of painters tape. This helps keep it clean, and also give an extra mm or so of space later, in case the fit is too snug.
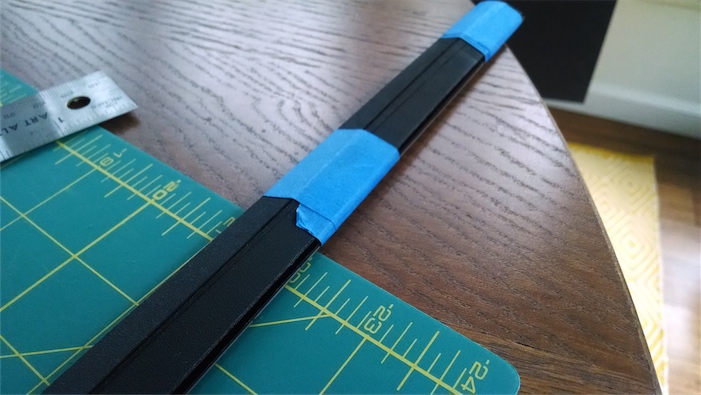
-Place the kydex slats on either side of the blade, and use more tape to attach them together so the edges meet flush along the lower 3/4 of the blade. Up at the top near the ricasso the edges won't meet, but if you tape it snugly you will create a rectangular cross section.
-Make sure the entire length of the seam on both sides is taped (and watertight)
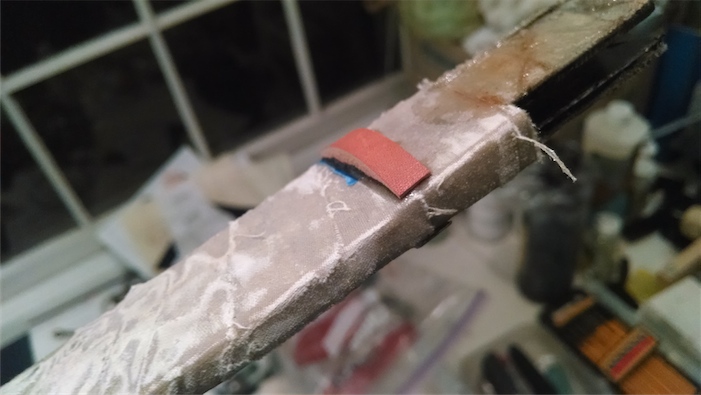
-Cut strips of muslin (or linen, or some thin cloth) into 2-3" strips, and soak them in fiberglass resin. Wrap these strips around the scabbard core in a spiral wrap with the blade still inside (more painters tape on the tang will keep the fiberglass off) . Try to keep the overlaps f each additional strip minimal, as they will generate fat spots later. I did 2-3 layers of muslin, with lots of resin in between. Also avoid wrinkles. I wrapped all the way around the throat of what would later be the ricasso tongues.
-Let the fiberglass dry....mine took way longer than the 2 hours it says on the box.
-Once the fiberglass is hard, sand down any high spots, rought spots, wrinkles, seams, etc. It won't be completely smooth, but the leather will cover some of this.
-I used thick leather to make a riser at the throat on the front and back to prevent the scabbard slipping through the loops of a rapier hanger.
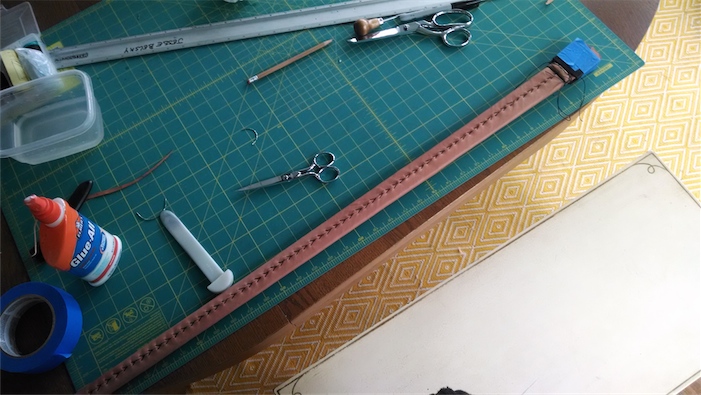
-Finally, I covered the scabbard in wet-formed leather attached with elmers white glue, and stitched up the back.
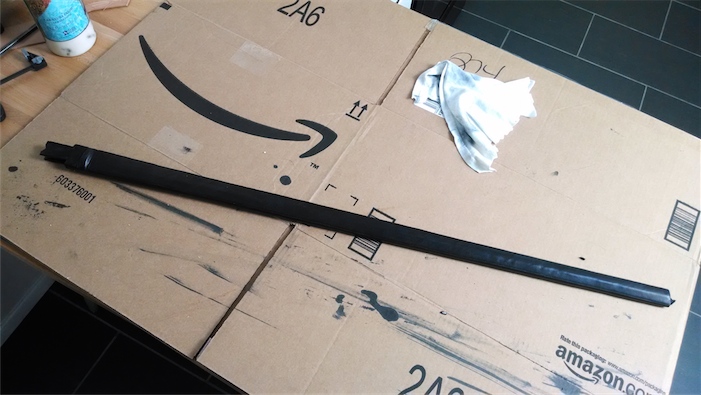
-The last step is cutting the sides off the box around the ricasso so that the tongues can pass inside the guard. I did this with a band saw. (in the pics you can see I did this before I covered in leather...next time I will wait)
The resulting scabbard is fairly light, a little bit flexible, and should be pretty durable. I didn't do any destructive testing to see what would happen if it bent sharply. I used kydex because I had some (its available on Amazon Prime in 24"x48" sheets"). The normal benefit of kydex is that its thermoformable, but I have trouble heating it evenly to avoid warping on long scabbard type lengths, so I'm making use of its flexibility and letting the fiberglass/muslin reinforce it and hold it in shape.
 Attachment: 130.3 KB Attachment: 130.3 KB
 Attachment: 120.17 KB Attachment: 120.17 KB

 Attachment: 146.92 KB Attachment: 146.92 KB

 Attachment: 133.35 KB Attachment: 133.35 KB
 Attachment: 151.96 KB Attachment: 151.96 KB
 Attachment: 97.53 KB Attachment: 97.53 KB
 Attachment: 124.06 KB Attachment: 124.06 KB
 Attachment: 110 KB Attachment: 110 KB

|
|

