| Author |
Message |
|
Antonio Ganarini
|
|
  |
 |
|
Antonio Ganarini
|
 Posted: Sat 08 Dec, 2012 11:49 pm Post subject: Posted: Sat 08 Dec, 2012 11:49 pm Post subject: |
 |
|
So:
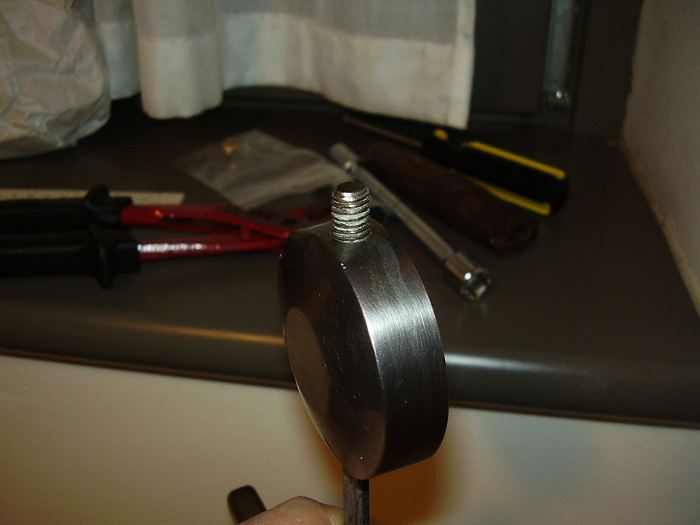
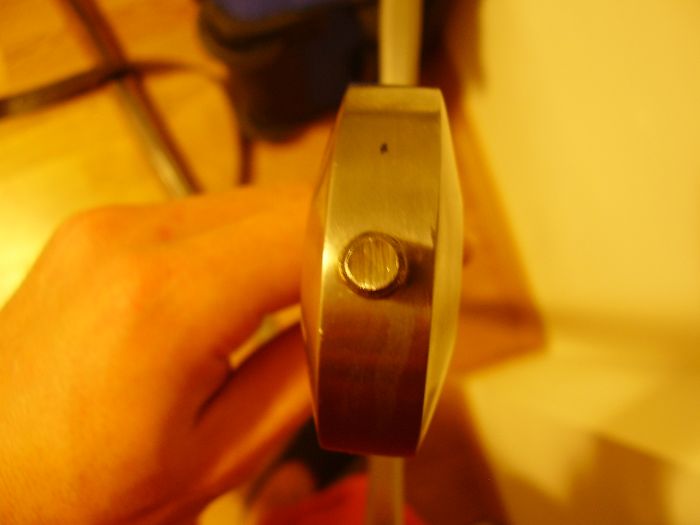
1) I would like to peen the tang, instead of having the pommel screwed to it, so I drilled through the pommel: the pommel now fits perfectly the tang leaving about 1cm of it exposed at the top.
---> I think I have to halve it: maybe 0.5 cm, filing down the screw thread at the top for the peening
2) I took off the old twine-leather grip covering, I shortened/reshaped the wood core and I'm planning to make a new covering with twisted brass wire. I've shortened the core both at the top and the bottom, so now it fits the tang more tightly, but I think that I'll put little wood wedges under it for a better security.
3) I left the cross untouched... I'll fix it to the tang with some epoxy.
4) If the pommel and the cross were blued, the whole would look much better, wouldn't it?
Below are some photoes of the pommel-tang!
 Attachment: 33.63 KB Attachment: 33.63 KB
Attachment: 30.2 KB
Ciao a tutti!
|
|
|
|
|
|
Antonio Ganarini
|
| Posted: Tue 11 Dec, 2012 5:21 am Post subject: |
|
|
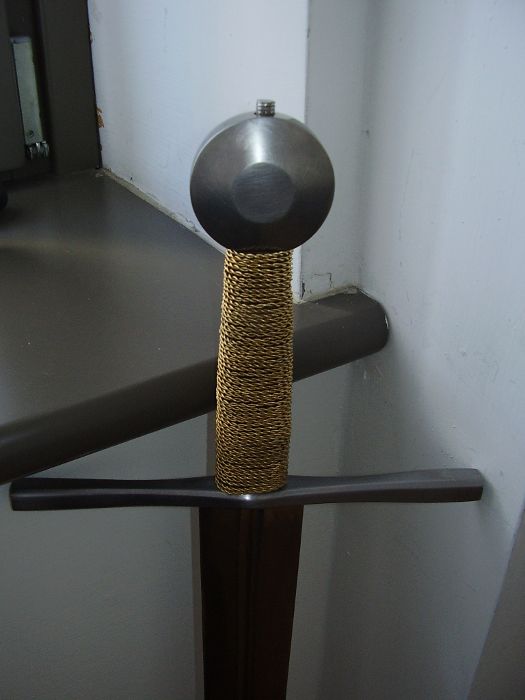
Some workinprogress...
Again, I'm trying to learn, so I would be very happy to listen to any idea about the work!
I know that these are very basic things, but everything is incredibly difficult the first time! 
Below is a photo of the shortened tang, with the grip almost finished (I think I'll do some file work on it...).
Attachment: 36.37 KB
Ciao a tutti!
|
|
|
|
|
|
Lewis Ballard
Location: Houston, TX Joined: 27 Dec 2009
Posts: 66
|
| Posted: Wed 12 Dec, 2012 8:38 am Post subject: |
|
|
I don't have much positive to contribute, except to say that I think you made a really big difference in the sword, and what's more, you have made it "yours" in a way no off-the-shelf blade ever will be.
Well done, sir.
|
|
|
|
|
Bryan Heff

|
| Posted: Wed 12 Dec, 2012 10:45 am Post subject: |
|
|
Coming along nicely. It really looks good, congrats on your hard work thus far. That windlass is actually a pretty good looking sword to start, save for the odd grip. I really like the cross guard on that, very understated.
You reference my project in your post above about peening a tang, mine was the Windlass claymore project.
I am NO expert, believe me, so take this with many grains of salt. That was my first and only peen attempt. When I peened mine I used a propane torch (purchased at my local hardware store) and a ball peen hammer. I used the rounded end of the hammer 99% of the strikes. The torch I used to heat the tang, but I never could get it hot enough to truly change its color to an orange, so honestly I don't know how much good it did.
Someone remarked to me that torch may not be the ideal way to go, that it simply does not have enough heat to get the tang the proper temperature. The other thing I can say is I do believe that the pommel steals away the heat from the tang, so you may want to try getting the tang really hot first without the pommel, then quickly slip the pommel on and start hammering. If it starts to mushroom then 1) that is a good thing, 2) you won't be able to take the pommel off and do that again, but at least you started the process of the peen.
It took me a very long time because I started with too much tang, from your picture I would guess you have about the correct amount, but again, I am new at this as you are.
The good thing that I learned is this. The metal will eventually move, and mushroom, even without heat (cold peening), at least it did with my project, it just took a long time and many many hammer strikes. I don't think cold peening is ideal as it may stress the metal (not sure though) but if you go slow and don't hit too hard, it eventually does what you want., my experience anyway.
Good luck.
|
|
|
|
|
|
Antonio Ganarini
|
| Posted: Wed 12 Dec, 2012 2:47 pm Post subject: |
|
|
Thank you guys!
I'm doing my best!
I was actually thinking to try a cold peening, but now I'm waiting for the blueing kit I ordered, so the peen can wait... I hope inspiration will come.
Bryan, since I've never peened anything, you're 100% more experienced than me! 
I'm not a wise man, but I promise I'll took everything with all the salt I can find around!
Ciao a tutti!
|
|
|
|
|
|
Antonio Ganarini
|
| Posted: Mon 20 May, 2013 11:10 am Post subject: |
|
|
I'm posting again my coclusions, after the last system break down... I beg yor pardon, I'm late, but I realized only today that this thread was gone away too!
-----------------------------------------------
Hi everyone!
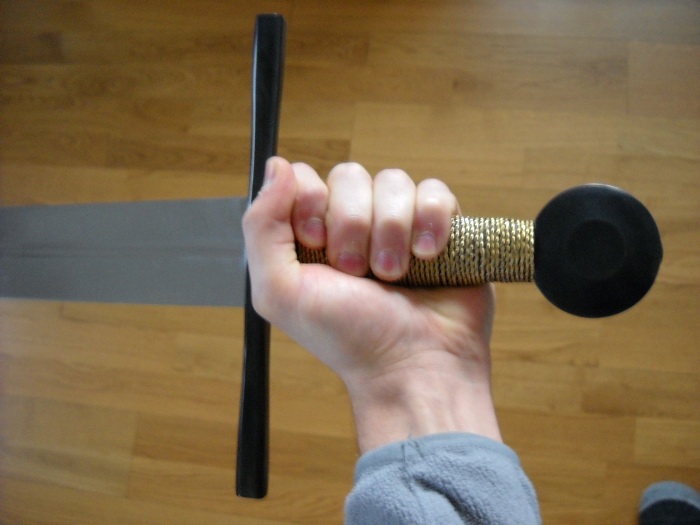
I'm glad to say that, finally, I've finished my little project (at least for now!).
Some things I've not already shared:
- for the grip I used brass wire (~1mm/0.04'' diameter) fixed to the wood core by mean of two little drill holes and a tip of carpenter glue. I don't remember the exact length of the wire, but it was 170 grams ca (5-6 meters?);
- for the blueing I used Birchwood super blue, following the instructions in this thread:
http://www.myArmoury.com/talk/viewtopic.php?t=21395
- I fixed wood core and cross to the tang using epoxy, but I thing the peening process loosed them in some way (I hammered over them a whole afternoon!).
- Now the hardest thing: the peening.
I started with 4mm/0.16'' of tang, but it was really TOO MUCH! 2mm/0.08'' is enough for a 8mm/0.3'' diameter, round section tang! So, after 2h of hammering, I had to shorten the exposed tang and restart! I followed the advices in this thread (how to peen a tang wasn't the real topic, but there were some infos on peening as well!)and I'm happy with the result!
http://www.myArmoury.com/talk/viewtopic.php?t=26272
Total: 5h of cold peening. I think the tang took 1h to start to assume a mushroom form, but after that things went more easy. I used a ball-peen hammer (I don't know the actual weight: it was the last in stock when I bought it, but I guess it should be 500grams ca., maybe too heavy). However I didn't go heavy with the blows.
I then blued the peen too, et voilà!
Something on the sword: now it feel more heavy in the hand (as expected: shortening the grip the POB shifted forward the tip, ~160mm/6.3'' from the cross). The weigth of the brass wire limited this shifting, but not too much. But I'm happy: I think now it has more personality!
Thank you all for the advices that directly and indirectly you gave me! I've learned something new!
Attachment: 88.01 KB
Attachment: 68.54 KB
[ Download ]
Attachment: 112.3 KB
[ Download ]
Ciao a tutti!
|
|
|
|
|
|
|
You cannot post new topics in this forum
You cannot reply to topics in this forum
You cannot edit your posts in this forum
You cannot delete your posts in this forum
You cannot vote in polls in this forum
You cannot attach files in this forum
You can download files in this forum
|
All contents © Copyright 2003-2024 myArmoury.com — All rights reserved
Discussion forums powered by phpBB © The phpBB Group
Switch to the Basic Low-bandwidth Version of the forum
|

