Best Armour Sallet Upgrades
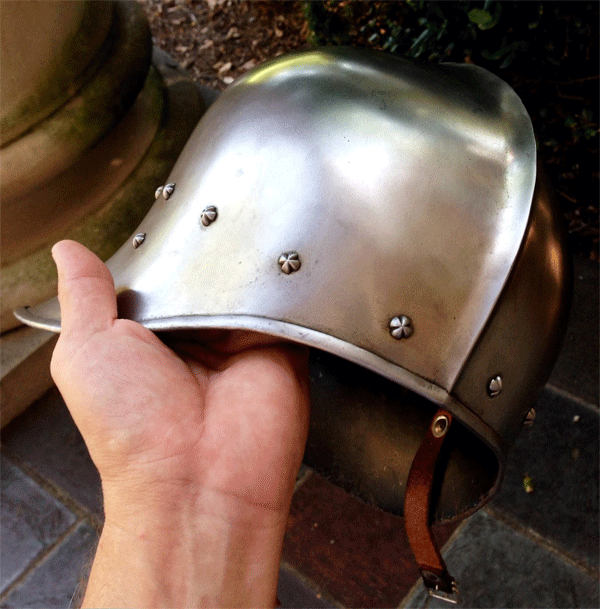
I got this Best Armour sallet in trade from MA member and Sallet King Mark T. It may have passed through your hands as well at some point. It's very nice, but the liner was a modern-ish leather affair that was inadequate to the task. I don't know if this liner is typical of BA, but I've seen similar liners elsewhere as well--including on Windlass and GDFB pieces.

What this sallet needs is a proper quilted linen liner, but I hated to lose those nice decorated rivets (and REALLY hated to have to replace them all, make a lining band, etc. in addition to making a new liner.

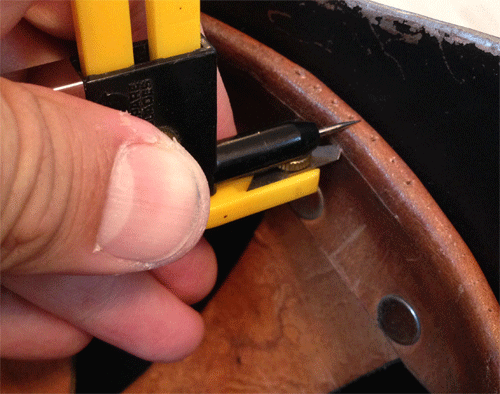
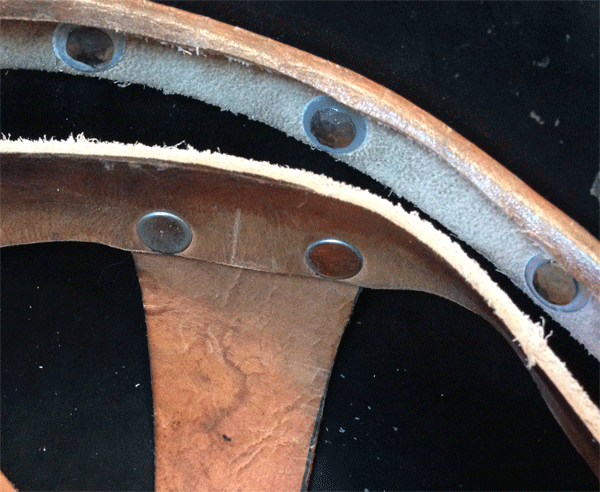
I had a brainstorm. I pierced the edge of the leather liner, then used a circle cutter to cut out the liner below (as seen here) that line of stitching holes, leaving the liner otherwise intact and giving me a perfect lining band for attaching the fabric liner. This took two quick passes of the cutter. If i wanted to re-use the liner I could easily rivet it directly into another helmet.

I'll be posting the results of this project, which probably will include two-point straps in addition to the new liner.

For now, if you have a similar project, consider grabbing one of these cheap tools: https://www.amazon.com/OLFA-9911-Compass-Circle-Cutter/dp/B000BK7NWC/ref=sr_1_6?ie=UTF8&qid=1475848888&sr=8-6&keywords=circle+cutter
 Attachment: 198.69 KB
sallet.gif


 Attachment: 113.29 KB
cutter.gif


 Attachment: 167.66 KB
cut.gif

I'm so glad to see that Sean took the time to post this here!

His solution is simple and brilliant, and to be left with both a usable liner band as well as the original rivets should give some options to folks who have some of the other helmets out there that tend to use leather spiders - whether they're the Indian fare, Best Armour, or even makers such as White Rose.

I, for one, hadn't heard of the tool that Sean used, and immediately thought of a few applications. Thanks Sean!
That device is also good for precise patterning of rondels (I used sheets of craft foam for all my patterns) for daggers and pollaxes. Would work for besagews and such as well, I guess.
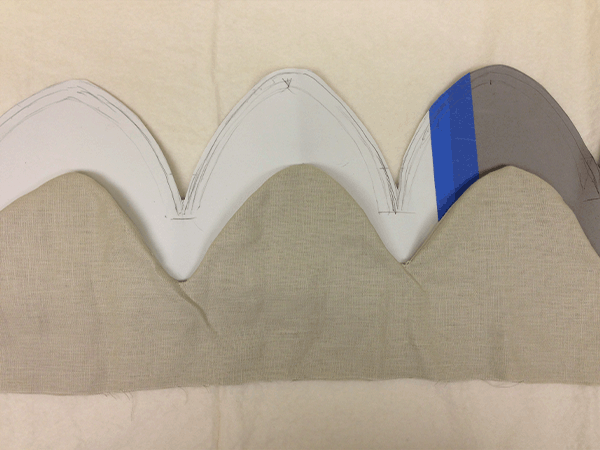
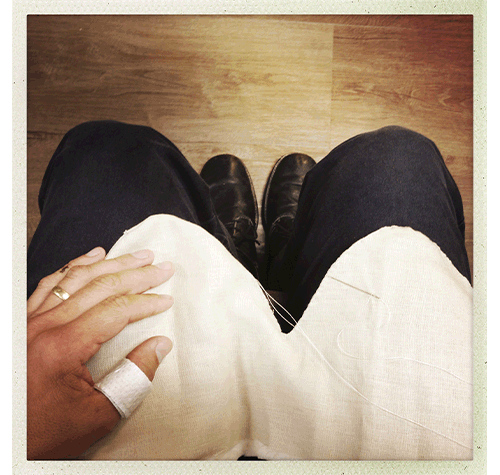
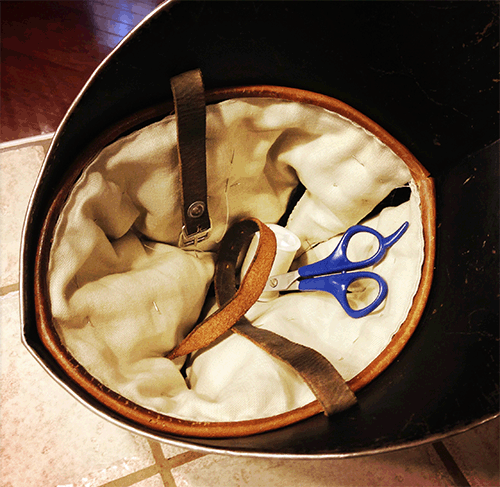
Here's the final set of lining images, showing a few details of construction. Tips from my experience doing a few of these:
• stitch everything by hand
• use a double strand of thread throughout
• when making the pattern, be sure to fit it to the inside of the helmet, NOT your head (fit to head is adjusted with thickness of lining)
• make sure to leave seam allowances. your pattern should be larger than you want the final piece.
• use running stitch around the top and sides, then turn.
• insert at least twice the desired final thickness of cotton batting, turn in lower edges and seal with running stitch.
• use pins to hold batting in place as you whip stitch all edges of the piece.
• test-fit the un-quilted liner to the helmet. Note that you can work with a liner that's too long, while a too-short liner would be more challenging.
• use strips of tape to gauge the width of quilting rows.
• for a more authentic look, don't get fussy about neatness of the quilting.
• whip-stitch liner to lining band.

The strap works better now with a proper liner, but I'll still probably make Y straps at some point.

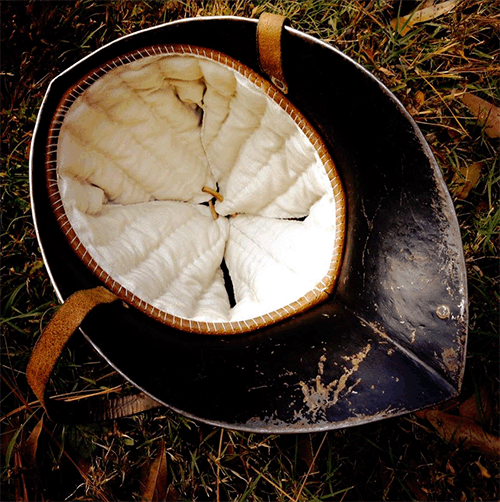
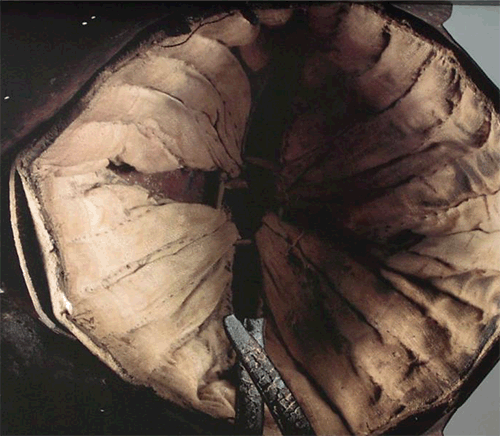
The last image below is of the lining in a Churburg sallet--a rare and very helpful guide to this work.


 Attachment: 176.34 KB
liner pattern.gif


 Attachment: 123.22 KB
liner stitching.gif


 Attachment: 142.71 KB
liner fitting.gif


 Attachment: 269.22 KB
liner tape.gif


 Attachment: 166.39 KB
liner installed.gif


 Attachment: 145.17 KB
liner churburg.gif


Page 1 of 1

Jump to:  
You cannot post new topics in this forum
You cannot reply to topics in this forum
You cannot edit your posts in this forum
You cannot delete your posts in this forum
You cannot vote in polls in this forum
You cannot attach files in this forum
You can download files in this forum


All contents © Copyright 2003-2006 myArmoury.com — All rights reserved
Discussion forums powered by phpBB © The phpBB Group
Switch to the Full-featured Version of the forum