Go to page 1, 2  Next

My New Rapier!
This MRL German Rapier had been retired from a myArmoury colleague's collection, and was Resting In Pieces when I bought it a few weeks ago. I bought it as a project piece, and it certainly was that--the most challenging project I've undertaken to date. The previous owner had trimmed .25" off the tip of the blade for WMA training purposes, stripped most of the original black lacquer finish from the hilt (thankfully,) removed the original cord wrap and disassembled the piece for storage. The pommel nut disappeared somewhere in that process, so I needed to create a new nut as well.

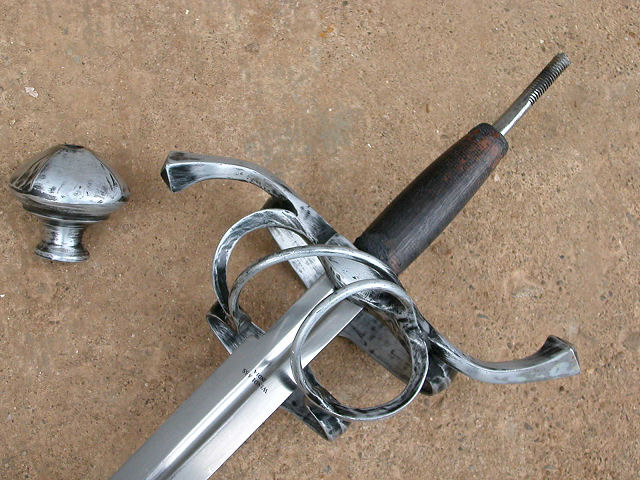
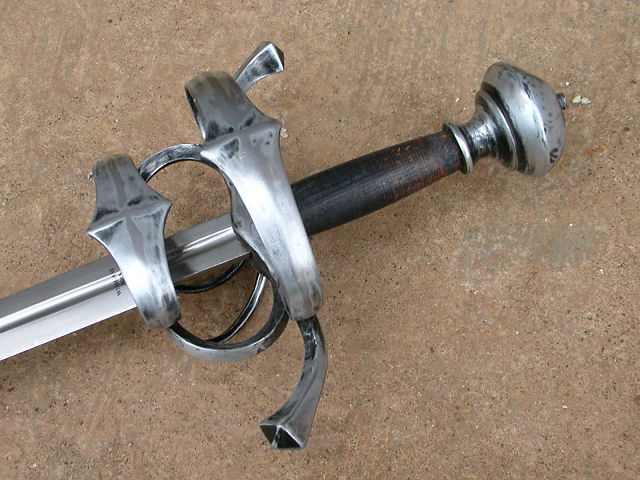
This piece is modeled on a rapier in the Wallace Collection (see this thread: http://www.myArmoury.com/talk/viewtopic.php?t...ht=wallace ). I chose to leave mine bright and add a leather wrap to the new cord. The most recent issue of the Fagan Arms catalog includes a German rapier of the same general era, and it has a wood/cord/leather grip, so I figured the Wallace piece might also originally have had a leather wrap. So, mine is a departure from the original, but very pretty.

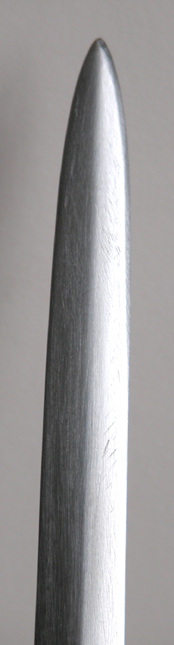
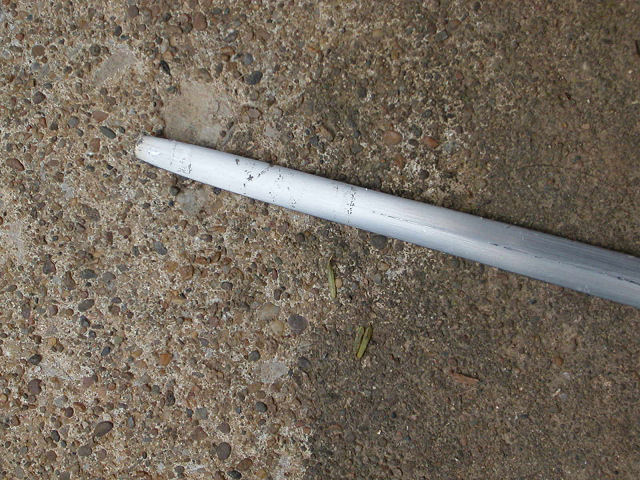
This required MANY hours of tedious handwork just to reach this somewhat imperfect finish and create a new point. I have new respect (and sympathy) for the finishers at Albion, A&A, et al. Dremel was of some use in this process, but was essential in the creation of the new pommel nut. It's an inverted wing nut with the "wings" cut off and ground smooth. I think this is as close as I'm likely to get to an off-the-shelf pommel nut that at least vaguely resembles period tang buttons. Overall, I'm very pleased with this piece. I've wanted it for years because I like the design, era and length (it's one of the few low-to-mid range rapiers with an historically appropriate length).


 Attachment: 113.37 KB
smallrapier.jpg


Last edited by Sean Flynt on Wed 16 Feb, 2005 9:47 am; edited 1 time in total
Looks great Sean! Well done......again. :cool:

Bill
Thanks! I was really wanting a rapier again. The type was conspicuously absent as my replica collection narrowed to only 16th and 17th century pieces.
Sean, it's all your fault. You've been posting pictures of your re-wrapped grips and whatnot, now you have me wanting to do the same for my swords! Oh well, redoing grips is cheaper than buying new swords and will hopefully help me keep some my money in my wallet. :D

You said you had to re-grind the tip of this sword, do you have any pictures of the tip. I'd love to see a before and after, if you have them. Either way, thanks for sharing.

-Grey
Here are a couple of quick (and bad) snaps of the tip and pommel nut. As you can see, both need a bit more polishing because they required so much more rough work. For the tip, I used a file and both coarse and fine stones (back-to-back on a single whetstone). Symmetry was the greatest challenge, and the new tip isn't quite perfect. The "before" shot, as supplied by the original owner, shows the general condition of the blade at time of purchase--nicks from sparring, peeling lacquer, etc.

As for the grip--you should try it! A more even cord will give prettier results, but I'm still working on my endless reel of natural hemp cord. I recommend using wood glue. I recently re-re-wrapped the grip of my backsword and had to remove my earlier work. I'd used wood glue on that, and found it strong enough to ensure the integrity of the grip, but relatively easy to remove. I just pulled the leather seam loose, removed the leather, unwound the cord and lightly sanded the wood. No problem. Reversability is a good thing. Also, this really is an inexpensive way to dramatically change the look of a piece.


 Attachment: 73.69 KB
tip.jpg


 Attachment: 121.69 KB
DSCN6036.jpg


 Attachment: 66.12 KB
pomnut.JPG

Now that I've posted one of the "before" photos sent to me by the original owner, I might as well post a couple more. If he objects I'll remove these. The first one below shows the back of the rapier.


 Attachment: 94.42 KB
DSCN6038.jpg


 Attachment: 90.76 KB
DSCN6033.jpg

Boy, I really butchered it. lol

Sean,

You did a great job giving it a new look. :cool: Did you do anything with the scabbard?

If you had never asked me about the rapier it would still be sitting scattered about. Thanks for bringing it back to life!

BTW, MRL's German rapier is probably one of the nicest budget priced rapiers on the market.

Here are a few pictures of the raper when it was new.
http://www.myArmoury.com/albums/photo/5844.html
http://www.myArmoury.com/albums/photo/5845.html
http://www.myArmoury.com/albums/photo/4830.html
http://www.myArmoury.com/albums/photo/5846.html
Nice rehabilitation project.
Hey, Stephen! Thanks for the photos and for the opportunity to resurrect this piece! It looks great with my ElJay basket of the same period (I actually POLISHED that piece as well).

As you know, losing the tip made for an odd fit in the scabbard. You had already slid the chape down a bit to accomodate the shorter blade length, so I just trimmed off the extra bit of exposed leather. I sanded and polished the scabbard furniture to match the hilt and ran steel wool over the leather to take off that patent-leather shine typical of MRL scabbards. My scabbards tend to sit in a closet, so this work was not vitally important (I like to see the blades, and this one is especially attractive). The scabbard seems well-made, though.
very nice work, Sean. You are inspiring me to go attempt some home improvements on my own MRL stuff.
Let me throw in a "well done, Sean", as well !

It's nice to see a piece resurrected and much improved ! Mac
Sean;

Great job there: It looks like NEW! ( Well actualy OLD but well cared for! Just teasing here as you do like to antique stuff, so looks like new might be a bad thing ......... LOL. )
Sean, very cool! Bully! I like those really long Elizabethan rapiers... this seems to be the rational, and economical way of going about getting yourself a good one. Great job, and good for you too in resurecting a "project" piece.

Gordon
Hey Sean,

If you can find the time. I'd really like to see the rapier from a few other angles, particulary the inner guard. :cool: You did superb job at polishing it up. I can't remember how long it took me to remove what black lacquer I did, I remember giving up on it and put it away in my 'spare parts' box. lol
Sorry about the delay in responding. Sometimes the auto-notification feature stops working for me. Anyway, I'll try to get more shots soon. The lacquer must have been a nightmare. It was hard enough just getting the various crevices clean and the finish even overall after you did the grunt work. The dremel certainly helped, especially for the inside of the guard.
Sean, absolutely beautiful work! The reshaping of the point was especially well done. The pommel nut is great as well.
A true inspiration to us all. Thanks for the great pics too. :)
Hey Sean...

Very very nice transformation.

BTW
I got to see the MRL hanger you transformed at Tom Carr's house the other day... Wow! You have the touch! definitely looked like something from the past. :)

take care

ks
Well...it is from my past! :D
Thanks for the compliment. I love these projects. Next step is a homemade Scottish dudgeon dagger of the late 16th c. This summer, perhaps....

I've taken a break from antiquing. I actually polished up what remains of my former collection (this rapier, E.B. Erickson basket and Scottish Backsword). I need to polish my Kern axe, too. I'm hoping to add a 17th c. hanger to my collection this summer, and I'll leave that bright as well. I'm going to play Patrick Kelly for a while--black and bright, emphasis on form.
aah... so young Skywalker (really deep voice)... you've decided to go over to the bright side of the force... I see. :surprised:

Well... when you're tired of all the fingerprints, smudges and micro-scratches, remember, you're always welcome to return to the dark-side :p :D ;)


ks
Sean,
Got any pics of the Scottish backsword re-do? Think you said awhile back that you were re-doing the handle wrap on it.

Just curious.

Bill
Go to page 1, 2  Next

Page 1 of 2

Jump to:  
You cannot post new topics in this forum
You cannot reply to topics in this forum
You cannot edit your posts in this forum
You cannot delete your posts in this forum
You cannot vote in polls in this forum
You cannot attach files in this forum
You can download files in this forum


All contents © Copyright 2003-2006 myArmoury.com — All rights reserved
Discussion forums powered by phpBB © The phpBB Group
Switch to the Full-featured Version of the forum