I recently ordered a Windlass spear head and it's time to haft it. I've chosen a nice piece of poplar that is straight and has nice, tight grain. I realize that ash would be the best, but considering that there's no good local source of ash hafts locally (East TN), I decided to go with some locally grown poplar. Plus, it's hard to beat $11 for a solid 6 ft. piece.
My real question is how to shape it so that it fits well in the socket. I'd like to have a nice shoulder on this piece, especially considering that the round section I have is around 1 3/8". A little big for it to be "right on" historically, but it's close enough. Since I'm not an expert I wanted to give myself plenty to work with to create a nice shoulder and strong, solid haft. I've actually gotten pretty close with my bench sander and a strip of sand paper that I've been using to try and help me keep uniform roundness. So, experts out there, what are the preferred methods to remove stock and create a nice shoulder for that spear head to rest on? As of now, I still have a tiny bit of "wiggle", but a little JB Weld can handle that if need be. Thanks!
I go by the depth of the socket and measure the outside with calipers and then subtract wall thickness. Measure the narrowest and widest. Mark the haft for depth (leaving a bit for final fitting. I use a surform type rasp and roll while stroking. Keep eyeballing those two measurements and check frequently with a caliper as you get close. Keep fitting and rotate the haft firmly, that will show high spots.
The big black one below went from 1 1/4" to less than pencil diameter and I filled most of the socket with excellent fit. The haft was a 6' oak bo staff. $30 shipped from from Cali to Ma. You can see my taper actually starts a couple of inches back.
The spontoon is one of the Hanwei and was an ash pole on Amazon from a flag company. The A&A Freidrich was second hand but looked a rather erstwhile fit (I need to fix that. The baby yari actually a stick tang and I created a collet fit for it (like a drill chuck).
[ Linked Image ]
Cheers
GC
Thanks Glen, I appreciate the info. This is my first foray into hafting, so I'm jumping in and learning as I go.
I generally start with coarse rasp to get an initial taper, then a less aggressive one as I start to fit the socket onto the wood. I don't always do a step, though I do if I can, but I'm not very precise about it. I just use the rasp to form it approximately, then trim it up with files or knife as the fitting proceeds and the socket approaches it. Generally I find the socket fits one way on the end of the shaft, so I often make pencil marks as alignment guides. Wherever the inside of the socket is rubbing the wood is where I take a little more off, until it goes just about where I want it. Then I seat it by rapping the butt solidly on pavement. I always use a nail or rivet to secure the head!
As you said, your shaft diameter is kind of big! I've been lopping an inch or so off the bottom of spear sockets to reduce their diameter, which helps enormously. The whole shaft can be thinner, lighter, and more pleasing to the eye.
Yay, spears!
Matthew
As you said, your shaft diameter is kind of big! I've been lopping an inch or so off the bottom of spear sockets to reduce their diameter, which helps enormously. The whole shaft can be thinner, lighter, and more pleasing to the eye.
Yay, spears!
Matthew
good info, diagram here: http://myArmoury.com/talk/viewtopic.php?t=704...lder+spear
| Sean Flynt wrote: |
| good info, diagram here: http://myArmoury.com/talk/viewtopic.php?t=704...lder+spear |
Thanks Sean. This is exactly what I was looking for.
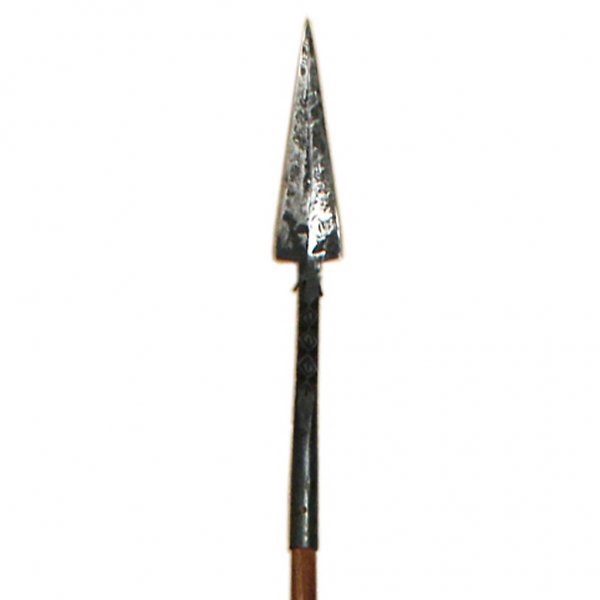
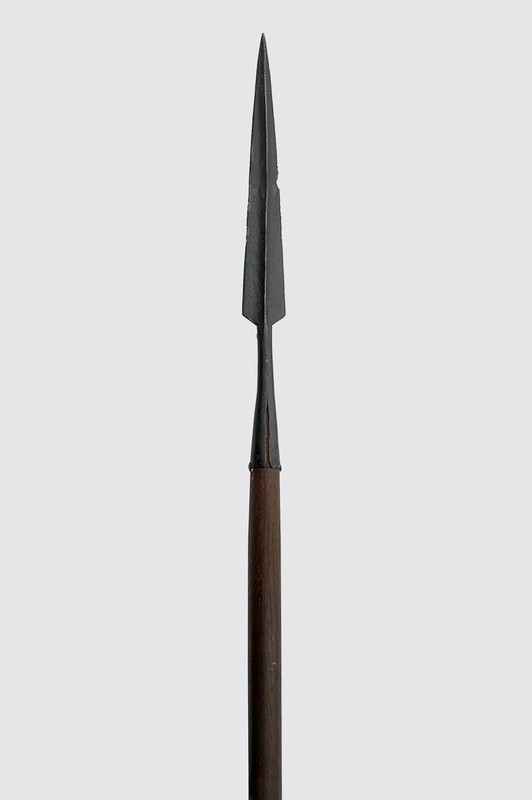
So I'm getting close to being ready to rivet my head onto the haft. It's been a blast shaping it so far and I've learned a lot. But I'm at a crossroads now. The Windlass spearhead I've got has pre-drilled holes for riveting...but they're in line with the cutting edge.
So, I'm left with three options:
1. Rivet perpendicular to the grain like I would normally and then have the cutting edge also be perpendicular to the grain, which is most definitely not ideal. I know axes and other striking tools always follow the grain...they also normally aren't riveted. After reading another lengthy, but extremely informative thread on the topic of wood stress in spears, found here - http://myArmoury.com/talk/viewtopic.php?t=121...;start=44, I'm hesitant to rivet across the grain and risk putting extra pressure on the wood at the base of socket mount.
2. Rivet in line with the grain and risk starting a split, or increasing the likelihood of a split down the road. Again, I'm hesitant.
3. Drill two new holes so that I can align the edge with the grain and still rivet across the grain, and then somehow fill the two original holes.
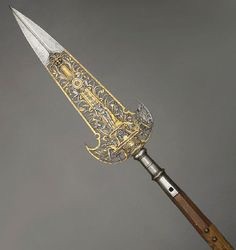
I've found at least two historical examples from the Wallace Collection that seem to show rivets or rivet holes as described in option 3. Any thoughts and suggestions are more than welcome.
 Attachment: 9.77 KB
Attachment: 15.86 KB
So, I'm left with three options:
1. Rivet perpendicular to the grain like I would normally and then have the cutting edge also be perpendicular to the grain, which is most definitely not ideal. I know axes and other striking tools always follow the grain...they also normally aren't riveted. After reading another lengthy, but extremely informative thread on the topic of wood stress in spears, found here - http://myArmoury.com/talk/viewtopic.php?t=121...;start=44, I'm hesitant to rivet across the grain and risk putting extra pressure on the wood at the base of socket mount.
2. Rivet in line with the grain and risk starting a split, or increasing the likelihood of a split down the road. Again, I'm hesitant.
3. Drill two new holes so that I can align the edge with the grain and still rivet across the grain, and then somehow fill the two original holes.
I've found at least two historical examples from the Wallace Collection that seem to show rivets or rivet holes as described in option 3. Any thoughts and suggestions are more than welcome.
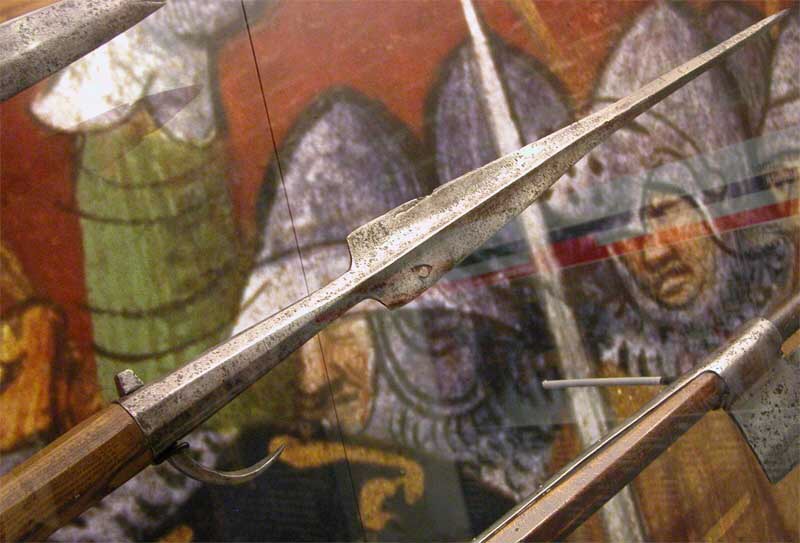
Also, just found these in an old thread by Sean Flynt - http://myArmoury.com/talk/viewtopic.php?t=114...mp;start=0 - which seems to show rivets in line with the edges. Looks like both may be historically appropriate. One of the images even shows a nice leveraging hook which would've undoubtedly put lots of stress on the haft.
Attachment: 97.71 KB
Attachment: 18.09 KB
I suspect that rivet placement has more to do with grain direction than anything. For greatest insurance against splitting the wood, rivets should go through the shaft perpendicular to the grain rather than parallel to it. If it's parallel to the grain, it's more likely to split.
Look at the end of your shaft, whichever one is convenient. Odds are that unless it's a coppiced shaft (unlikely), it's been cut from a larger board, right? So it'll have a segment of grain running from one side to the other. Like so:
(III)
(well that's kind of crude, but you get the general idea)
So the rivet should go like so: -(III)-
Does that help?
Thanks Jeffrey. This was what I would most likely do as I don't want to have to drill new holes and fill the old ones. I, too, am afraid that drilling parallel with the grain is just too risky. Glad to know at least someone else shares my sentiment.
Page 1 of 1
You cannot post new topics in this forumYou cannot reply to topics in this forum
You cannot edit your posts in this forum
You cannot delete your posts in this forum
You cannot vote in polls in this forum
You cannot attach files in this forum
You can download files in this forum
All contents © Copyright 2003-2006 myArmoury.com — All rights reserved
Discussion forums powered by phpBB © The phpBB Group
Switch to the Full-featured Version of the forum
Discussion forums powered by phpBB © The phpBB Group
Switch to the Full-featured Version of the forum