Hi Lukas,
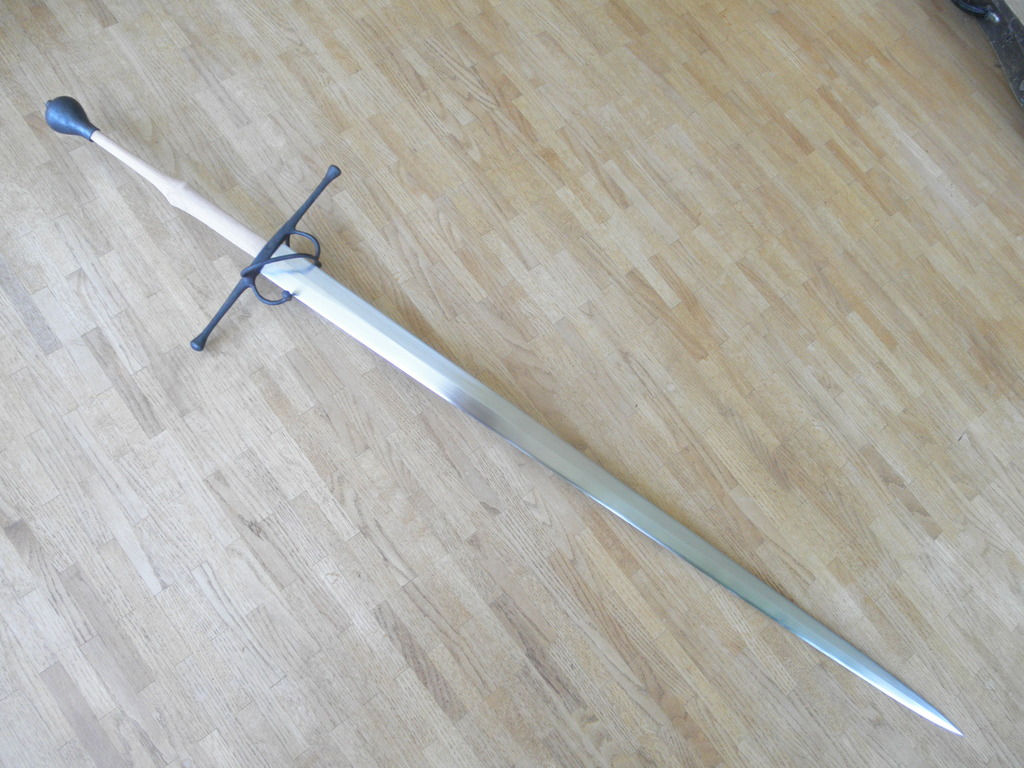
I'm thoroughly enjoying your work in progress reports, and I'm impressed by your angle-grinder skills.
It's reassuring to find others come up against the same problems that I do - mainly that everything takes at least three times longer than you expect it to.
I'm not familiar with the steel you've used for the blades. Will these swords be getting much full contact use?
Cheers
https://www.facebook.com/TimHarrisSwords
Hi Tim, glad that you like my swords!
I only make sharps so I hope they don't see much contact ;) I like 56Si7 (I believe it's similar to 9260?) because it has a very high shock absorption at a high hardness. Also, it was what I started out with and I never had a reason to change. I would like to try 80Crv2 at some point though.
Two bonus shots of the proportions. Don't be irritated by the blade finish, I did some more regrinding.
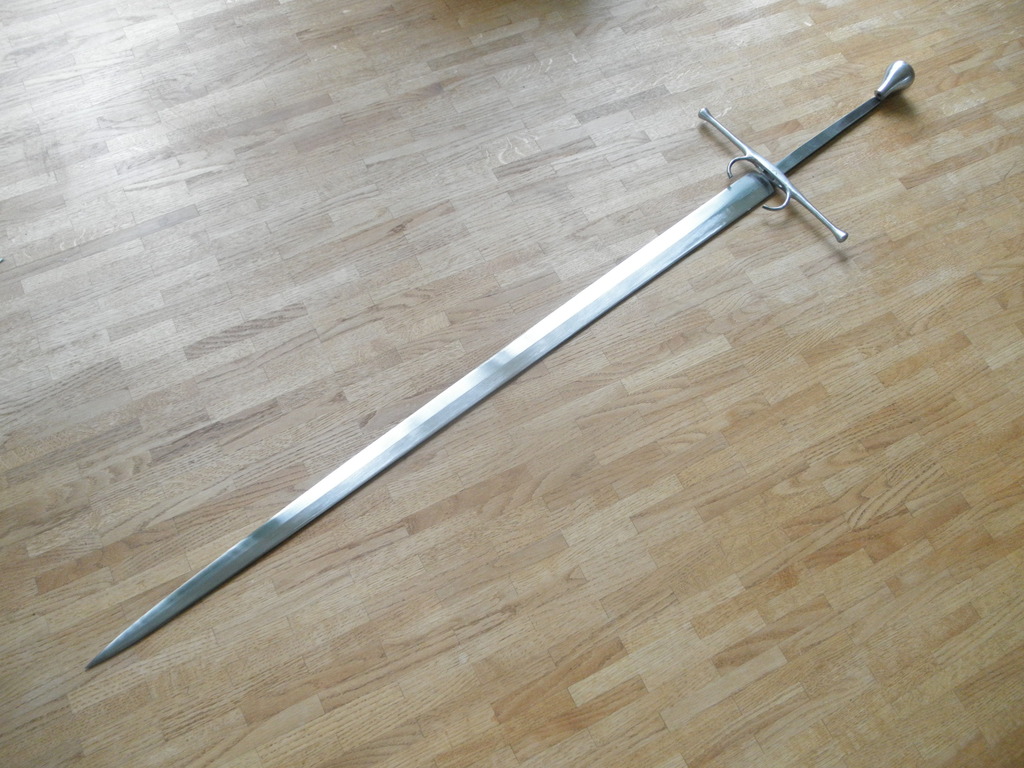
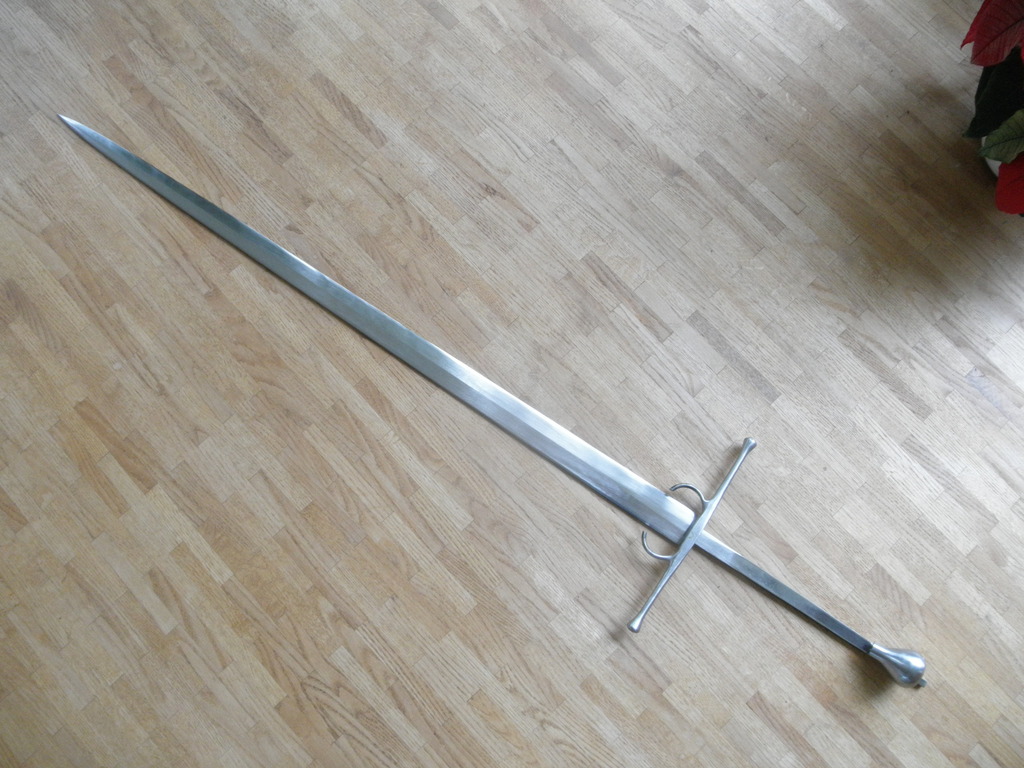


I'm completely in love with this sword. Basically, it's a perfect longsword.
| Luka Borscak wrote: |
| I'm completely in love with this sword. Basically, it's a perfect longsword. |
If you're into really BIG longswords, yes ;)
| Lukas MG wrote: | ||
If you're into really BIG longswords, yes ;) |
Well, yes. I always complain how most replicas are too small. ;)
It's true, there are very few replica longswords of this length. Most are well below 50" in length. That makes it challenging especially for practitioners of later period sources (Goliath, etc) to find a fitting sharp.
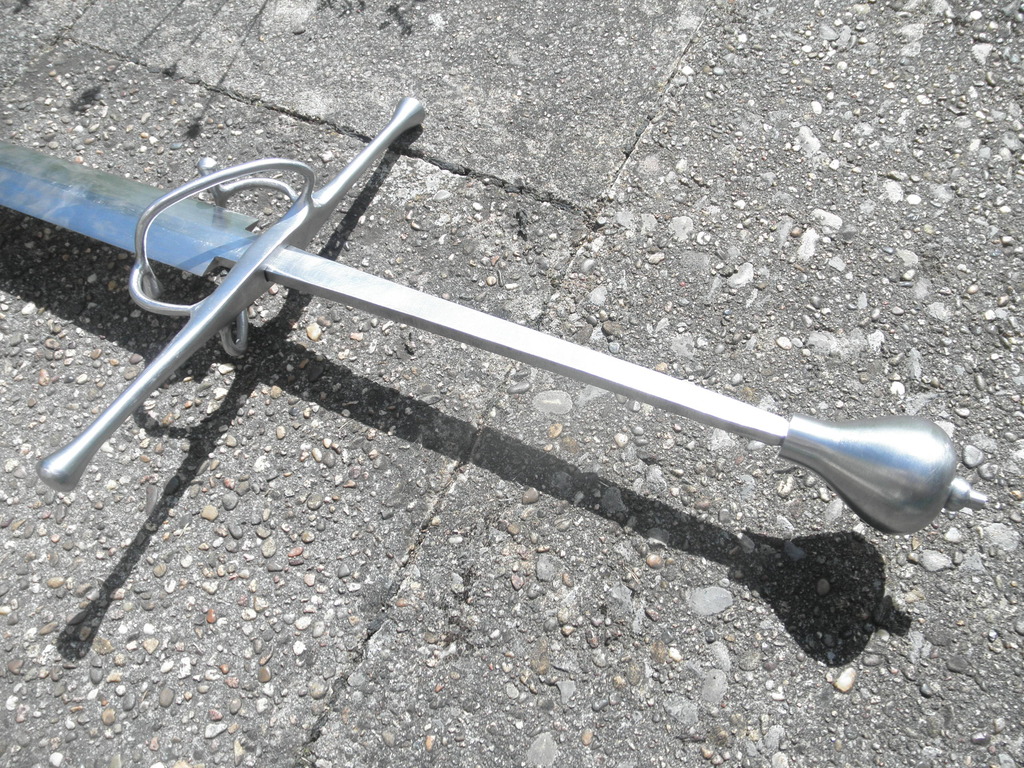
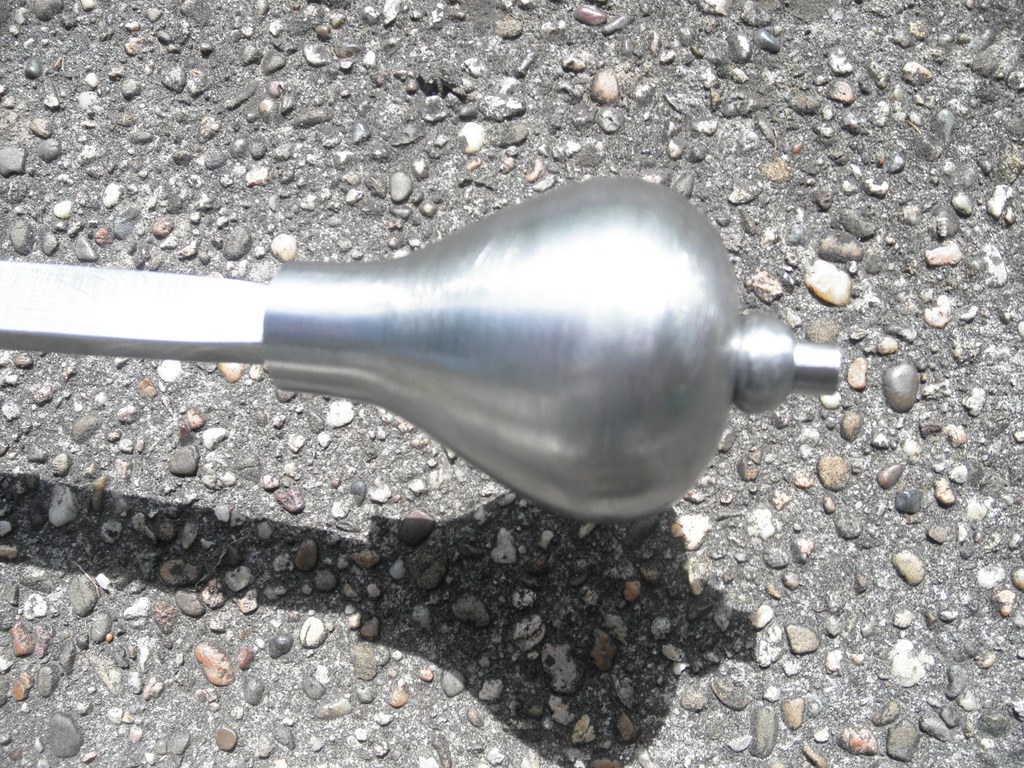
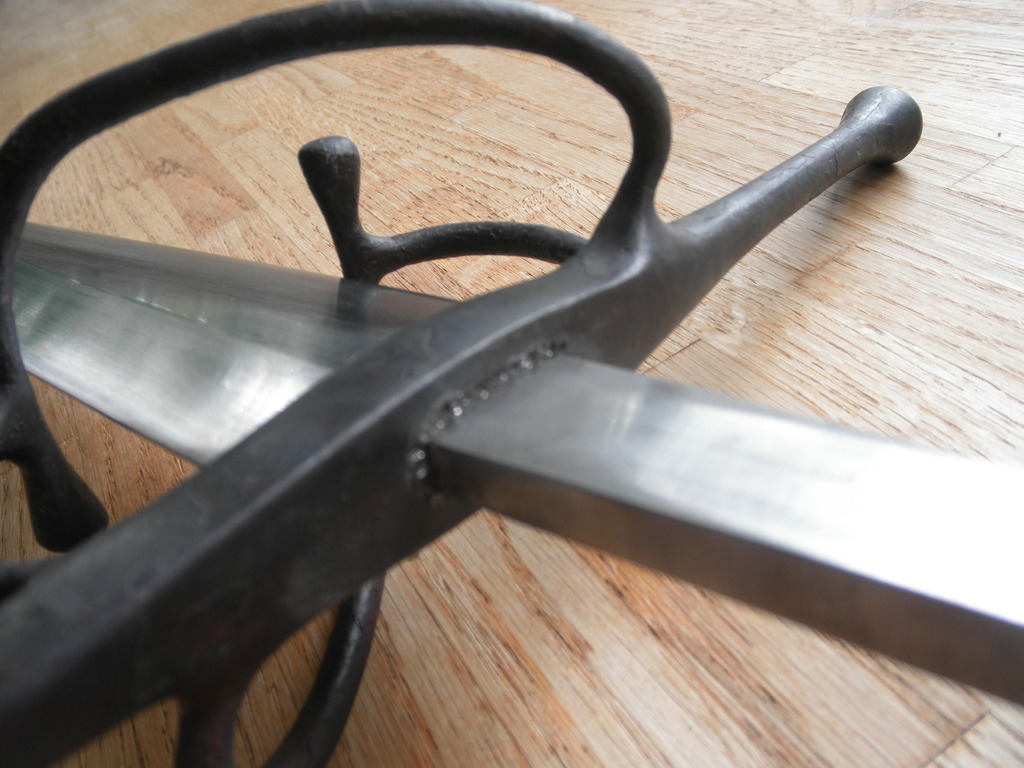
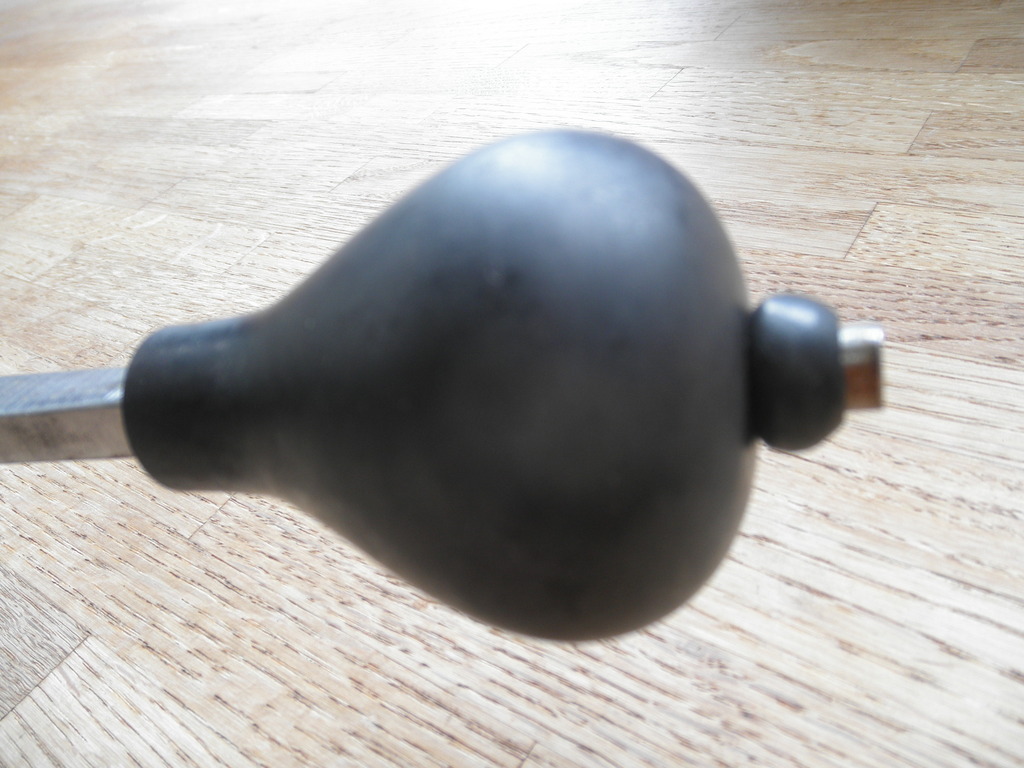
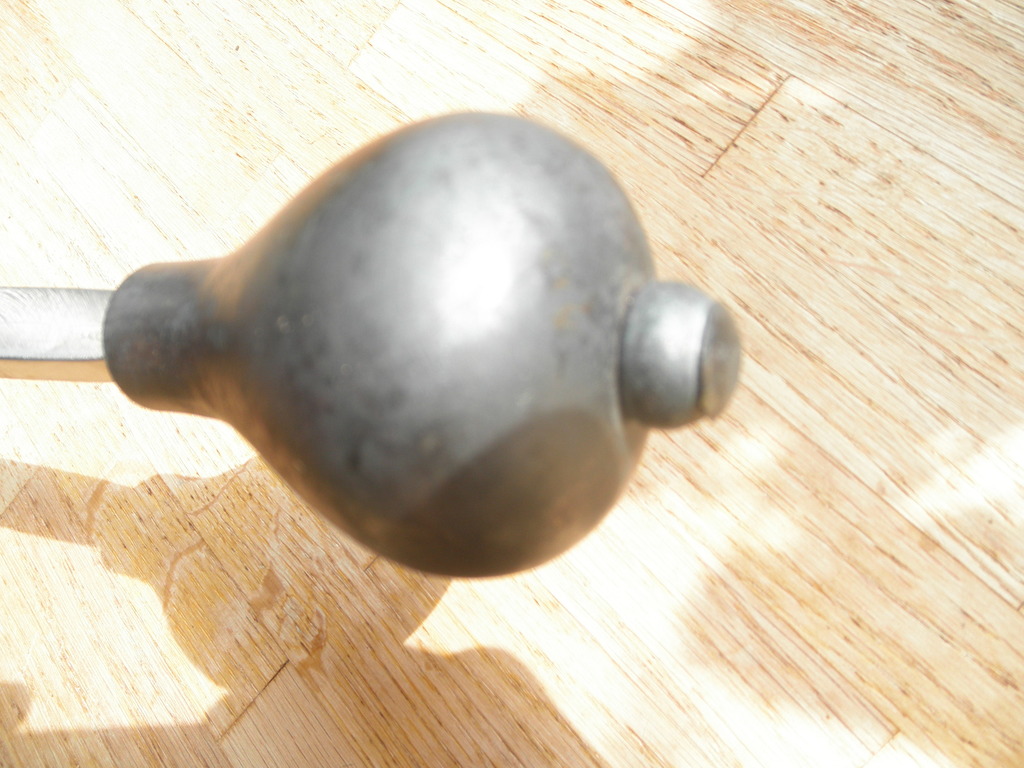
So, the pommel is fitted. I still need to finish the peen block that I'd like to add (waiting to hear from my customer if he wants it, we haven't discussed this possibility yet). I put the starter material for the peen block on the tang to give an impression, it will of course be shaped much further.
You can see how the round section that runs through the pommel is shaped directly from the tang itself (as it should be) and that the transition from round to rectangular is also inside the pommel. That is very important to ensure a durable construction. The fit of the pommel is such that it slips on easily 3/4 of the way but has to be hammered down the rest, wedging tightly in the process. Even without the following hot peen that pommel would not be coming off in use.
I also narrowed down the tang some more to loose some excess material. The 8mm thickness allows to go quite narrow. Really doing everything I can to keep the weight as low as possible...
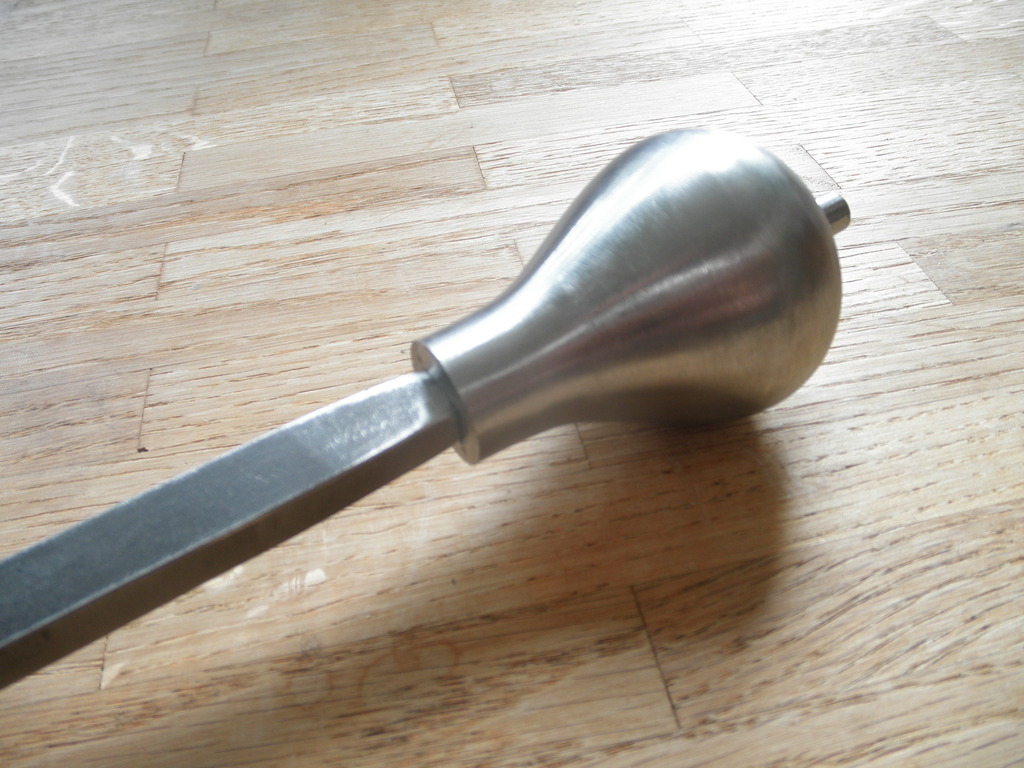
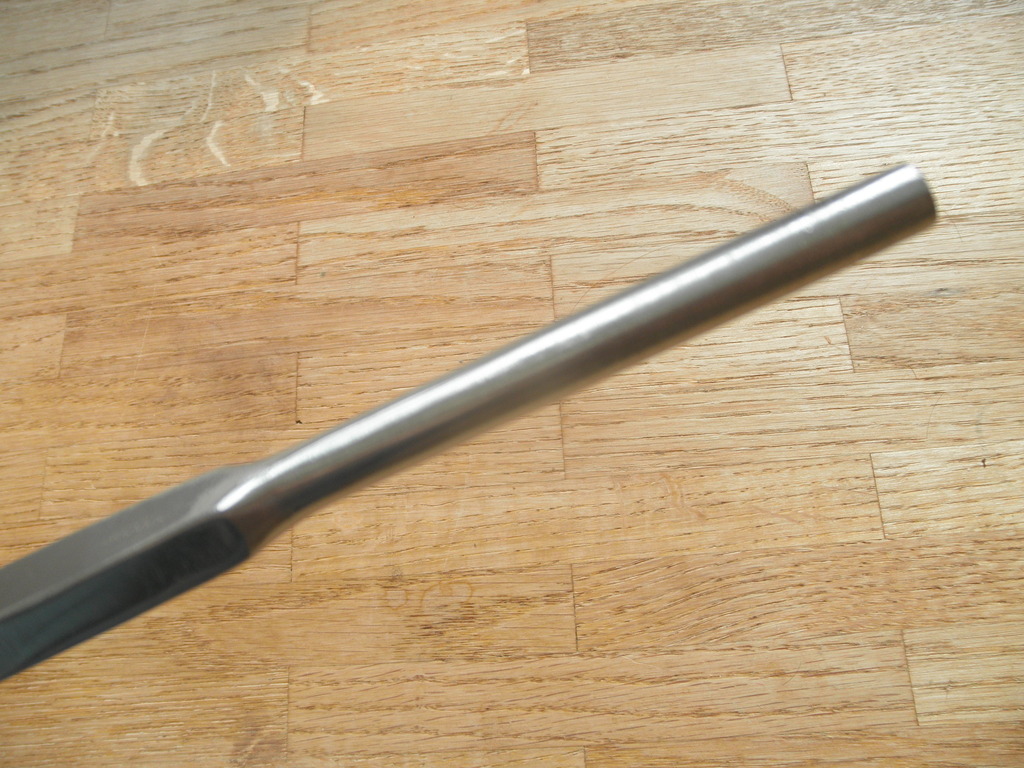
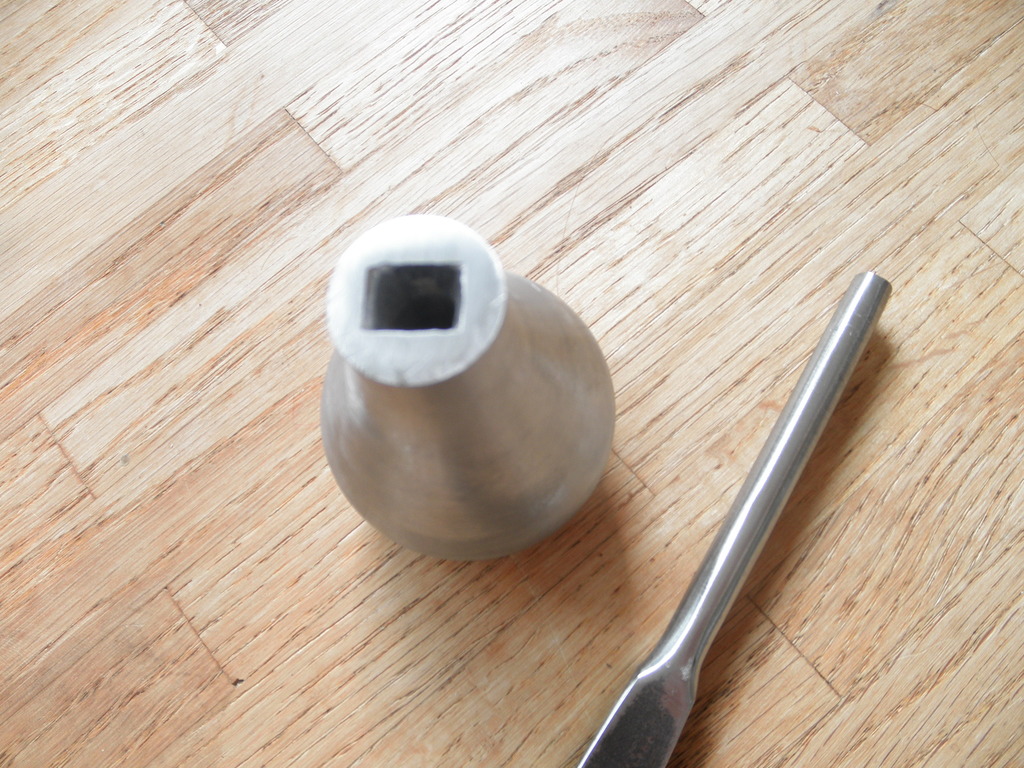
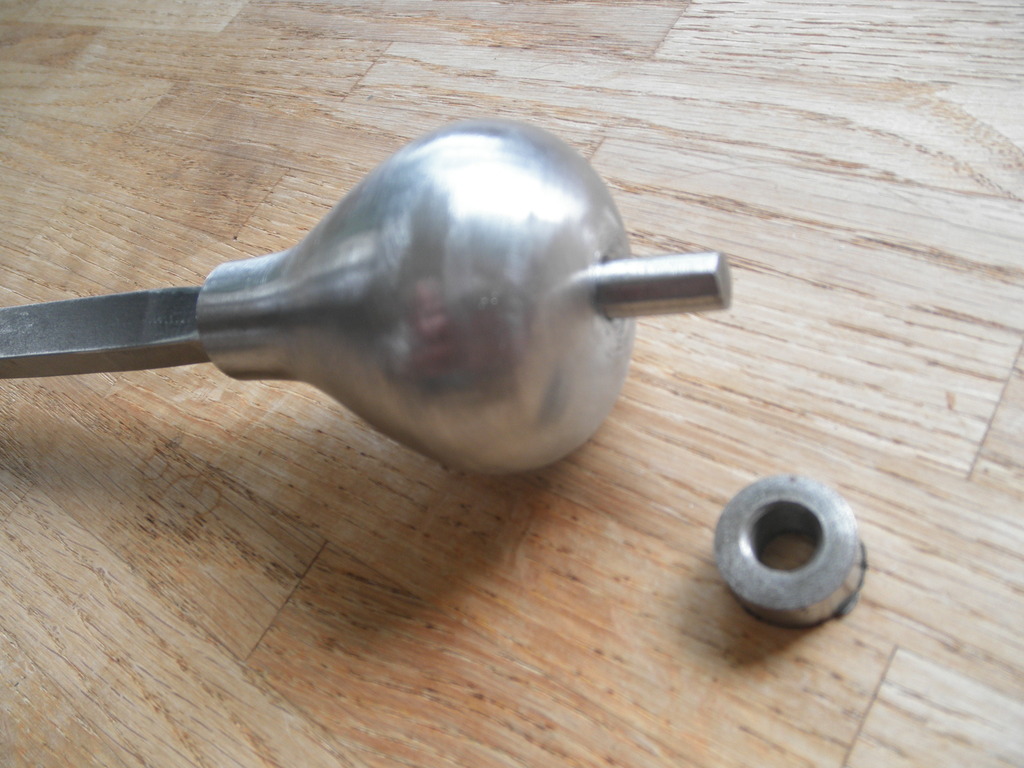
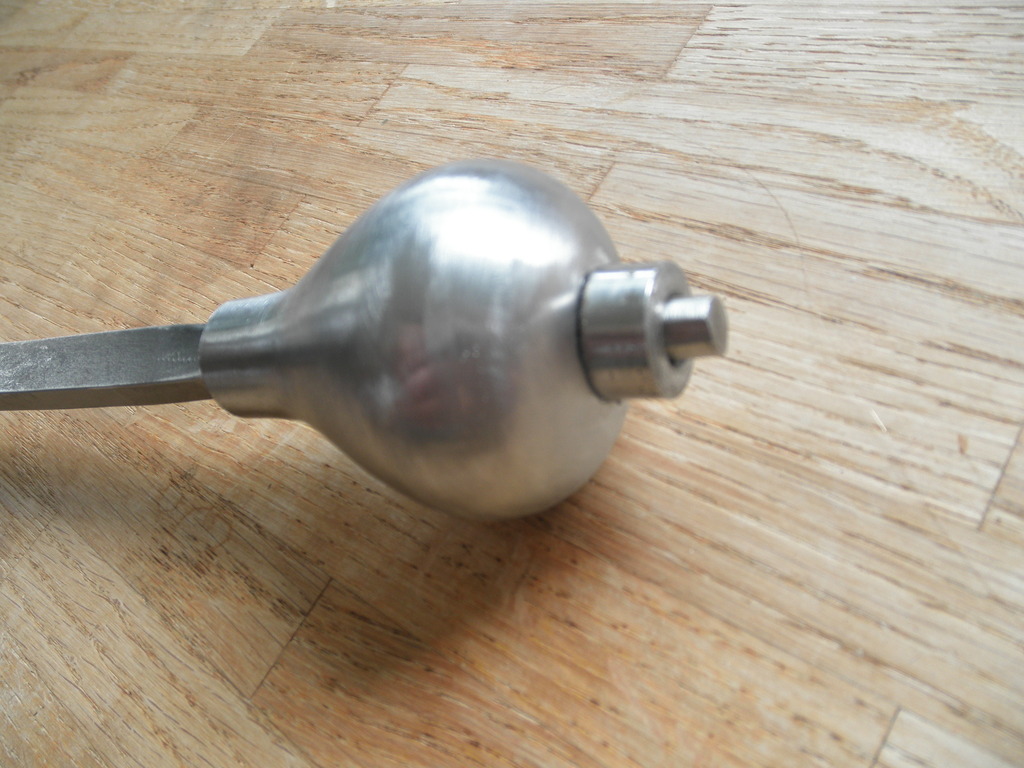
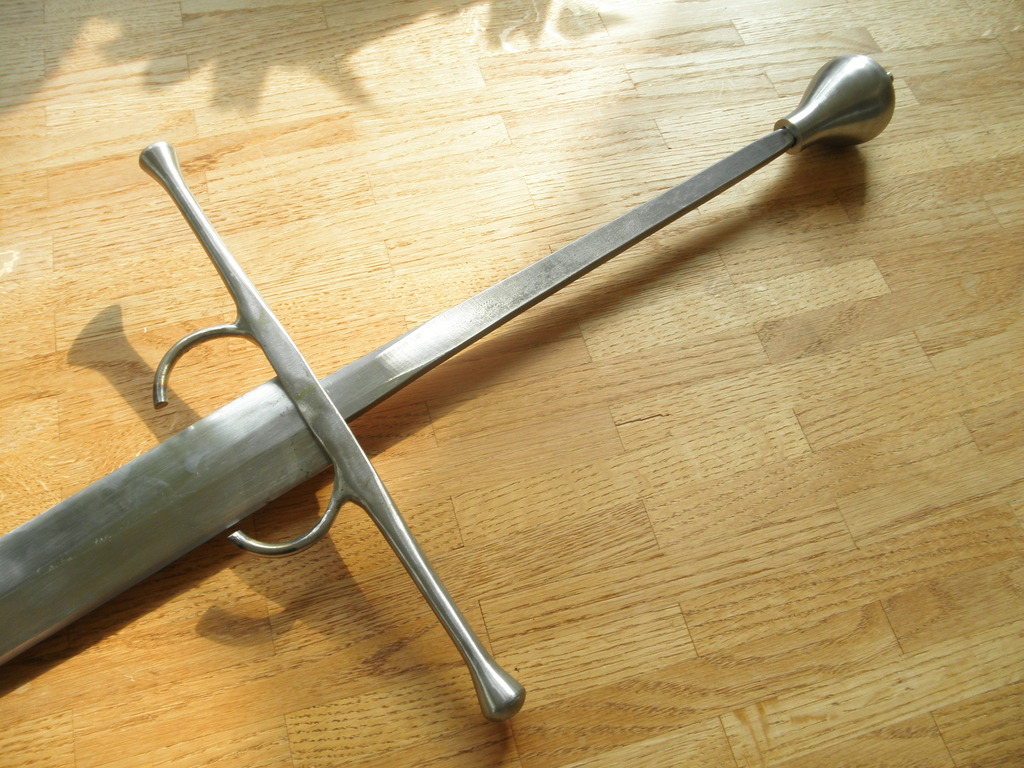
(the guard isn't yet mounted and only laying on the tang)
You can see how the round section that runs through the pommel is shaped directly from the tang itself (as it should be) and that the transition from round to rectangular is also inside the pommel. That is very important to ensure a durable construction. The fit of the pommel is such that it slips on easily 3/4 of the way but has to be hammered down the rest, wedging tightly in the process. Even without the following hot peen that pommel would not be coming off in use.
I also narrowed down the tang some more to loose some excess material. The 8mm thickness allows to go quite narrow. Really doing everything I can to keep the weight as low as possible...


(the guard isn't yet mounted and only laying on the tang)
All components of the guard have been welded together:
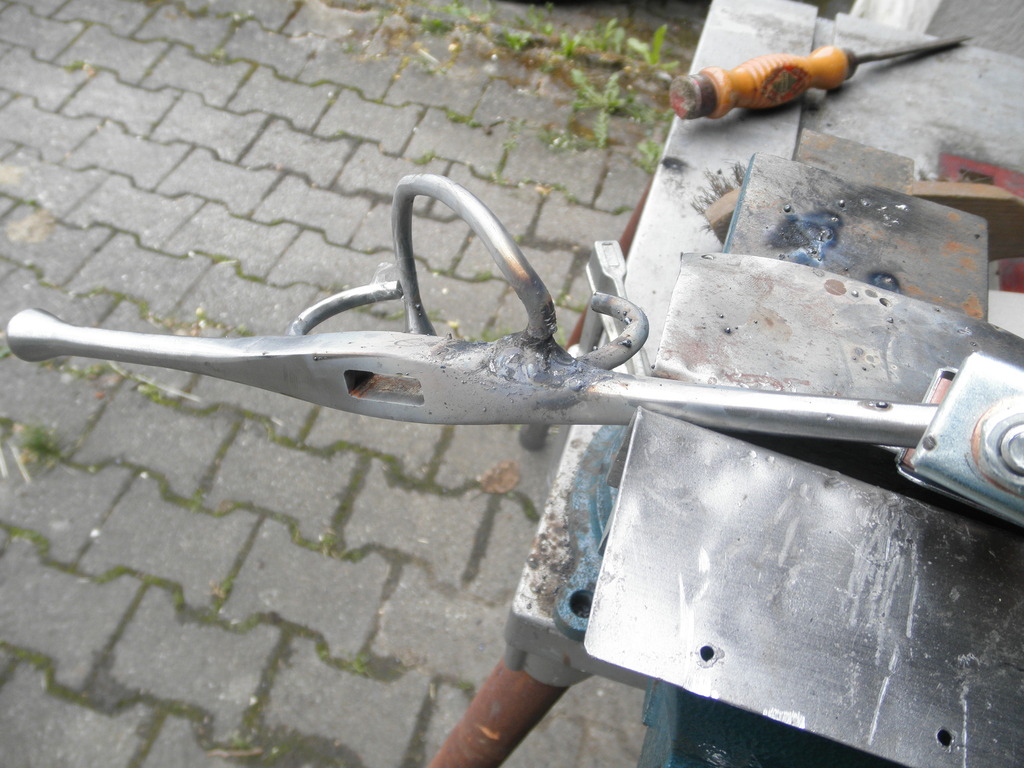
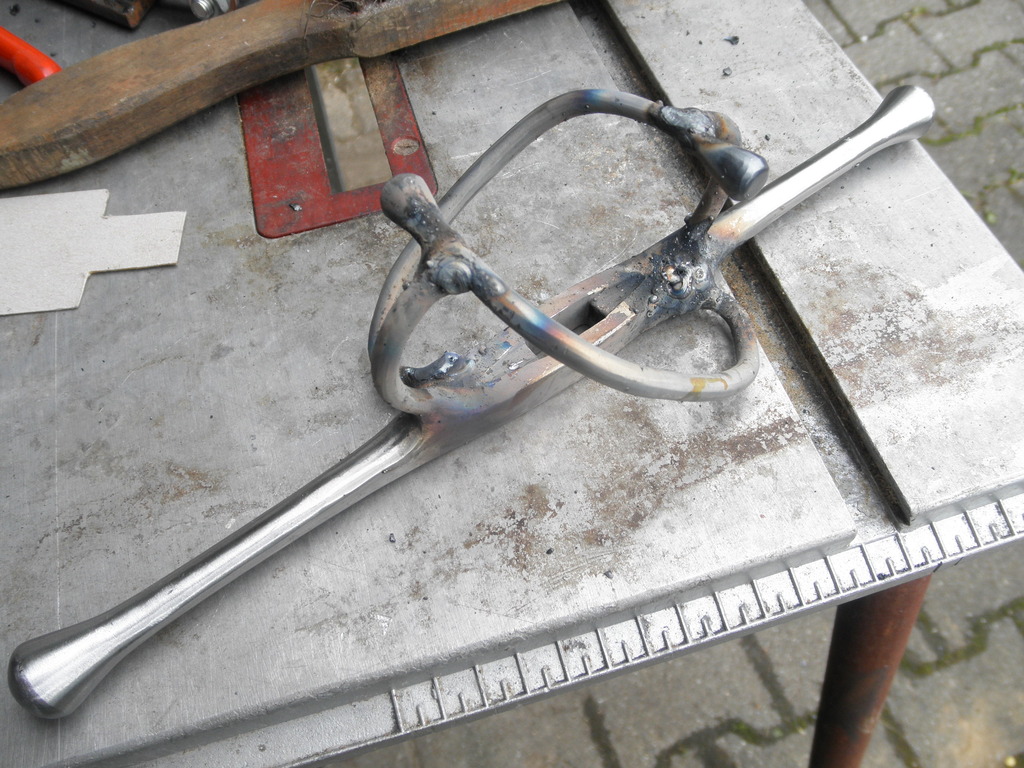
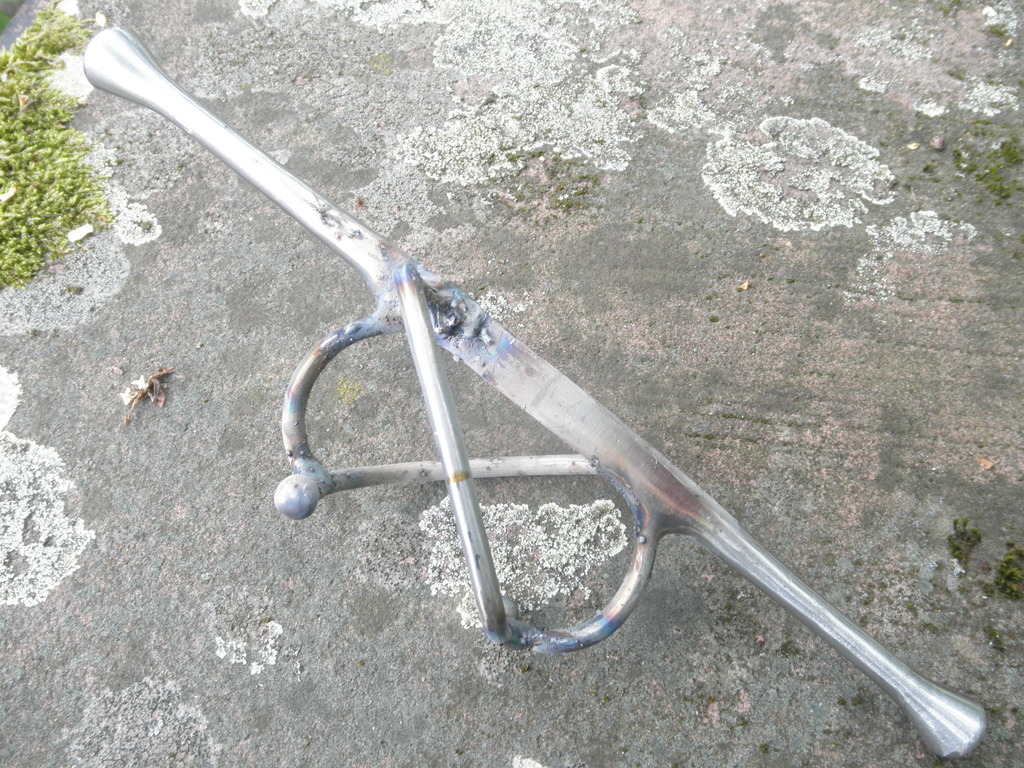
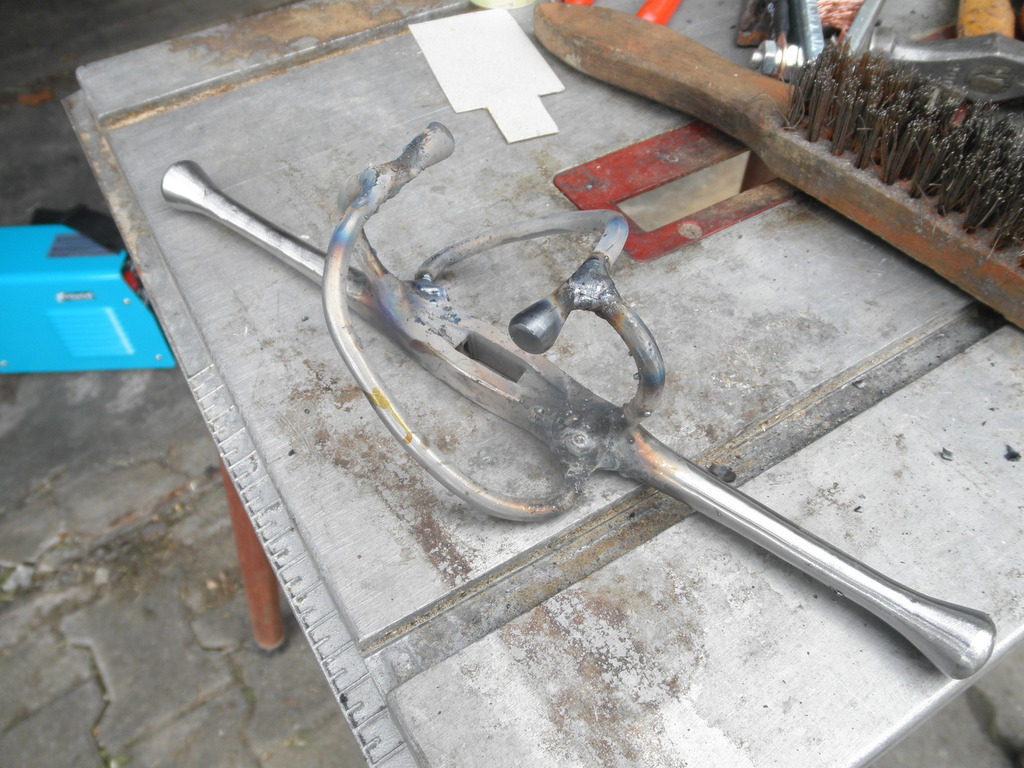
Arc welding isn't ideal here nor am I the best welder out there so I'll need to do a lot of clean up but as long as the welds hold and clean up fine, I'm satisfied. The finials on the side rings mirror the shape of the guard's ends (and the pommel). They were formed by welding a disk onto each end and grinding it to shape.


Arc welding isn't ideal here nor am I the best welder out there so I'll need to do a lot of clean up but as long as the welds hold and clean up fine, I'm satisfied. The finials on the side rings mirror the shape of the guard's ends (and the pommel). They were formed by welding a disk onto each end and grinding it to shape.
Nice to see you here, too.
Those are great blades, and the guards are both very nice, in their own ways. The complex guard is going to be killer. I am really impressed.
What sort of welding (or other method of attachment) did you use to build up the pieces of the second guard? Hope you don't mind my asking. I always have trouble deciding between modern wire welding, fairly modern oxy/acet welding, forge welding, or brazing when doing something like that. I like to know what others choose.
again, very interesting and impressive swords.
take care,
kc
Hi Kevin! I think you got mixed up a little, that's only one guard so far. I welded on the finger rings a while ago and today the rest. I can see how one could think it was two guards ;)
For the complex guard I used arc welding. It works and the result is good (after lots of clean up) but its not ideal, MIG or TIG would have been much better. I only have an arc welder though. Forge welding would have been awesome of course but it's not possible right now either.
For the complex guard I used arc welding. It works and the result is good (after lots of clean up) but its not ideal, MIG or TIG would have been much better. I only have an arc welder though. Forge welding would have been awesome of course but it's not possible right now either.
aha! yes, I thought there was one simple guard, and one complex guard. Two swords, so in my mind, two guards. I get it, now. That looks really clean for arc welding. Good job. I do mig a lot.
take care,
kc
take care,
kc
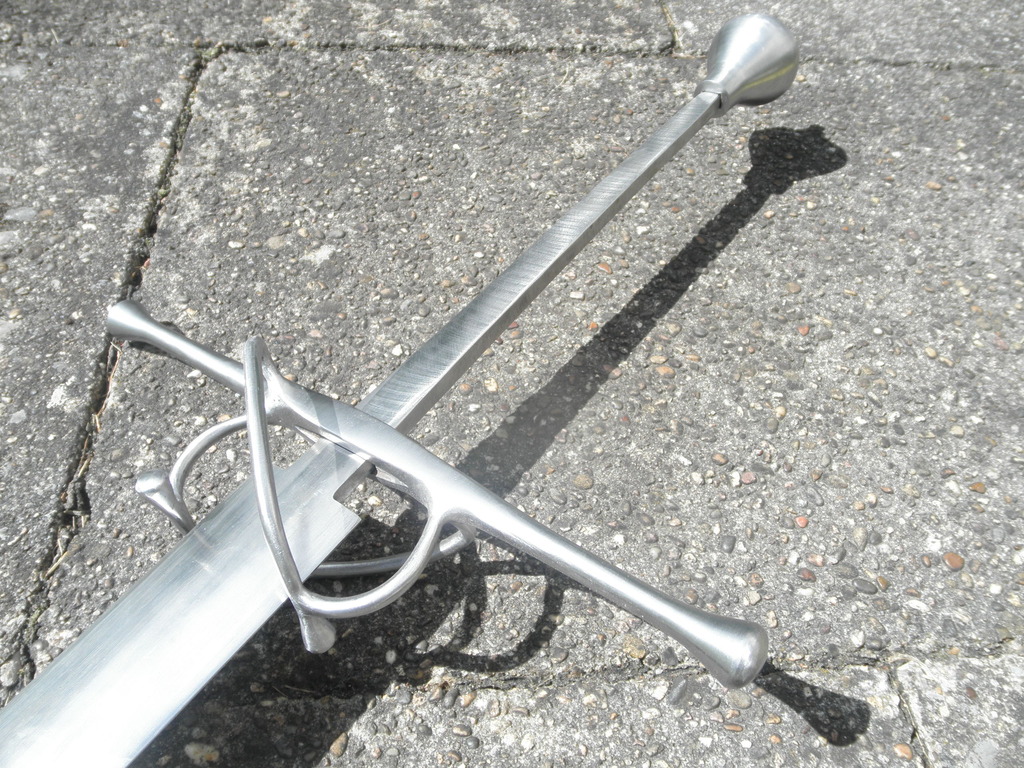
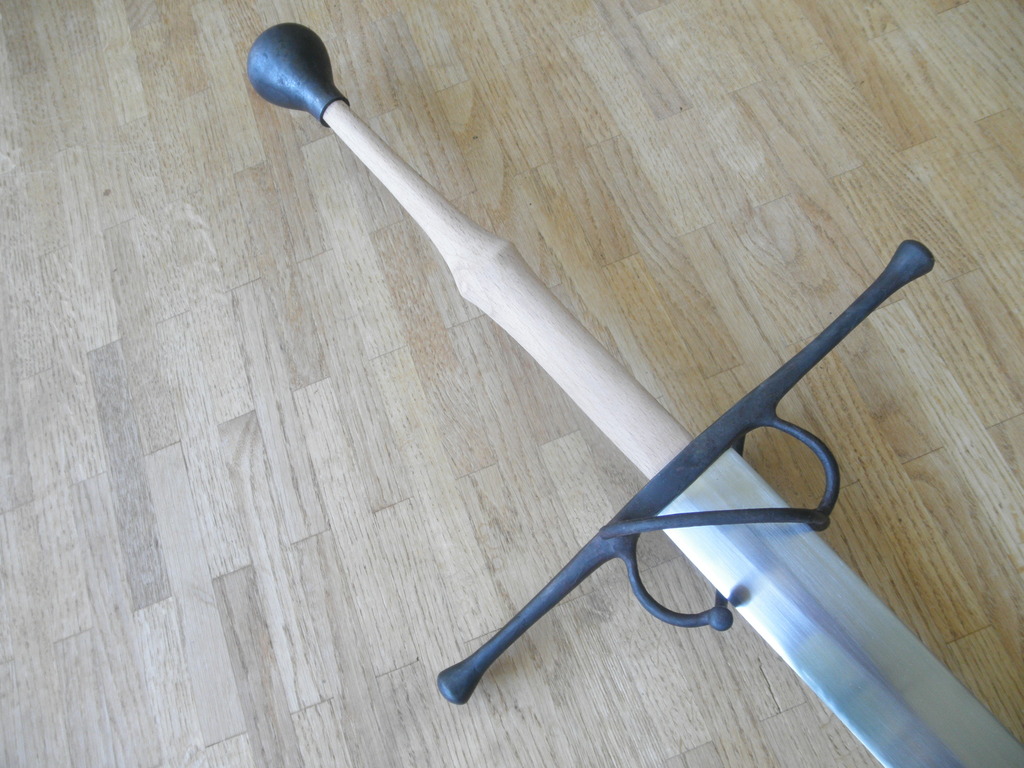
Guard is cleaned up but not yet polished. It will most likely be blackened as well.
Obviously it will be seated right at the blade's shoulders once mounted but the final 2cm it needs to be hammered down, wedging tightly in the process. That will be done once everything is polished and ready to be put together.
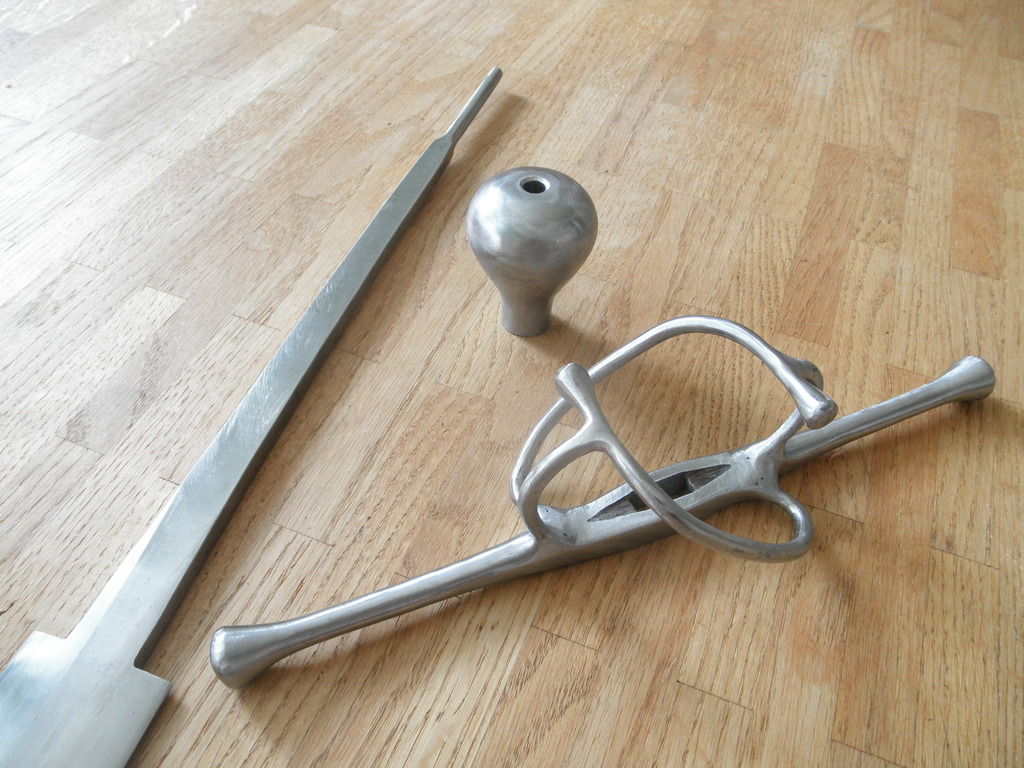
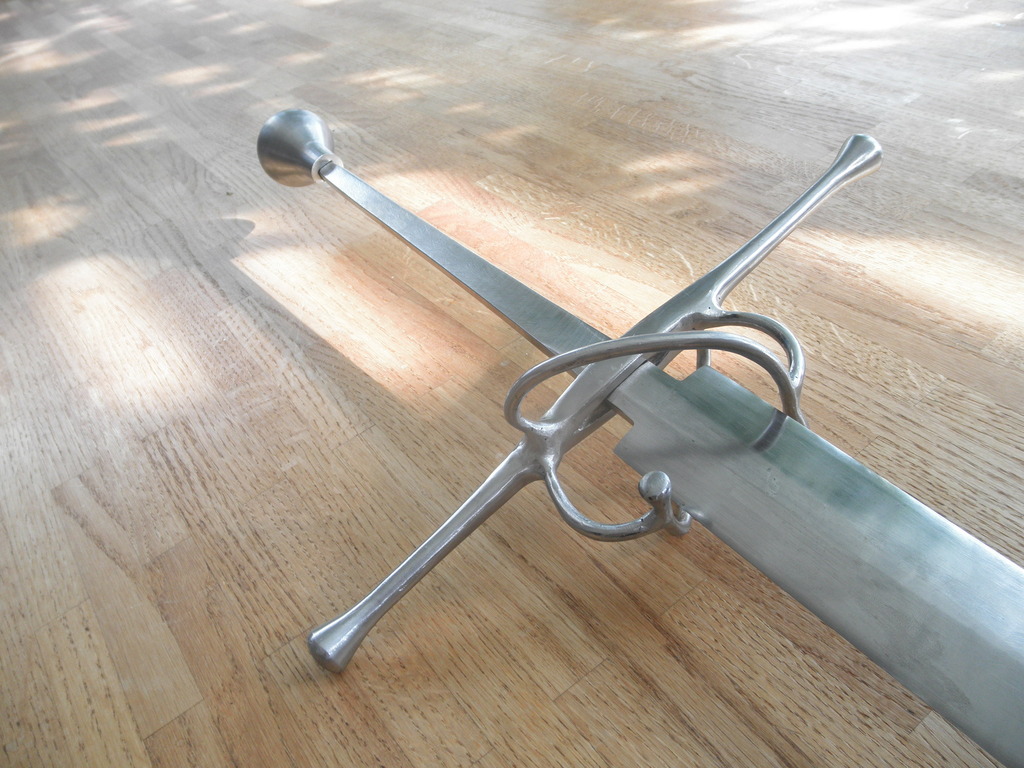
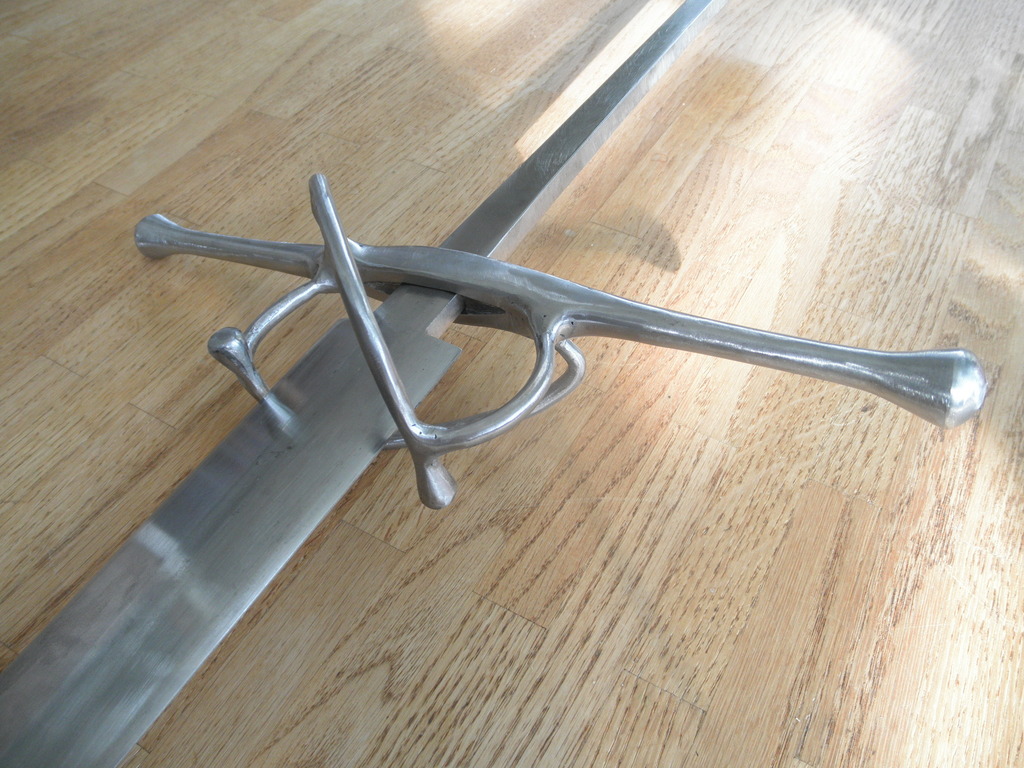
It's coming together...
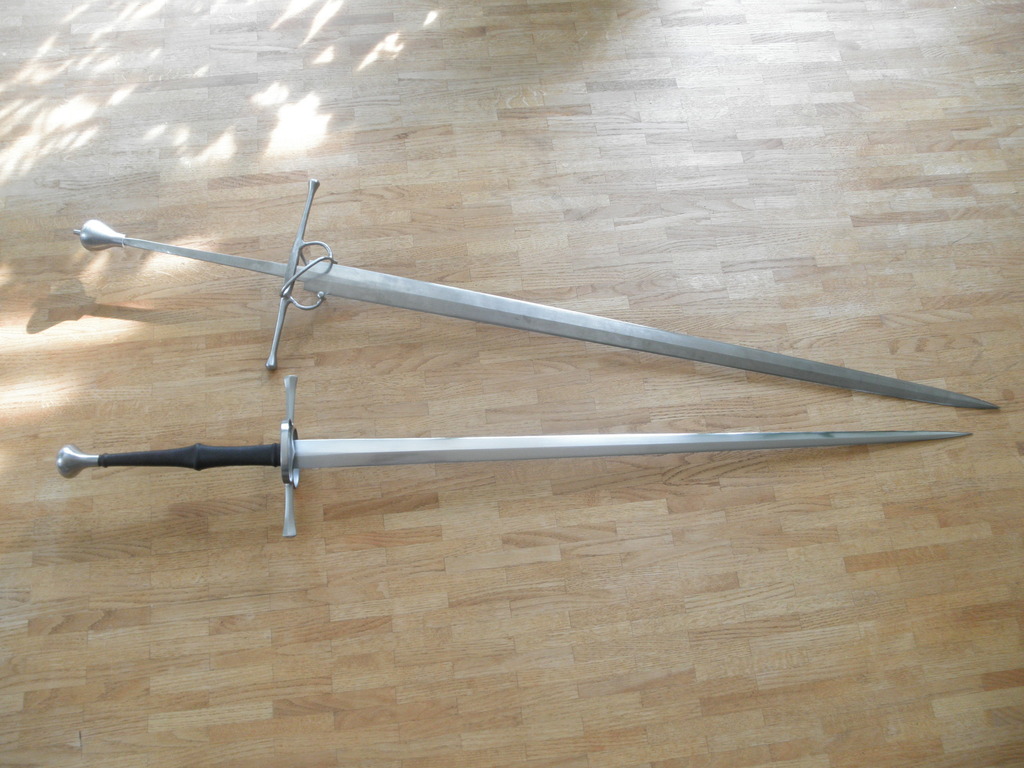
Obviously it will be seated right at the blade's shoulders once mounted but the final 2cm it needs to be hammered down, wedging tightly in the process. That will be done once everything is polished and ready to be put together.


It's coming together...

Hi Lukas
Very nice not my time line but love the time and workmanship that you have put in to the making the two swords
Wonderful workmanship
Very nice not my time line but love the time and workmanship that you have put in to the making the two swords
Wonderful workmanship
Thank you! I'm glad my efforts are appreciated also by those who are not so much into this type of sword. That tells me I'm doing something right ;)
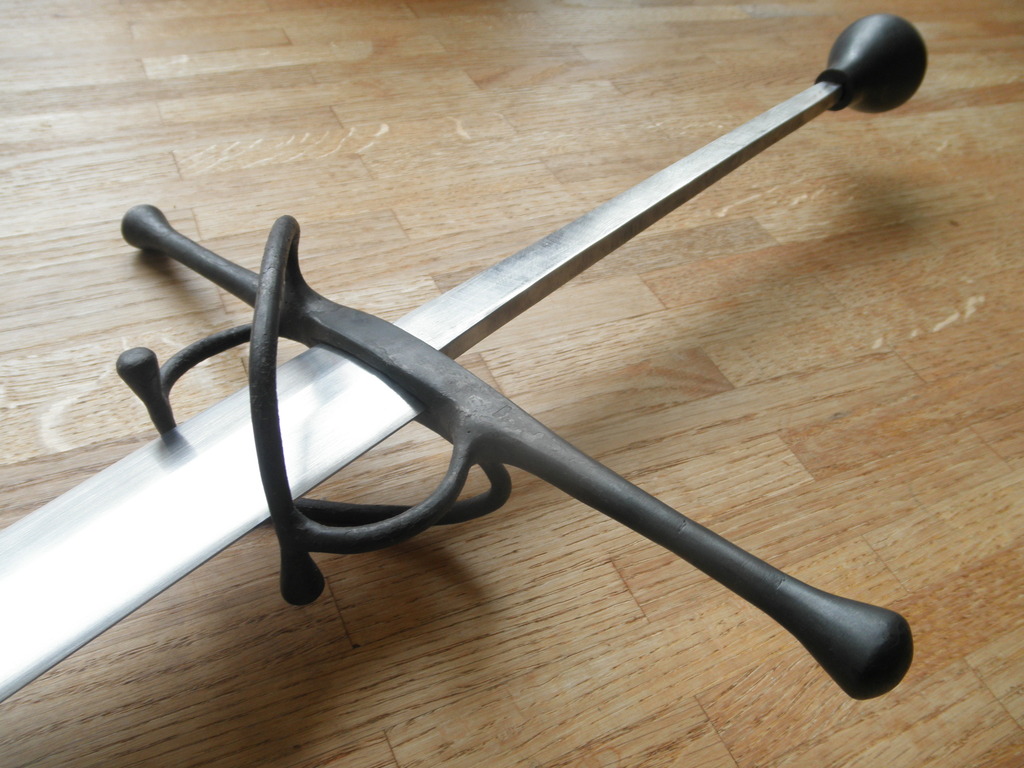
Blade is polished and the hilt components blackened. I love the gnarly look ;) Stands in nice contrast to the polished blade and gives the sword a lot of character I think.
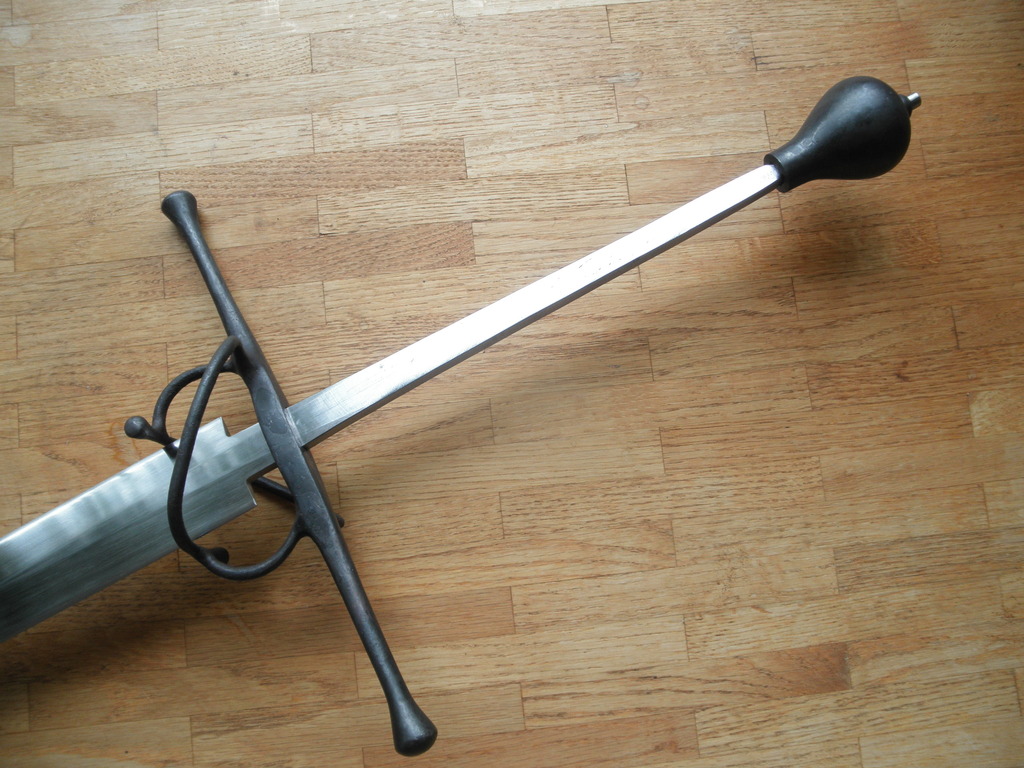
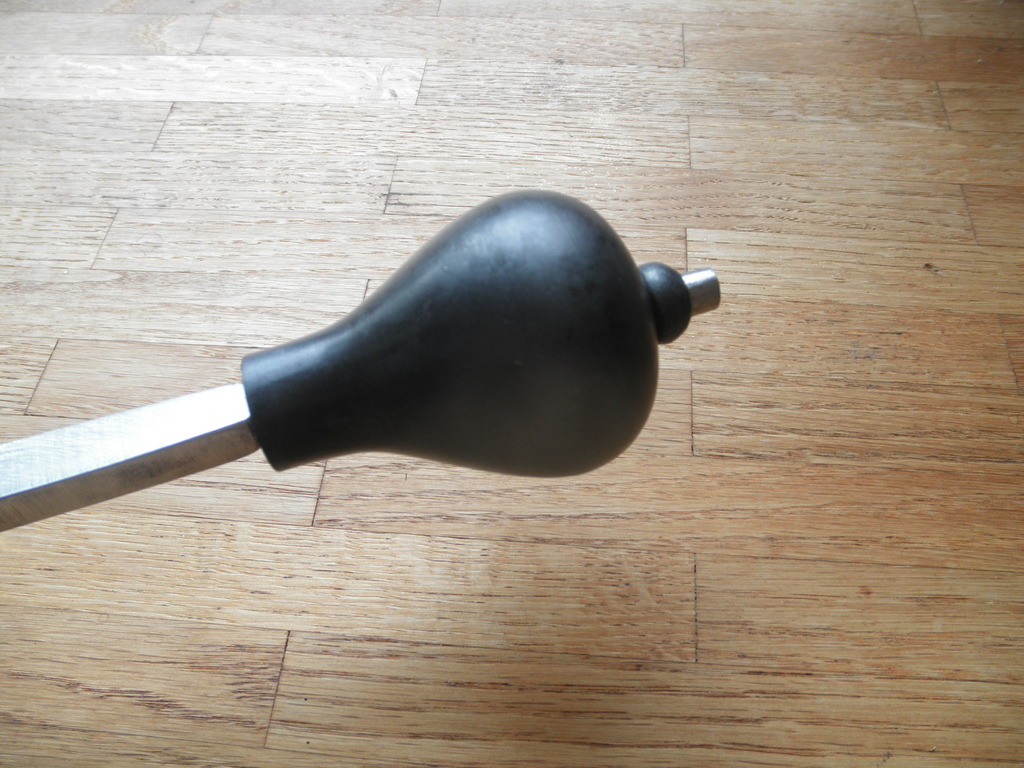
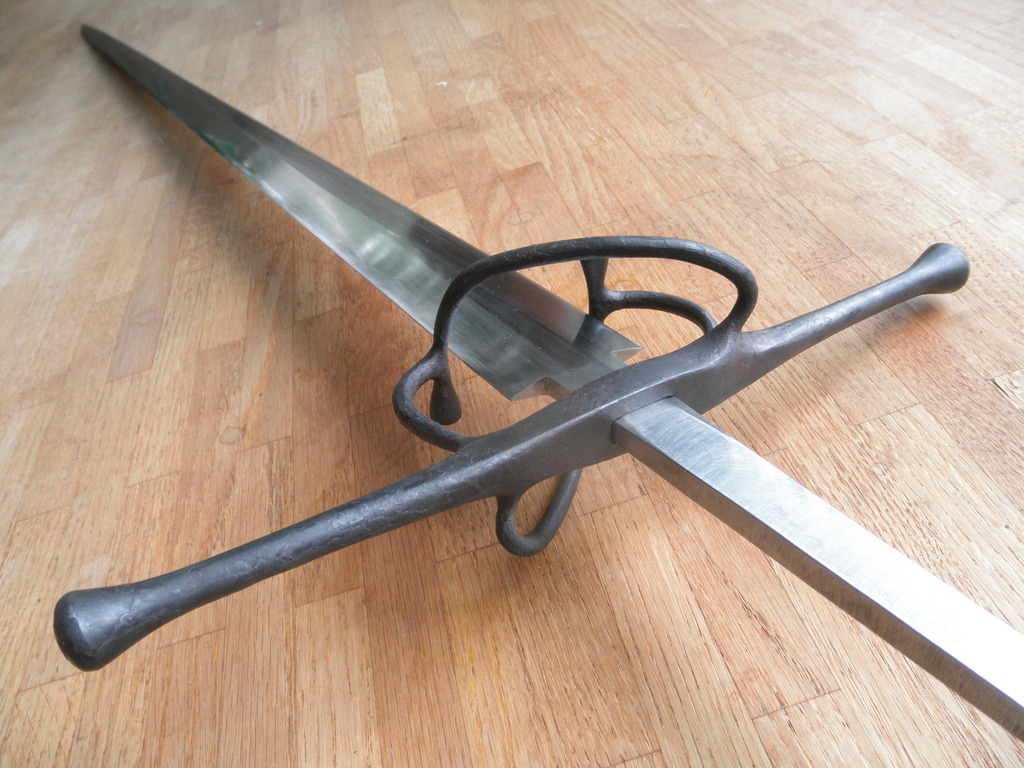
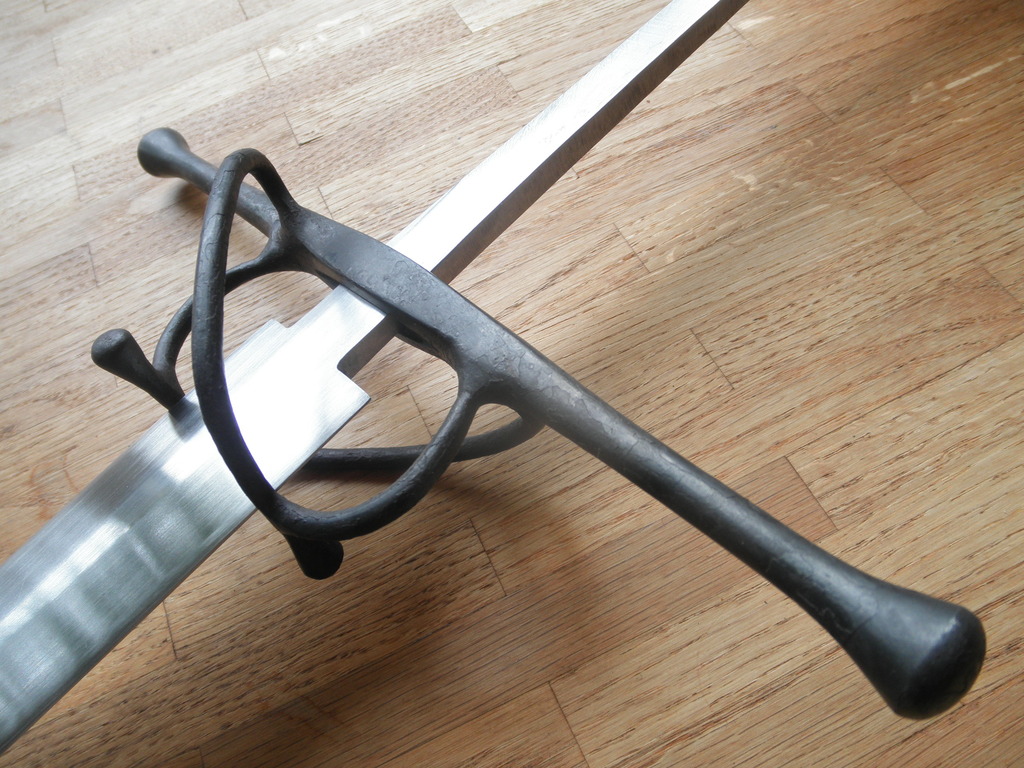
Blade is polished and the hilt components blackened. I love the gnarly look ;) Stands in nice contrast to the polished blade and gives the sword a lot of character I think.


nice look :) very interesting work. can`t wait for the final result.
I have been following for some time this topic and must say this is very usefull and enlightening to see every step of your work, Lukas. I look forward to watching the next stages - I am waiting for the grip :) ...and maybe scabbard :)
I have been following for some time this topic and must say this is very usefull and enlightening to see every step of your work, Lukas. I look forward to watching the next stages - I am waiting for the grip :) ...and maybe scabbard :)
Thanks. I always find it very interesting to see how other makers do things and I've learned a lot just by following similar WIP threads so I'm glad to hear you find this useful.
I won't be making a scabbard for these two swords but maybe someone else will at some point?
I won't be making a scabbard for these two swords but maybe someone else will at some point?
Page 2 of 4
You cannot post new topics in this forumYou cannot reply to topics in this forum
You cannot edit your posts in this forum
You cannot delete your posts in this forum
You cannot vote in polls in this forum
You cannot attach files in this forum
You can download files in this forum
All contents © Copyright 2003-2006 myArmoury.com — All rights reserved
Discussion forums powered by phpBB © The phpBB Group
Switch to the Full-featured Version of the forum
Discussion forums powered by phpBB © The phpBB Group
Switch to the Full-featured Version of the forum
