[ Linked Image ]
[ Download ]
[ Download ]
[ Download ]
| Greg Ballantyne wrote: |
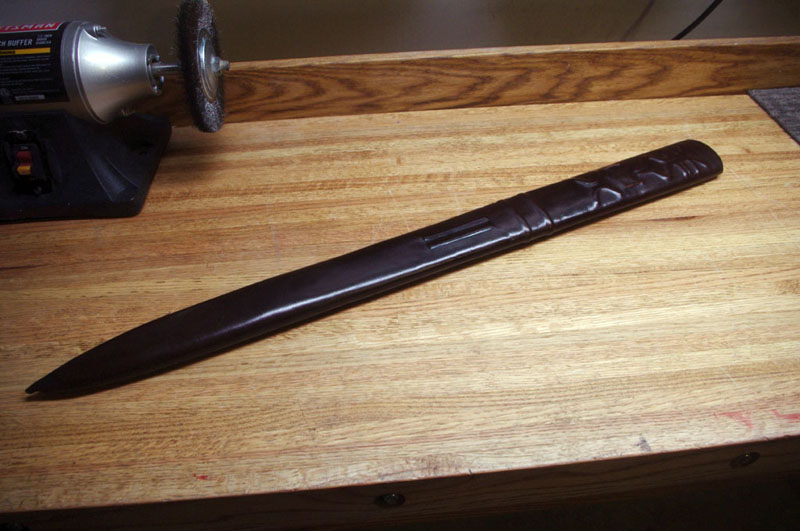
| Not sure the blade deserves the scabbard........ |
| Jeffrey Faulk wrote: |
| Rather historically inaccurate but you could try 'pop' rivets. It's either that or anneal some small brass nails, slide a flat piece of steel down the scabbard, and try to 'clench' the nails by hammering them against the steel to turn them around into the wood of the scabbard. |
| Harry Marinakis wrote: | ||
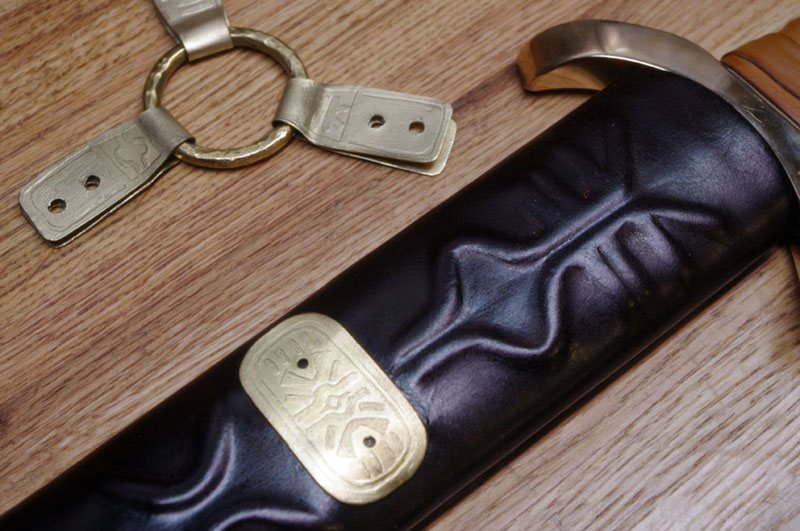
Here's what I did to rivet the upper fixing plate to the scabbard: 1. Carefully measured the thickness of the fixing plate, strap, leather cover and wood core wall = 7mm 2. Carefully drilled two rivet holes 6mm deep 3. Cut and sanded two rivets so that the shanks were 6mm long 4. Plastered the back of the fixing plate and the rivets holes with super epoxy and glued the damn stuff into place [ Linked Image ] |