English Rapier hilt commission
Here’s a rapier hilt I just put in the mail today. This was commissioned by a forumite in the UK to be mounted on a blade of his own. We looked at a number of rapiers from this period and settled on replicating a particular English antique from the early/mid 1600’s. I’ve included some pictures of the original I was working from…as you can see the engraving on the shell is of that period when the English were putting pictures of the king’s head of everything. We opted to go a different route and so I kept the basic structure of the original decoration but substituted a foliage theme.

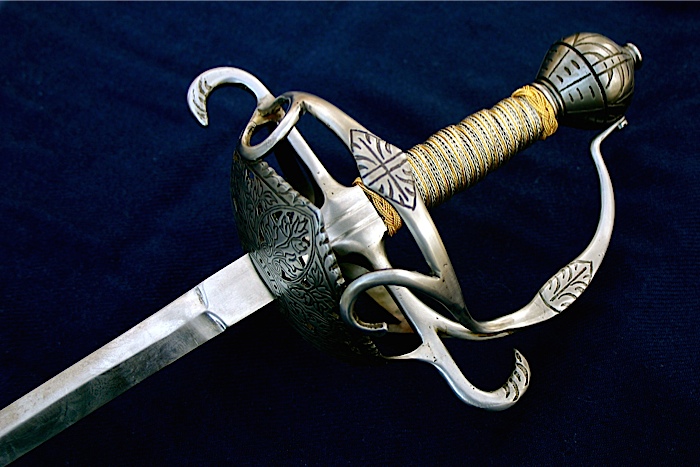
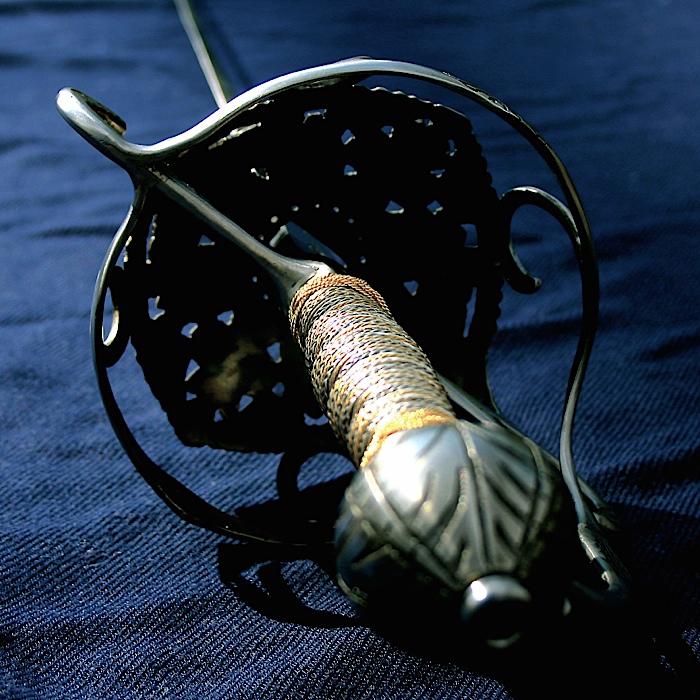
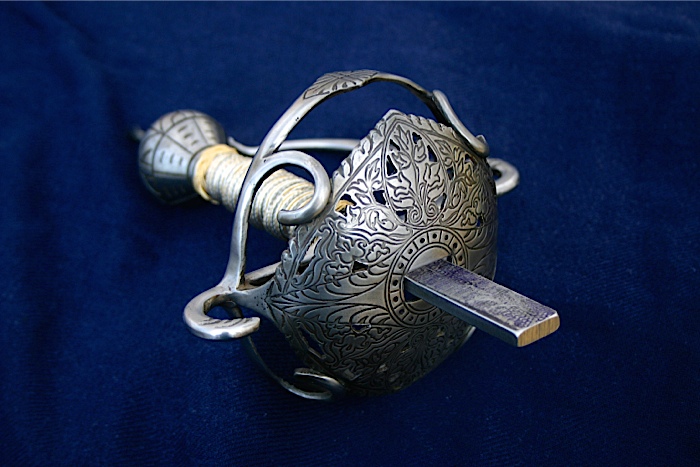
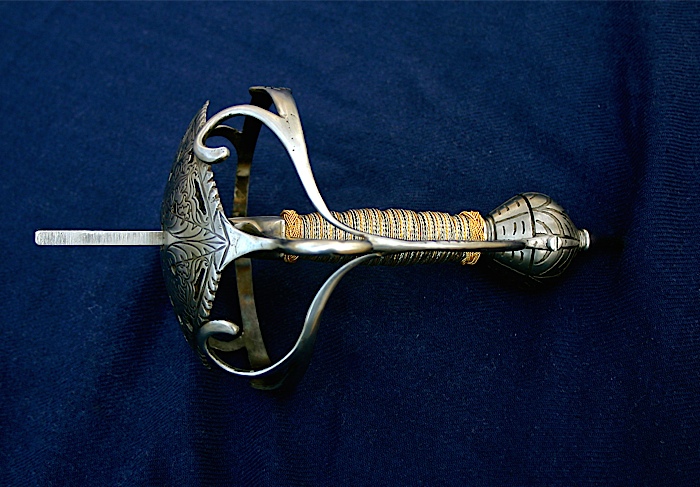
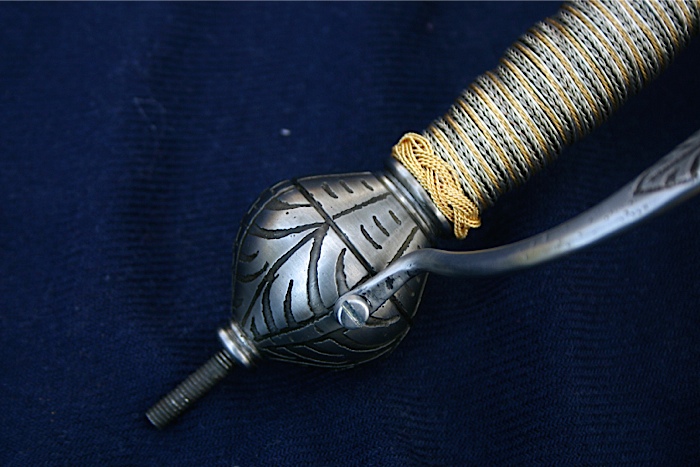
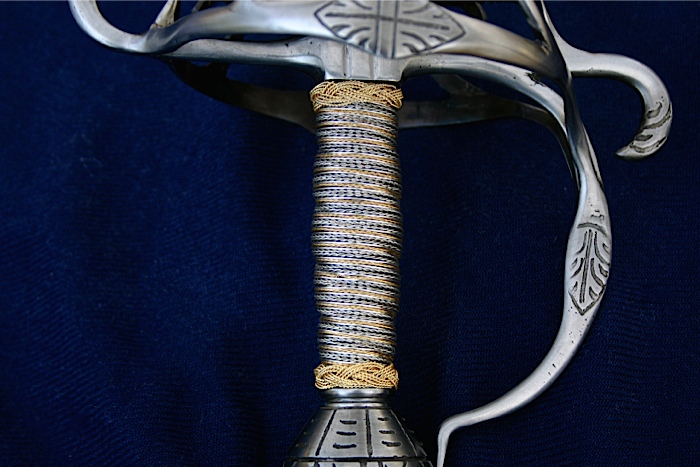
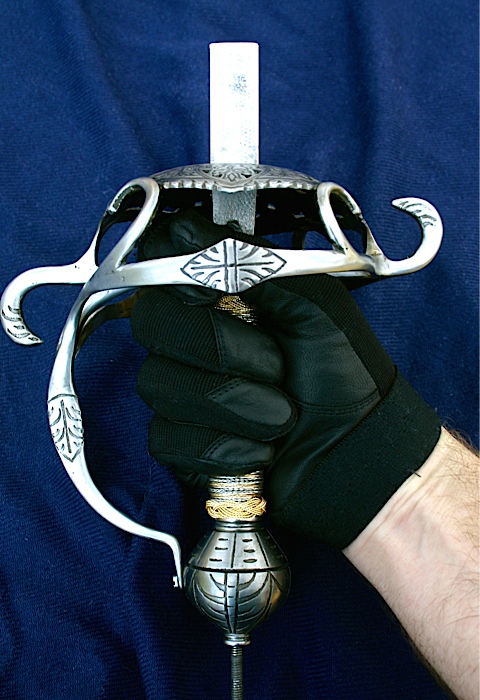
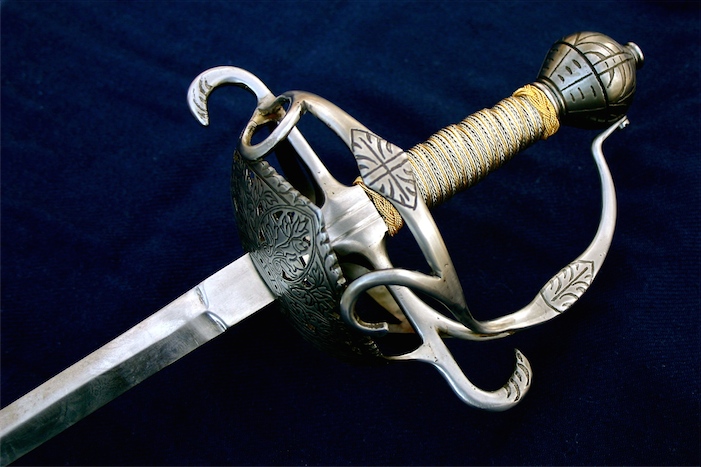
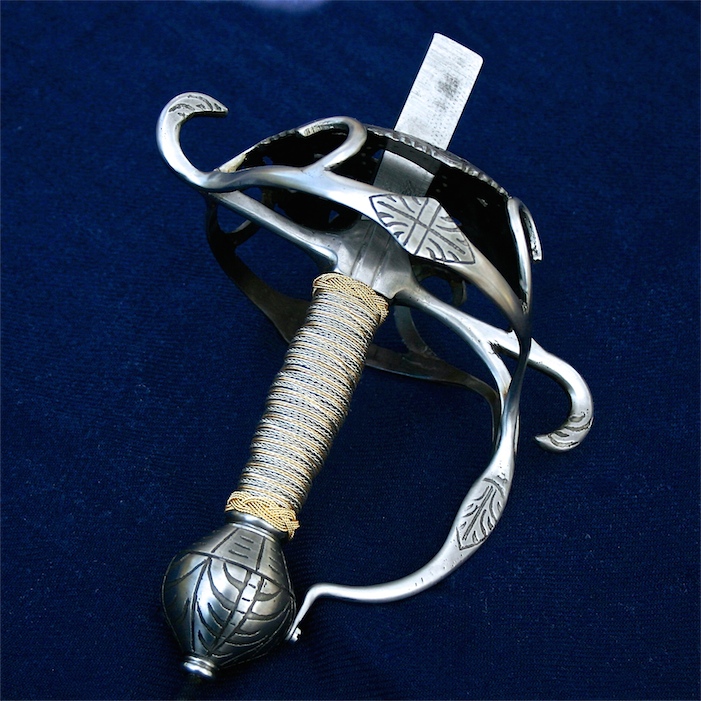
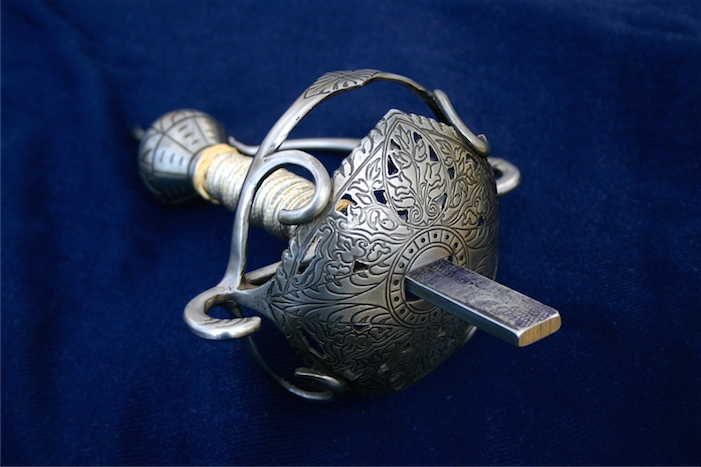
My decorative work is etched rather than engraved like the original, but I think it works fairly well to capture the effect of the original. The pommel is keyed to the tang and ready to be hot-peened in place. A sword like this can't really have a screw-on pommel anyhow, since the knucklebow screws to the pommel (so keeping things tight would be problematic). The grip is carved polycarbonate plastic, to add strength to the narrow parts of the carving and also to minimize weather-based changes in the grip which could affect tightness later on in the weapon’s life. I went with 4 passes on the turk’s head knots, which makes them fatter and more visually substantial.

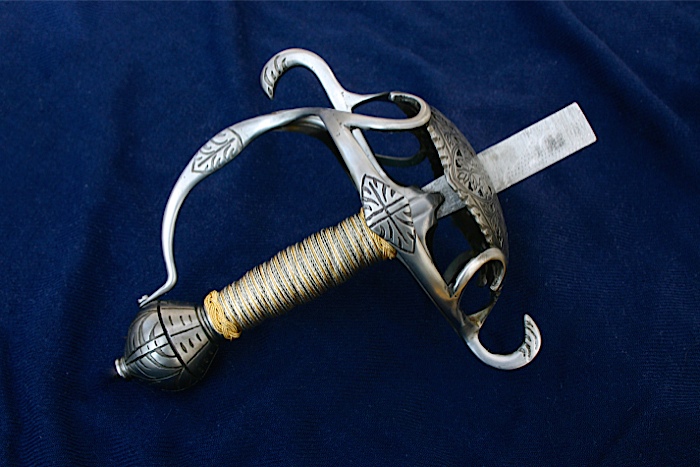
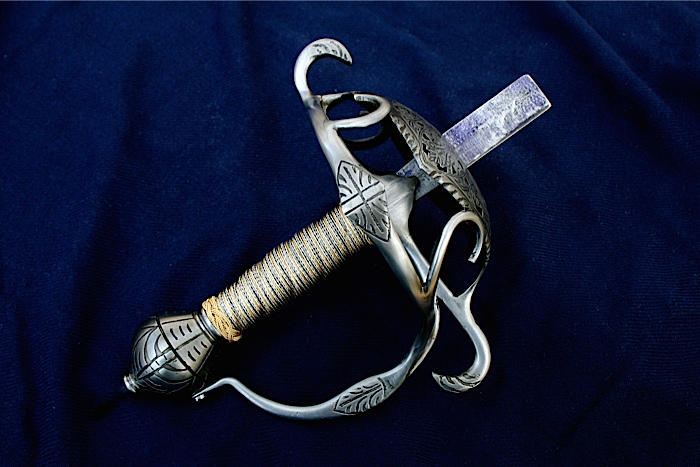
I tried it on a few different blades I had in the shop…none fit quite right without modifying the tangs, but my guess is this sword will balance quite close to the hilt on the average size blade. The pommel is good sized, and there is a lot of mass in the hilt (1.65 lbs total). Interestingly the grip is slightly longer than most rapiers i’ve looked carefully at. I scaled the images of the original, and while its likely there is lens distortion in the full length photos, the grip appears to be 3.5” long. Most rapier grips are only 3” long, and that extra half inch isn’t immaterial. However, the portion of the hilt above the arms (the shell part) is about a half inch shorter than most rapiers with pas d’ane, so the total length of the hilt is “normal” but the pivot point of the quillon block is further from the pommel. Anyhow, I followed those proportions carefully in my own version, so I look forward to hearing about how it handles once it is all mounted up.

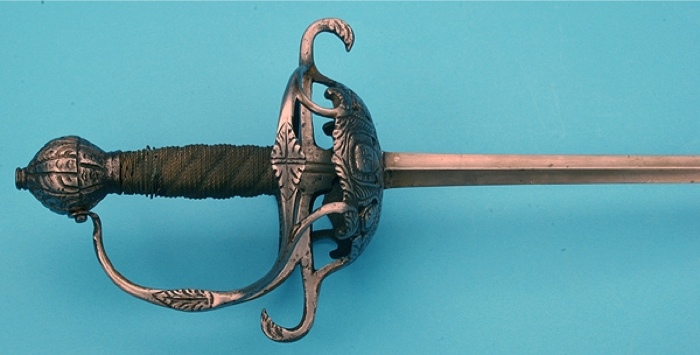
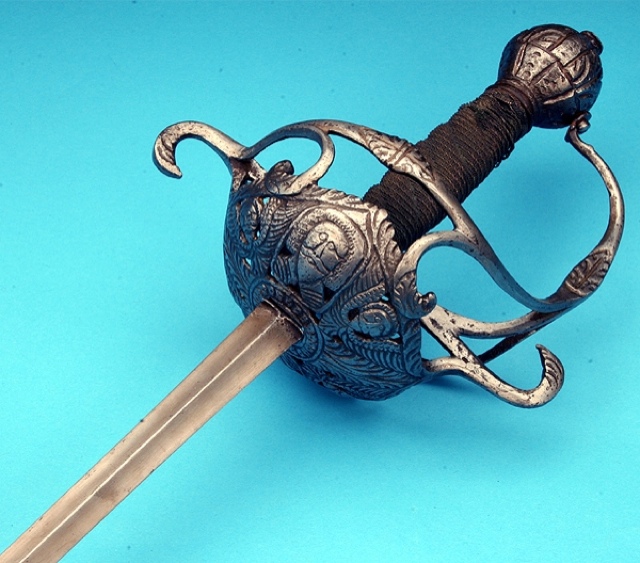
Here is the auction of the original this is based on if anyone is curious: http://antiqueswords.com/product-1992-A-Good-...ad-image-3


 Attachment: 140 KB
IMG_8957 - Version 2-resized.JPG


 Attachment: 219.67 KB
IMG_8968 - Version 3-resized.JPG


 Attachment: 132.38 KB
IMG_8986-resized.JPG


 Attachment: 166.13 KB
IMG_9000 - Version 2-resized.JPG


 Attachment: 130.85 KB
IMG_9006-resized.JPG


 Attachment: 143.6 KB
IMG_9009-resized.JPG


 Attachment: 135.1 KB
IMG_9014-resized.JPG


 Attachment: 138.55 KB
IMG_9016-resized.JPG


Last edited by Jesse Belsky on Mon 10 Mar, 2014 6:23 pm; edited 1 time in total
And some additional photos, including the original antique this was inspired by.


 Attachment: 235.55 KB
IMG_8975 - Version 2-resized-resized.JPG


 Attachment: 164.75 KB
IMG_9022 - Version 2-resized.JPG


 Attachment: 165.94 KB
IMG_9028-resized.JPG


 Attachment: 24.23 KB
products_1992_2_large-resized.jpg


 Attachment: 82.52 KB
products_1992_4_large-resized.jpg


 Attachment: 139 KB
products_1992_9_large-resized.jpg


 Attachment: 147.41 KB
products_1992_12_large-resized.jpg

That's beautiful work.

It's not a Mortuary sword, but it is definitely related to those hilts, with some similar features.

It was a good choice to go with the leafy/floral pattern, and ditch the goofy cavalier faces.
Hi Jesse.
Love that hilt as does my wife she said it is the only type of sword that she would like to own.
May be an hint ?
Well done Jesse,
Lovely job, good call on the floral too over the faces,
:cool:
HI Jesse, it´s really super-nice. I love that decoration. I´m a big fan of your rapiers...
May I ask one technical question? From your pictures I assume that the hilt parts are welded together (if so, your welds are nice and clean ), not hot-forged and cut from one piece of steel. Do you use electric welding? Thanks.
Thanks everyone. Jerry, it's my professional opinion that you should definitely buy her one!

Radovan, you are correct, my hilt elements are electrically welded, not hot-split and forged. I use a smallish MIG welder. I know a lot of people swear by Oxy-Acetylene, and there are times when I really wish I had a TIG welder, but a MIG is what I have so that's what I use :) It's also worth noting that Oxy and TIG welding require a lot more skill than MIG welding. MIG takes a lot more time to clean up, but it's pretty easy to use.

I took a lot of process photos as I made this, but none that show the welds before they got cleaned up...
I've been disappointed by the image quality of the resized jpegs i've been posting here recently. I finally figured out the image resizing app I was using is just not very good. I got a new one, and the difference is pretty impressive. I won't repost all the these photos, but here are a couple. For anyone who is interested, these were done using ResizeX from the Mac app store. Previous ones were done using "Quick Resizer".


 Attachment: 145.17 KB
IMG_8957 - Version 2.JPG


 Attachment: 234.64 KB
IMG_8975 - Version 2.JPG


 Attachment: 130.68 KB
IMG_8986.JPG


 Attachment: 218.5 KB
IMG_8968 - Version 3.JPG

This is really excellent work Jesse. There are not many tackling complex period hilts like these so this is most welcome.
Loved your previous hilts too, and looking forward for more.

J

Page 1 of 1

Jump to:  
You cannot post new topics in this forum
You cannot reply to topics in this forum
You cannot edit your posts in this forum
You cannot delete your posts in this forum
You cannot vote in polls in this forum
You cannot attach files in this forum
You can download files in this forum


All contents © Copyright 2003-2006 myArmoury.com — All rights reserved
Discussion forums powered by phpBB © The phpBB Group
Switch to the Full-featured Version of the forum