[ Linked Image ] [ Linked Image ] [ Linked Image ] [ Linked Image ] [ Linked Image ] [ Linked Image ] [ Linked Image ] [ Linked Image ] [ Linked Image ] [ Linked Image ]
Thanks, Kessler! That's a fantastic contribution!
does anyone know something about any iron reinforcements in the pavises? if it's clean soft wood construction it's easy to crack it(especially when layers are vertical). maybe there was any leather reinforcement on the rim to protect planks for split after have slash?
what is thickness of the planks?
what is thickness of the planks?
| Bjorn Hagstrom wrote: | ||
That is not a bad theory at all. I suppose in a siege situation where the enemy has very high ground it would be a good idea to add a protective layer on top. Another theory, depending on the height of the pavise, could the beak be there to be a support to aim a crossbow? |
I like both of these theories and I think they both could be the correct answer for specific circumstances. I figured I'd throw in a third from my perspective: I've fought with center grip shields, including a round-guttered hand pavise in an SCA setting. Sometimes a strong horizontal shot ("flat snap") aimed at my head can push past the top edge of my center grip shield. The shield just rotates backwards a bit and the sword (in this case a rattan stick) slides past it, often with enough force to get a "kill."
The projecting beak would catch pretty much any horizontal shot falling under it and even if the pavise spun back a great deal the shot would not slide past. I would love to try building in such a beak for SCA-style fighting. THe historical reality however, is that I'm betting real edged weapons would just bite into the wood of the pavise and stick rather than pushing through, so my theoretical benefit is probably more just a coincidence. Still, in some circumstances I could see it being a significant benefit, so maybe it's a theory worth presenting.
Note: I am only referring to the hand pavises, since large pavises would (again, I assume) not deal directly with opposing swords, but rather opposing missiles and at closest maybe pikes. I notice, of course, that very few of the smaller hand pavises have that beak, but in smaller pavises the rotation problem is not so pronounced (distance from handle decreases -> leverage increases) , so maybe this theory would only apply to the larger hand pavises.
Thanks for the great posts guys!
I am looking for a books , articles about pavises , the best catalogues.
I know only Polish articles and Denkstein's books. I thank for every help.
Yours faithfully
I know only Polish articles and Denkstein's books. I thank for every help.
Yours faithfully
Dear all,
first I would like to thank you for this wonderful collection of pavises and information. This thread has been highly educational to me! I'm currently building my own pavise, with the aim of being quite close to historical accuracy. The wooden corpus is already finished (see attached image), and now I'm looking into the issue of covering it with canvas.
In my search for information I haven't yet found a detailed account of the covering technique. Is it supposed to be just a single layer of linen canvas, or more? Also, I'm wondering if a single sheet of canvas was used or multiple adjoining strips. I guess at least the "beak" must be covered separately to avoid wrinkles in the surface.
The process of covering is also unclear to me. Is it neccessary to tightly stretch the fabric over the surface (for stability), or would it suffice to loosely cover it? In the former case, I would need to somehow fix the canvas to the wood, maybe with small nails, to keep it tightly strung while gluing. It would be interesting to see if historical evidence supports either technique.
It would be great if some of you who built a replica pavise could share your experiences. I'll also make a web page documenting the building process and post the link here later.
 Attachment: 149 KB
[ Download ]
first I would like to thank you for this wonderful collection of pavises and information. This thread has been highly educational to me! I'm currently building my own pavise, with the aim of being quite close to historical accuracy. The wooden corpus is already finished (see attached image), and now I'm looking into the issue of covering it with canvas.
In my search for information I haven't yet found a detailed account of the covering technique. Is it supposed to be just a single layer of linen canvas, or more? Also, I'm wondering if a single sheet of canvas was used or multiple adjoining strips. I guess at least the "beak" must be covered separately to avoid wrinkles in the surface.
The process of covering is also unclear to me. Is it neccessary to tightly stretch the fabric over the surface (for stability), or would it suffice to loosely cover it? In the former case, I would need to somehow fix the canvas to the wood, maybe with small nails, to keep it tightly strung while gluing. It would be interesting to see if historical evidence supports either technique.
It would be great if some of you who built a replica pavise could share your experiences. I'll also make a web page documenting the building process and post the link here later.
[ Download ]
Hello Karsten!
Me and a friend made two simple pavises for our cannon crew last spring. They are about 5' tall and very simple with a flat surface. Not as tricky to cover as yours but I hope I can share some valuable information.
We used hideglue which we melted in an ordinary kitchen pot mixed with water. If you paint a layer on teh wood before you put the canvas on it's stickier but dries quite fast. We tried that method but also to water the gluemix down a bit and applying the glu/watermix on top of the canvas (which was now lying on the wood) and found this to be easier. I htink it might be easiest if the cloth is a bit damp. Use lots and lots of the glue so it soaks through the cloth and into the wood. Done outside in the sunshine it dried really fast for us. The canvas was not folded around the edges on this first layer and we cut the excess off after it had dried. We then applied a second layer of cloth with the same method and this time we folded the cloth and nailed them down along the sides after trimming the edges a bit.
I put up some pictures on the web for you all if you're interested. You can find them HERE.
And thanks for the pictures Kessler!
edit* Just added more pictures of the painting of the pavises.
Karsten,
That is very nice work and exactly what I aspire to make (or buy) this year. I look forward to seeing your web page about the construction.
Regards
John Waller
That is very nice work and exactly what I aspire to make (or buy) this year. I look forward to seeing your web page about the construction.
Regards
John Waller
Dear all,
in case you are curious - we have set up a web page detailing the construction of our pavise. You can view it here.
I still haven't got around to do the canvas covering - but I did buy gesso. We're going to use modern, acrylic gesso and colors, because we don't want to worry about the waterproof-ness of the historic materials... nor about the lead-based whitening agent (and other toxic stuff) of the old painting paraphenalia.
| Karsten Rohweder wrote: |
| Dear all,
in case you are curious - we have set up a web page detailing the construction of our pavise. You can view it here. I still haven't got around to do the canvas covering - but I did buy gesso. We're going to use modern, acrylic gesso and colors, because we don't want to worry about the waterproof-ness of the historic materials... nor about the lead-based whitening agent (and other toxic stuff) of the old painting paraphenalia. |
I'm making one myself at the moment
Plywood construction (I don't trust my carpentry with "real" timber yet)
Canvas covering - which is waterproof in itself
Acrylic Gesso
but I have used authentic tempera paints - the black pigment is ash, with red and yellow ochre. Chosen along the lines of cheapness! I thought blue from lapis lazuli would be a bit decadent.
Not all authentic pigments contained lead - vermillion yes, but you can get appropriate modern substitutes.
I may finish it in shellac
I wish it could look as good as this...
http://www.fuscher.com.pl/awroclaw.htm
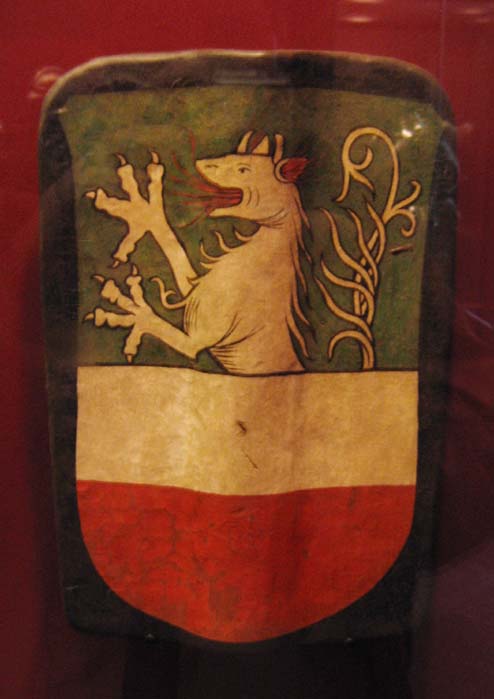
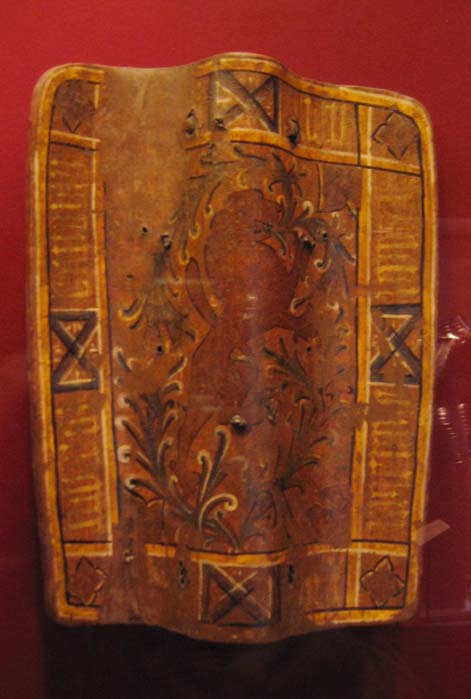
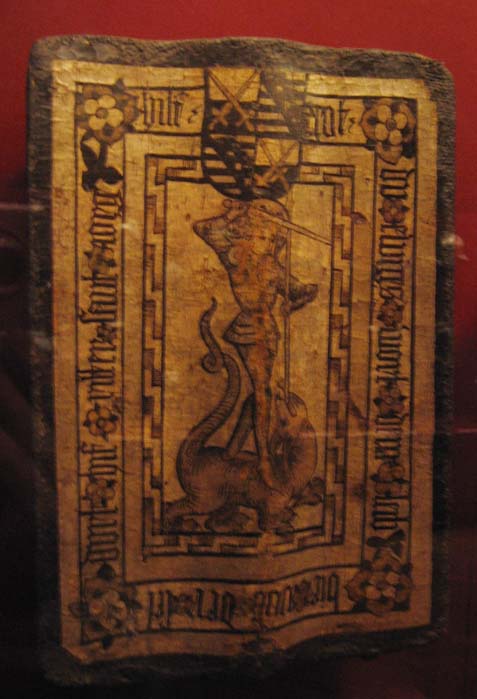
Here are three hand pavises from the Met, one of which I posted a different pic of above.
Attachment: 38.61 KB
Attachment: 42.93 KB
Attachment: 51.45 KB
Hello everybody.
Here are two pavises from Museum Lauriacum, Enns, Austria ( http://www.museum-lauriacum.at/ ). Unfortunately without accompanying informations (only dated about 1450):
http://img5.rajce.idnes.cz/d0505/2/2719/27193...9_394_.JPG
http://img5.rajce.idnes.cz/d0505/2/2719/27193...9_396_.JPG
http://img5.rajce.idnes.cz/d0505/2/2719/27193...9_397_.JPG
I have a problem with grip in pavises. What leather was he made of? I heard about bull's penis ( :eek: ), but I need the confirmation.
Have Lurked here for a while, but now i decided to post some.
I'm currently building a pavise, but have run into a problem. What to paint it with:
A: Egg tempera. Classic and works well on gesso but from what i understand waterproof so it would probably fall of if i carry the pavise around in wet weather.
B: Oil paints, Also works well on gesso but i don't know how historical accurate it is.
So should i go for A, and try to find some kind of period early 15th century varnish? Or B?
After some thinking i have decided to go for Oil and then cover it with wax to make it the shield more water proof.
Page 6 of 9
You cannot post new topics in this forumYou cannot reply to topics in this forum
You cannot edit your posts in this forum
You cannot delete your posts in this forum
You cannot vote in polls in this forum
You cannot attach files in this forum
You can download files in this forum
All contents © Copyright 2003-2006 myArmoury.com — All rights reserved
Discussion forums powered by phpBB © The phpBB Group
Switch to the Full-featured Version of the forum
Discussion forums powered by phpBB © The phpBB Group
Switch to the Full-featured Version of the forum