Zombie Slayer grip upgrade.
I liked the Zombie Slayer as purchased but the handle felt too narrow, rectangular with sharp corners in the grip and I also wanted to make an exotic wood grip for it, which I call an " upgrade ", at least for me.

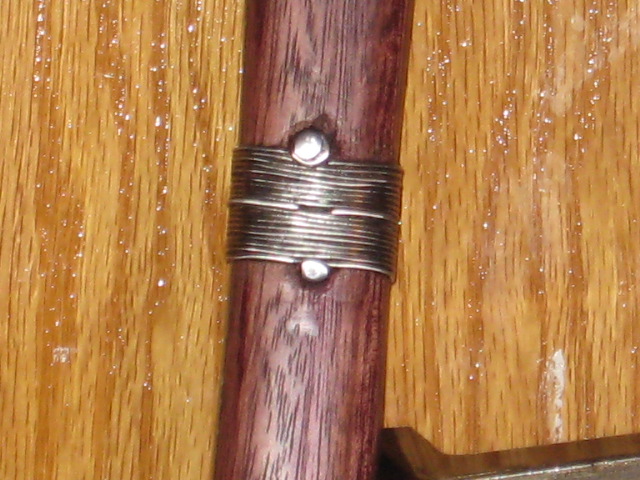
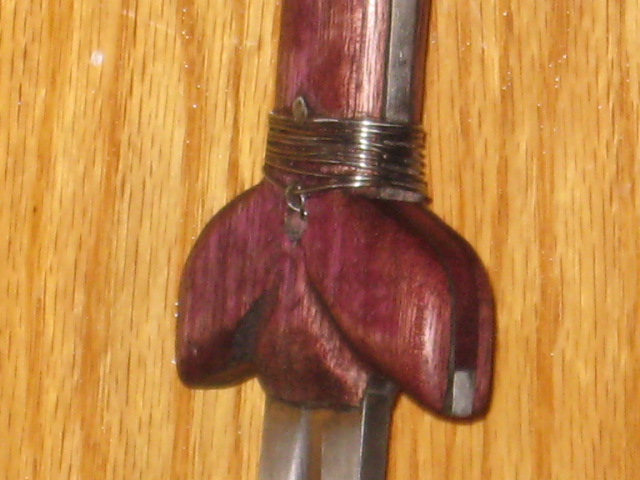
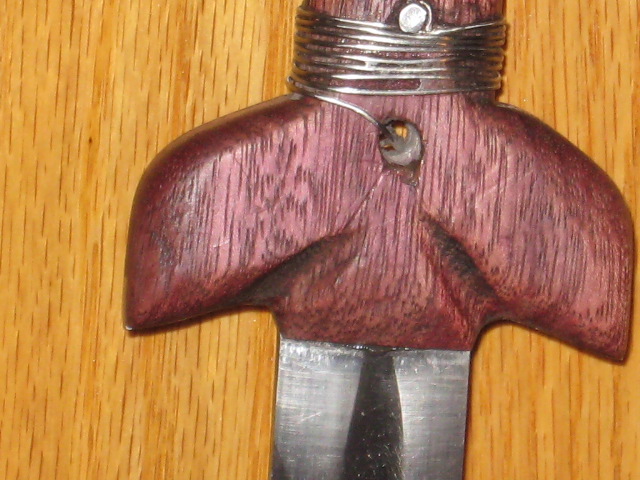
Used Jatoba for the scales and used some stainless steel wire wrap at the ends and at the middle.

This being a first attempt at using a wire wrap, even if only for short sections of the handle, I found it difficult to get it really neat and the very stiff wire didn't make it any easier for me.

On the plus side, a certain crude and rude improvised look is what I wanted to fit with the concept of a Zombie Slayer sword: The back story I have in mind is that after years of fighting and surviving Zombie attacks the grip needed replacement and the work was dome with found materials while hiding in some basement refuge during a long cold Winter.

Maybe old but still usable two part epoxy, stainless steel wire and the wood salvaged from a hardware store also selling exotic woods before the Zombie Apocalypse. ;) :lol:


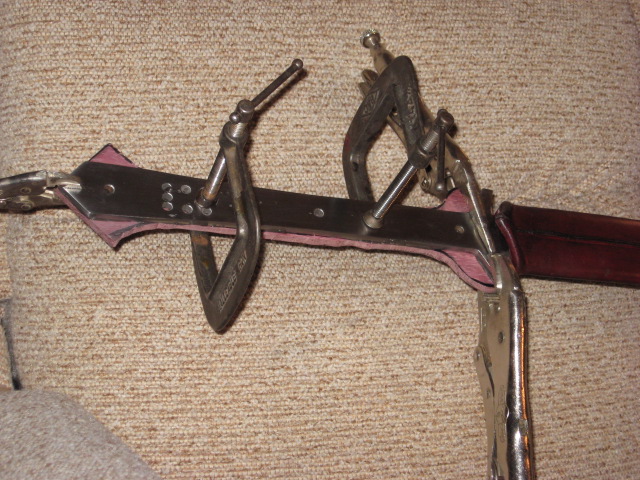
After removing the original leather scales here is an explanation of my assembly process below:

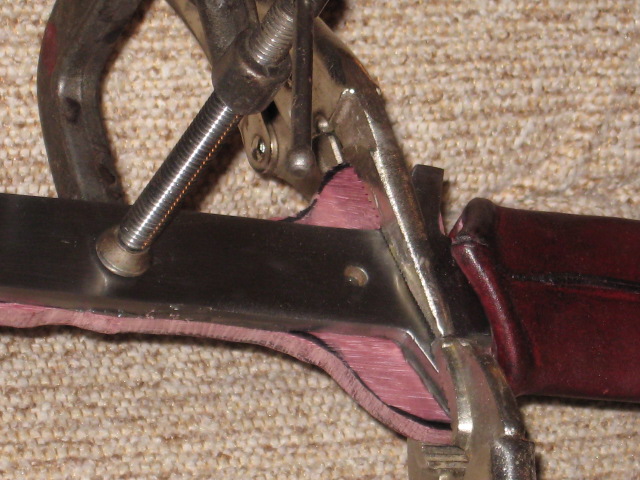
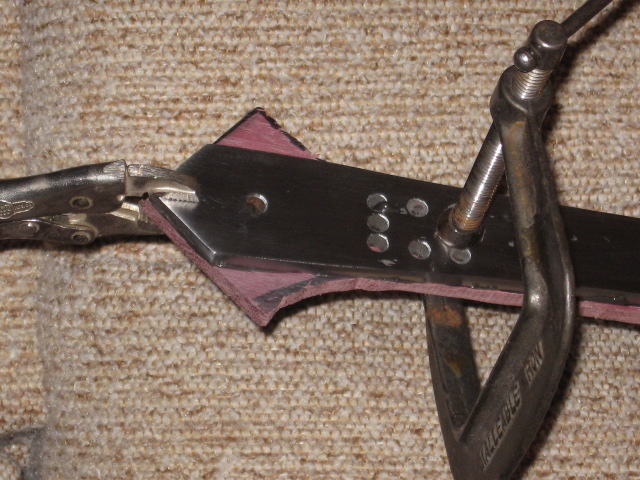
There are 3 holes that make sense to me: One just behind the guard, one in the middle and one near the end of the tang.
The grouping of holes between the middle one and the one at the end of the tang form a square pattern but I don't see a use for them unless they are there to fine tune the POB of the blade or something ?

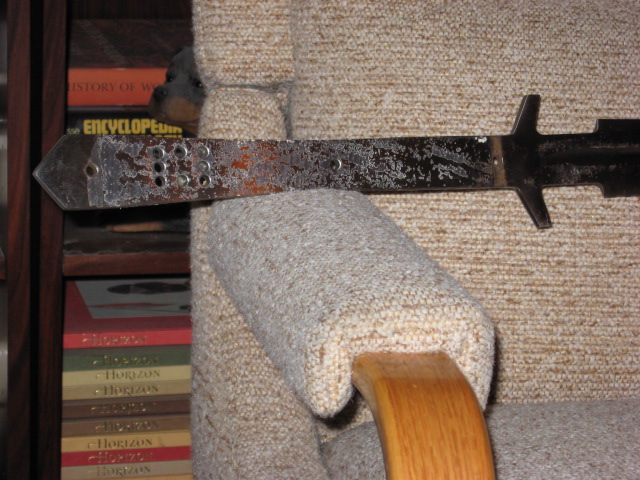
Before I cleaned the tang there was a lot of residue from the adhesive used to glue the original handle onto the tang, but this is not really a pattern.

In short:

A) Remove original handle.
B) Draw on one piece of " Jatoba " a rough outline of the grip scales, cut it out with a coping saw.
C) Glue one scale onto the tang with epoxy.
D) Cut small wood inserts for the guard and pommel and glue them on, file these inserts flush with the surface of the tang where they where too thick and use a lot of epoxy to compensate for gaps at the other end where the inserts where just a little to thin and where below being flush with the tang. ( Used a steel epoxy that could fill large gaps )
E) Cut and glued on the other scale. ( Since the tang wasn't perfectly flat I used slow curing epoxy and a toothpick to push in epoxy into some of the gaps between the wood scales and the steel tang ).

F) Refine the outline with rasp and files.
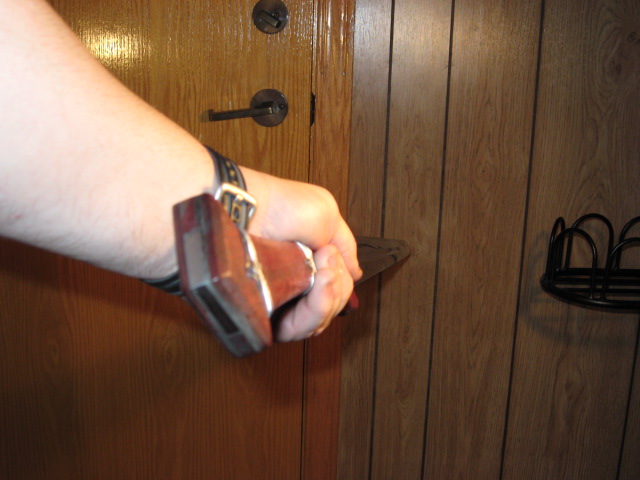
G) Round the edges and at the same time trying to get the outline symmetrical, but it's not perfectly symmetrical, just generally " eyeballed " symmetrical a bit like Medieval period work that often was a little off in dimensional regularity.
H) Sand out tool marks.
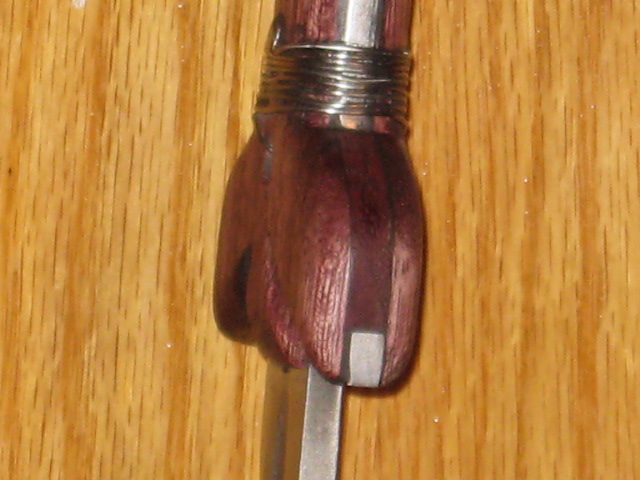
I) Add the wire wrap and oil the wood.

Definitely not the conventional way a handle is built and put on a tang.

Note: The stainless steel wire was too stiff and hard to bend in a way that it wanted to spring back and loosen, had to pull very hard on the wire with pliers and hammer lightly the wire to get it to stay in contact with the wood, as I progressed I put on the wood drops of crazy glue that sort of helped keep thing down and the tacks really help in tying things down: Where possible I started to drive the tack and wound a bit of wire around it before driving it home. The crazy glue doesn't hold everywhere below the wire but it does keep it from shifting. ( Could have used four hands to be able to tension the wire, hammer it down and glue it all at the same time ).

Difficulties, the flats of the tang where not perfectly flat: Irregular finishing of the flats of the tang that curved down a little near the butt end and also at the integral guard the tang seems to be a little thinner + the ends of the guard also curve a little and have some sloppy grinding: In short the surface wasn't given a final grind with any great care or precision, but this didn't make much difference with the leather scales and enough epoxy under pressure would fill in the gaps. ( Note the first scale I glued on seemed to lie flat but the other side of the tang gave me problemsL After it was glued with 5 minute epoxy I notice that I could see " air " for maybe 35% of the length of the tang and some more extreme gapping at the ends. I used very slow clear epoxy to get it to fill the gaps using a toothpick and pushing in epoxy as deep in as I could ).

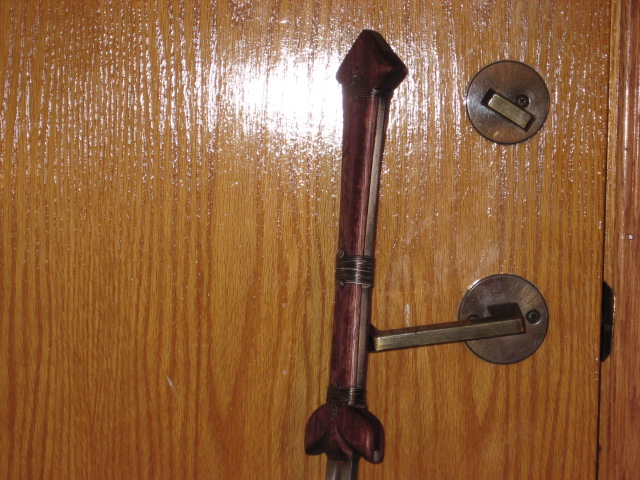
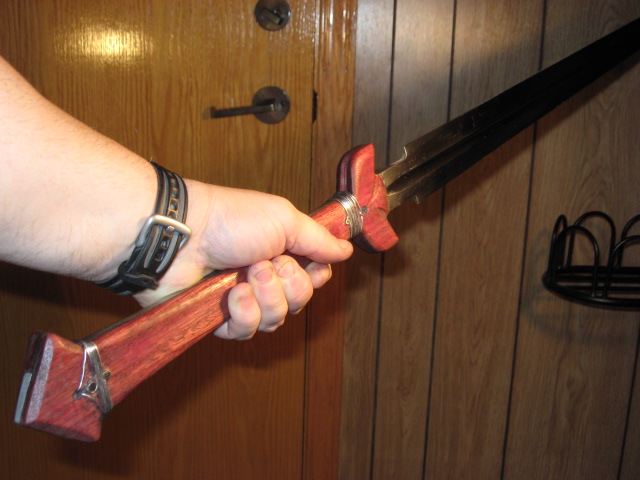
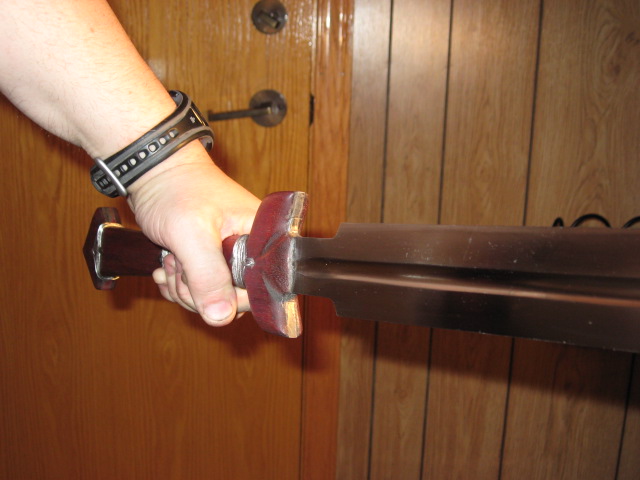
The scales where shaped after being glued onto the tang, I could have kept them the same in profile as the tang and integral guard, but I wanted to have more " meat " around the guard and at the pommel end I needed something that would harmonized at the other end. By the way I was thinking a bit of the wooden grips and guards of the Roman Gladius but also a bit of the look of the Ballock dagger hilts...... LOL.

Part of the difficulties was in trying to use the holes as the original plan was to form a loop of wire passing through the holes and thread back the wire through the loop before wrapping on each side of the holes and tucking the ends of the wire under the wrap + the tacks ...... too stiff a wire made this a " nightmare " : If one could tack one end securely and be able to use a lot of tension one could get a neat wrap and then tack it at the other end without having to depend on crazy glue. ( I could have abandoned the wire idea and done the wrap using glued down nylon cord, which is a bit silvery, or some more organic looking natural fibre cord ).

One other problem is avoiding kinks or bends in the wire and use it when it comes off the spool as cleanly as possible: This problems happens if one bend the wire in a wrong way and has to unwrap and rewrap and the bends happen in another place than the original bend ..... getting the wire cleanly wrapped and close together starts to look sloppy with gaps and irregularities.

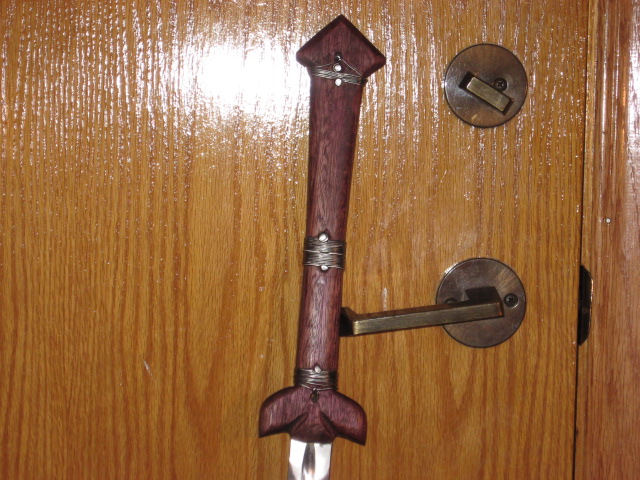
The look of the handle sort of reminds me of the Roman Gladius in being mostly just wood, but also reminds me a bit of a Ballock Dagger handle at the guard.

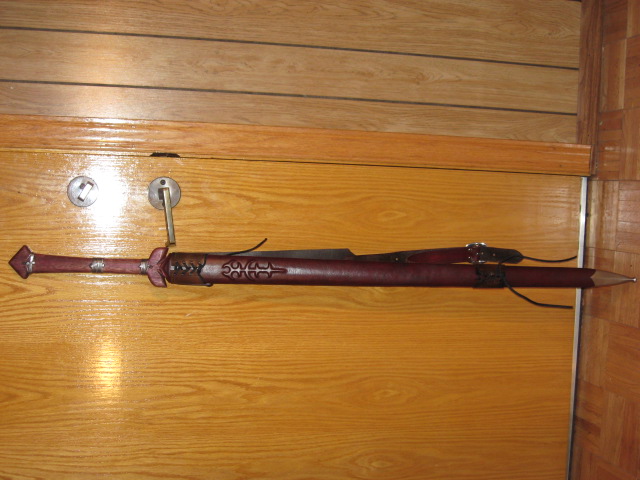
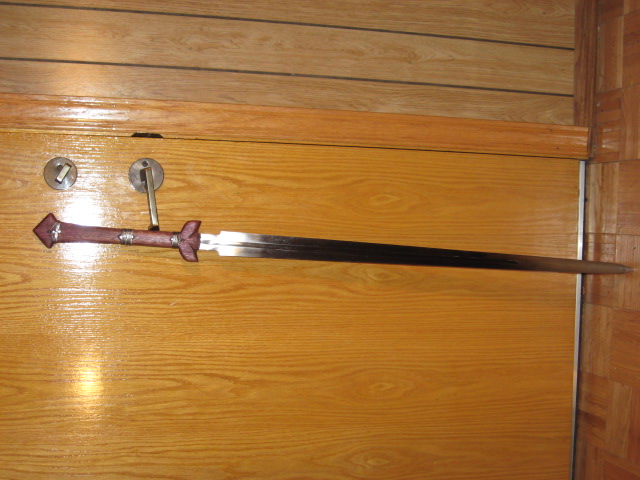
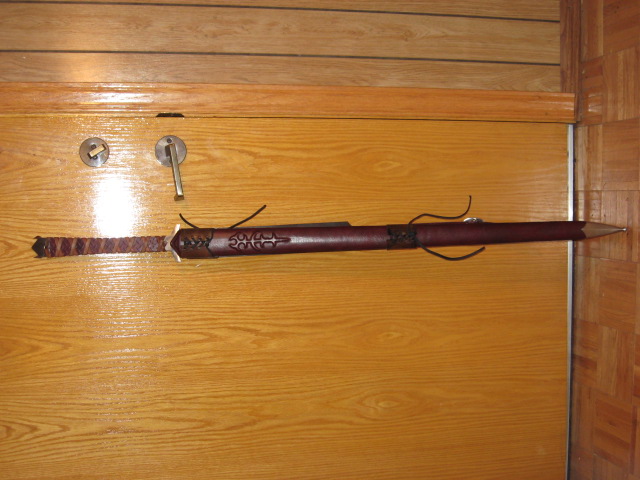
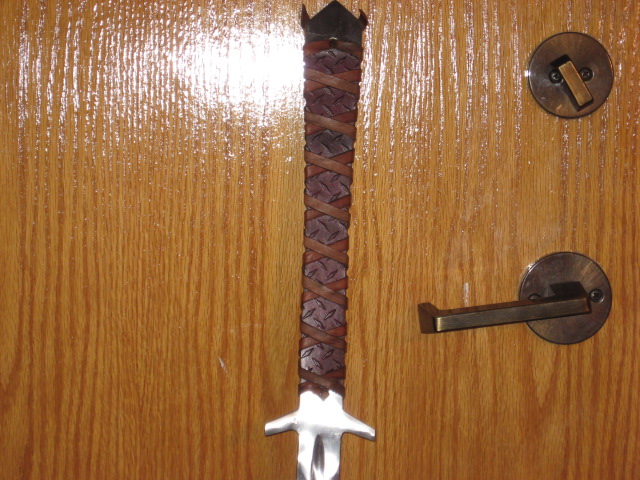
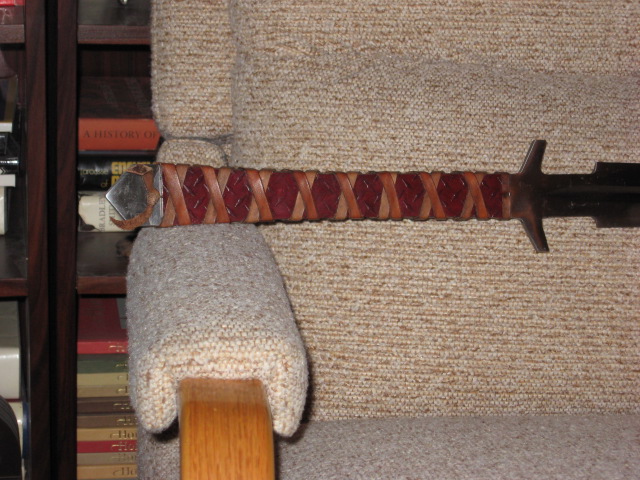
The pics are first of the Zombie slayer as purchased followed by some in progress pics and finally the finished sword and handle that feels very much more comfortable.


 Attachment: 100.9 KB
ZS01.JPG
As purchased.

 Attachment: 141.37 KB
ZS03.JPG


 Attachment: 86.09 KB
ZS04.JPG
Close up of integral guard.

 Attachment: 140.54 KB
ZS06.JPG


 Attachment: 134.59 KB
ZS07.JPG
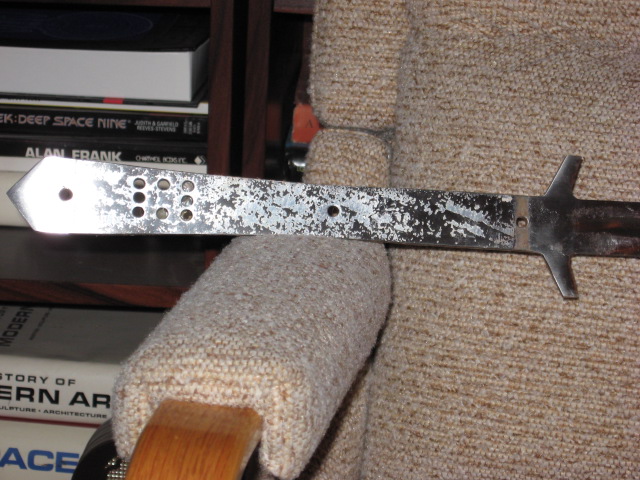
Handle stripped off.

 Attachment: 136.07 KB
ZS08.JPG


 Attachment: 108.86 KB
ZS09.JPG
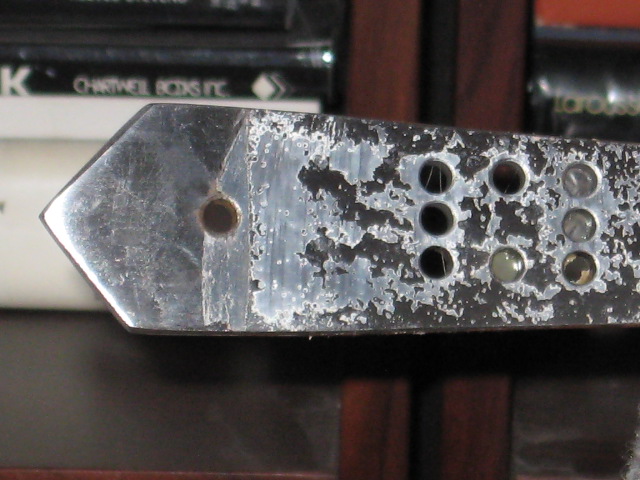
Close up of group of mystery holes in a square pattern ?

 Attachment: 150.03 KB
ZS10.JPG
Outline drawn on Jatoba.


Last edited by Jean Thibodeau on Thu 23 Aug, 2012 5:29 pm; edited 1 time in total
Early stages of assembly, scale epoxied to one side of tang, the pattern is oversized and only roughly cut in outline.


 Attachment: 161.11 KB
ZS11.JPG
Scale glued and clamped for curing of epoxy.

 Attachment: 125.26 KB
ZS12.JPG


 Attachment: 142.73 KB
ZS13.JPG


 Attachment: 153.64 KB
ZS14.JPG
Flipped over to show the Jatoba grip scale.

 Attachment: 138.34 KB
ZS15.JPG


 Attachment: 101.02 KB
ZS16.JPG
Finished handle sword in scabbard.

 Attachment: 100.06 KB
ZS17.JPG


 Attachment: 143.73 KB
ZS18.JPG

More pics of finished sword in close ups and in hand.


 Attachment: 128.36 KB
ZS20.JPG
Close up of wire wrap middle of handle.

 Attachment: 143.28 KB
ZS22.JPG


 Attachment: 101.87 KB
ZS23.JPG
Wire wrap at guard 3/4 profile.

 Attachment: 88.58 KB
ZS24.JPG
In hand and feels much more comfortable and controlable.

 Attachment: 81.1 KB
ZS25.JPG


 Attachment: 85.82 KB
ZS26.JPG
Notice that the tang steel is visible here with the widened wood serving as a pommel.

 Attachment: 126.32 KB
ZS27.JPG


 Attachment: 98.11 KB
ZS28.JPG
Notice that the ends of the steel guard are also exposed but surrounded by the wood grip.
This looks really nice! A bit like an overgrown celtic longsword...
I like it! The hilt looks far more comfortable in the hand, and the wire preserves the home grown, post-apocalyptic aesthetic feel. As a bonus, I think we can safely say that the upgrade is as hysterically accurate and true to the period as it was before. Happy zombie cleaving! :lol:

About those mystery holes... perhaps mass removal to fine tune the POB? That's all I got unless they were originally intended for rivets or something decorative.
Among other complimentary things,Sam wrote, ".... the upgrade is as hysterically accurate ..."

I'm wondering, is "hysterically accurate" the most recent addition to the sword fanciers lexicon?

I"m wondering if Jean may have started a cottage industry. With the exception of the recalcitrant wire Jean's upgrade looks like great fun! Rehilting one of these could be treated something like a treasure hunt. Competitors could be limited to a$25.00 budget and turned loose in a building center or well stocked hardware store to find the raw materials to construct a new handle for a Zombie hunter sword and then there could be a vote or a panel of judges to choose the most "hysterically accurate" sword.

What would the prize be? Well, I'll leave that to others to decide.

Great job Jean! And great fun too, thanks.
Hello
It looks real good! Especialy the wire wrap.You sure dont want your grip to slip, when those stinkys are closeing in on you;-)
Once again I'm impressed with your work Jean! Though I'm normally not a fan of wire wrapped grips, with the wood scales and the post-apocalyptic motif, they really work here. It looks much more comfortable than the before pictures. Many of my friends have small stockpiles of guns and ammunition for when the zombies come (noticed I didn't say "if"). I keep trying to tell them that eventually they WILL wish they had at least one edged weapon to fall back on. :lol:
Thanks everyone for the nice complements.

Luka: Yes it does also remind me of a Celtic Longsword.

Sam: Yes the grip is much more comfortable and the wide pommel should keep it from slipping out of one's hands when covered with " ZOMBIE STINKY GOO & GORE ". ;) :lol:

The holes main be fine tuning the balance and handling of the blade or for some other reason related to it's making ?

Ken: I would certainly enjoy seeing what other people might make as an improvised handle based on hardware store salvage.

Karl: Ironically the less than perfect wire wrap work better than something perfect in the context of this project I think, not a completely deliberate choice, but instead of being disappointed with the results I was actually very happy with it. :D :cool:

D.S.: Well, thanks for the kind words.
Wow. It'd fit quite easily not just into a post-apocalyptic environment, but also into an urban fantasy or even a more conventional fantasy milieu. I don't know if this versatility was intentional but you ought to make the most of it. ;)
Lafayette C Curtis wrote:
Wow. It'd fit quite easily not just into a post-apocalyptic environment, but also into an urban fantasy or even a more conventional fantasy milieu. I don't know if this versatility was intentional but you ought to make the most of it. ;)


Thanks for the compliment. :D :cool:

Not intentional in the sense of being planned out from the start to have an improvised look to it: I still wanted it to look good, but some difficulties with cutting the outline of the scales induced a little asymmetry mostly in the pommel and the not perfect wire wrap. Normally this would have bothered me enough to restart and try to get things " perfect ", or closer to perfect, but as it just seemed " RIGHT " I continued with it, but I didn't deliberately do something to make it more improvised/crude looking.

If I had done it deliberately I think it would have felt wrong and artificial.

I have slightly refined the guard side with a little extra sanding of the shape and the exposed front of the steel guard I noticed some roughness caused by the file work I did on the wooden scales and some squeezed out epoxy that needed to be removed.

Also, some more sanding with 1200 grit sand paper to give the finish a little extra gloss that may look like the way the wood might get polished by a lot of handling: Still look fundamentally the same, but it usually take a lot of time of hand rubbing Boiled Linseed Oil to get what I like as a mature finish with a soft sheen.

Playing with the sword it flows and handles much more fluidly without the sharp corners of the original handle.

In handling it feels much better, especially better, when used one handed and the POB feels just subtly closer to the guard but measures out at 5 1/2": Not sure what is was originally ? Just surprised how much a change of grip profile/cross section and texture can make a good handling sword feel like a great handling sword.

Just checked on the Kult of Athena site and the statistics seem to indicate that the POB is not obviously changed, but it just feels much better. :?: :surprised:

http://www.kultofathena.com/product.asp?item=...ayer+Sword
Jean Thibodeau wrote:
Just surprised how much a change of grip profile/cross section and texture can make a good handling sword feel like a great handling sword.

Just checked on the Kult of Athena site and the statistics seem to indicate that the POB is not obviously changed, but it just feels much better. :?: :surprised:


The grip can really make a world of difference on a sword. We have a supplier for sabre-trainers, for example, and while he does produce really descent weapons I just cannot for the life of me get used to the grips he makes. To me they always make the whole weapon awkward to handle. Combine the same blade and shell with a different handle and voilą, works just fine.

Page 1 of 1

Jump to:  
You cannot post new topics in this forum
You cannot reply to topics in this forum
You cannot edit your posts in this forum
You cannot delete your posts in this forum
You cannot vote in polls in this forum
You cannot attach files in this forum
You can download files in this forum


All contents © Copyright 2003-2006 myArmoury.com — All rights reserved
Discussion forums powered by phpBB © The phpBB Group
Switch to the Full-featured Version of the forum