Go to page Previous  1, 2, 3, 4, 5  Next

Re: My new shieldpress and my first shield
Sander Marechal wrote:
Thanks for the compliments and tips!

Ron Reuter wrote:
I have found that the Birch plywood springs back much more then using fir or pine plywood.


Any idea if a shield made out of fir or pine is as strong as one made from birch? When I was in the hardware store I mainly chose the birch plywood because it had nice, even layers. The fir plywood and a very thick and light coloured inner layer and two very thin outer layers. Almost as if it was veneer instead of plywood.


I feel the fir/pine plywood is stronger than birch, but that is just my opinion without any tests. In the USA, anyway, Birch plywood is constructed as "furniture grade" (used for cabinets, furniture, etc.). This is one reason why the birch plywood has nice even layers so the edges look nicer when finished. Fir/pine plywood is construction grade used to build houses (roof, wall and floor sheeting). Fir/pine plywood is constructed more for strength than looks. Not sure how plywood is graded in the Netherlands, but here (USA) you want to use something like an AC or AB grade fir/pine plywood.

We are not talking night or day differences here. Birch plywood is lighter (maybe not as strong), but much harder to bend and snaps back a bit more. Fir/Pine plywood seems stronger, is heavier, but bends much easier for more curve.

If you look at the bottom of my shield press construction page, I have a closeup photo of the layers of the fir/pine plywood. I swear I could run my car over this shield and it would not hurt it :>)

Ron
T. Hamilton wrote:
Randall Moffett wrote:
I really wish I had a shield press. I have attempted to make one but the press cracked and was basically worthless. I have not tried to make one since...


I can't say enough good things about Gaffer's press. Don't worry about it breaking. This thing is SOLID.


I agree. I think I overbuilt mine. The curved ribs are 1.25" fir. The base plate is 1" MDF. The ribs are glued on and screwed from the bottom. The frame at the bottom is 2x2" fir beams, also glued and screwed. The slot at the side is made from 1/2" hardwood. The entire construction is quite heavy, but very solid. It feels as if you can bend oak beams on them ;)

Quote:
I feel the fir/pine plywood is stronger than birch, but that is just my opinion without any tests. In the USA, anyway, Birch plywood is constructed as "furniture grade" (used for cabinets, furniture, etc.). This is one reason why the birch plywood has nice even layers so the edges look nicer when finished. Fir/pine plywood is construction grade used to build houses (roof, wall and floor sheeting). Fir/pine plywood is constructed more for strength than looks. Not sure how plywood is graded in the Netherlands, but here (USA) you want to use something like an AC or AB grade fir/pine plywood.


Thanks. For my next shield I will give fir/pine a try and see how that works.
I did mine just using 2 or 3 straps. Without a log to pull around. I first started to pull it around a tree log, but it did work better with just applying tension through the straps. You can distribute the tension by using wooden bars as shown in Sanders pictures, but from what I have seen, you don´t necessarily need a press for ply wood shields. It may be a different matter in the plank construction of shields. I had the recommendation from this book: http://www.amazon.de/mittelalterliche-Reiters...=8-2-spell
I went to a wood store today and I picked up a sheet of Okoumé multiplex, which was recommended to me by the shop keeper after I explained what I wanted to do. It's supposed to be tougher than birch but it should bend with less internal stress, so less spring back. On the flip side, its almost 50% more expensive. I'll let you know how it goes.
The first shield (the birch one) has been covered with canvas and is now ready for painting (pics to follow). But I have a question about colours.

What colours were available early to mid 13th century? And how deep/bright would they be? I'm specifically interested in red, white (for my Hospitaller shield) and black (because my family arms are black and white). Were they really as bright red & white and as pitch black as modern paints are?

I did some searching on this forum but most topic seem to be about colouring leather.

Thanks in advance!
Sander Marechal wrote:
The first shield (the birch one) has been covered with canvas and is now ready for painting (pics to follow). But I have a question about colours.

What colours were available early to mid 13th century? And how deep/bright would they be? I'm specifically interested in red, white (for my Hospitaller shield) and black (because my family arms are black and white). Were they really as bright red & white and as pitch black as modern paints are?

I did some searching on this forum but most topic seem to be about colouring leather.

Thanks in advance!


In case you are able to read German, or know of a fes people who can, get yourself the book I posted the link to. It will answer most to all of your questions. There is an extensive "how to" in it.
Thanks! I can read German. I'll see if I can get my hands on that book.
Nice.
Uncovered cloth edges, even thick ones, will fray quite a lot after beeing used a while; for durability I've found that it is better to apply the rawhide on top of the cloth cover. Rawhide is also easier to replace.
Historical shields did not have reinforced rims, so the apperance is tecnically a bit of. However, it is better to have a shield with impropper rims than a shield that is falling appart (This can also be risky for the people you figth...)

The important thing about plywood is that it is only flexible one way; if you cut it the wrong way, you might end up with a blank that won't bend. (I've got a couple of 60x60 heaters that where the result of this :P )

How do you plan on arranging the straps and guige?
I also found a website called Pigments through the ages that looks extremely useful. It even lists C.I. numbers for all the colors. Now all I need to do is map those to modern paint colors. But between Lead White, Vermillion and Bone Black I think that I can paint my shields in quite striking bright and deep colours.
Elling Polden wrote:
Uncovered cloth edges, even thick ones, will fray quite a lot after beeing used a while; for durability I've found that it is better to apply the rawhide on top of the cloth cover. Rawhide is also easier to replace.


True. But I still haven't decided if I'm going to edge this shield at all. I am half a mind of leaving it unedged and taking it to training, just to see how it holds up against steel weapons.

Quote:
How do you plan on arranging the straps and guige?


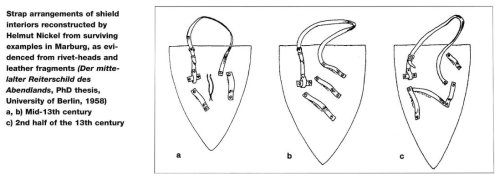
I haven't decided yet. I found an image from Osprey's German Medieval Armies online somewhere. It's probably going to be somewhat like (a) and somewhat like Gaffer's kite shield. I really like the system with the punctured straps and lace on Gaffer's shield.It depends a bit. I plan to pick up a copy of the Mittelalterliche Reiterschild book that Felix recommended at the local library and see what's in there. It also depends on what leather I can get my hands on.

Getting leather is turning out to be a bit of a problem. I found a few local shops who can order it for me, but they only sell full hides. All I need is a bit of suede-like leather for the arm padding and some straps of thick leather.

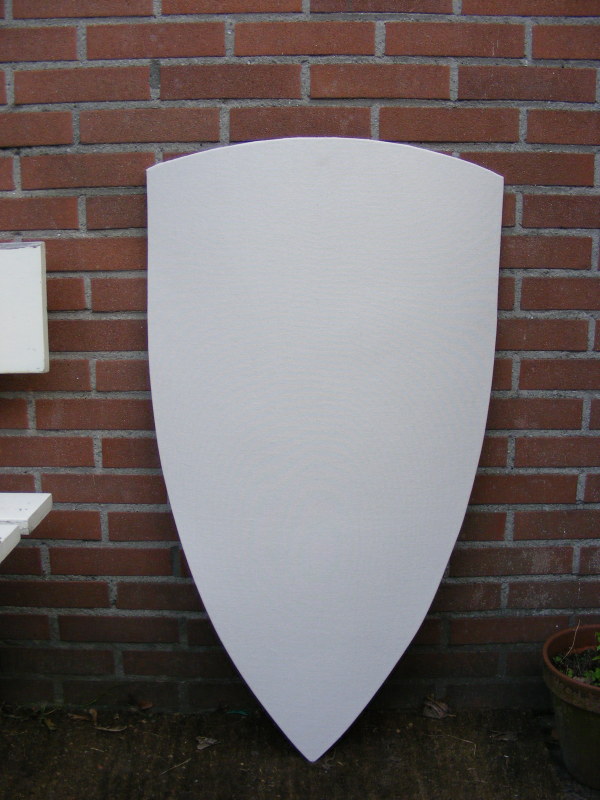
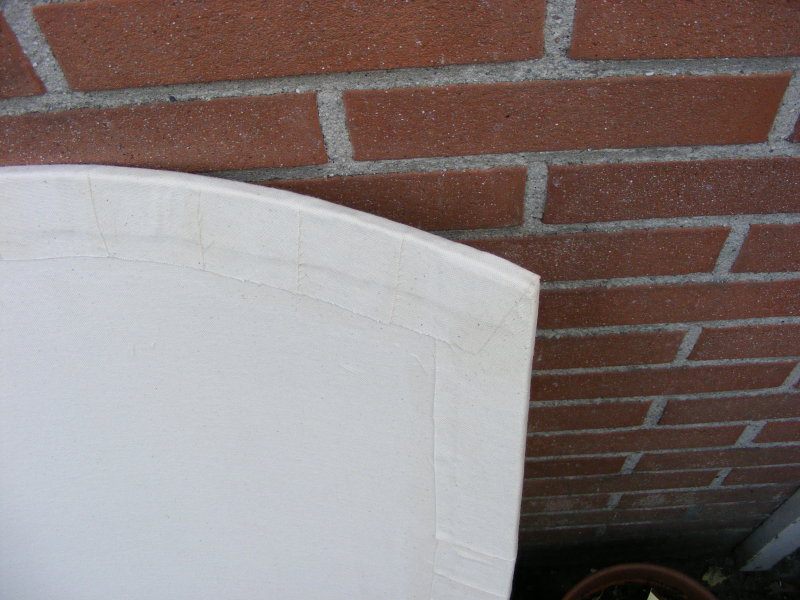
Anyway, below are the pictures I promised of the canvassed shield. It has one layer on the back and two layers on the front. As you can see in the second picture, the overlap of the outer layer is bigger than the overlap of the inner layer.


 Attachment: 19.28 KB
shield-straps-small.jpg
Strapping arrangements from the Osprey book

 Attachment: 100.46 KB
shield5-small.jpeg
Canvassed shield, front.

 Attachment: 91.16 KB
shield6-small.jpeg
Detail of canvas overlap on the back.
Sander Marechal wrote:


Getting leather is turning out to be a bit of a problem. I found a few local shops who can order it for me, but they only sell full hides. All I need is a bit of suede-like leather for the arm padding and some straps of thick leather.


For a small amount of long strap proportion leather for straps, and edging you could order a tooling belly. These are not excessively high priced in terms of overall project costs, and can be worked like any other vegetable tanned leather. http://www.tandyleatherfactory.com/home/depar...=Product_5
i wouldn't suggest bellys. they tend to stretch over time. i sometimes order a wide belt blank and then cut them into the proper width strips i want.
Quote:
I really like the system with the punctured straps and lace on Gaffer's shield.


I went with that one. Feels great!
The A option looks good. I've got "Reitershild", and it seems that the strap arrangements where quite individualized in the high middle ages.

One thing that seems to be neglected in most sugested strap reconstructions is that the knightly shield would, most of the time, be worn suspended on the guige while the user is mounted. A guige attatched towards the center of the shield, like the one on example A, will rest against the upper arm, and thus follow the movement of the user. A corner-to-corner guige, on the other hand, will be highly disadvantageous unless you have a dedicated upper arm strap.
With a propperly adjusted and fitted guige, you can even fight decently without using the rear arm straps.

I've curently got two heaters, a 60x60 with a suspenision based on Edward the Confessor, and a 60x90 loosely based on "Reitershield" and experience. The 60x60 has a horisontal strap that goes across the overarm, the 60x90 a centraly attatched guige.

A crappy picture of the back of the 60x60
[ Linked Image ]
In use;
[ Linked Image ]

the 60X90 In use;
[ Linked Image ]
Elling Polden wrote:
A guige attatched towards the center of the shield, like the one on example A, will rest against the upper arm, and thus follow the movement of the user. A corner-to-corner guige, on the other hand, will be highly disadvantageous unless you have a dedicated upper arm strap.
With a propperly adjusted and fitted guige, you can even fight decently without using the rear arm straps.


Thanks for that, and for your pictures. I was wondering about the corner-to-corner guiges I saw in several recreations.

I have found some leather straps that I will be picking up this Saturday. The longest is about one meter, so I hope that's long enough to make a guige from (by adding another piece and making it adjustable, I cat probably get it up to 1.5 meter long if required). I'll think about finding a way to attach these to the shield temporarily without drilling holes, so I can properly test and fit it.
Sander Marechal wrote:
. I'll think about finding a way to attach these to the shield temporarily without drilling holes, so I can properly test and fit it.


*cough* staple gun*cough* ;)

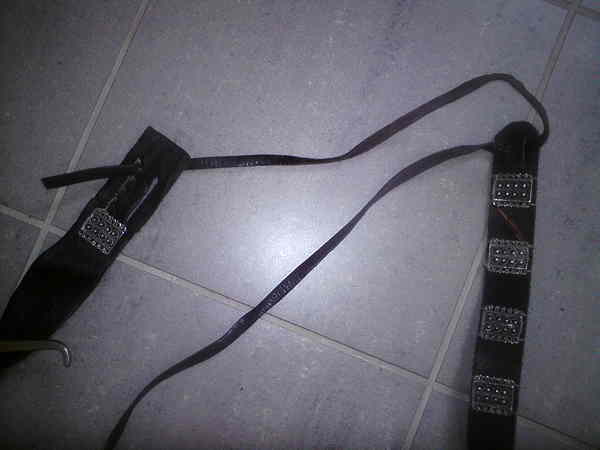
An easy way to make an historical, adjustable strap is to use the same tying method as seen on some high medevial scabards;
this was commonly done by spliting the belt, but a simple alternative is to make holes in both ends and pass a thiner cord through one side, as I've done on my sword belt below. The main straps do not need to overlap, either.


 Attachment: 20.44 KB
DSC00187.jpg

That's also a nice strapping option, thanks.

One more question: What will make my shield stronger? Applying gesso on the canvas or applying normal primer? I have never used gesso so I have no idea what it is or what it's like, but I have seen several shield building articles refer to it. PS: I intend to paint my shield using normal Acryllic/Latex-y paint, not milk paint or tempura.
Sander Marechal wrote:
Getting leather is turning out to be a bit of a problem. I found a few local shops who can order it for me, but they only sell full hides. All I need is a bit of suede-like leather for the arm padding and some straps of thick leather.


May be you can try here:
http://www.moetjediezien.nl/index.htm

I've not yet ordered something, so please let me know how it works out.
Sander Marechal wrote:
That's also a nice strapping option, thanks.

One more question: What will make my shield stronger? Applying gesso on the canvas or applying normal primer? I have never used gesso so I have no idea what it is or what it's like, but I have seen several shield building articles refer to it. PS: I intend to paint my shield using normal Acryllic/Latex-y paint, not milk paint or tempura.


For the arm padding you can also use canvas or linen.
Paul Hansen wrote:
May be you can try here:
http://www.moetjediezien.nl/index.htm


His websites doesn't list leather, though he does sell hides (i.e. with the hair still on). Perhaps he does sell it though but just doesn't list it on his website. I also found one other website, where you can buy leather and belt blanks: http://www.boomsma.nl

Quote:
For the arm padding you can also use canvas or linen.


That would be a lot cheaper, but I wonder if this would cause trouble with rain water or sweat soaking into the padding. Do you have any experience with that?

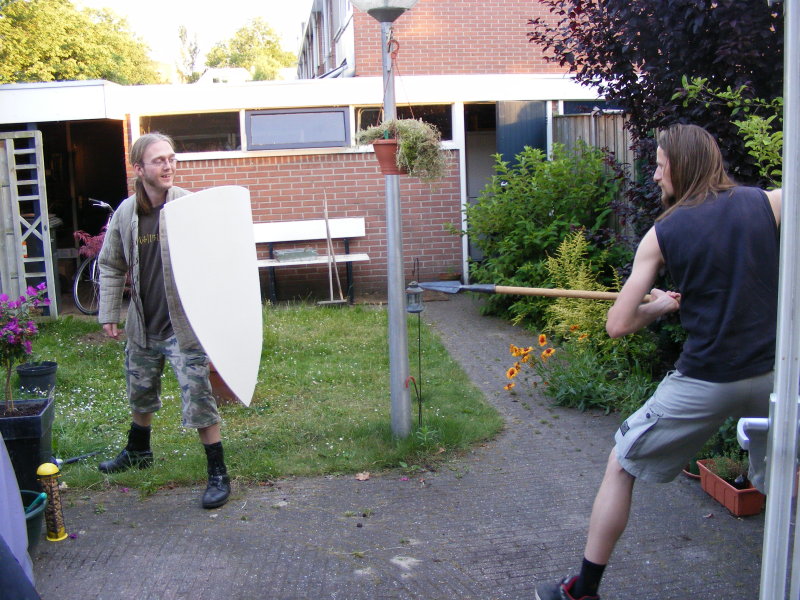
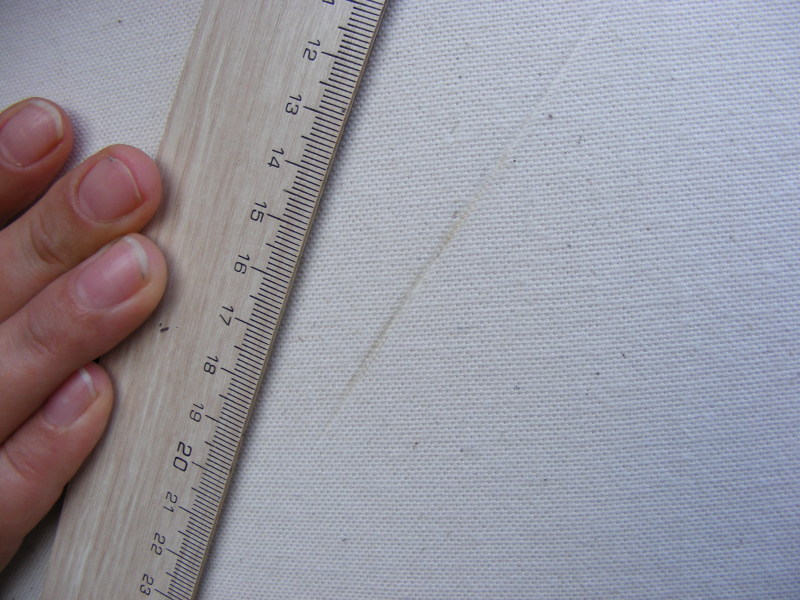
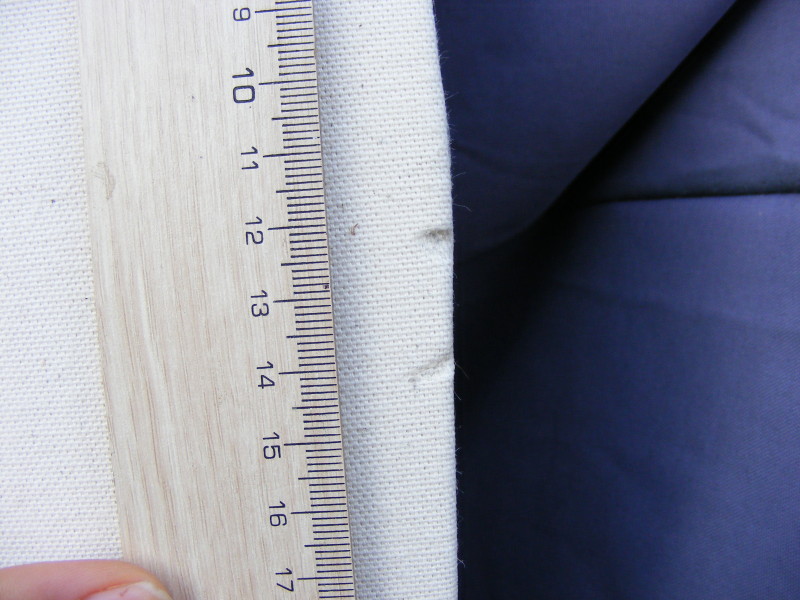
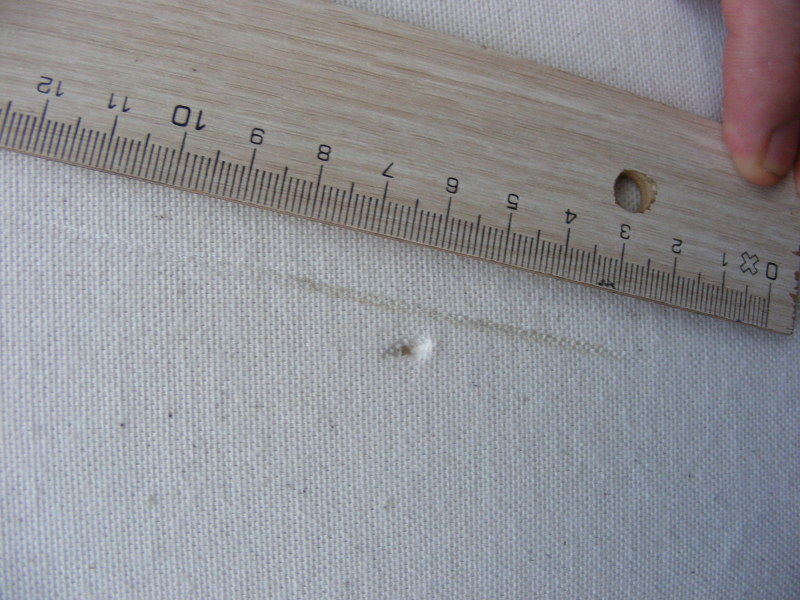
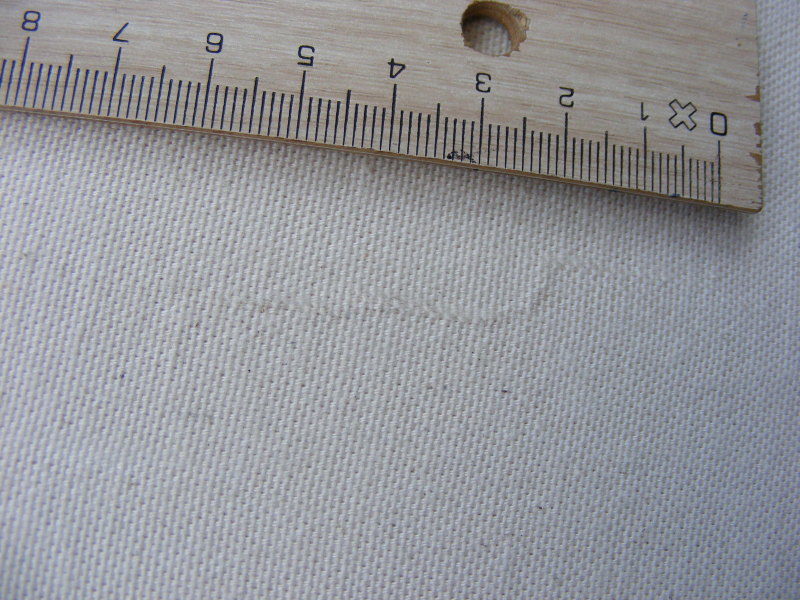
Anyway, yesterday me and a friend tested my shield for strength. The shield had not been painted yet, so it's not quite as strong as the final product. We've concluded that it's strong enough for our purposes. We whacked the shield with a couple of swords, a heavy axe and a spear. The sword only dented the canvas but not the wood underneath. Thrusts with the sword went a little deeper, denting the wood, but the canvas wasn't torn. Cuts to the edge of the shield were a little deeper but still did not tear the canvas.

Next we took a heavy axe to the shield. The dent in the front wasn't any deeper than from the sword cuts, but on the back side of the shield you can see a little bit of cracking. Axe blows are much more powerful than sword cuts. We tried to twist, bend and break the shield to see if the crack would pose any problems but we couldn't do it. My friend told me that the crack wouldn't pose any problems. He once damaged his shield in a similar way and fought with it for more than two years before it failed. He said that in order to break it, you would probably have to repeatedly hit it in the exact same spot with heavy axe blows.

Finally we attacked the shield with a spear. Note that the spear we used is not suitable for reenactment fighting. This spear was made for parades and shows. It's far too pointy and sharp to use in a fight. The dents caused by the spear are deeper than all the other dents. Also, the spear managed to tear the canvas, unlike the sword and shield. We expected a crack on the backside similar to what the axe caused but we could not find any evidence of this.

Finally we tried to twist, bend and break the shield some more but without result. It appears to be as strong as it was before these tests. Laminated birch and canvas appears to be quite strong, more then enough for our needs. Which is great, because the shield is also quite light because it's only 8mm (1/3") thick (ex. canvas) as opposed to the normal 1/2" I see everyone else use. This shield is 57x100 centimeters and weighs 2.6 kilo including canvas.

Anyway, I am happy with the shield. I'm going to fill up the dents with wood putty, put another layer of canvas on the front and finish it.

Note on the pictures: The ruler in in centimeters, not inches :)


 Attachment: 154.75 KB
shield7-small.jpeg
Me and my friend, testing the shield. I am wearing my gambeson because the shield did not have padding.

 Attachment: 136.02 KB
shield8-small.jpeg
One of the largest dents caused by the sword.

 Attachment: 117.27 KB
shield9-small.jpeg
Dents from cutting to the edge.

 Attachment: 126.97 KB
shield10-small.jpeg
Axe strike and spear thrust.

 Attachment: 137.04 KB
shield11-small.jpeg
A small crack on the back showing from the axe blow.

 Attachment: 100.81 KB
shield12-small.jpeg
The spear we used. Too pointy and sharp for reenactment fighting.
Go to page Previous  1, 2, 3, 4, 5  Next

Page 2 of 5

Jump to:  
You cannot post new topics in this forum
You cannot reply to topics in this forum
You cannot edit your posts in this forum
You cannot delete your posts in this forum
You cannot vote in polls in this forum
You cannot attach files in this forum
You can download files in this forum


All contents © Copyright 2003-2006 myArmoury.com — All rights reserved
Discussion forums powered by phpBB © The phpBB Group
Switch to the Full-featured Version of the forum