Hello,
someone could tell me in wich way the shell part of a walloon style hilt is constructed?
i'm mainly interested to learn how the pierced part of the shell is welded/fastened.
thanks for help.
Gabriele
Check out this link - http://www.collectie.legermuseum.nl/strategio...07268.html - for a lot of information on the classic Walloon hilt. Part way through the article, the author says, In a well-executed, enlightening series of structural drawings entitled `Wallone de Solingen dite "de 1679"', reproduced by Puype, Petard explains how the hilt of the Walloon sword was made and put together Unfortunately, the bibliography at the end isn't very helpful in showing where you can find those drawings.
Are you thinking of recreating a Walloon sword, or restoring an antique?
 Attachment: 40.51 KB
Are you thinking of recreating a Walloon sword, or restoring an antique?
Hi Roger,
thank you for the informations, i have always liked the walloon hilt and now i wish to try to recreate one,
if my try will be succesfull i'll post for sure some pics of it.
cheers
Gabriele
thank you for the informations, i have always liked the walloon hilt and now i wish to try to recreate one,
if my try will be succesfull i'll post for sure some pics of it.
cheers
Gabriele
I would guess that they are brazed, or possibly just set onto a lip inside the ring and the top edge of the ring peened over to pinch it into place. This is just a guess though, I am not familiar with these type of hilts.
E.B. Erickson could probably tell you for sure, hopefully he or someone with direct knowledge of these hilts will pipe in.
E.B. Erickson could probably tell you for sure, hopefully he or someone with direct knowledge of these hilts will pipe in.
I think your best chance of finding that article on Walloon construction is to contact the Leger Museum.
Hi Gabrielle,
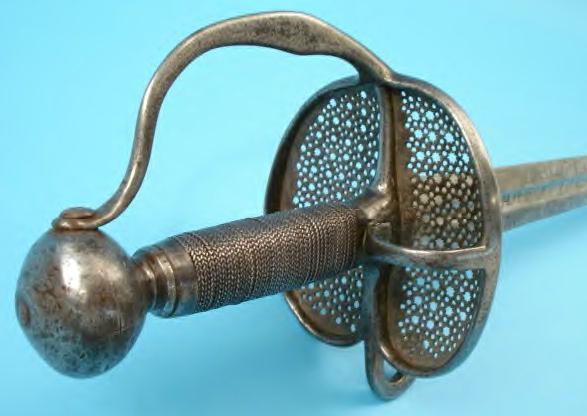
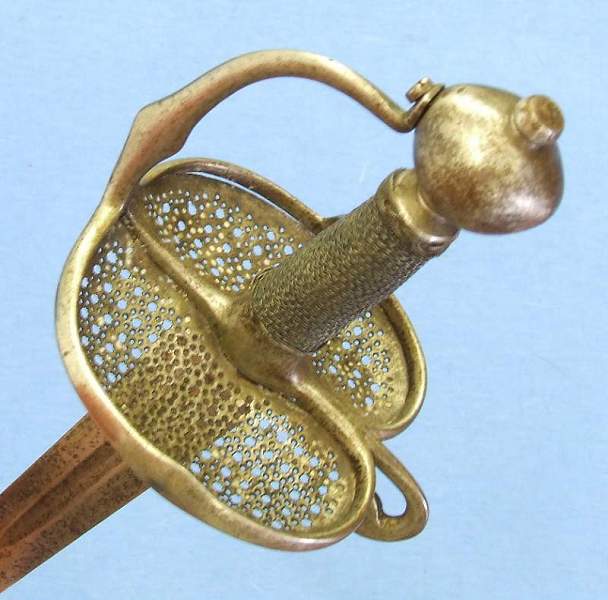
I've got a Walloon similar to that shown by Justin that's missing it's inboard plate, so the construction is visible. A slot is cut around the inside of the guard, and the plate is "sprung " into place. I did work on a transitional rapier some years ago that had the plates attached this way, but also had copper braze in the slot to really secure things.
Many swords of the 1600s had this construction of the sprung in plates. Sometimes you find antiques that have only a right hand ring and plate, and a good way to tell if the sword was made that way or if it has lost it's left hand ring/plate is to look for the remains of the slot on the quillon block.
--ElJay
Thank you for the reply, E.B. Details about the construction of complex hilts always fascinate me.
FWIW, here is a photo of a Walloon (from Bolk Antiques) with one of its plates partially detached on the inboard side-ring.
Attachment: 43.74 KB
Hello Mr. Erickson,
thank you very much for your answer, it's just the kind of information i was searching for,
do you have some pictures or drawing to share?
cheers
Gabriele
thank you very much for your answer, it's just the kind of information i was searching for,
do you have some pictures or drawing to share?
cheers
Gabriele
Unfortunately I don't have photos to post. However, the last photo above posted by Mr. Hooper is really all you need, as you can see the slot cut in the ring where the plate has become "unsprung". Thanks for that excellent photo, Roger!
--ElJay
--ElJay
Just to add to the posts above:
The plate can also be secured by working the surface lightly between a stake anvil and a planishing hammer: it expands sideways into the slot cut into the inside of the ring as the result of many light blows along the rim. The piercing is done afterwards. Cut the plate so it sit snugly in the inside of the ring. Remember that these plates tend to be more or less domed. The doming should be done first: shape as much as possible and trim the edges for a good fit when all shaping is done. Only a light hammering to achieve expansion into the slot is then needed. It is common to braze the plate as well. Both tin solder or copper brazing was used historically.
The plate can also be secured by working the surface lightly between a stake anvil and a planishing hammer: it expands sideways into the slot cut into the inside of the ring as the result of many light blows along the rim. The piercing is done afterwards. Cut the plate so it sit snugly in the inside of the ring. Remember that these plates tend to be more or less domed. The doming should be done first: shape as much as possible and trim the edges for a good fit when all shaping is done. Only a light hammering to achieve expansion into the slot is then needed. It is common to braze the plate as well. Both tin solder or copper brazing was used historically.
Mr.Johnsson,
thank you for your addition,
just for having a little more knowledge about the subject could you tell me in wich way the piercing of the plate was historically done?
how about the plates tickness? looks wery thin judging from the photos posted above .
cheers
Gabriele
thank you for your addition,
just for having a little more knowledge about the subject could you tell me in wich way the piercing of the plate was historically done?
how about the plates tickness? looks wery thin judging from the photos posted above .
cheers
Gabriele
| Peter Johnsson wrote: |
|
The plate can also be secured by working the surface lightly between a stake anvil and a planishing hammer: it expands sideways into the slot cut into the inside of the ring as the result of many light blows along the rim. The piercing is done afterwards. |
That's interesting that the piercing is done after the plates are attached to the side-rings/counterguards. I would have thought it would be easier to do it before.
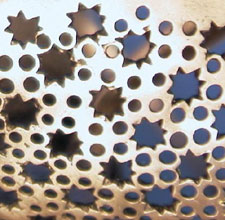
It must be a very difficult, methodical task to create those complex star and moon patterns. One mistake and you have to throw away the plate and start all over again.
| Gabriele Becattini wrote: |
| Mr.Johnsson,
thank you for your addition, just for having a little more knowledge about the subject could you tell me in wich way the piercing of the plate was historically done? how about the plates tickness? looks wery thin judging from the photos posted above . cheers Gabriele |
I do not really know exactly how it was done back in the day.
This is my guess (as the tools used are not so different from any simple hand tools available today):
A small drill powered by a bow, just like some jewelers still use today, was used to drill the holes.
To get the holes in the right place, very thin lines could have been scribed marking out the geometrical grid (but later scrubbed away). Exact location for the drill hole was marked by a small pointy punch.
The drill bit itself might have looked like a small bodkin: the conical point makes the hole gradually larger, depending on how deep you work the drill.
Some holes were then also worked with a small needle file, or possible a sharp graving chisel, to shape the stars and angular shaped holes.
If the method with cold hammering the plate to expand it is used, you cannot really have the holes cut in advance, as the pattern would be distorted. If you cut the panels in size so they can be pushed/sprung in place, they can be more or less finished before hand.
Thickness of the plate: yes it is pretty thin. Often less than 1 mm. Perhaps 0.8 would be good choice as a kind of standard? Some times it looks even thinner, like 0.5 mm or so.
Page 1 of 1
You cannot post new topics in this forumYou cannot reply to topics in this forum
You cannot edit your posts in this forum
You cannot delete your posts in this forum
You cannot vote in polls in this forum
You cannot attach files in this forum
You can download files in this forum
All contents © Copyright 2003-2006 myArmoury.com — All rights reserved
Discussion forums powered by phpBB © The phpBB Group
Switch to the Full-featured Version of the forum
Discussion forums powered by phpBB © The phpBB Group
Switch to the Full-featured Version of the forum