My shield is here:
http://www.myArmoury.com/talk/viewtopic.php?t...ght=shield
I do not have any pictures of my most recent shield (made onyl last month), but to give you an idea, it is a "heater" made of a 1/2" thick foam board with black fabric glued front and back, webbing for the enarms held on by carriage bolts, and a big white Maltese cross painted on the front.
Not durable, but light as a feather and required less than $10 worth of materials total. The idea is a lightweight, low-cost "costume shield"
Hello All,
Giving a Blossfecthen demo... my heater that I built is hanging from the tent to the right.

Celtic Shield & Roman shields made in part my me and other members of my group. ( I forged all the bosses and helped with covering with cloth & the painting)

Two of my Targes at a Highland Broadsword class taught by me.

The last targe I've made.


I want to make a pavise... maybe this year.
Cheers,
DT
Giving a Blossfecthen demo... my heater that I built is hanging from the tent to the right.
Celtic Shield & Roman shields made in part my me and other members of my group. ( I forged all the bosses and helped with covering with cloth & the painting)
Two of my Targes at a Highland Broadsword class taught by me.
The last targe I've made.
I want to make a pavise... maybe this year.
Cheers,
DT
[ Linked Image ]
[ Linked Image ]
Here my new shield. Haven't used it yet but I 'll use it soon (I hope)
[ Linked Image ]
Here my new shield. Haven't used it yet but I 'll use it soon (I hope)
I like what you did on the edge with the stitching. How did you do it?
Thanks :)
I first soaked the rawhide and than drilled a hole in the shield every 2cm. Than took a needle and cross-stiched the rawhide on to the shield :) It's an easy job, it just takes a lot of time.
I first soaked the rawhide and than drilled a hole in the shield every 2cm. Than took a needle and cross-stiched the rawhide on to the shield :) It's an easy job, it just takes a lot of time.
Hi Allen,
That's a very nicely done paint job. My local SCA group has a horn as one of the major charges of it's group heraldry and I always find them a pain to draw.
With respect to the "family crest"; at risk of giving you a bad day I have to point out there is no such thing. Arms belong to individuals, not families. It's probably the single most commonly misunderstood aspect of heraldry. I wrote a post explaining the issue in this thread.
| Allen Foster wrote: |
|
I then took the shield and covered the back side with pig skin and stretched canvas over the front. I then painted my family crest onto the canvas. Next I gave the shield to a friend who makes metal chimney caps and had him put an 18 gauge steel edging around the whole thing. I nailed the whole thing together with brass upholstery tacks. Next I plan to stain the leather backside and mount the straps. I'll post a picture of backside when it's done. |
That's a very nicely done paint job. My local SCA group has a horn as one of the major charges of it's group heraldry and I always find them a pain to draw.
With respect to the "family crest"; at risk of giving you a bad day I have to point out there is no such thing. Arms belong to individuals, not families. It's probably the single most commonly misunderstood aspect of heraldry. I wrote a post explaining the issue in this thread.
| Al Muckart wrote: |
| Hi Allen,
That's a very nicely done paint job. My local SCA group has a horn as one of the major charges of it's group heraldry and I always find them a pain to draw. With respect to the "family crest"; at risk of giving you a bad day I have to point out there is no such thing. Arms belong to individuals, not families. It's probably the single most commonly misunderstood aspect of heraldry. I wrote a post explaining the issue in this thread. |
Thanks. I cut a template with an exacto knife and used it to get all three the same. I also had to use different shades of color to give it depth.
You're absolutely right and I did realize that there is no such thing as a family crest. I was being lazy when I wrote it. I should have said it was the crest of one of my ancestors. Thanks for keeping me straight.
Well, I'm not yet ready to dive into the kits & harnesses thread (still waiting on... shoes!) but today I did receive another bit of kit. As you might guess, it was a shield. Nothing special: a bone-stock Viking Age round shield courtesy of Allan at the Mercenary's Tailor and his recent sale. I snapped a couple of photos today, hoping that this will become a "before" post; I plan to paint the front in a pattern similar to my avatar, if I can get the curves looking right. (Suggestions on how to go about this are welcome!)
So anyway, my humble contribution, Part the First:

(Yeah, I know we all know what it looks like. But I've got plans!) :D
So anyway, my humble contribution, Part the First:
(Yeah, I know we all know what it looks like. But I've got plans!) :D
| Justin B. wrote: |
| Well, I'm not yet ready to dive into the kits & harnesses thread (still waiting on... shoes!) but today I did receive another bit of kit. As you might guess, it was a shield. Nothing special: a bone-stock Viking Age round shield courtesy of Allan at the Mercenary's Tailor and his recent sale. I snapped a couple of photos today, hoping that this will become a "before" post; I plan to paint the front in a pattern similar to my avatar, if I can get the curves looking right. (Suggestions on how to go about this are welcome!)
So anyway, my humble contribution, Part the First: (Yeah, I know we all know what it looks like. But I've got plans!) :D |
Cut out a cardboard pattern and use it to repeat the shape over the whole shield, it might take some cut and try to get it right so that you get the right number of repeats to cover the shield.
You could use chalk around the pattern to see if the size is right and then pencil it in when it works: Then paint in the alternating colours.
You want the curves on both sides of the pattern to be identical so that the first curve will end up being the last one when you have gotten around the entire shield.
Another similar way to do this, that will cut down on your trial and error: Take several sheets of graph paper, tape them together with transparent tape, aligning the graph lines to match up and so all the squares are the same size. You will have to have some overlap. Once you have enough sheets taped together to completely cover your shield, use a compass or string and pencil to get the demensions of your boss in the dead center, cut out the center "boss" piece and place your graph paper over the shield. Trim off all the over hanging graph paper and tape the paper in place over the edges. Draw your pattern onto the graph paper useing the squares as guides.
Your pattern consists of 6 points to plot on the outside and six points plotted where the paper meets the boss. Take a plate/ platter and trace the curve from the outer plotted point to it's mirrored inner point. Once the paper is plotted with the six curves, press firmly useing a pencil or marker or even a razor knife. Remove the graph paper and your pattern is marked/outlined or scribed onto your shield. Paint and your done.
With your particular pattern of six points in and out and 360 degrees in a circle it is fairly easy to get it right the first time.
Have fun!
Here is one of my viking shields: With some extra bosses in the early viking age fashion lying around.
The shield is 85cm in diameter, covered with linnen cloth, rawhide edge with some metall fittings.
/Viktor
[ Linked Image ]
The shield is 85cm in diameter, covered with linnen cloth, rawhide edge with some metall fittings.
/Viktor
[ Linked Image ]
Last edited by Viktor Abrahamson on Tue 21 Apr, 2009 12:49 am; edited 1 time in total
Here is the back of two planked shields i have made, resting in a tent at Birka.
These are about 70cm in diameter.
/Viktor
[ Linked Image ]
 Attachment: 67.18 KB
[ Download ]
These are about 70cm in diameter.
/Viktor
[ Linked Image ]
[ Download ]
Here is mine.

| Brian Ames wrote: |
| Here is mine. |
That's a nice photo of it. Looking good!
Thanks Ed, for bringing this thread back to the top of the page! Saves me a search for it ;)
Anyway, thank you both to Jean and Peter for your suggestions on how I might go about getting a good, curved pattern onto my shield. After starting the project with the best of intention and planning, I somehow wound up taping out a hackneyed patten using a template and some old newspapers. It worked, though I utterly failed to actually go about it as I'd planned to!
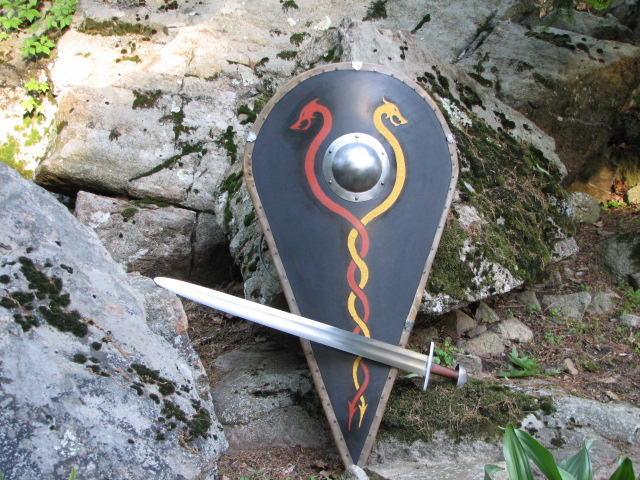
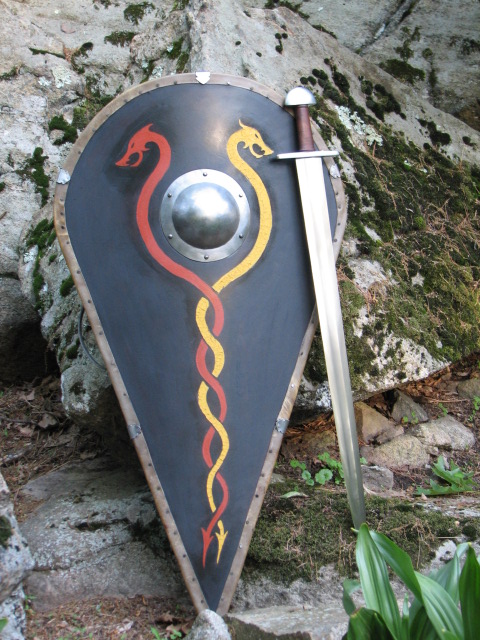
So anyway, without further ado, here's my shield as it is today:

As noted in my earlier contribution to this thread, I'd originally planned to outline the border of each field with yellow. While I like the red-black-yellow colour scheme, I was frankly expecting to make rather more of a mess of the painting, where the red and black fields meet. Really, that went off quite well, and the shield looks just dandy even without the yellow outlining. Now, I'm not sure if I want to add it... any thoughts or opinions?
(And yeah, I know that the fields curve to the left on my avatar--when I sat down to tape this out, it just seemed more natural to have them curve to the right on my shield. But otherwise!)
Anyway, thank you both to Jean and Peter for your suggestions on how I might go about getting a good, curved pattern onto my shield. After starting the project with the best of intention and planning, I somehow wound up taping out a hackneyed patten using a template and some old newspapers. It worked, though I utterly failed to actually go about it as I'd planned to!
So anyway, without further ado, here's my shield as it is today:
As noted in my earlier contribution to this thread, I'd originally planned to outline the border of each field with yellow. While I like the red-black-yellow colour scheme, I was frankly expecting to make rather more of a mess of the painting, where the red and black fields meet. Really, that went off quite well, and the shield looks just dandy even without the yellow outlining. Now, I'm not sure if I want to add it... any thoughts or opinions?
(And yeah, I know that the fields curve to the left on my avatar--when I sat down to tape this out, it just seemed more natural to have them curve to the right on my shield. But otherwise!)
Wow! some very nice shields.. I have always been intrigued with shields..
Here are a couple of mine that I have constructed. These are made from two pieces of 1/4" plywood and canvas wrapped on the front.
[ Linked Image ]
[ Linked Image ]
I have a couple of links on my web page on how I made these shields:
http://yeoldegaffers.com/project_shield.asp
and here is some info on my shield press:
http://yeoldegaffers.com/project_shieldpress.asp
Ron
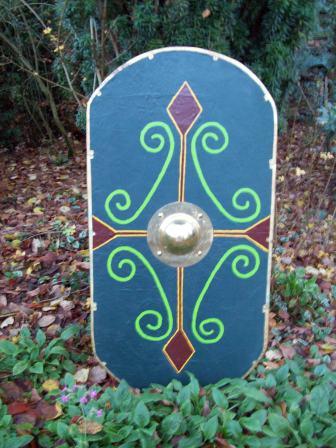
Ah, the Gauls and Batavians are still missing from the lineup! Very nice Celtic shield with the solid wood boss, by the way.
Top shield is a gaul "body board", front is leather, back is in linen, riveted rim and boss are made of brass.
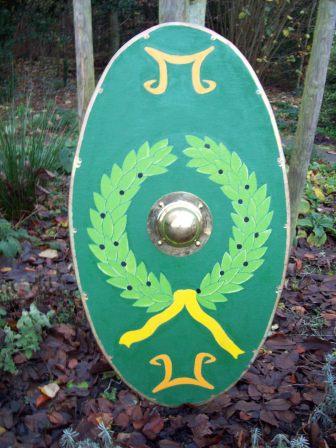
Second is a first century auxiliary shield with a wreath design taken from Trajan's column.
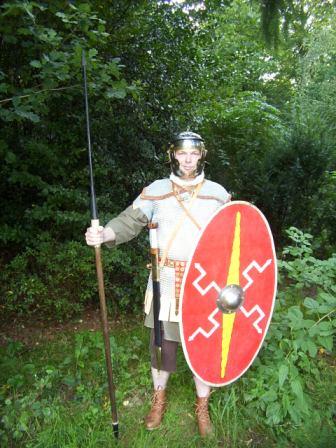
Then there's me as a Batavian horseman, alas holding a pilum, not a hasta. Shield is rawhide rimmed, boss is iron. Dimensions after the Valkenburg finds.
Attachment: 49.64 KB
Attachment: 48.81 KB
Attachment: 40.39 KB
Top shield is a gaul "body board", front is leather, back is in linen, riveted rim and boss are made of brass.
Second is a first century auxiliary shield with a wreath design taken from Trajan's column.
Then there's me as a Batavian horseman, alas holding a pilum, not a hasta. Shield is rawhide rimmed, boss is iron. Dimensions after the Valkenburg finds.
Last edited by Robert P. Wimmers on Tue 05 May, 2009 3:52 am; edited 1 time in total
Well I recently did this to try my hand at making somthing as opposed to buying it, so here I present my first attempt at making a shield, or rather buckler :lol:
Went to the tip-shop, found a vat lid, and all up it cost me $1 and 12 hours.
I think I'll try to get a bit more of the rust off with some stainless-steel cleaning stuff, otherwise I'm rather pleased.
Next project, round shield with centre grip, boss and rawhide rim :cool:
Attachment: 115.74 KB
It started out as an industrial vat lid, after removing the screw on bit with a hacksaw, it left it with a decent folded rim. Many hours of sandpapper later...
Attachment: 105.26 KB
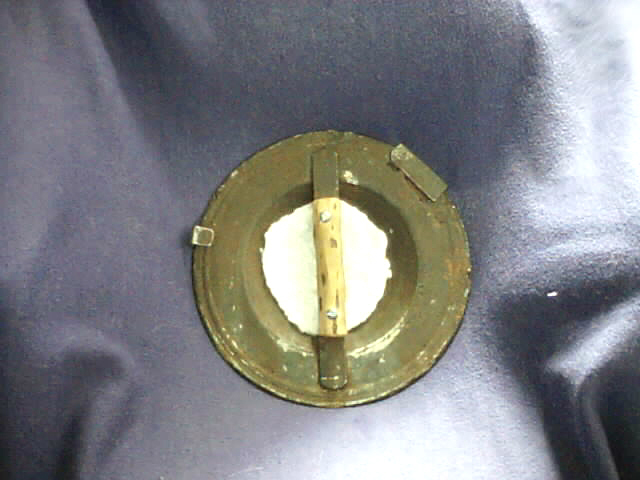
Put some holes in the lids handle, bolted on some softwood for a grip, folded over a little bit of the leftover rim bit to make a belt-hook,made some meagre repairs and put in some fake fleece which I'll replace at some point.
Attachment: 129.27 KB

I have rather small hands, so I seem to be the only one who can use (more for me :D), but here's a side shot. I didn't dish it, it was that way to begin.
Went to the tip-shop, found a vat lid, and all up it cost me $1 and 12 hours.
I think I'll try to get a bit more of the rust off with some stainless-steel cleaning stuff, otherwise I'm rather pleased.
Next project, round shield with centre grip, boss and rawhide rim :cool:
It started out as an industrial vat lid, after removing the screw on bit with a hacksaw, it left it with a decent folded rim. Many hours of sandpapper later...
Put some holes in the lids handle, bolted on some softwood for a grip, folded over a little bit of the leftover rim bit to make a belt-hook,made some meagre repairs and put in some fake fleece which I'll replace at some point.
I have rather small hands, so I seem to be the only one who can use (more for me :D), but here's a side shot. I didn't dish it, it was that way to begin.

I shot these the other day in the backyard. I chose milk paint to work in and I pretty pleased how it came out. The only issue I came across in using that type of paint is that you have to be careful and consistant with your mixture and application, otherwise you run the risk if it cracking as it dries.
Attachment: 180.89 KB
Attachment: 165.66 KB
Page 3 of 13
You cannot post new topics in this forumYou cannot reply to topics in this forum
You cannot edit your posts in this forum
You cannot delete your posts in this forum
You cannot vote in polls in this forum
You cannot attach files in this forum
You can download files in this forum
All contents © Copyright 2003-2006 myArmoury.com — All rights reserved
Discussion forums powered by phpBB © The phpBB Group
Switch to the Full-featured Version of the forum
Discussion forums powered by phpBB © The phpBB Group
Switch to the Full-featured Version of the forum