| Author |
Message |
|
Mikko Remes
Location: Finland Joined: 04 Apr 2006
Posts: 23
|
 Posted: Mon 02 Apr, 2007 9:16 am Post subject: My new Seax Posted: Mon 02 Apr, 2007 9:16 am Post subject: My new Seax |
 |
|
Hello all.
Phew! A long wait has come to an end. Over six months has passed since I got a chance to spend some time at the forge. And here is what I came up with.
Yep. It's a seax. Forged from a spring steel, filed, heat treated and sharpened. Here are the stats
OA lenght: 57cm
Blade lenght: 44cm
Blade width at the widest point: 4cm
Blade thicknes: 5mm with a very subtle distal taper
Any comments would be appriciated.
I've been busting my head with the scabbard. I'm aware that a seax should be slung horizontaly at the waist. Now that my seax measures almost 60cm the question is: How horizontaly should I wear it? And should I make a wooden core for the scabbard or settle with just thick leather. I think I would feel much more secure with the wooden core, but is it historicaly correct?
-mr
 Attachment: 116.07 KB Attachment: 116.07 KB
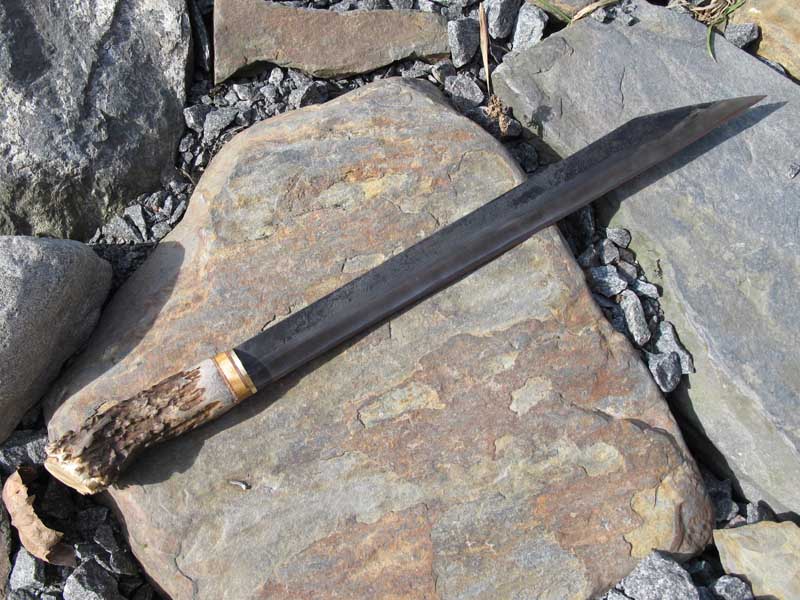
The Seax
Hakkaa päälle!
|
|
  |
 |
|
Mikko Remes
Location: Finland Joined: 04 Apr 2006
Posts: 23
|
| Posted: Mon 02 Apr, 2007 9:36 am Post subject: |
|
|
Here's some in progress photos.
Boy was I sour after two days of work. I have been working only with a mouse for over six months...
-mr
Attachment: 111.03 KB
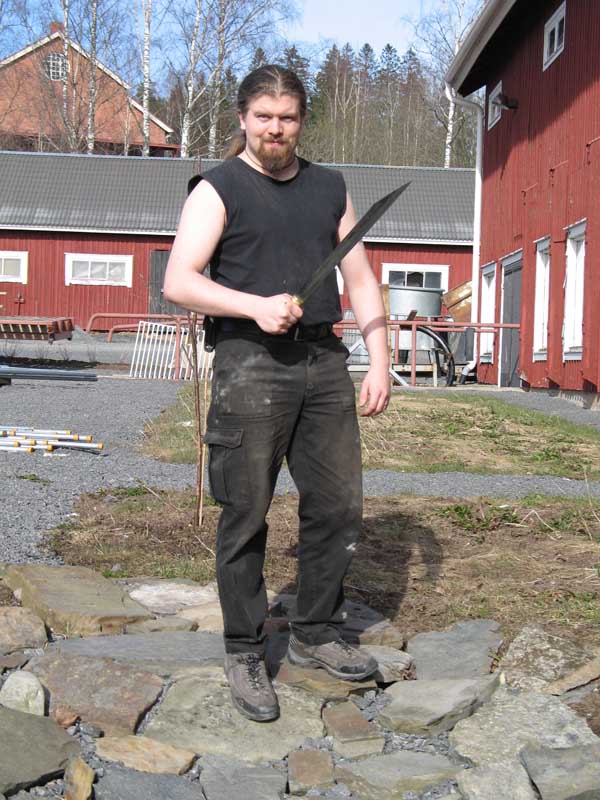
The proud father
Attachment: 64.72 KB
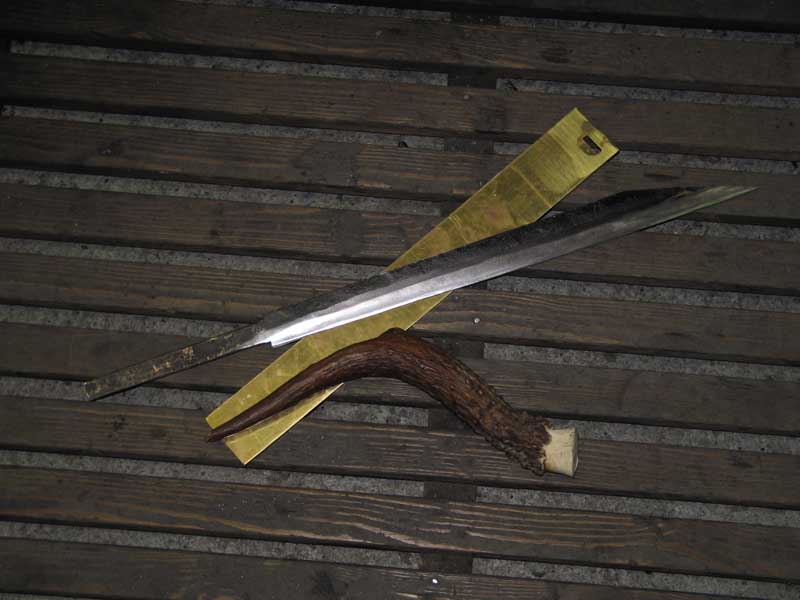
Handle materials all lined up...
Attachment: 65.05 KB

The quench...
Attachment: 59.93 KB
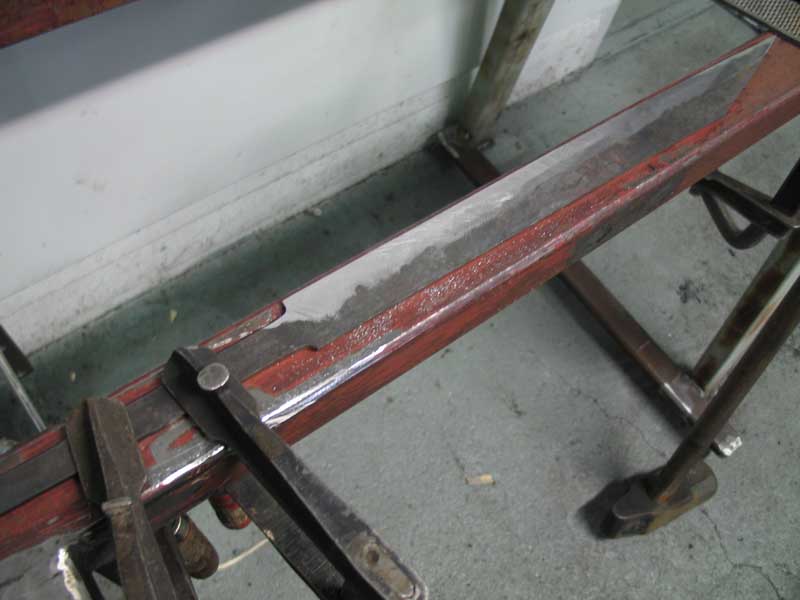
Draw filing...
Attachment: 72.12 KB

Forging...
Hakkaa päälle!
|
|
|
|
|
|
Mikko Remes
Location: Finland Joined: 04 Apr 2006
Posts: 23
|
| Posted: Mon 02 Apr, 2007 9:39 am Post subject: |
|
|
Well. It seems I messed up the order of the pictures anyway... How embarassing.
Oh well. Need sleep I guess.
-mr
Hakkaa päälle!
|
|
|
|
|
|
Kerry G. Neuls
|
| Posted: Mon 02 Apr, 2007 9:56 am Post subject: About that seax |
|
|
Excellent work,
I like the fact that your blade is longer than other seax's I've seen makes the point more appealing to me. Short wide seax have always seemed a bit off due to the clipped point.
About the sheath. I would think the period that knives of this type were carried would lend itself to either style. Most seax(what is the plural for seax anyhow) were probably carried by folkes of a more modest fortune so a sheath of simple leather was probably more common. But I you would feel more comfortable with a wood liner I can't see why you shouldn't make one.
Kerry Neuls
|
|
|
|
|
Jean Henri Chandler

|
| Posted: Mon 02 Apr, 2007 10:47 am Post subject: Re: My new Seax |
|
|
| Mikko Remes wrote: | Hello all.
Phew! A long wait has come to an end. Over six months has passed since I got a chance to spend some time at the forge. And here is what I came up with.
Yep. It's a seax. Forged from a spring steel, filed, heat treated and sharpened. Here are the stats
OA lenght: 57cm
Blade lenght: 44cm
Blade width at the widest point: 4cm
Blade thicknes: 5mm with a very subtle distal taper
Any comments would be appriciated.
I've been busting my head with the scabbard. I'm aware that a seax should be slung horizontaly at the waist. Now that my seax measures almost 60cm the question is: How horizontaly should I wear it? And should I make a wooden core for the scabbard or settle with just thick leather. I think I would feel much more secure with the wooden core, but is it historicaly correct?
-mr |
That is a really nice Sax. The kind of blade shape I like best on those. It's kind of rare to see people get them with just the right feel of the kind of old ones you see in museums and archeology books. Really good work.
I can't tell you much about how to wear them, other than to look for photos of reenactors online and emulate what seems to look right.
Jean
Books and games on Medieval Europe Codex Integrum
Codex Guide to the Medieval Baltic Now available in print
|
|
|
|
|
John Cooksey

|
| Posted: Mon 02 Apr, 2007 12:21 pm Post subject: |
|
|
That's great work.
I didn't surrender, but they took my horse and made him surrender.
|
|
|
|
|
|
Martin Wilkinson
|
| Posted: Mon 02 Apr, 2007 1:21 pm Post subject: |
|
|
Congratulations, absolutely gorgeous.
"A bullet you see may go anywhere, but steel's, almost bound to go somewhere."
Schola Gladiatoria
|
|
 |
|
|
Mikko Remes
Location: Finland Joined: 04 Apr 2006
Posts: 23
|
| Posted: Mon 02 Apr, 2007 9:42 pm Post subject: |
|
|
Thank you for your kind words 
I too find the short brocken back seax to be rather blunt looking IMHO. I wanted mine to have a mean point suitable for stabbing and blade long enough to make a nasty chopper. Something a modest smith could have put together in a bit of a hurry.
Now that I have one I can easily figure out why the seax was so popular. It realy was rather fast to mak even with simple tools. It took me about 15 hours to complete. Someone with a little more skill could propably have done it in half the time.
Next weekend I'm planning to do some cutting with it. We shall see how it handles...
I think I'll go with the wooden core. I still need to figure out the angle and the suspension, though.
-mr
Hakkaa päälle!
|
|
|
|
|
Vegard Stomsvik Pedersen

|
| Posted: Thu 05 Apr, 2007 10:35 am Post subject: |
|
|
|
Beautiful seax!
|
|
 |
|
Etienne Hamel

Location: Granby (QC) canada Joined: 09 Sep 2006
Posts: 443
|
| Posted: Sun 06 May, 2007 1:51 pm Post subject: |
|
|
|
What did you take to make the blade stuck with the handle?
|
|
|
|
|
|
Mikko Remes
Location: Finland Joined: 04 Apr 2006
Posts: 23
|
| Posted: Sun 06 May, 2007 8:27 pm Post subject: |
|
|
Etienne:
I drilled a hole on the handle and then shaped the hole with files to tightly fit the tang. I filled the hole with epoxy glue and hammered the handle in place. Later I was told that if I soaked the antler in warm water for a while it would have soften enough that I could have just pushed the antler in to place. As the antler dries out it would shrink and seal the tang tightly to the handle. Thus, I wouldn't have needed glue at all. That would propably have saved me a lot of time, since I wouldn't have needed to shape the hole as much as I did. Antler is pretty tough when it's dry and it doesn't give up much. Therefore the hole needs a lot of shaping to accept the tang. Next time I will definitely try to soften the antler with water...
Toni R. posted some cutting pics on this http://www.myArmoury.com/talk/viewtopic.php?t...highlight= thread a while back. As he stated on his thread, the seax cut like dream. We had a lot of fun.
-mr
Hakkaa päälle!
|
|
|
|
|
Henrik Bjoern Boegh

Location: Agder, Norway Joined: 03 Mar 2004
Posts: 386
|
| Posted: Wed 09 May, 2007 10:29 am Post subject: |
|
|
Hi Mikko,
Your seax looks great! I like the hilt. With the antler and the fittings it has a practical, simple and elegant look. The blade looks as if it's made for business 
Good luck with the scabbard!
Cheers,
Henrik
Constant and true.
|
|
|
|
|
|
Korey J. Lavoie
Location: New Hampshire, USA Joined: 06 Apr 2006
Posts: 63
|
| Posted: Thu 10 May, 2007 2:30 pm Post subject: |
|
|
Excellent work Mikko. I'm curious about the quenching method you used, that almost looks like a Salt-Pot.
From the hundred year war
To the Crimea
With a Lance and a Musket and a Roman Spear
To all of the Men who have stood with no fear
In the Service of the King
-The Clash: The Card Cheat
|
|
|
|
|
|
Mikko Remes
Location: Finland Joined: 04 Apr 2006
Posts: 23
|
| Posted: Thu 10 May, 2007 8:08 pm Post subject: |
|
|
| Korey J. Lavoie wrote: | | Excellent work Mikko. I'm curious about the quenching method you used, that almost looks like a Salt-Pot. |
Thank you. No salts involved with the quench. It's actualy just a metal tube filled with oil.
-mr
Hakkaa päälle!
|
|
|
|
|
Bruno Giordan

|
| Posted: Thu 10 May, 2007 9:33 pm Post subject: |
|
|
| Mikko Remes wrote: | | Korey J. Lavoie wrote: | | Excellent work Mikko. I'm curious about the quenching method you used, that almost looks like a Salt-Pot. |
Thank you. No salts involved with the quench. It's actualy just a metal tube filled with oil.
-mr |
Old wisdom at work.
recently an old smith told me this was a "secret" of old italian smiths.
Well known i would say, but truely an old method (seventeenth century according to his version).
The narrowness of the container causes a stirring that should improve cristallization.
I'm eager to try it.
|
|
|
|
|
|
Mikko Remes
Location: Finland Joined: 04 Apr 2006
Posts: 23
|
| Posted: Fri 11 May, 2007 12:23 am Post subject: |
|
|
| Bruno Giordan wrote: | | Mikko Remes wrote: | | Korey J. Lavoie wrote: | | Excellent work Mikko. I'm curious about the quenching method you used, that almost looks like a Salt-Pot. |
Thank you. No salts involved with the quench. It's actualy just a metal tube filled with oil.
-mr |
Old wisdom at work.
recently an old smith told me this was a "secret" of old italian smiths.
Well known i would say, but truely an old method (seventeenth century according to his version).
The narrowness of the container causes a stirring that should improve cristallization.
I'm eager to try it. |
I had no idea that the tube would improve the quench. I quess it was the only container tall enough to accept the blade that long... Well, one learns something new every day =)
-mr
Hakkaa päälle!
|
|
|
|
|
Michal Plezia
Industry Professional

|
| Posted: Fri 11 May, 2007 12:48 am Post subject: |
|
|
Great item! It is not your first,is it?
www.elchon.com
Polish Guild of Knifemakers
The sword is a weapon for killing, the art of the sword is the art of killing. No matter what fancy words you use or what titles you put to
it that is the only truth.
|
|
|
|
|
|
Mikko Remes
Location: Finland Joined: 04 Apr 2006
Posts: 23
|
|
|
|
|
Bruno Giordan
|
| Posted: Fri 11 May, 2007 11:21 pm Post subject: |
|
|
| Mikko Remes wrote: | | Bruno Giordan wrote: | | Mikko Remes wrote: | | Korey J. Lavoie wrote: | | Excellent work Mikko. I'm curious about the quenching method you used, that almost looks like a Salt-Pot. |
Thank you. No salts involved with the quench. It's actualy just a metal tube filled with oil.
-mr |
Old wisdom at work.
recently an old smith told me this was a "secret" of old italian smiths.
Well known i would say, but truely an old method (seventeenth century according to his version).
The narrowness of the container causes a stirring that should improve cristallization.
I'm eager to try it. |
I had no idea that the tube would improve the quench. I quess it was the only container tall enough to accept the blade that long... Well, one learns something new every day =)
-mr |
Another interesting aspect is differential heat treating: again my friend was told by his elder bldesmith mentors that they used to quench blades in two (or three for double edged blades) stages: using a large water tank, they would quench first just the edge of the blade, then, after a few seconds, they would immerse the entire blade.
In the case of a doble edged one, they would swiftly quench both edges, then they would sink the entire blade itself.
Cold water
|
|
|
|
|
|
Mikko Remes
Location: Finland Joined: 04 Apr 2006
Posts: 23
|
| Posted: Sun 13 May, 2007 8:15 am Post subject: |
|
|
Yep. I've done differential heat treating with puukko-blades. Actualy most of puukkos I've made were differentialy heat treated. I have always used Oil as quench medium, though.
-mr
Hakkaa päälle!
|
|
|
|
|
|
|

