Info Favorites Register Log in
myArmoury.com Discussion Forums

Forum index Memberlist Usergroups Spotlight Topics Search
Forum Index > Historical Arms Talk > Inexpensive Sallet Upgrade: DIY Project Reply to topic
This is a standard topic  
Author Message
Sean Flynt


Location: Birmingham, Alabama
Joined: 21 Aug 2003
Likes: 10 pages
Reading list: 13 books

Spotlight topics: 7
Posts: 5,981

PostPosted: Wed 04 Aug, 2021 7:37 am    Post subject: Inexpensive Sallet Upgrade: DIY Project         Reply with quote

Here's another inexpensive armour project for the DIY crowd. This $88 "Burgundian Sallet" (mine is from Kult of Athena, but you can find it under that name worldwide.) is aiming for an Italian/Franco-Burgundian form like that of the Metropolitan Museum of Art's heavily restored example: https://www.metmuseum.org/art/collection/search/26451

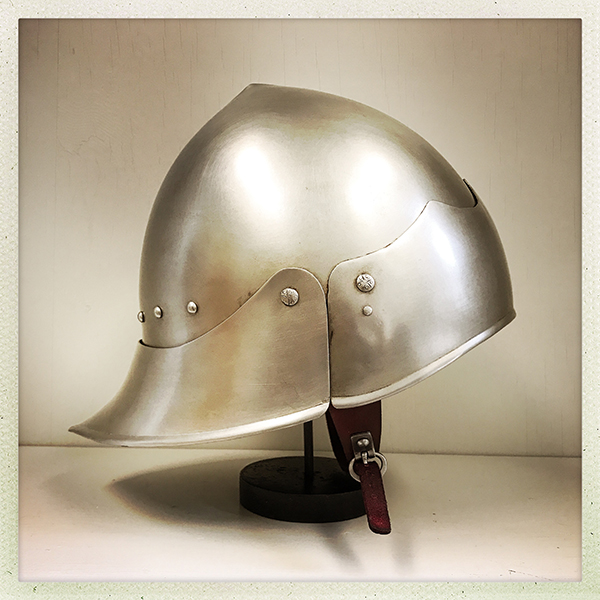
You can see the reproduction from various angles here: https://www.kultofathena.com/product/burgundian-sallet/

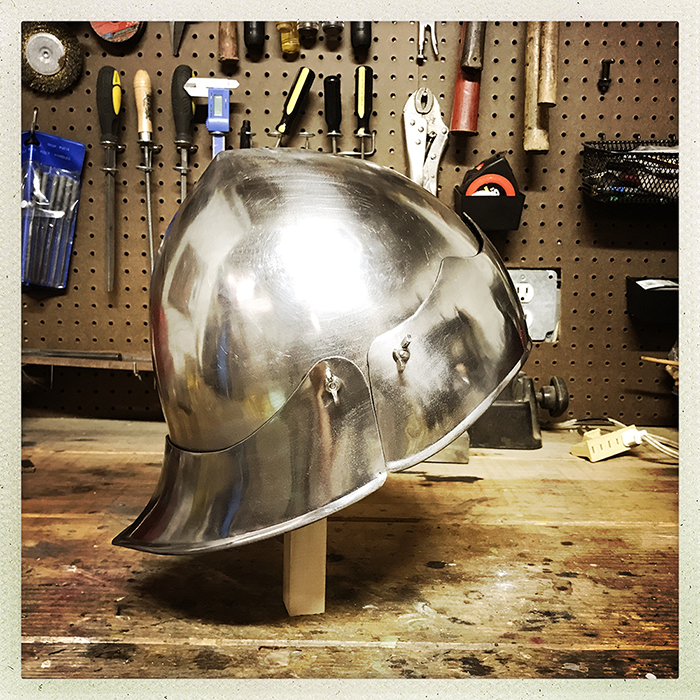
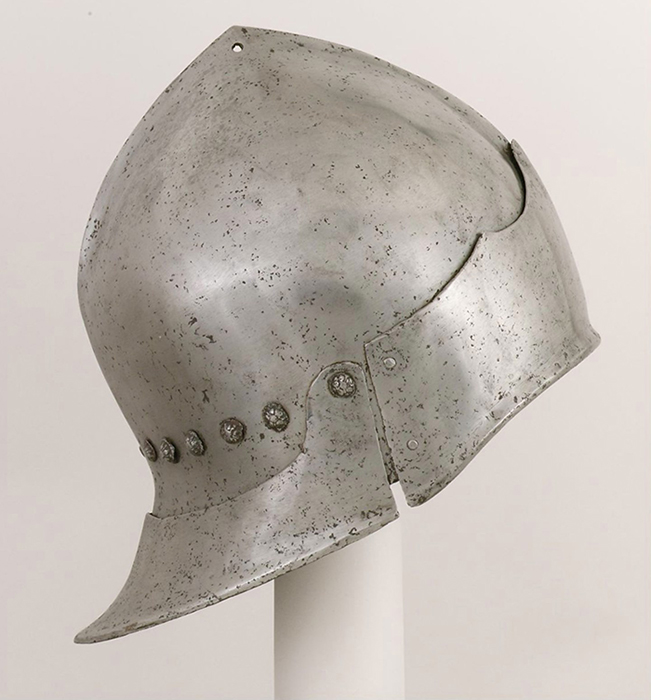
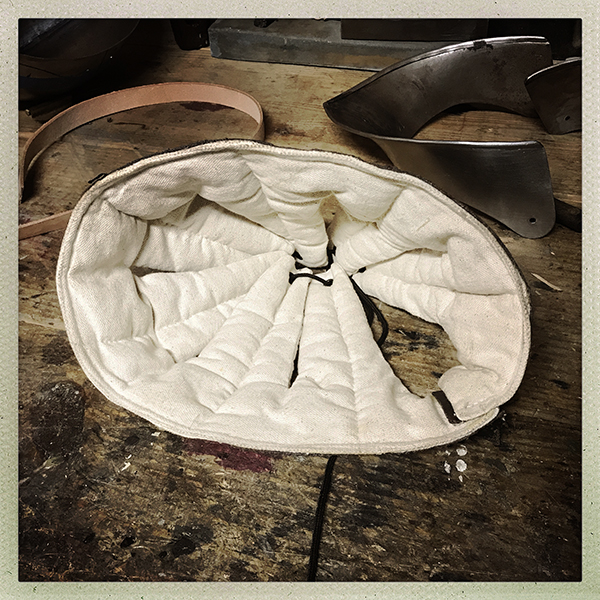
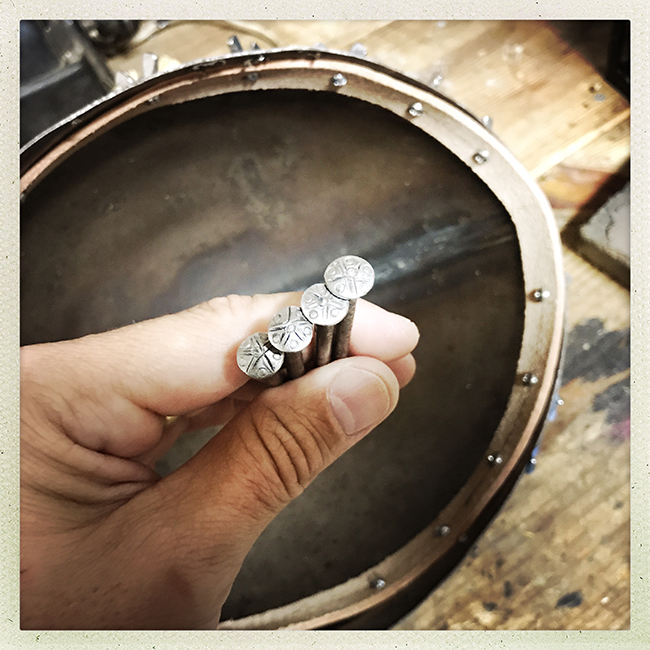
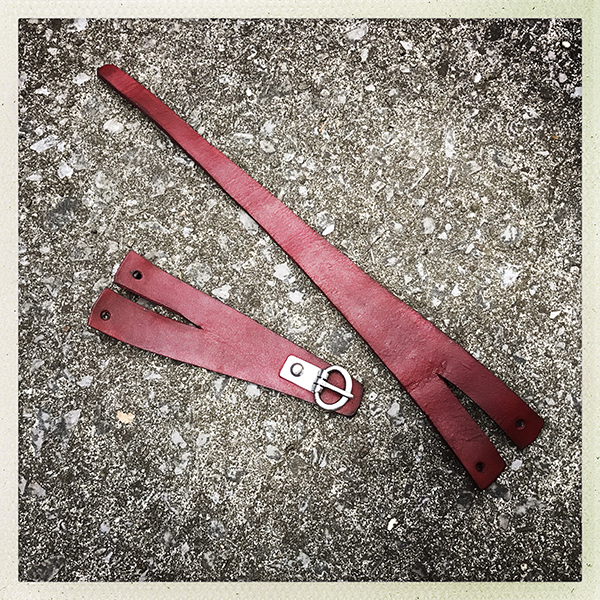
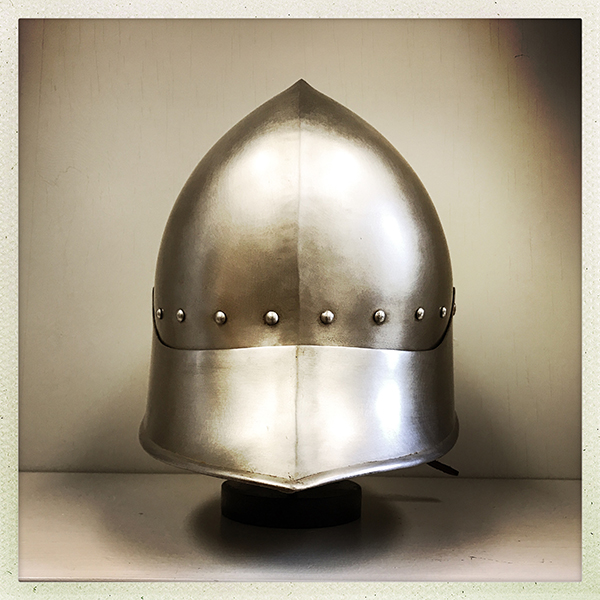
It seems to me that this the most historically plausible off-the-rack sallet currently available at the low end of the market. I'd like it to be deeper, but the form is pretty good overall, and even the turns of the plates correspond to the Met's sallet. Lining is of historical style, but glued-in rather than riveted. It pulls out easily and can be reinstalled with a proper lining band. Straps are the right shape, but of modern stitched construction. The 16 ga. bowl is too shallow to be worn without the brow reinforcement and articulated nape defense, but those plates have good form and decent fit. It's not oversized, and it can be bent here and there to customize fit. This piece is easily upgraded to something relatively plain, as in the Met example. That's pretty much free. If you want to invest in a handful of fancy brass rivets for the back and plates, and maybe add a plume holder and blued finish, you could have a high-status sallet of ca. 1480.

My current aim is for a plain finish with a new and properly secured liner and straps. So far, I have:

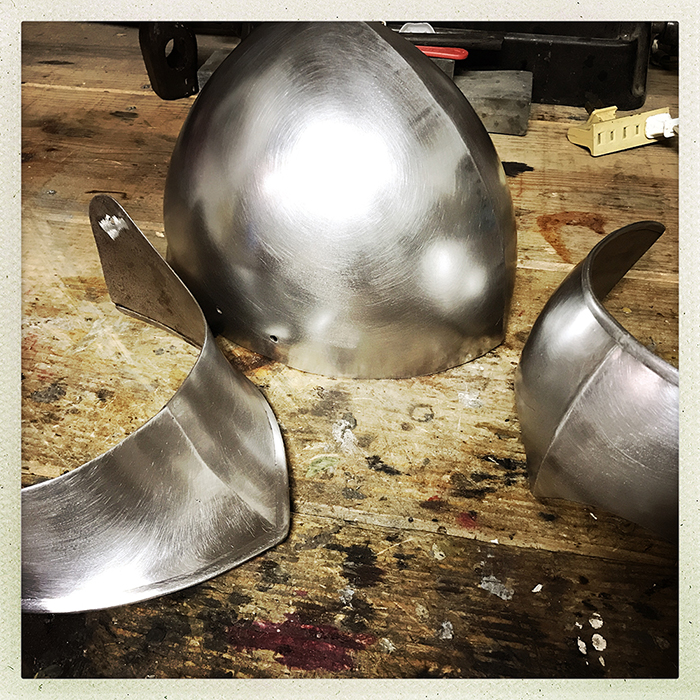
• Pressed in the sides of the bowl slightly to customize the fit.

• Removed the four rivets that secured the brow reinforcement and nape defense. I'm using wing nuts for easy assembly/disassembly during the upgrade process.

• Used CitriStrip to easily remove the flaking glossy black paint from the interior of the bowl and plates.

• Sanded the bowl and plate exteriors to reduce the very bright factory polish. I haven't yet decided on the final finish.

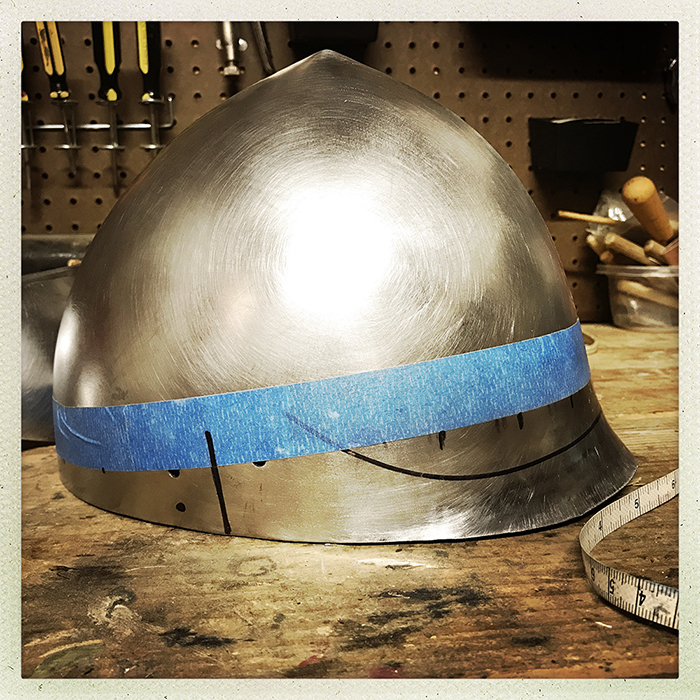
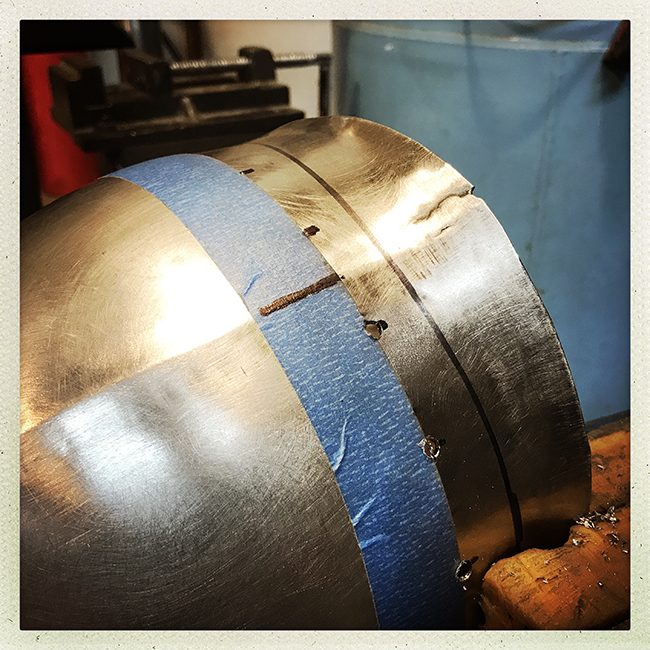
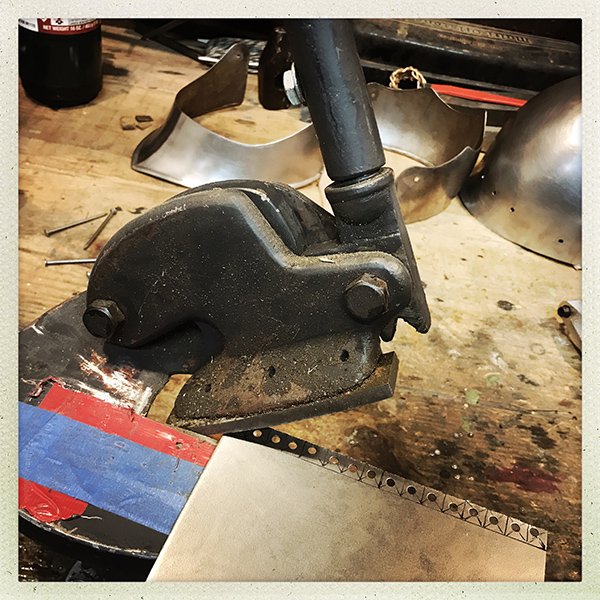
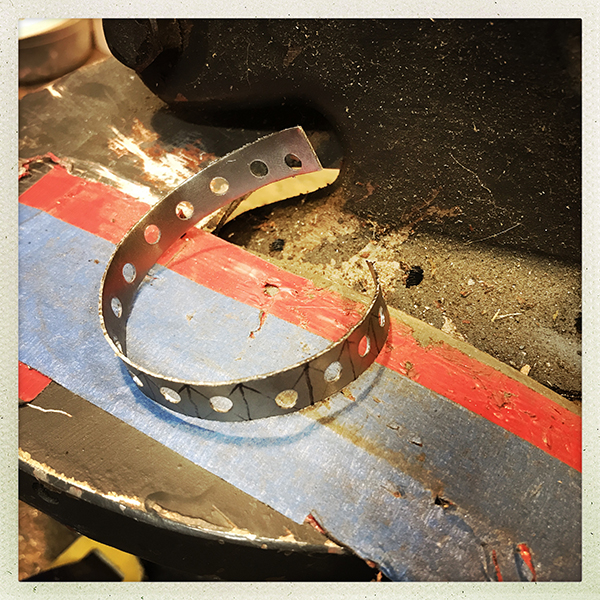
• Marked the rivet line for the lining band. As shown here, I've planned for eight standard domed steel rivets across the back, four large decorative rivets to secure the plates, six or eight flush rivets under the brow defense, and one flush rivets below the decorative rivet on each side of the brow reinforcement. The nape defense requires free articulation.

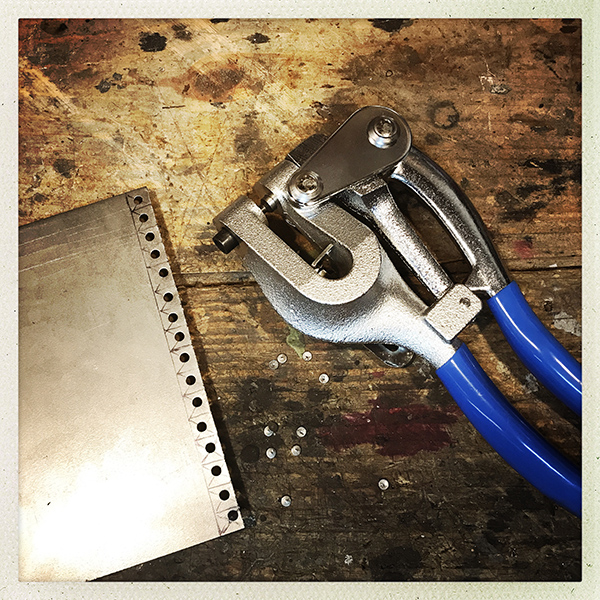
• Cut a lining band.

I'll add photos as I go through this project.


 Attachment: 582.82 KB
SUDX0872.JPG


 Attachment: 556.61 KB
BNQV0450.JPG


 Attachment: 546.83 KB
HHRD5686.JPG


 Attachment: 219.16 KB
217400197_10158566141674387_4059793133530609967_n.jpg


-Sean

Author of the Little Hammer novel

https://www.amazon.com/Little-Hammer-Sean-Flynt/dp/B08XN7HZ82/ref=sr_1_1?dchild=1&keywords=little+hammer+book&qid=1627482034&sr=8-1
View user's profile Send private message Visit poster's website
Tyler C.


Location: Canada
Joined: 20 Aug 2019
Reading list: 2 books

Posts: 160

PostPosted: Mon 09 Aug, 2021 5:19 pm    Post subject:         Reply with quote

This looks like a fun project. Looking forward to seeing your updates!
View user's profile Send private message
Sean Flynt


Location: Birmingham, Alabama
Joined: 21 Aug 2003
Likes: 10 pages
Reading list: 13 books

Spotlight topics: 7
Posts: 5,981

PostPosted: Fri 13 Aug, 2021 10:06 am    Post subject:         Reply with quote

Here's the original liner, with the start of a new lining band in the background. You can see that the ends of the liner are overlapped to create the proper fit. The thin black material visible in that overlap is the very thin original lining band. The lining is stitched separate from that band, so removal of the band stitches will not affect the liner apart from unstitching the overlap. I'll make a new liner and band, though the original liner is better than what you'll find in some reproduction sallets costing far more. The only reasons not to use it (with a proper lining band) are if you just want to say you did as much as possible yourself, or if you find it too thin. I'm in both of those camps.


 Attachment: 406.57 KB
liner.JPG


-Sean

Author of the Little Hammer novel

https://www.amazon.com/Little-Hammer-Sean-Flynt/dp/B08XN7HZ82/ref=sr_1_1?dchild=1&keywords=little+hammer+book&qid=1627482034&sr=8-1
View user's profile Send private message Visit poster's website
Sean Flynt


Location: Birmingham, Alabama
Joined: 21 Aug 2003
Likes: 10 pages
Reading list: 13 books

Spotlight topics: 7
Posts: 5,981

PostPosted: Thu 19 Aug, 2021 7:27 am    Post subject:         Reply with quote

The bowl is drilled for a variety of rivet types. The rivets under the brow defense will be modified flat-head nails. The row of rivets over the nape defense will be standard domed rivets. The brow defense will have on each side one decorated rivet and one flush or almost flush rivet. The nape dense will pivot on two decorated rivets.

Flush rivets would be most appropriate for use under the brow defense but I think the bowl is a bit too thin to create the necessary recess.

The first image below shows how I mark the position of lining rivets for drilling. Note the poor weld where the halves of the bowl were joined. This flaw is concealed by the nape defense.

The second image shows my quick/crude decoration of the nails that will become rivets at the sides of the sallet. These are loosely based on the rivets of the Met sallet, which might have been added as part of the sallet's renovation. In the background, the rivet-punched band is temporarily in place (with wing nuts) to ensure fit before I trim the length and punch the holes for stitching.


 Attachment: 430.29 KB
XVSQ1353.JPG


 Attachment: 354.79 KB
OMTZ2352.JPG


-Sean

Author of the Little Hammer novel

https://www.amazon.com/Little-Hammer-Sean-Flynt/dp/B08XN7HZ82/ref=sr_1_1?dchild=1&keywords=little+hammer+book&qid=1627482034&sr=8-1
View user's profile Send private message Visit poster's website
Sean Flynt


Location: Birmingham, Alabama
Joined: 21 Aug 2003
Likes: 10 pages
Reading list: 13 books

Spotlight topics: 7
Posts: 5,981

PostPosted: Tue 07 Sep, 2021 9:02 am    Post subject:         Reply with quote

Here a few more shots of the process. These include making washers for the lining rivets, developing new straps and making/mounting the steel buckle.


 Attachment: 335.62 KB
PLBS6764.JPG


 Attachment: 285.66 KB
CUHW5339.JPG


 Attachment: 439.01 KB
XHBI5587.JPG


 Attachment: 450.24 KB
CVUP6053.JPG


 Attachment: 452.56 KB
RXXK0868.JPG


 Attachment: 318.3 KB
FQFTE0028.JPG


 Attachment: 567.39 KB
THVX9374.JPG


-Sean

Author of the Little Hammer novel

https://www.amazon.com/Little-Hammer-Sean-Flynt/dp/B08XN7HZ82/ref=sr_1_1?dchild=1&keywords=little+hammer+book&qid=1627482034&sr=8-1
View user's profile Send private message Visit poster's website
Sean Flynt


Location: Birmingham, Alabama
Joined: 21 Aug 2003
Likes: 10 pages
Reading list: 13 books

Spotlight topics: 7
Posts: 5,981

PostPosted: Tue 21 Sep, 2021 7:36 am    Post subject:         Reply with quote

Just finished this one. I didn't include a drawstring/thong at the top of the lining peaks. Most one-size-fits-none helmets need that suspension system, but this one fits me so well that it's not needed.

If you want to try a helmet project, I'd say this is a good and cheap introduction to that work. You can do a complete overhaul like this project, but it's wearable (and a good value) in its stock form. You don't have to have multiple rivet types or make your own rivets. Use one kind of readily available rivet and one drill bit. Use manufactured round washers (they won't be seen). Re-use the stock liner until you feel ready to do that work. You definitely should make new straps and buckle to install with the lining band. Buckles are not hard to make, and they have applications across the whole hobby.


 Attachment: 360.14 KB
Stitching.JPG


 Attachment: 258.02 KB
Side.JPG


 Attachment: 256.33 KB
Back.JPG


 Attachment: 252.96 KB
Front.JPG


-Sean

Author of the Little Hammer novel

https://www.amazon.com/Little-Hammer-Sean-Flynt/dp/B08XN7HZ82/ref=sr_1_1?dchild=1&keywords=little+hammer+book&qid=1627482034&sr=8-1
View user's profile Send private message Visit poster's website
Bill Grandy
myArmoury Team


myArmoury Team

Location: Northern VA,USA
Joined: 25 Aug 2003
Reading list: 43 books

Spotlight topics: 2
Posts: 4,194

PostPosted: Tue 21 Sep, 2021 7:45 am    Post subject:         Reply with quote

Awesome work, Sean!
HistoricalHandcrafts.com
-Inspired by History, Crafted by Hand


"For practice is better than artfulness. Your exercise can do well without artfulness, but artfulness is not much good without the exercise.” -anonymous 15th century fencing master, MS 3227a
View user's profile Send private message Visit poster's website
Sean Flynt


Location: Birmingham, Alabama
Joined: 21 Aug 2003
Likes: 10 pages
Reading list: 13 books

Spotlight topics: 7
Posts: 5,981

PostPosted: Tue 21 Sep, 2021 8:04 am    Post subject:         Reply with quote

Thanks! I hope this company will be rewarded for trying, and turn out some other simple forms that could be used as-is or serve as the foundation for projects. A plain steel cap would be cool. You could line it, add rondels, etc. Black sallet–paint it, cover it. Those helmets are expected to be of indifferent quality and finish, so the historical bar is already pretty low. They just have to try to get the form right. So many manufacturers don't even try.
-Sean

Author of the Little Hammer novel

https://www.amazon.com/Little-Hammer-Sean-Flynt/dp/B08XN7HZ82/ref=sr_1_1?dchild=1&keywords=little+hammer+book&qid=1627482034&sr=8-1
View user's profile Send private message Visit poster's website
Julien M


Location: Austin TX
Joined: 14 Sep 2005

Spotlight topics: 1
Posts: 1,086

PostPosted: Wed 22 Sep, 2021 9:22 am    Post subject:         Reply with quote

Great work as usual, subtle but clear improvements.
Good to see you back at the workbench Sean Happy
View user's profile Send private message
Sean Flynt


Location: Birmingham, Alabama
Joined: 21 Aug 2003
Likes: 10 pages
Reading list: 13 books

Spotlight topics: 7
Posts: 5,981

PostPosted: Thu 23 Sep, 2021 2:45 am    Post subject:         Reply with quote

Thanks! Now, back to edged weapons!
-Sean

Author of the Little Hammer novel

https://www.amazon.com/Little-Hammer-Sean-Flynt/dp/B08XN7HZ82/ref=sr_1_1?dchild=1&keywords=little+hammer+book&qid=1627482034&sr=8-1
View user's profile Send private message Visit poster's website
Christian Henry Tobler


Location: Oxford, CT
Joined: 25 Aug 2003

Posts: 704

PostPosted: Mon 27 Sep, 2021 5:04 am    Post subject:         Reply with quote

Nicely done, Sean - this looks great!

Best regards,

Christian

Christian Henry Tobler
Order of Selohaar

Freelance Academy Press: Books on Western Martial Arts and Historical Swordsmanship

Author, In Saint George's Name: An Anthology of Medieval German Fighting Arts
View user's profile Send private message Visit poster's website AIM Address


Display posts from previous:   
Forum Index > Historical Arms Talk > Inexpensive Sallet Upgrade: DIY Project
Page 1 of 1 Reply to topic
All times are GMT - 8 Hours

View previous topic :: View next topic
Jump to:  
You cannot post new topics in this forum
You cannot reply to topics in this forum
You cannot edit your posts in this forum
You cannot delete your posts in this forum
You cannot vote in polls in this forum
You cannot attach files in this forum
You can download files in this forum


All contents © Copyright 2003-2024 myArmoury.com — All rights reserved
Discussion forums powered by phpBB © The phpBB Group
Switch to the Basic Low-bandwidth Version of the forum