| Author |
Message |
|
Alex Indman
|
 Posted: Wed 17 Apr, 2019 7:21 pm Post subject: Anglo-Saxon seax with runic inlays (DIY project) Posted: Wed 17 Apr, 2019 7:21 pm Post subject: Anglo-Saxon seax with runic inlays (DIY project) |
 |
|
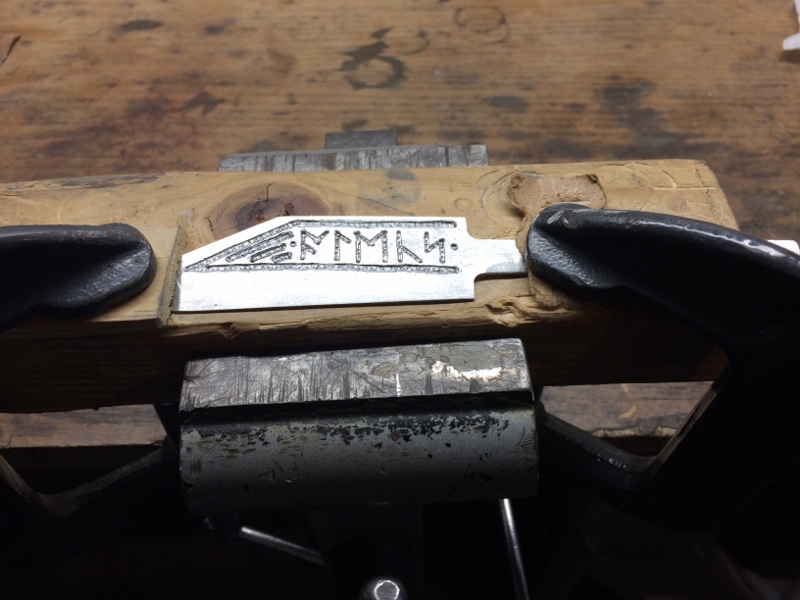
Just finished my last hobby project - a small Anglo-Saxon seax inspired by the famous Osmund seax from the Museum of London and similar examples.
It was my first experiment with 1084 steel; with using a coffee can forge (used just a torch before, limiting myself to 3" edge at most); and with doing blade inlays more complicated than a single short line.
This time I took some WIP pictures so decided to start with them and some discussion of techniques involved rather than posting the finished knife right away.
The blade was made by stock removal. 4" long, 1 1/8" wide, 3/16" thick back, flat ground almost all the way to edge (actually edge was later finished as slightly convex).
Just like with my last project, I decided to cut all the grooves for inlay before heat treatment. I was afraid that the back of heat treated blade may end up too hard for cutting grooves, and this time this is exactly what happened: even though I only dipped the edge for about 1/2" into oil, the whole blade including the back got hardened! Could it be something about 1084 steel (I used 1095 before a few times and differential quench worked)?
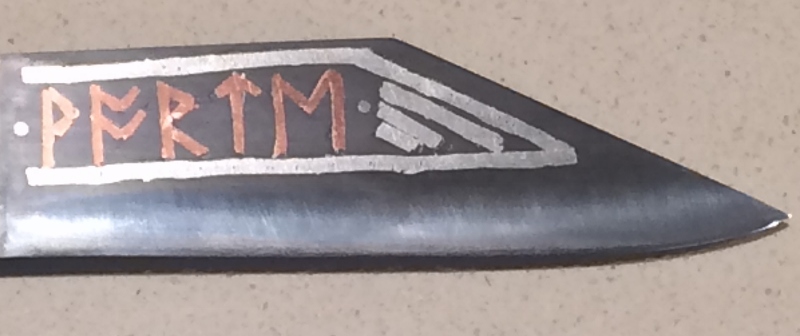
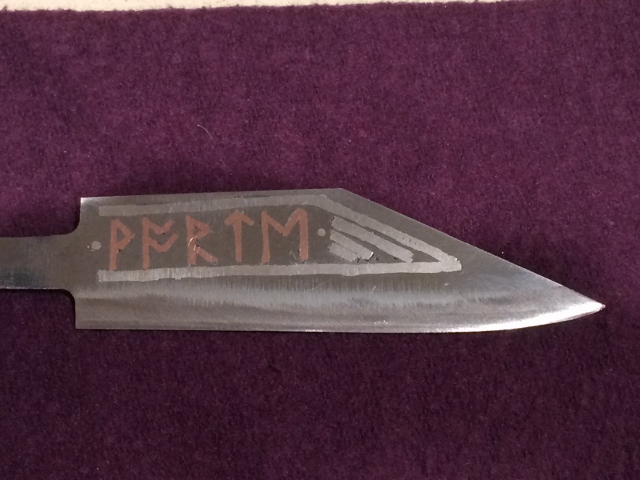
I originally planned for inlay in Anglo-Saxon runes, one word on each side: "ALEKS WORTE" (Alex made), to be surrounded by a border of two opposing strands of twisted copper/silver wire (to form the classic chevron pattern).
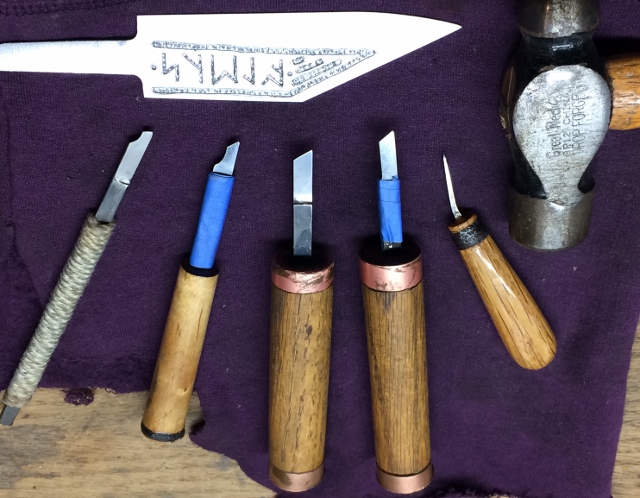
I also used self made experimental chisels (of 1095 steel) , some of which I used in the past for inlays in soft metals (Japanese style projects) and some specially made for this project. I know it must be a pain in the neck compared to modern tools, but I figured simple high carbon steel tools is what they used in the past for engraving unhardened steel so it can be done and would be more interesting.
So here are the tools and blade engraved for inlay.
To be continued...
 Attachment: 199.86 KB Attachment: 199.86 KB
Attachment: 209.51 KB
|
|
  |
 |
|
Alex Indman
|
| Posted: Wed 17 Apr, 2019 7:32 pm Post subject: |
|
|
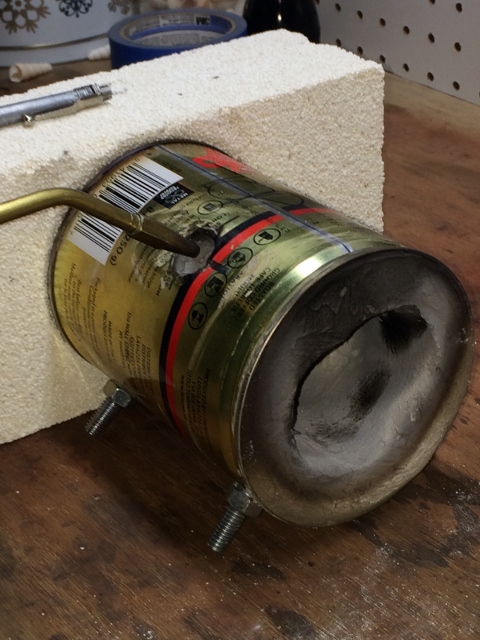
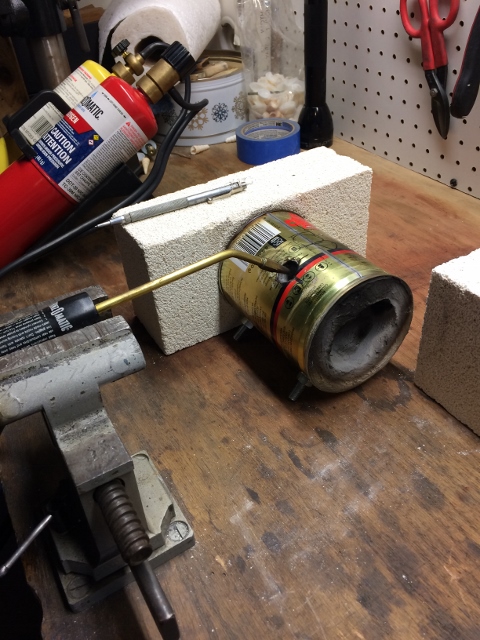
Next I made a coffee can forge from plans found online. Worked great, the 4" blade got uniformly hot enough for quenching in just a few minutes. Next time I will try 5", which is the length of the can.
Differential quench didn't work, though, as I said above.
I tempered the blade in oven, leaving it pretty hard (should be safe for a short stout blade).
So here is my coffee can forge setup and heat treated/cleaned up blade:
To be continued...
Attachment: 187.29 KB
Attachment: 212.05 KB
Attachment: 185.49 KB
|
|
|
|
|
|
Alex Indman
|
| Posted: Wed 17 Apr, 2019 7:58 pm Post subject: |
|
|
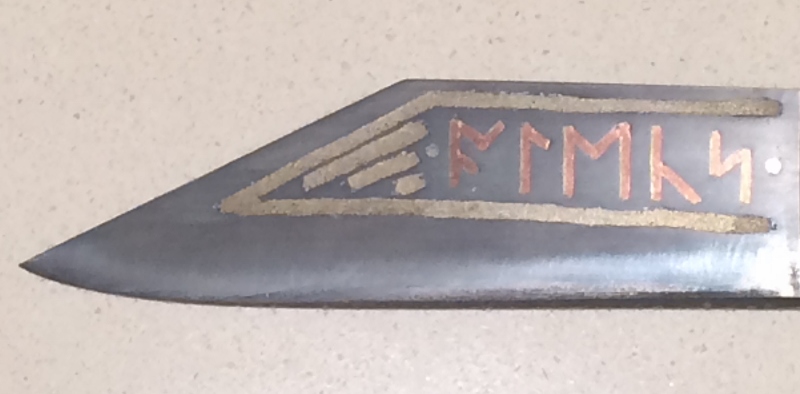
Next I started putting inlays in. The copper runes and silver dots went without any trouble (just a few tiny gaps in some corners of the runs, will have to be careful about that next time).
But the border just wouldn't go in! I was planning to use two strands of very thin (24ga) twisted wires. This required very shallow and relatively broad grooves. I tested that on a very short stretch and it held, but apparently such things don't scale up very well... Turned out that with such a shallow depth it is very easy to screw up undercutting the edges and not see it. The worst part was that since the blade was all hardened, I couldn't correct anything.
So I tried to hammer into the border grooves some very soft silver solder alloy of suitable dimensions I happened to have. And it did work on one side. Actually looks pretty good.
Unfortunately, on the other side some stretches wouldn't hold metal no matter what I did. So I had to cheat - got some powdered
brass, mixed it with epoxy, and used that to fill the border. Ended up looking not quite as real solid brass inlay, but surprisingly close. If you didn't know, could take it for inlay of some brass-like copper alloy (and BTW, medieval inlays could include all kinds of non-standard alloys).
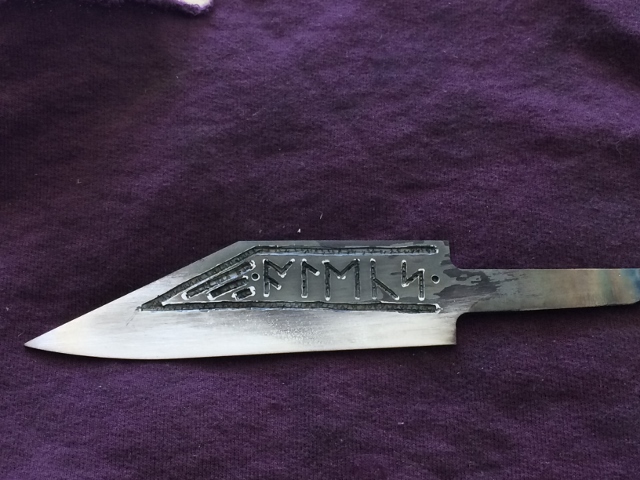
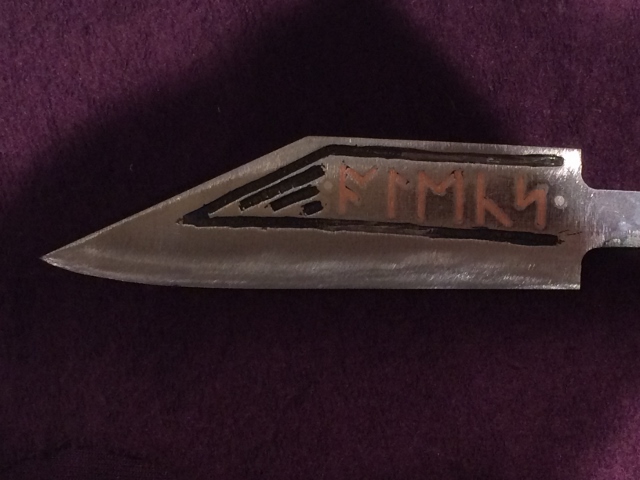
Here are the inlays after rough sanding, and then finished blade (600 grit, blade darkened with vinegar for contrast a little, edge sharpened and stropped to razor sharpness):
To be continued...
Attachment: 115.98 KB
Attachment: 111.46 KB
Attachment: 136.18 KB
Attachment: 161.69 KB
|
|
|
|
|
|
Alex Indman
|
| Posted: Thu 18 Apr, 2019 1:10 pm Post subject: |
|
|
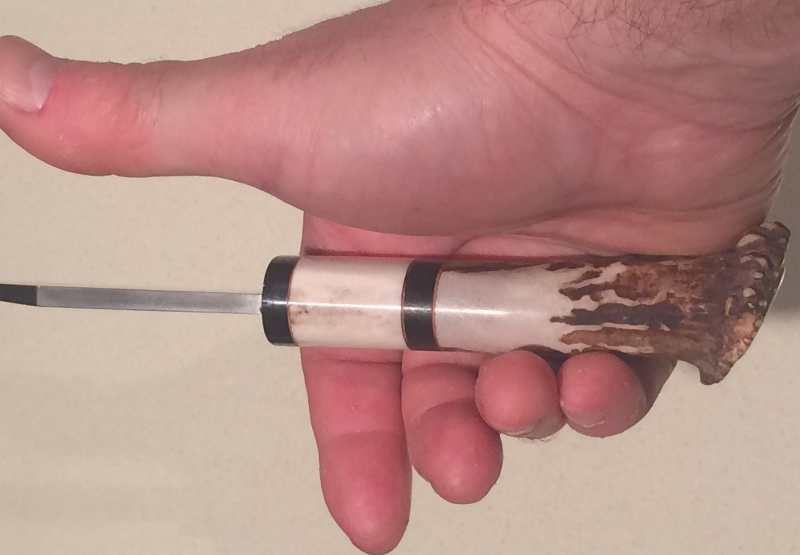
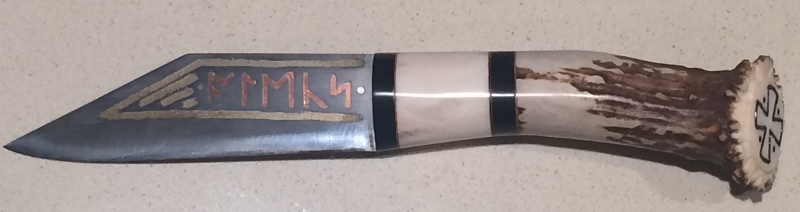
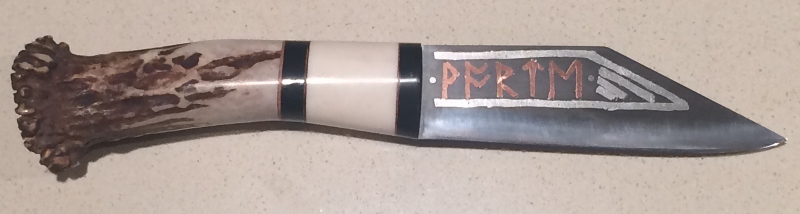
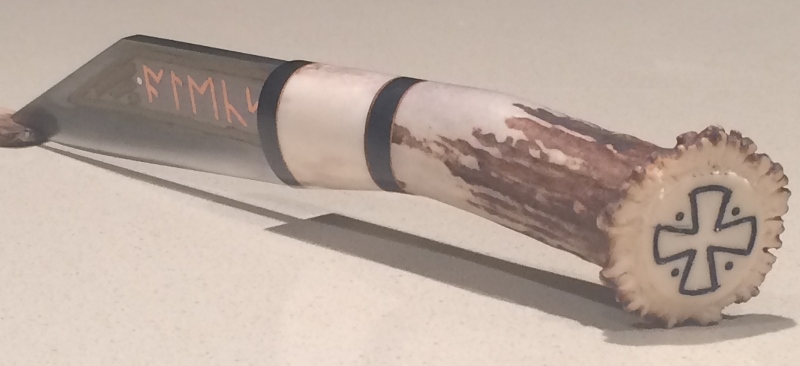
Now the finished knife. The handle is made of crown stag horn (whitetail deer), with a thicker stag horn section in front (leftover from some old project), two thick spacers of black buffalo horn, and thin leather spacers in between. Everything tight fitted and assembled with epoxy.The handle sits extremely comfortable in hand, just the right curve, and crown is tilted so the heel of my hand and my pinkie both rest right against it.
Attachment: 150.63 KB
Attachment: 94.55 KB
Attachment: 96.02 KB
Attachment: 113.1 KB
|
|
|
|
|
|
Alex Indman
|
| Posted: Thu 18 Apr, 2019 1:18 pm Post subject: |
|
|
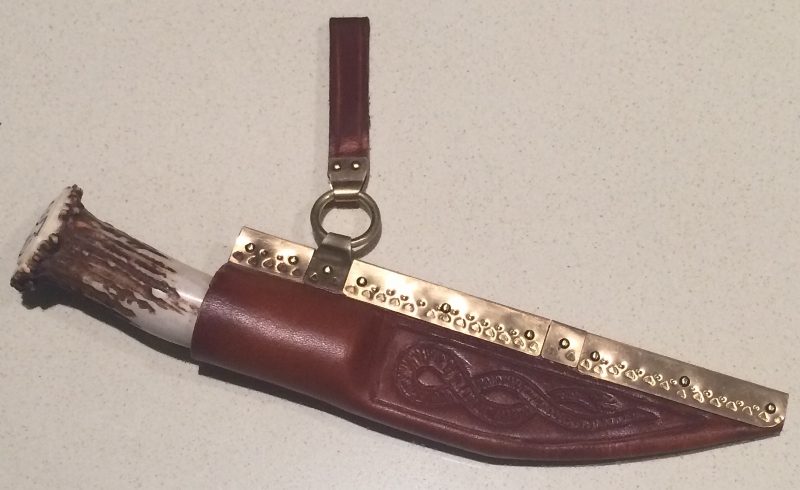
And finally the sheath. Made of leather treated with hot was on the outside for stiffness.
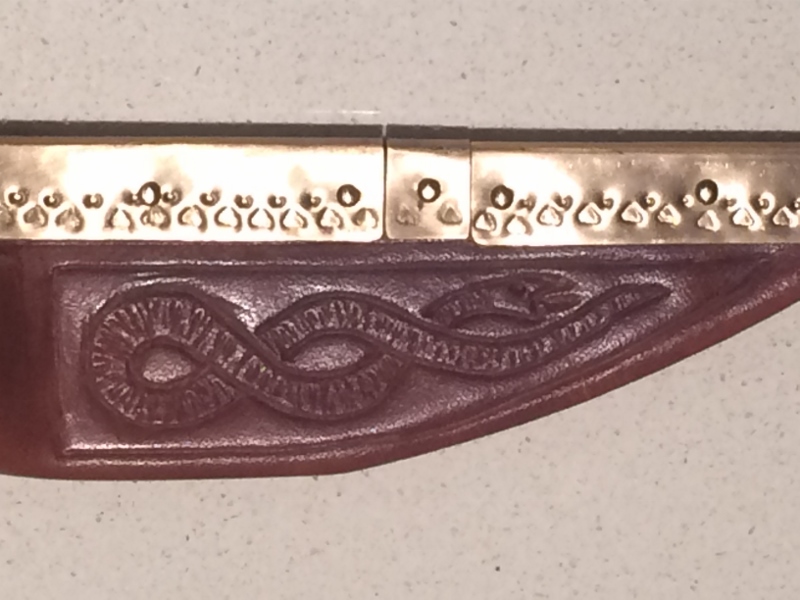
Decorated with a little snake design - I am no artist, but I think it came out well enough (at least recognizable as a snake).
Edge covered with riveted brass, decorated with some punched triangles and dots.
One suspension ring (since it's a very short seax) with a belt loop attached. Hangs almost horizontally, at the angle pictured.
Attachment: 179.91 KB
Attachment: 186.88 KB
|
|
|
|
|
|
Alex Indman
|
| Posted: Thu 18 Apr, 2019 1:27 pm Post subject: |
|
|
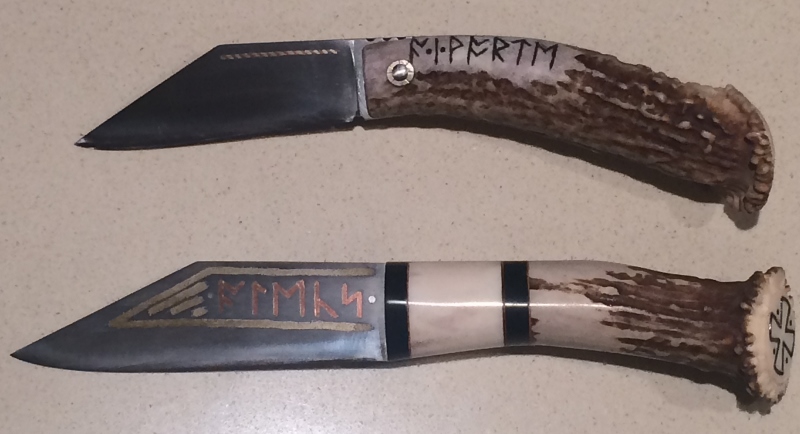
One last note: if you remember my friction folder seax project posted about 3 months ago ( http://myArmoury.com/talk/viewtopic.php?t=37280&highlight= ), this one was made sort of as a bigger fixed blade brother to it.
I used a pair of whitetail dear crown staghorn pieces that I got a few years ago at a gun show of all places. Should have bought more!
The cross engraving on the crown is identical. And runic inscriptions are almost the same (though in different places/techniques), not to mention overall seax style.
Here they are as a pair:
Attachment: 157.82 KB
|
|
|
|
|
|
|
You cannot post new topics in this forum
You cannot reply to topics in this forum
You cannot edit your posts in this forum
You cannot delete your posts in this forum
You cannot vote in polls in this forum
You cannot attach files in this forum
You can download files in this forum
|
All contents © Copyright 2003-2026 myArmoury.com — All rights reserved
Discussion forums powered by phpBB © The phpBB Group
Switch to the Basic Low-bandwidth Version of the forum
|

