Info Favorites Register Log in
myArmoury.com Discussion Forums

Forum index Memberlist Usergroups Spotlight Topics Search
Forum Index > Historical Arms Talk > Another DIY BastardDIY Project Reply to topic
This is a standard topic Go to page 1, 2  Next 
Author Message
Sean Flynt


Location: Birmingham, Alabama
Joined: 21 Aug 2003
Likes: 10 pages
Reading list: 13 books

Spotlight topics: 7
Posts: 5,981

PostPosted: Wed 29 Jun, 2016 8:12 am    Post subject: Another DIY Bastard         Reply with quote

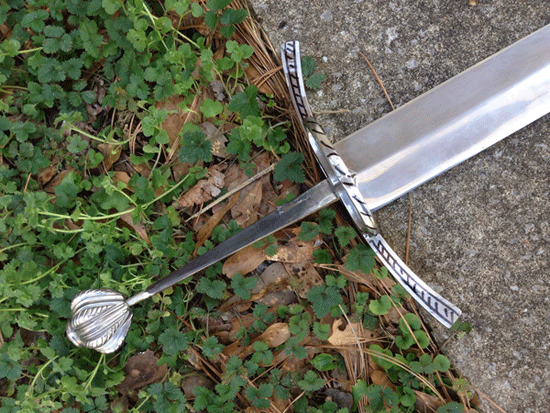
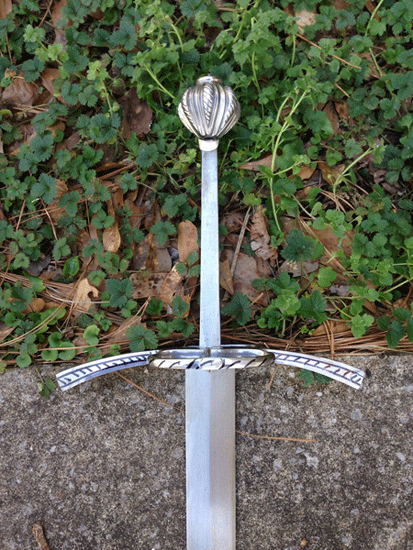
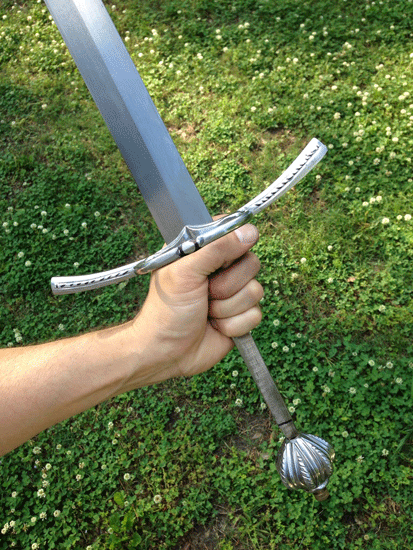
That's me! And this is my 2016 project. I'm down to one per year, now, but they're getting better.
I like to have a stack of blades and hilt components so I can mix and match to get what I want.
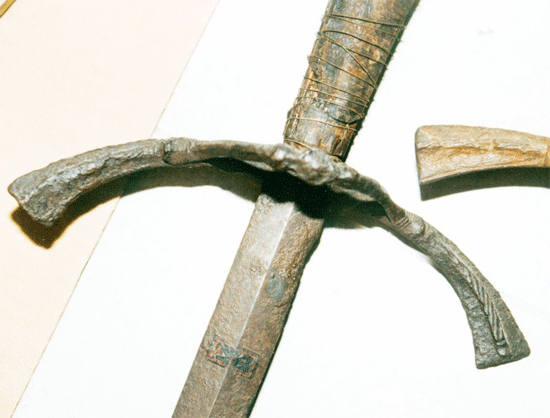
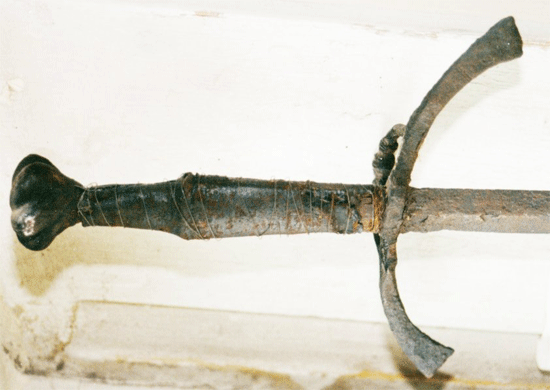
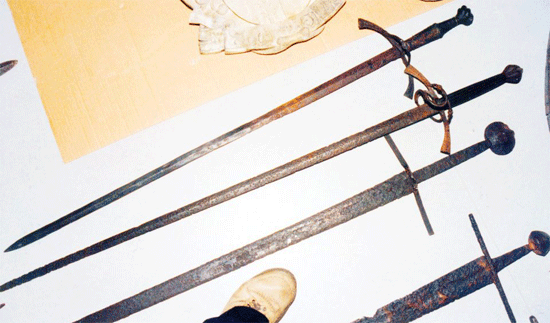
I'm a fan of the early 16th c. complex hilt bastard swords and longswords (see great examples here: http://myArmoury.com/talk/viewtopic.php?t=197...=composite )
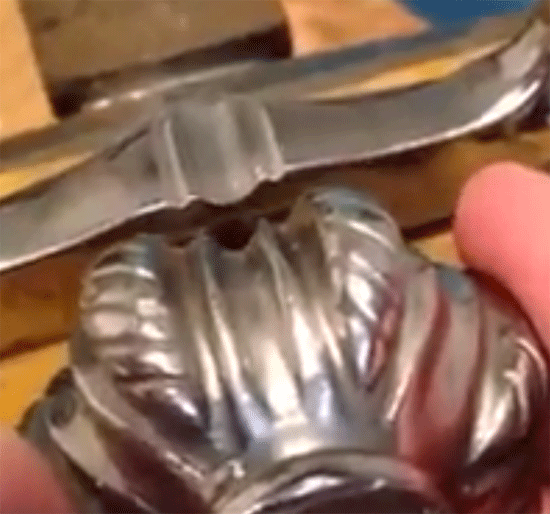
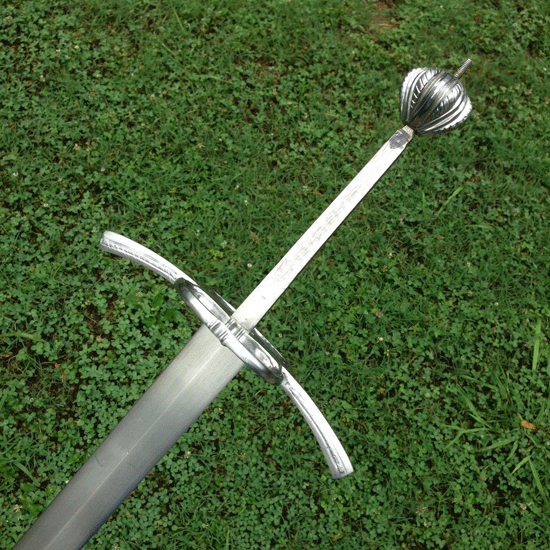
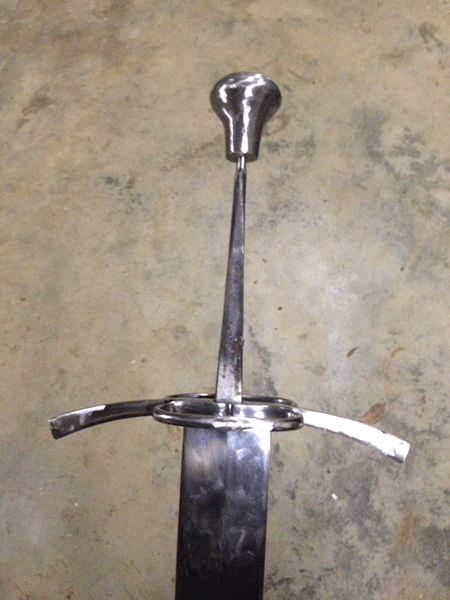
I had the idea to build one of these using a guard and pommel from different Windlass swords (Italian Longsword and Italian Cut and Thrust, respectively). I originally thought I would marry these to a Windlass Erbach (broad Type XVIII) blade for an effect similar to Wallace Collection A479. A479's blade is thought to be a later marriage, though. I see more historic examples with narrower Type XVIII blades, sometimes fullered, sometimes not. I tried the hilt with a fullered HT bastard sword blade. That wasn't a bad look, but the un-fullered HT blade looked best of the three options, and also fit the guard better.
You can see the evolution below. As of today, I've fitted guard and pommel, done rough filework on the guard to add some elements to unify it with the pommel, inverted the pommel and removed the former foot from the new top of the pommel. Since the last photo, I've had the final pass of the file on the guard roping.
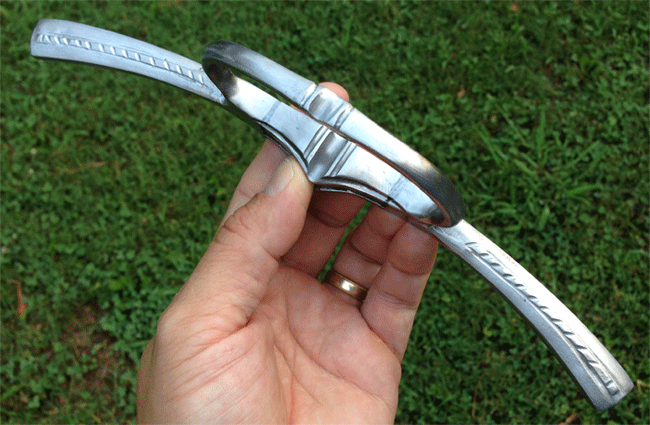
When I've done everything I need to do on the front of the guard, I'll remove the ring on the reverse and finish the back. At present, that ring serves to keep the piece securely gripped in my bench vise. From there, it's on to the grip!
I hope to finish this, with scabbard and suspension, some time in late fall.
 Attachment: 101.27 KB
inspiration.gif


 Attachment: 108.88 KB
inspiration2.gif


 Attachment: 101.07 KB
inspiration3.gif


 Attachment: 206.04 KB
test.gif


 Attachment: 207.31 KB
test2.gif


 Attachment: 201.92 KB
test3.gif


 Attachment: 203.18 KB
test4.gif


 Attachment: 165.24 KB
test6.gif


 Attachment: 294.19 KB
test7.gif


-Sean

Author of the Little Hammer novel

https://www.amazon.com/Little-Hammer-Sean-Flynt/dp/B08XN7HZ82/ref=sr_1_1?dchild=1&keywords=little+hammer+book&qid=1627482034&sr=8-1
View user's profile Send private message Visit poster's website
Sean Flynt


Location: Birmingham, Alabama
Joined: 21 Aug 2003
Likes: 10 pages
Reading list: 13 books

Spotlight topics: 7
Posts: 5,981

PostPosted: Wed 29 Jun, 2016 9:31 am    Post subject:         Reply with quote

FYI, I plan for the Type T5 pommel seen in the first of my test fitting shots to stay with that broad Type XVIII blade (Windlass Erbach). I'll make a long recurved cross for that and finish all in the style of the wonderful Dresden sword so many of us love. http://myArmoury.com/talk/viewtopic.php?t=2618 That project could not be a reproduction of the Dresden sword (too small and different proportions, among other things) but would certainly take inspiration from it.
-Sean

Author of the Little Hammer novel

https://www.amazon.com/Little-Hammer-Sean-Flynt/dp/B08XN7HZ82/ref=sr_1_1?dchild=1&keywords=little+hammer+book&qid=1627482034&sr=8-1
View user's profile Send private message Visit poster's website
Jonathan Hodge


Location: East Tennessee
Joined: 18 Sep 2015

Posts: 132

PostPosted: Wed 29 Jun, 2016 7:08 pm    Post subject:         Reply with quote

As always Sean, I look forward to your DIY projects. I think the roping on the guard is a nice touch - especially when paired with the pommel. All hand file work, or did the dremel help to ease the aching in the hands for so much fine detail?
View user's profile Send private message
Harry Marinakis


PostPosted: Wed 29 Jun, 2016 9:03 pm    Post subject:         Reply with quote

Nice work
How are you getting your hilt parts? Forging? Stock removal?
View user's profile Send private message
Julien M


Location: Austin TX
Joined: 14 Sep 2005

Spotlight topics: 1
Posts: 1,086

PostPosted: Thu 30 Jun, 2016 3:23 am    Post subject:         Reply with quote

Good to see you back at the workshop Sean - great looking project too.
You definitely have a keen eye for later swords of that period (often neglected by the repro mkt). Also I like the way you reinforced the hilt cohesion by adding file work on the center piece of the guard. Clever choice (these hours of looking at period art and original sword paid off Happy )
J
View user's profile Send private message
Sean Flynt


Location: Birmingham, Alabama
Joined: 21 Aug 2003
Likes: 10 pages
Reading list: 13 books

Spotlight topics: 7
Posts: 5,981

PostPosted: Thu 30 Jun, 2016 5:12 pm    Post subject:         Reply with quote

Thanks for the encouragement! I used the Dremel with cutoff wheel just to define the strips to be roped, then used the disc on my belt sander to quickly shape the quillons to a roughly triangular section, with the strips at the apex of that triangle. Then I brought the strips into further relief by filing away the steel around them. I marked them for the roping by filing a line with the edge of a triangular needle file, then rolling over the file to the next edge for the next mark, and so on. I went back over those initial marks with a round needle file and used a Dremel sanding drum to clean up the stray file marks (the space was too tight for filing).

I scrounge for parts, mix and match, and make what I can. I've gone so far as to buy a sword just for the hilt or blade and sell the rest. Used swords and Musem Replicas Deal of the Day are favorite sources. I've made a simple cross, made at least a couple of filed pommels and radically modified many other parts. It's not too hard--just lots of filing and patience, sometimes a torch for bending. I like the Alchem round pommels as a base for those Type R pommel projects. They're a good size, cheap, soft steel and already have a pilot hole drilled most of the way through. Type R has a long historical life, too, and can be used in projects ranging from high medieval to 17th c., depending on how you mount and decorate/finish it. I had a local steel supply place cut some 1" thick wheel pommel blanks for me off of a 2" diameter bar, but I haven't used one of those yet.

-Sean

Author of the Little Hammer novel

https://www.amazon.com/Little-Hammer-Sean-Flynt/dp/B08XN7HZ82/ref=sr_1_1?dchild=1&keywords=little+hammer+book&qid=1627482034&sr=8-1
View user's profile Send private message Visit poster's website
Kai Lawson


Joined: 26 Aug 2010
Likes: 7 pages

Posts: 589

PostPosted: Fri 01 Jul, 2016 10:42 am    Post subject:         Reply with quote

Looking forward to seeing the detailing on this one (and on seeing the Dresden inspired piece!)
"And they crossed swords."
--William Goldman, alias S. Morgenstern
View user's profile Send private message
Jonathan Hodge


Location: East Tennessee
Joined: 18 Sep 2015

Posts: 132

PostPosted: Sun 10 Jul, 2016 8:22 am    Post subject:         Reply with quote

Thanks for sharing your process with dremel and file. It seems to be rather efficient, or as efficient as one can be with such fine detail. Also, the wheel pommel idea seems like a great solution for some simple raw material to further shape and refine. A steel blank like that can become almost anything!
View user's profile Send private message
Martin Moser


Joined: 13 Feb 2014
Likes: 1 page

Posts: 43

PostPosted: Fri 15 Jul, 2016 10:57 pm    Post subject:         Reply with quote

Thanks for the details on how you source and work your materials and parts, Sean. Very interesting and I'll pick up some of these I'm sure :-)
Cheers,
Martin

https://www.facebook.com/leatherworkthroughtheages/
View user's profile Send private message Visit poster's website
Sean Flynt


Location: Birmingham, Alabama
Joined: 21 Aug 2003
Likes: 10 pages
Reading list: 13 books

Spotlight topics: 7
Posts: 5,981

PostPosted: Thu 21 Jul, 2016 8:42 am    Post subject:         Reply with quote

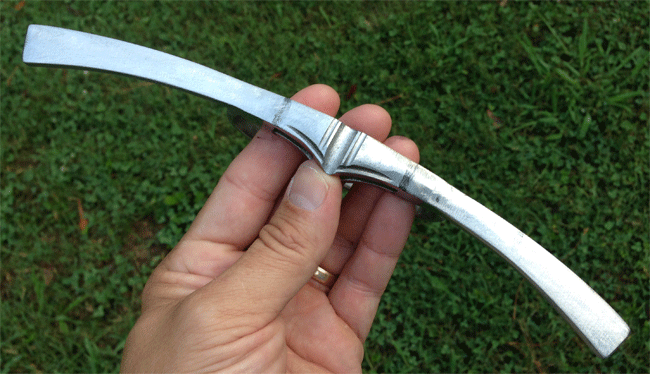
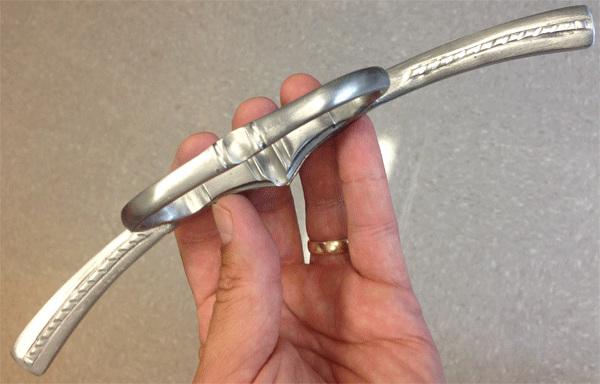
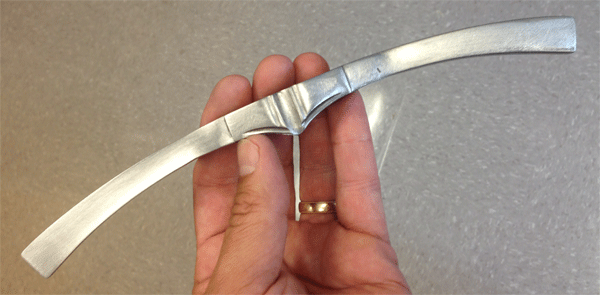
Progress on the guard--lacking some filing and finish on the front, and having only the rough grinding on the reverse. I removed the ring on the reverse because I thought the front was complete. Then I thought the reverse looked too featureless, so I decided to define the quillon block (marked in pen here). That requires me to do the same on the front, but that's pretty easy compared to the other work I've done on this. I think this will further help match the guard to the blade, and bring harmony to the whole piece. Once I'm through with the guard, I'll be into the easier parts of the work--wood, leather and brass!

I'm reminded just how much you can do with the Windlass guards, which tend to be overbuilt.


 Attachment: 202.72 KB
obverse.gif


 Attachment: 178.74 KB
reverse.gif


-Sean

Author of the Little Hammer novel

https://www.amazon.com/Little-Hammer-Sean-Flynt/dp/B08XN7HZ82/ref=sr_1_1?dchild=1&keywords=little+hammer+book&qid=1627482034&sr=8-1
View user's profile Send private message Visit poster's website
Sean Flynt


Location: Birmingham, Alabama
Joined: 21 Aug 2003
Likes: 10 pages
Reading list: 13 books

Spotlight topics: 7
Posts: 5,981

PostPosted: Wed 03 Aug, 2016 9:11 am    Post subject:         Reply with quote

all filing complete. only final finish work to do now, before moving on to the grip.


 Attachment: 141.14 KB
obverse.gif


 Attachment: 120.87 KB
reverse.gif


-Sean

Author of the Little Hammer novel

https://www.amazon.com/Little-Hammer-Sean-Flynt/dp/B08XN7HZ82/ref=sr_1_1?dchild=1&keywords=little+hammer+book&qid=1627482034&sr=8-1
View user's profile Send private message Visit poster's website
Lukas MG
Industry Professional


Location: Germany
Joined: 23 Feb 2010

Posts: 330

PostPosted: Sun 07 Aug, 2016 12:21 am    Post subject:         Reply with quote

Lovely work, Sean. Looking forward to seeing this progress.

Where did you get that pommel from, btw?

Custom sword maker:

http://www.lukasmaestlegoer.com
View user's profile Send private message Visit poster's website
Sean Flynt


Location: Birmingham, Alabama
Joined: 21 Aug 2003
Likes: 10 pages
Reading list: 13 books

Spotlight topics: 7
Posts: 5,981

PostPosted: Mon 08 Aug, 2016 7:13 am    Post subject:         Reply with quote

Thanks! The pommel is from this sword: http://myArmoury.com/talk/viewtopic.php?t=26749
It's beautiful, but that Italian sword is a mess. The blade is too short/light and the hilt is too large.
I cut off the knucklebow and fitted a HT fullered bastard sword blade with an eye toward creating an Italian longsword of ca. 1600. That's a viable project for someone else who gets one of these, but I decided that the pommel, inverted, would better serve my early 16th c. project.

-Sean

Author of the Little Hammer novel

https://www.amazon.com/Little-Hammer-Sean-Flynt/dp/B08XN7HZ82/ref=sr_1_1?dchild=1&keywords=little+hammer+book&qid=1627482034&sr=8-1
View user's profile Send private message Visit poster's website
Sean Flynt


Location: Birmingham, Alabama
Joined: 21 Aug 2003
Likes: 10 pages
Reading list: 13 books

Spotlight topics: 7
Posts: 5,981

PostPosted: Fri 12 Aug, 2016 7:31 am    Post subject:         Reply with quote

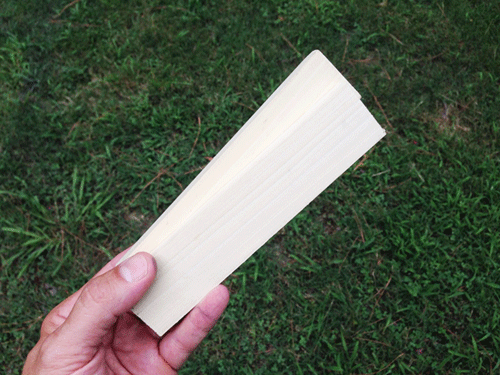
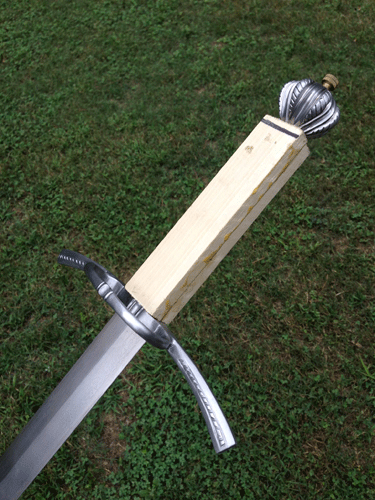
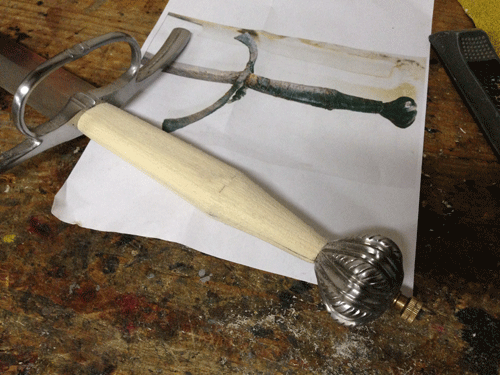
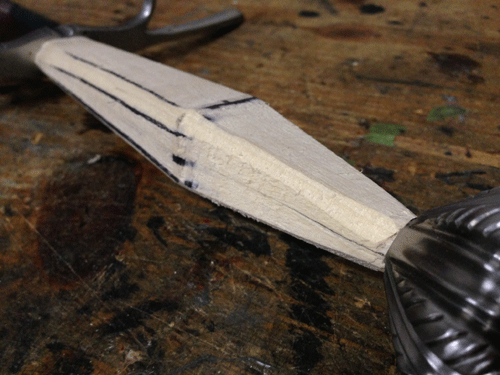
All the rough shaping of the grip core is complete. I'll use paper over small blocks and dowels for the final shaping. this will need at least one cord riser at the waist, probably small risers at top and bottom. The historical example in the background seems to have only a waist riser. i can't tell if the wire visible there is a sprung binding or an old attempt at conservation.

The only step not shown here is the inletting of the grip halves, which is just a matter of tracing the tang onto both halves and chiseling out half the depth of the tang on each and gluing. My aim is always to have the glued core fit snugly but not easily slide down the last couple of inches. I seat it with light taps of a mallet or block. This method is not necessarily historical. I know that Albion and Peter Johnsson mount the finished guard and pommel, then mount the mostly-finished grip halves. I have seen photos of PJ using small wooden pins to temporarily secure the grip halves to the tang for part of the shaping and finishing.

I'm not sure how much difference there is in the final product resulting from these methods, but i do like to be able to easily mount and dismount the grip when i'm shaping it. It's easier to judge symmetry by turning the core freely in the hand and sighting down the length, but it's easier to refine the fit in relation to the furniture by working with the grip in place. you can see some of that work in the photo below where I've roughly set the planes that help me keep things symmetrical. I've used a knife to shape the very top of the grip to the final thickness where it meets the narrow foot of the pommel. Then I removed the core, put it in my vise and used a rasp and paper to blend the top of the grip to that level.


 Attachment: 157.21 KB
slats.gif


 Attachment: 176.67 KB
core-fit.gif


 Attachment: 133.36 KB
rounded.gif


 Attachment: 147.53 KB
planes.gif


-Sean

Author of the Little Hammer novel

https://www.amazon.com/Little-Hammer-Sean-Flynt/dp/B08XN7HZ82/ref=sr_1_1?dchild=1&keywords=little+hammer+book&qid=1627482034&sr=8-1
View user's profile Send private message Visit poster's website
Mark T


PostPosted: Thu 18 Aug, 2016 1:54 pm    Post subject:         Reply with quote

Hi Sean,

Looking good! Can't wait to see how this one turns out. The grips on your other projects were very well done ... will be interesting to see which way you decide to go with the risers on this one.

Chief Librarian/Curator, Isaac Leibowitz Librarmoury

Schallern sind sehr sexy!
View user's profile Send private message
Sean Flynt


Location: Birmingham, Alabama
Joined: 21 Aug 2003
Likes: 10 pages
Reading list: 13 books

Spotlight topics: 7
Posts: 5,981

PostPosted: Fri 19 Aug, 2016 6:47 am    Post subject:         Reply with quote

Thanks! I'm ready for the risers, and I'll probably use two smaller strands for each of three risers, as opposed to the thicker single cord I typically use. We'll see....
-Sean

Author of the Little Hammer novel

https://www.amazon.com/Little-Hammer-Sean-Flynt/dp/B08XN7HZ82/ref=sr_1_1?dchild=1&keywords=little+hammer+book&qid=1627482034&sr=8-1
View user's profile Send private message Visit poster's website
Sean Flynt


Location: Birmingham, Alabama
Joined: 21 Aug 2003
Likes: 10 pages
Reading list: 13 books

Spotlight topics: 7
Posts: 5,981

PostPosted: Mon 22 Aug, 2016 10:29 am    Post subject:         Reply with quote

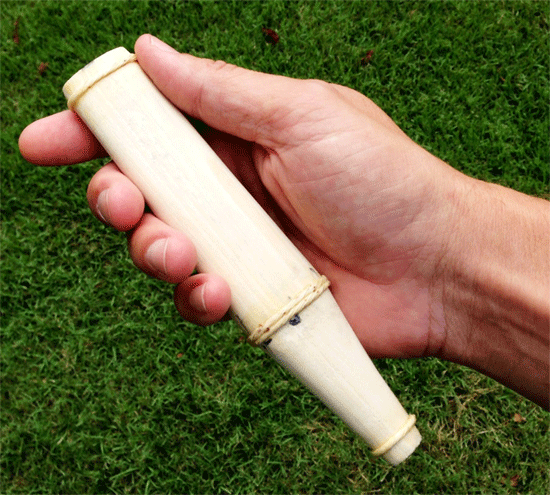
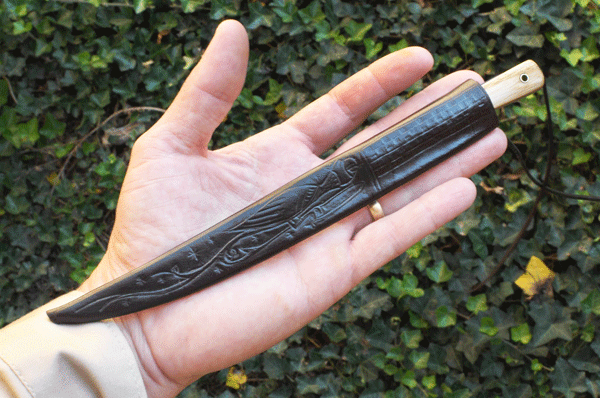
The core is complete. I plan to use brown leather. I was impressed with the richness of the color on a sheath I made for one of my thrift store butter knife conversions. It's almost as dark as black, but there's a warmth to it that I really like.


 Attachment: 201.32 KB
core.gif


 Attachment: 175.7 KB
brown.gif


-Sean

Author of the Little Hammer novel

https://www.amazon.com/Little-Hammer-Sean-Flynt/dp/B08XN7HZ82/ref=sr_1_1?dchild=1&keywords=little+hammer+book&qid=1627482034&sr=8-1
View user's profile Send private message Visit poster's website
Sean Flynt


Location: Birmingham, Alabama
Joined: 21 Aug 2003
Likes: 10 pages
Reading list: 13 books

Spotlight topics: 7
Posts: 5,981

PostPosted: Thu 25 Aug, 2016 8:35 am    Post subject:         Reply with quote

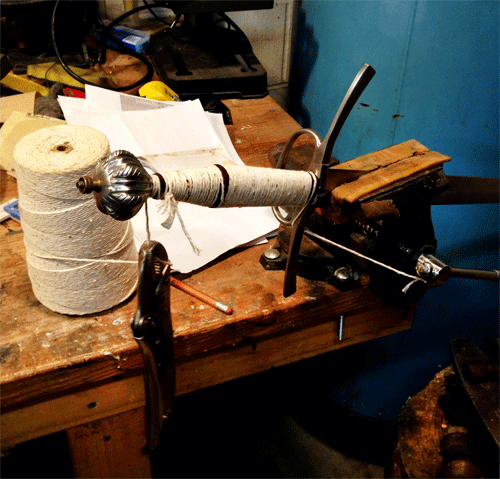
I was out of the synthetic cord I prefer for the overwrap. It doesn't stick to the leather or shed fibers during the process. I used the natural fiber cord I used for the risers, but it's not a huge hassle. Use what you have.

The Feibing's Chocolate dye bled yellow when I rinsed the leather after dyeing (I like to work with it a little damp). That left the color a light brown, so I hit it again with the applicator and proceeded.

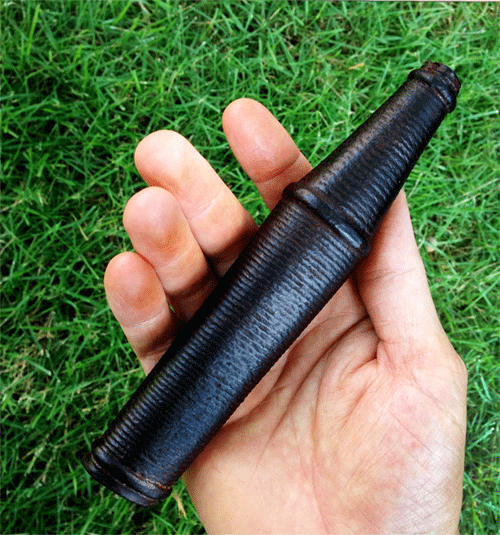
What I have this morning is a completed grip that will need to harden a little under the wax (Ren Wax, because I was out of the beeswax weather spirits I prefer) and have a final buffing. I see some light spots where I didn't apply the wax thoroughly. The wax darkens the color overall, but it's still a deep chocolate in good light, and warmer than black in any light.


 Attachment: 125.68 KB
wrap.gif


 Attachment: 208.03 KB
finishedgrip.gif


-Sean

Author of the Little Hammer novel

https://www.amazon.com/Little-Hammer-Sean-Flynt/dp/B08XN7HZ82/ref=sr_1_1?dchild=1&keywords=little+hammer+book&qid=1627482034&sr=8-1
View user's profile Send private message Visit poster's website
Jonathan Hodge


Location: East Tennessee
Joined: 18 Sep 2015

Posts: 132

PostPosted: Sun 28 Aug, 2016 11:27 am    Post subject:         Reply with quote

As always, Sean, superb work. I'm a big fan of the file work on the reverse side of the guard - very tasteful, and just enough to give it an accent and "feel" of it's own. I appreciate your attention to detail and patience with projects of this kind. I usually become frustrated with my own inabilities over the course of the project and am tempted to lose patience. However, with each new project comes more education and a new skill of some kind.

I can't wait to see the piece all put together! Just curious to see if this project happens to include a custom scabbard as well. With all the work you've done on the guard, an accompanying scabbard to accent that work would be (extra) icing on the cake for this blade.
View user's profile Send private message
Sean Flynt


Location: Birmingham, Alabama
Joined: 21 Aug 2003
Likes: 10 pages
Reading list: 13 books

Spotlight topics: 7
Posts: 5,981

PostPosted: Mon 29 Aug, 2016 7:05 am    Post subject:         Reply with quote

Thanks! I'm almost done with the sword! I do want a scabbard, but I'll probably take a break to work on an armour project this fall.

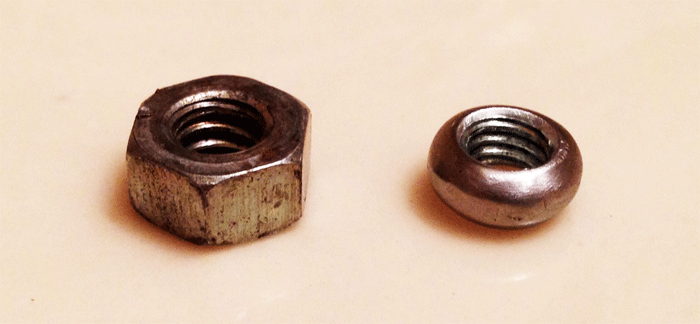
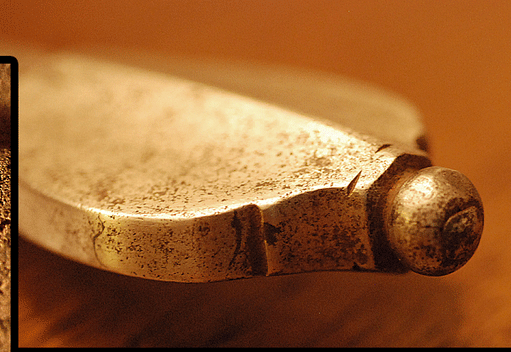
Since the H-T tangs are threaded and I didn't need to lose all of the threading, I decided to use a nut. I don't need a nut for compression, as I always wedge and epoxy the guard and grip, and the pommel does not apply pressure to the grip.

See discussion of various methods here: https://www.albion-swords.com/swords-functional.htm

I often find that a pommel and un-threaded nut or peen block like to jump when I'm peening, which can be annoying. The threaded nut prevents that and speeds peening. So, you do get a peened construction. For me, the threading is really just a third hand.

As you can see, if I have to buy a nut I always get two in case I screw up the first. If you do this, be sure NOT to get stainless. Mild shapes easily and can be finished properly.

My method here is very simple--just clamp the nut in a vise and file away the corners. For this one, I also threaded it onto a bolt and used that as a handle to do some light shaping with the sanding wheel of my bench grinder. Power tools are dangerous for these little projects, though. You can easily go too far, too fast. I really prefer files and paper.

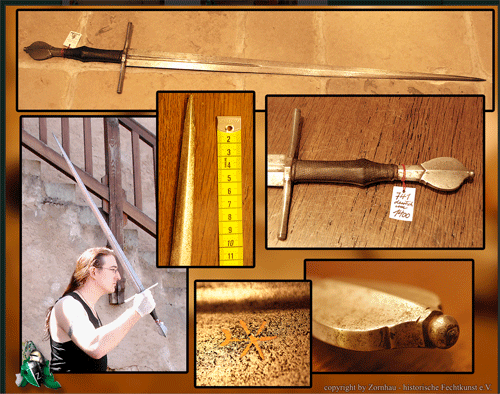
You can see a similar-shaped nut/block on the sword shown one of the wonderful Zornhau data sheets: http://www.zornhau.de/dinkelsbuhl-first-steel/


 Attachment: 119.17 KB
nuts.gif


 Attachment: 130.94 KB
zornhau.gif


 Attachment: 119.99 KB
nut.gif


-Sean

Author of the Little Hammer novel

https://www.amazon.com/Little-Hammer-Sean-Flynt/dp/B08XN7HZ82/ref=sr_1_1?dchild=1&keywords=little+hammer+book&qid=1627482034&sr=8-1
View user's profile Send private message Visit poster's website


Display posts from previous:   
Forum Index > Historical Arms Talk > Another DIY BastardDIY Project
Page 1 of 2 Reply to topic
Go to page 1, 2  Next All times are GMT - 8 Hours

View previous topic :: View next topic
Jump to:  
You cannot post new topics in this forum
You cannot reply to topics in this forum
You cannot edit your posts in this forum
You cannot delete your posts in this forum
You cannot vote in polls in this forum
You cannot attach files in this forum
You can download files in this forum


All contents © Copyright 2003-2024 myArmoury.com — All rights reserved
Discussion forums powered by phpBB © The phpBB Group
Switch to the Basic Low-bandwidth Version of the forum