Info Favorites Register Log in
myArmoury.com Discussion Forums

Forum index Memberlist Usergroups Spotlight Topics Search
Forum Index > Historical Arms Talk > DIY: 3 arquebusesDIY Project Reply to topic
This is a standard topic Go to page 1, 2  Next 
Author Message
Radovan Geist


Location: Slovakia
Joined: 19 Aug 2010
Likes: 5 pages

Posts: 399

PostPosted: Thu 12 Jun, 2014 12:13 am    Post subject: DIY: 3 arquebuses         Reply with quote

This will probably be a slow-moving, long-time project, because it will run alongside other things I have to finish and it´s fairly complex, but nevertheless I´m quite excited about it:)

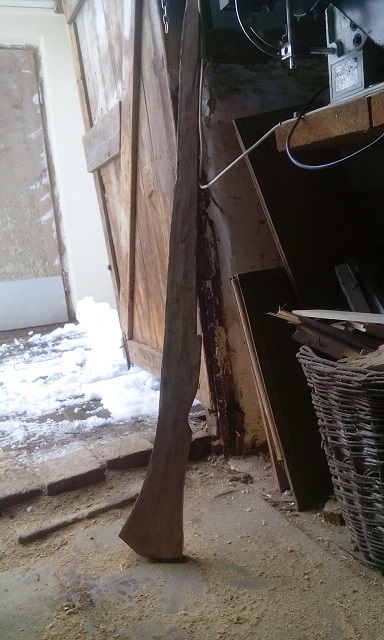
Some two years ago I´ve bought 6 semi-finished arquebuse barrels (app. 100 cm long, with 14-16 mm calibers) from a son of a deceased local blacksmith / weapon maker. They were only roughly shaped, without even touch holes drilled, etc. Last weekend I´ve finally managed to work on them. The plan is to create 3 fully functional matchlock arquebuses from different periods: a) first half of the 16th c., with serpentine matchlock and button trigger; b) end of 16th c. petronel type arquebuse (with strongly curved stock - this http://www.vikingsword.com/vb/showthread.php?t=16183 shows the overall shape); c) early 17th century caliver / schutzrohr / arquebuse that would be typical for German lands.

I have not decided yet what to do with the remaining 3 barrels, but their time will come:)

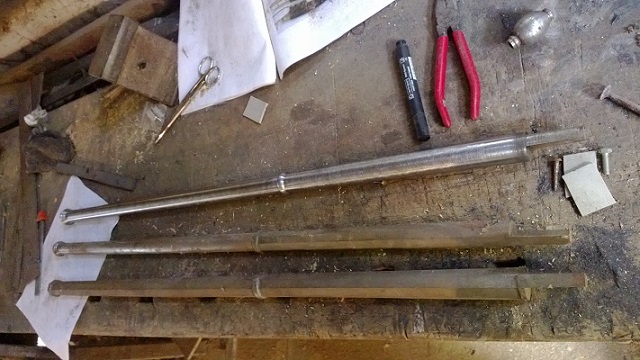
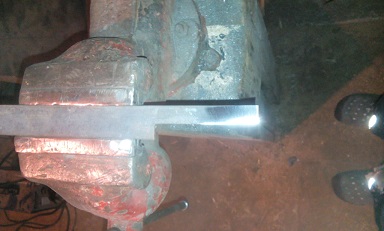
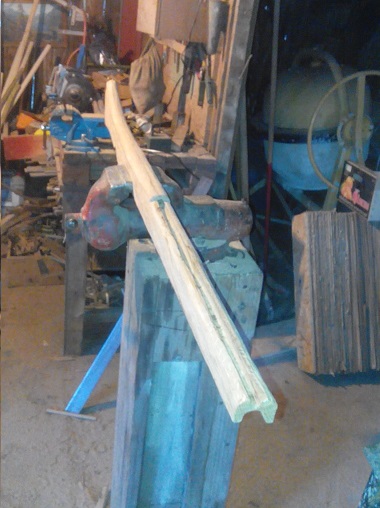
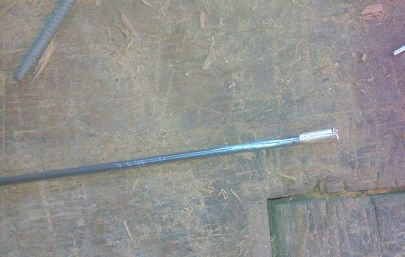
So the work has started. First picture shows comparison of barrels as I´ve received them, and one semi-cleaned. They were cleaned on a lathe (parts with circular cross-section) and then by hand, using sandpaper. By cleaning then, I have also removed rough scratches from miller and lathe.

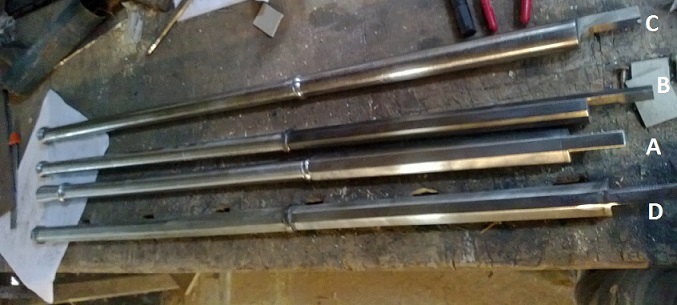
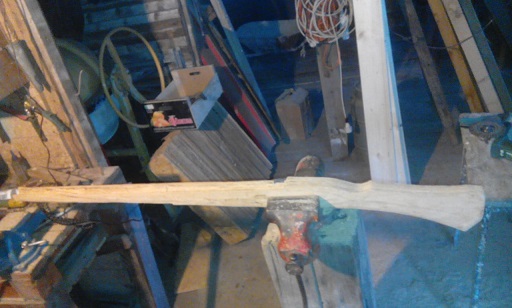
The second picture shows them semi-polished (A - early 16c, B - petronel, C - early 17c, D - I-dont-know-yet:)) I will work on them more later, after attaching flash-pans etc.

After that, I´ve drilled touch holes and holes for screws that will hold the back of the barrel to the stock (no pictures taken) and cut and shaped eyelets that will be soldered to the bottom of the barrels and secure then to stocks. These are quite simple, just a piece of mild steel, 20*10*4 mm, with a hole in the middle (I will take pictures later).

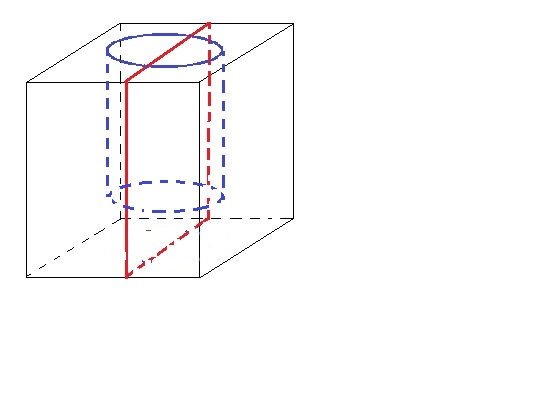
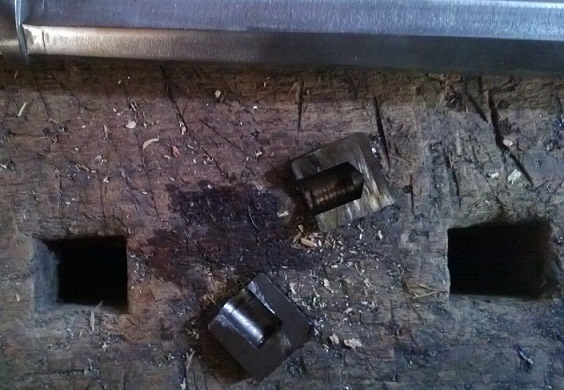
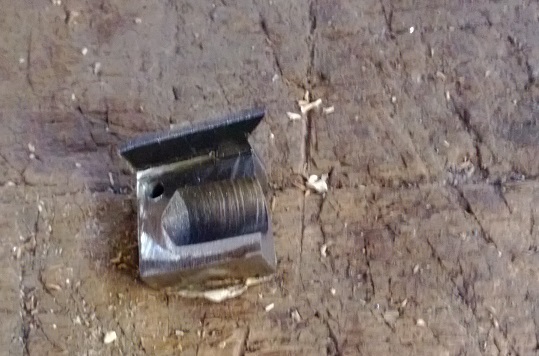
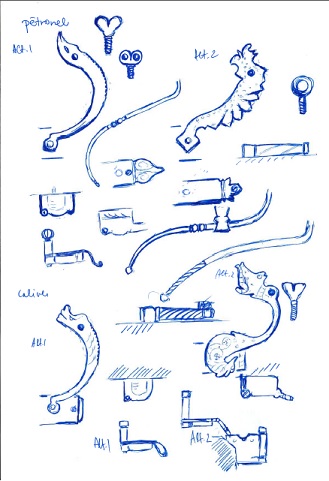
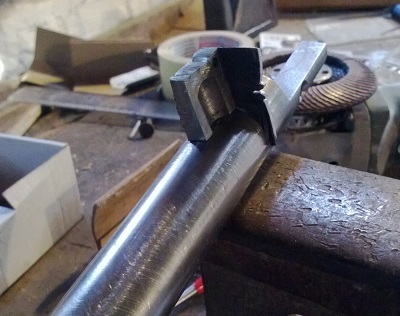
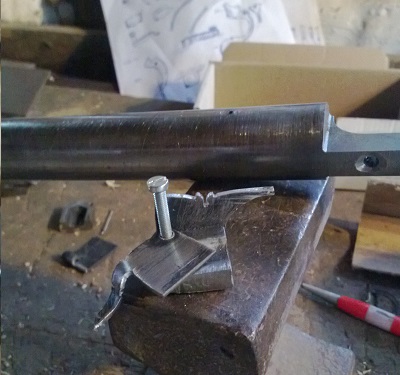
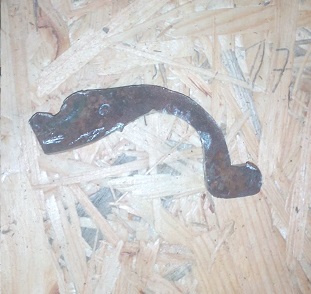
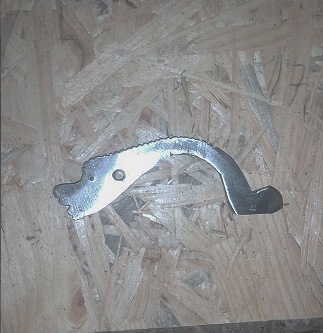
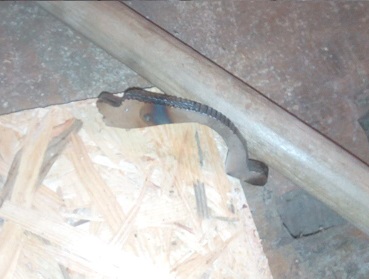
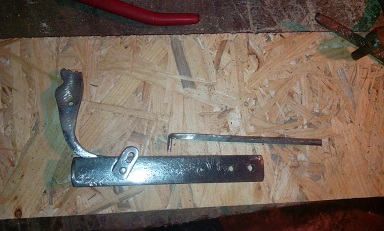
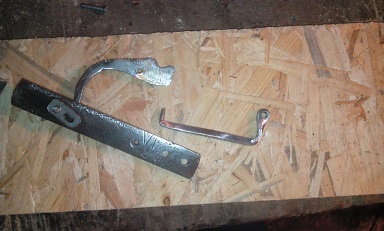
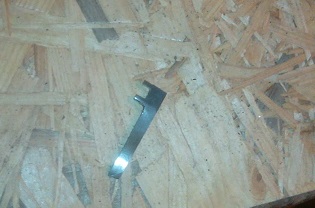
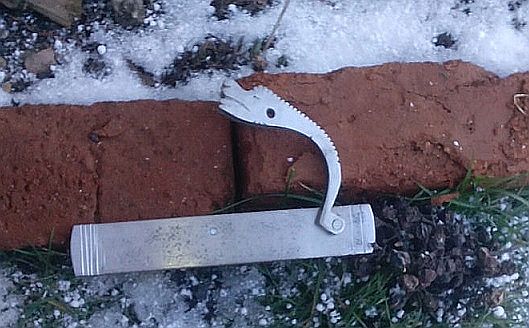
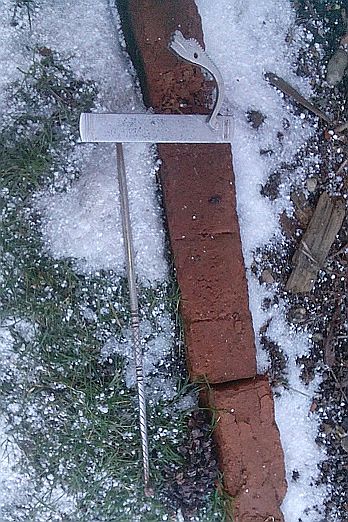
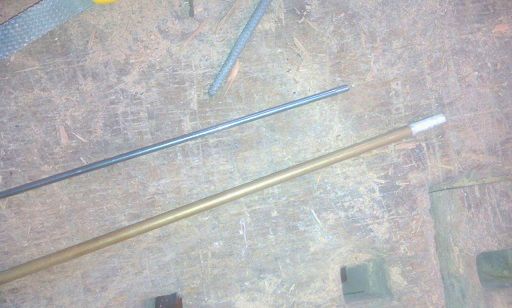
I have started to work on flash-pans. Obviously, these three different guns will have them shaped differently, but to simplify my work, I wanted to make some "generic" piece that could be shaped later. Given my limited access to tools (no miller), flash-pans were a hard nut. I came up with following: I took a piece of mild steel with square cross-section. I have drilled a hole (12 mm diameter) app to two thirds of its length. Then I´ve cut it in half, alongside the hole - and I had two rough stocks for flash-pans. I tried to sketch it on picture 3, and the last picture shows the cut pieces. It´s not perfect, but I will have to do for now.

Next steps: shaping the flash-pans, and soldering them, together with eyelets, to barrels (soldering will be done by a friend of mine, who is definitely much better in that).

Any comments and suggestions are welcome. I would especially appreciate any nice detailed pictures of petronels - matchlock mechanism, decoration, stock details, etc. I have some, but the more the better:)


 Attachment: 117.93 KB
DIY-arquebuse-17c-1.jpg


 Attachment: 90.97 KB
DIY-arquebuse-17c-2.jpg


 Attachment: 23.91 KB
DIY-arquebuse-17c-4.jpg


 Attachment: 111.52 KB
DIY-arquebuse-17c-3.jpg

View user's profile Send private message
Bjorn Hagstrom


Location: Höör, Skane
Joined: 25 Oct 2007
Likes: 1 page
Reading list: 8 books

Posts: 355

PostPosted: Thu 12 Jun, 2014 7:01 am    Post subject:         Reply with quote

This is going to be very interesting to follow, your track-record is excellent as it is and this brings it up another notch Happy
And I just love early firearms!

There is nothing quite as sad as a one man conga-line...
View user's profile Send private message MSN Messenger
Radovan Geist


Location: Slovakia
Joined: 19 Aug 2010
Likes: 5 pages

Posts: 399

PostPosted: Mon 16 Jun, 2014 5:17 am    Post subject:         Reply with quote

Thank you, Bjorn Happy It will be a challenge!

I did not have much time to work on this in last few days, so there are not many updates. I´m working on flash-pans, and they are roughly finished. Obviously, each one have a different shape to fit to its period. The one on the picture will go on the 17th c. caliver. It´s just a rough work, I hope to add pictures of cleaned pieces after this weekend.


 Attachment: 93.15 KB
DIY-arquebuse-17c-5.jpg

View user's profile Send private message
Radovan Geist


Location: Slovakia
Joined: 19 Aug 2010
Likes: 5 pages

Posts: 399

PostPosted: Tue 24 Jun, 2014 3:39 am    Post subject:         Reply with quote

I did not have much opportunity to work on this project, so I´ve at least made some concept drawings of different lock elements. All are based on surviving period pieces, even though I´ve sometimes combined design elements from two or three lock (from the same period, of course) into one. I still need to design something for the earliest arquebuse.


 Attachment: 56.27 KB
DIY-arquebuse-17c-6.jpg

View user's profile Send private message
Radovan Geist


Location: Slovakia
Joined: 19 Aug 2010
Likes: 5 pages

Posts: 399

PostPosted: Sun 29 Jun, 2014 11:07 pm    Post subject:         Reply with quote

I managed to spend some 2 hours in the workshop this weekend, working on the flash-pans with hand files, here is the result. Well, it´s still a long way to go:)


 Attachment: 66.62 KB
DIY-arquebuse-17c-7.jpg


 Attachment: 66.56 KB
DIY-arquebuse-17c-8.jpg


 Attachment: 66.21 KB
DIY-arquebuse-17c-9.jpg

View user's profile Send private message
Radovan Geist


Location: Slovakia
Joined: 19 Aug 2010
Likes: 5 pages

Posts: 399

PostPosted: Fri 04 Jul, 2014 1:29 am    Post subject:         Reply with quote

After finishing flash-pans for petronel and caliver, I´ve started working on tubular sights (I hope it´s the correct term). I have used a piece of old soft-steel, turned on a lathe the basic design and cleaned it with sand paper (still on lathe), and bored the hole (picture 1).
Then, the spiral grooves were made with hand-files (I shall definitely buy a Dremmel tool:)), and the whole thing was cleaned (sandpaper, then brass brush) and flattened on one side, where it will be soldered to the barrel. Picture 2 shows the sights and the pan on the barrel (of course, I will make another screw for the pan cover).

I have one question: I am planning to do the petronel a little bit more decorated. Have you ever seen brass/copper/bronze decorations on tubular sights of existing pieces, such as a narrow band around the muzzle?

Thanks for any comments or suggestions.


 Attachment: 92.69 KB
DIY-arquebuse-17c-10.jpg


 Attachment: 99.79 KB
DIY-arquebuse-17c-11.jpg

View user's profile Send private message
Radovan Geist


Location: Slovakia
Joined: 19 Aug 2010
Likes: 5 pages

Posts: 399

PostPosted: Mon 07 Jul, 2014 1:28 am    Post subject:         Reply with quote

I have finished sights for the petronel. As I said, this arquebuse should be little more decorative, so I´ve tried a more complex design. The rear half has a hexagonal cross-section, and the front side a circular one, with four deep spiral groves. All was done on lathe and with hand files. Picture 1 shows it half through the filing process, the second picture shows the whole set before the final cleaning with sandpaper and brass brush, and the last one shows the sights after cleaning and polishing.


 Attachment: 153.23 KB
DIY-17c-arquebuse-12.jpg


 Attachment: 160.5 KB
DIY-17c-arquebuse-13.jpg


 Attachment: 118.87 KB
DIY-17c-arquebuse-14.jpg

View user's profile Send private message
William P


Location: Sydney, Australia
Joined: 11 Jul 2010

Posts: 1,523

PostPosted: Mon 14 Jul, 2014 1:35 am    Post subject:         Reply with quote

wait, wait, did i hear

'tubular sights' as in, sights to look through while aiming??!!

the more i look at arms and armour from this period, the more and more i get amazed... its mindblowing just how much innovation and experiemntation happened in that era...
View user's profile Send private message Send e-mail
Radovan Geist


Location: Slovakia
Joined: 19 Aug 2010
Likes: 5 pages

Posts: 399

PostPosted: Mon 14 Jul, 2014 5:36 am    Post subject:         Reply with quote

hi william, yes Happy
check some pictures in this wonderful collection: http://www.vikingsword.com/vb/showthread.php?t=18212
View user's profile Send private message
Lafayette C Curtis


Location: Indonesia
Joined: 29 Nov 2006
Reading list: 7 books

Posts: 2,698

PostPosted: Sat 02 Aug, 2014 3:42 am    Post subject:         Reply with quote

Sights were very common on 16th- and 17th-century long firearms. Don't be misled by the lack of sights on the Brown Bess and some other standard-issue military muskets from the late 18th and early 19th centuries -- this absence lasted for barely a century and was never universal (since hunting and target rifles continued to have sights, and many standard army muskets had them too).

I find the prevalence of these tubular sights curious, though, since the sight image they produce can be quite dark (though quite sharp). They're really nice for shooting in bright daylight but it could take considerable effort to spot the target (and the front sight) in the early morning or late evening.
View user's profile Send private message
Radovan Geist


Location: Slovakia
Joined: 19 Aug 2010
Likes: 5 pages

Posts: 399

PostPosted: Sun 12 Oct, 2014 10:50 pm    Post subject:         Reply with quote

a little update: last week I have just received the barrels with silver-soldered flash-pans (this needed to be done really well, so I gave it to a friend of mine with better equipment, and more experience with soldering). I have already started to clean the pieces, but the picture was made as I´ve received them...


 Attachment: 157.07 KB
DIY-17c-arquebuse-15.jpg

View user's profile Send private message
Radovan Geist


Location: Slovakia
Joined: 19 Aug 2010
Likes: 5 pages

Posts: 399

PostPosted: Mon 24 Nov, 2014 7:52 am    Post subject:         Reply with quote

the project is going really slow - even more than I´ve expected...
However, here´s another (small) step - I started working on the lock of caliver. First, the serpent:
- Basic shape was cut from a piece of soft-steel, 5mm thick (picture1).
- Then it was roughly shaped with angle grinder and hand files (picture 2)
- After that I have bent it using a vice and hammer; heating the piece would be preferable, but I did not have an equipment for that, so I just had to use a brute force - and was lucky for not breaking it (picture 3)
- Next the serpent was cleaned, with scratches from bending removed by files. I have drilled and threaded a hole for a screw that will hold the match-cord (picture 4)
- at this point, I have cut a lenghtwise slot for the match-cord. For that, I have used an angle grinder with a thin cutting disc (it´s important to clamp the piece tightly to the vice, and have a firm hand:)), and once I got through the "head" of the serpent, I´ve finished it with a hack-saw (picture 5)

after that I´ve made a pivot that will go through the lock plate, cleaned the serpent and finished all details with hand files. at that point my cellphone was already discharged so I could not make more pictures:(

Anyways, more will follow (hopefully) soon.


 Attachment: 76.03 KB
DIY-17c-arquebuse-16.jpg


 Attachment: 85.2 KB
DIY-17c-arquebuse-17.jpg


 Attachment: 86.57 KB
DIY-17c-arquebuse-18.jpg


 Attachment: 49.54 KB
DIY-17c-arquebuse-19.jpg


 Attachment: 82.92 KB
DIY-17c-arquebuse-20.jpg

View user's profile Send private message
Radovan Geist


Location: Slovakia
Joined: 19 Aug 2010
Likes: 5 pages

Posts: 399

PostPosted: Mon 01 Dec, 2014 11:03 pm    Post subject:         Reply with quote

Some new steps were made last Sunday. I was working on the trigger mechanism.

First, I´ve made the lever that guides the serpent - picture 1 shows the inside of the plate (the plate used is still only a "construction plate", not the one that will be used on an actual arquebuse); picture 2 is pretty much the same, only that the lever is already bent, with a hole drilled and threaded for future trigger.

The last thing I needed to make was a spring. It was cut from a piece of spring-steel (picture 3 shows the stock), and then shaped, thinned, and slightly bent (picture 4). Now I need to temper it. According to the supplier, 200 C should be enough for that, so I´ll try to "bake it" in our kitchen oven and let it cool slowly. Hopefully it will go OK and my wife wont kill me Happy


 Attachment: 92.57 KB
DIY-17c-arquebuse-21.jpg


 Attachment: 90.1 KB
DIY-17c-arquebuse22.jpg


 Attachment: 81.8 KB
DIY-17c-arquebuse-23.jpg


 Attachment: 75.32 KB
DIY-17c-arquebuse-24.jpg

View user's profile Send private message
Radovan Geist


Location: Slovakia
Joined: 19 Aug 2010
Likes: 5 pages

Posts: 399

PostPosted: Fri 06 Feb, 2015 3:29 am    Post subject:         Reply with quote

I´m working on this super-slowly, as I had to move with some other projects etc. Anyways, one matchlock mechanism is now finished (will post pictures later), I´ve done some work on barrels, and started to work on stocks. I was lucky to find a good local supplier of hardwood planks, so I took some well-dried oak.

At first, the rough shape was cut with a circular saw, which was hell of a work, as the plank was 10cm thick and really hard. Then I´ve shaped it with hand-saw, rasp, and a rotating rasp for angle-grinder: http://www.rotacnirasple.cz/sites/default/fil...15mali.jpg (I have discovered this instrument only recently, and it´s really helpful for rough work). The picture shows the result.

After that I´ve bored a hole for ramrod, working very slowly and carefully with drill & a ling bore. Still I went some few mm off-center, which is not tragic, but I have to find a different method for the next stock. Now I´ve started to make a channel for barrel. I have seen on youtube that there are some specialised instrument, but I work only with what I have = chisels. I will post some (better) pictures in coming days.


 Attachment: 148.07 KB
DIY-17c-arquebuse-25.jpg

View user's profile Send private message
Radovan Geist


Location: Slovakia
Joined: 19 Aug 2010
Likes: 5 pages

Posts: 399

PostPosted: Mon 09 Feb, 2015 1:39 am    Post subject:         Reply with quote

a small update: picture of a finished lock mechanism. It still needs some polishing, but that will be done once I finish the rest. Also, the trigger/lever will be bent later, when I assemble it on stock.


 Attachment: 54.09 KB
DIY-17c-arquebuse-26.jpg


 Attachment: 80.11 KB
DIY-17c-arquebuse-27.jpg

View user's profile Send private message
Radovan Geist


Location: Slovakia
Joined: 19 Aug 2010
Likes: 5 pages

Posts: 399

PostPosted: Sun 15 Feb, 2015 11:19 pm    Post subject:         Reply with quote

I managed to work on the stock, so here are some update pictures. First two show some rough shaping with rasp, the result is on the third one.

After finishing that I have fine-tuned the channel for a barrel, and fixed the barrel to the stock. Next I started to work on in-letting the lock. That proved to be quite painstaking process and at one point I thought I have ruined the whole stock - the part of stock around where the barrel ends is quite "packed", many things have to fit there: the thickest part of the barrel, the lock, the end of the ramrod. Fitting everything there, while you don´t want to weaken the wood too much, was more difficult than I thought. However, I worked slowly with chisels, and after some 2-3 hours somehow managed that. The last picture shows the whole thing assembled (the trigger-lever is still not bent). I´m sorry for crappy pictures, I will try to take better ones on daylight.

Now I still need to get back to the lock (I want to alter a bit the angle of the serpent), work on some details and clean the whole thing.


 Attachment: 122.66 KB
DIY-17c-arquebuse-28.jpg


 Attachment: 112.18 KB
DIY-17c-arquebuse-30.jpg


 Attachment: 143.73 KB
DIY-17c-arquebuse-31.jpg


 Attachment: 141.74 KB
DIY-17c-arquebuse-32.jpg

View user's profile Send private message
Radovan Geist


Location: Slovakia
Joined: 19 Aug 2010
Likes: 5 pages

Posts: 399

PostPosted: Mon 23 Feb, 2015 6:36 am    Post subject:         Reply with quote

This weekend I have worked on some details.
First, I needed two screws that would go through the stock and hold the lock-plate in place. I needed some that are relatively thin (4mm in diameter), long (5+ cm), and with a big oval head heads, like on originals. As I did not have any screws that would fit that, I decided to make some.
- I took a big nail, and threaded it on one side (picture 1).
- Then I´ve cut a small cylinder from from a soft steel (12 mm in diameter), and drilled a hole in the center (picture 2).
- I´ve cut the nail to a proper length and attached a head to it (both were threaded, screwed-on, and secured by soldering).
- finally, I have shaped the conical head to oval, cut a central slot with hack-saw & needle-files, and cleaned it (picture 3)

All in all, it took me some 2 hours to make two screws - but it was fun:)


 Attachment: 52.29 KB
DYI-17c-arquebuse-33.jpg


 Attachment: 104.61 KB
DIY-17c-arquebuse-34.jpg


 Attachment: 36.23 KB
DIY-17c-arquebuse-35.jpg

View user's profile Send private message
Aaron Hoard


Location: Seattle, WA
Joined: 01 Sep 2009
Likes: 4 pages

Posts: 176

PostPosted: Mon 23 Feb, 2015 6:43 am    Post subject:         Reply with quote

Looks like a great project - thanks for taking us along!
View user's profile Send private message
Radovan Geist


Location: Slovakia
Joined: 19 Aug 2010
Likes: 5 pages

Posts: 399

PostPosted: Mon 23 Feb, 2015 6:57 am    Post subject:         Reply with quote

Thanks Aron! It´s a lot of fun, too. I´ve never done anything so complex, so it´s very much learning by doing. I have three more barrels waiting, so the next one should be easier (and better) - at least I hope so:)

The next step was to make the musket-rest. As I understand it, there were basically two methods of attaching the U-shaped holder to a wooden rest: either, it was made from a one piece with a cap, like on this piece http://www.bonhams.com/auctions/21020/lot/4228/, or it was just "stuck" into the wooden rest, like on picture 1. I´ve decided for the later option.

First, I´ve cut a piece 130 cm long from what has originally been an old broom handle:) I´ve cleaned it, shaped on both ends and added metal bands on both ends (picture 2).
Then the U-shaped holder was made from a piece of soft steel, with a spike protruding from the center. This has been crammed into a hole drilled to the one end of the wooden rest. Similarly, a short steel spike was hammered into the lower end.
After coating in oil, the musket fork-rest was done (picture 3).


 Attachment: 9.12 KB
nemecko-1ctvrt-17stol-167-cm.jpg


 Attachment: 104.82 KB
DIY-17c-arquebuse-36.jpg


 Attachment: 89.11 KB
DIY-17c-arquebuse-37.jpg


Last edited by Radovan Geist on Mon 23 Feb, 2015 7:11 am; edited 1 time in total
View user's profile Send private message
Radovan Geist


Location: Slovakia
Joined: 19 Aug 2010
Likes: 5 pages

Posts: 399

PostPosted: Mon 23 Feb, 2015 7:06 am    Post subject:         Reply with quote

And the last thing that was finished on weekend was the ramrod. It´s made from a soft steel bar (originally it would be made from wood, and I´ll make a new one when I get to a suitable piece of hardwood).
- A piece was cut and threaded on one end (picture 1)
- And a brass cap was made from a thicker brass bar. It´s been screwed on, and secured by soldering (picture 2). After that the cap has been shaped and cleaned.

The last picture shows the musket assembled. I will still need to finish some metal parts (screw on the matchlock holder etc.) and work more on the stock, but at least it starts to look like a 17 C. musket, not a piece of tube attached to a piece of wood Happy


 Attachment: 33.98 KB
DIY-17c-arquebuse-38.jpg


 Attachment: 22.58 KB
DIY-17c-arquebuse-39.jpg


 Attachment: 139.17 KB
DIY-17c-arquebuse-40.jpg

View user's profile Send private message


Display posts from previous:   
Forum Index > Historical Arms Talk > DIY: 3 arquebusesDIY Project
Page 1 of 2 Reply to topic
Go to page 1, 2  Next All times are GMT - 8 Hours

View previous topic :: View next topic
Jump to:  
You cannot post new topics in this forum
You cannot reply to topics in this forum
You cannot edit your posts in this forum
You cannot delete your posts in this forum
You cannot vote in polls in this forum
You cannot attach files in this forum
You can download files in this forum


All contents © Copyright 2003-2024 myArmoury.com — All rights reserved
Discussion forums powered by phpBB © The phpBB Group
Switch to the Basic Low-bandwidth Version of the forum