Info Favorites Register Log in
myArmoury.com Discussion Forums

Forum index Memberlist Usergroups Spotlight Topics Search


myArmoury.com is now completely member-supported. Please contribute to our efforts with a donation. Your donations will go towards updating our site, modernizing it, and keeping it viable long-term.
Last 10 Donors: Anonymous, Daniel Sullivan, Chad Arnow, Jonathan Dean, M. Oroszlany, Sam Arwas, Barry C. Hutchins, Dan Kary, Oskar Gessler, Dave Tonge (View All Donors)

Forum Index > Historical Arms Talk > A handful of knivesDIY Project Reply to topic
This is a standard topic Go to page 1, 2  Next 
Author Message
Radovan Geist


Location: Slovakia
Joined: 19 Aug 2010
Likes: 5 pages

Posts: 399

PostPosted: Sun 16 Dec, 2012 12:22 pm    Post subject: A handful of knives         Reply with quote

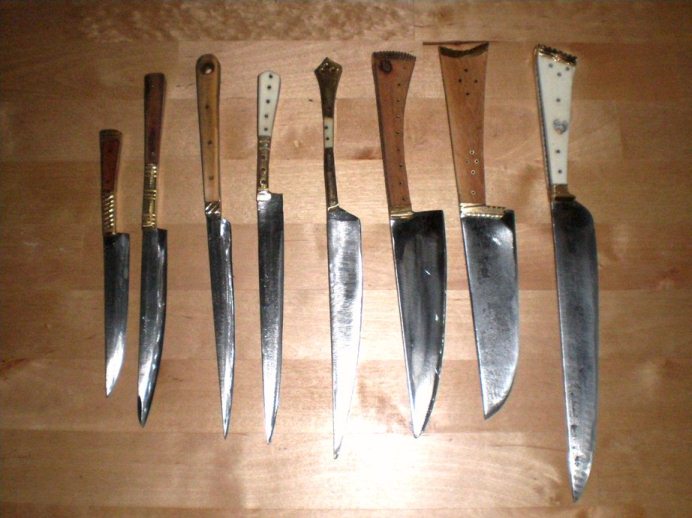
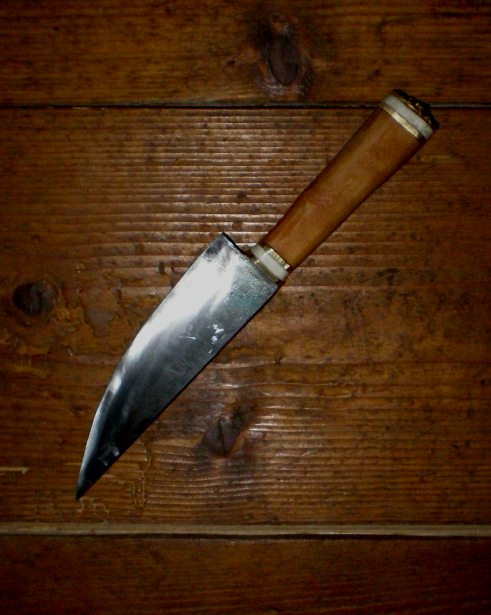
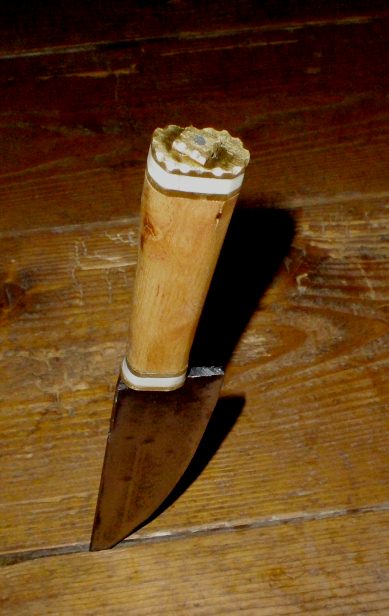
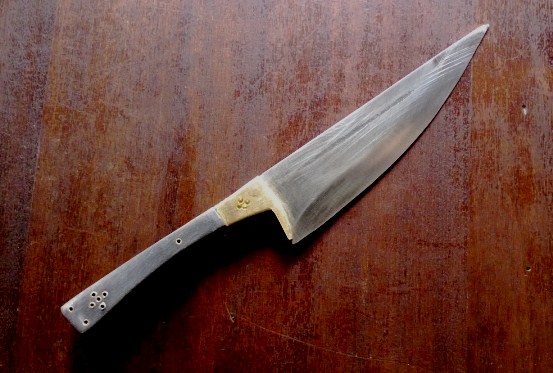
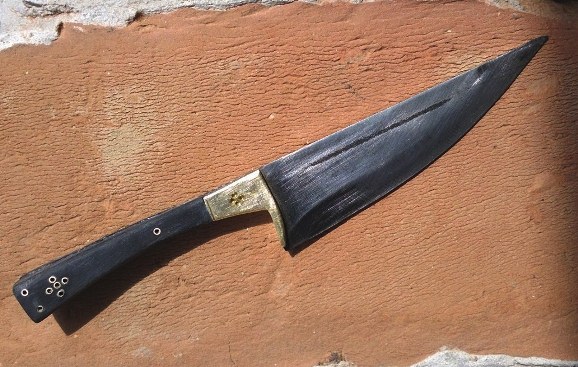
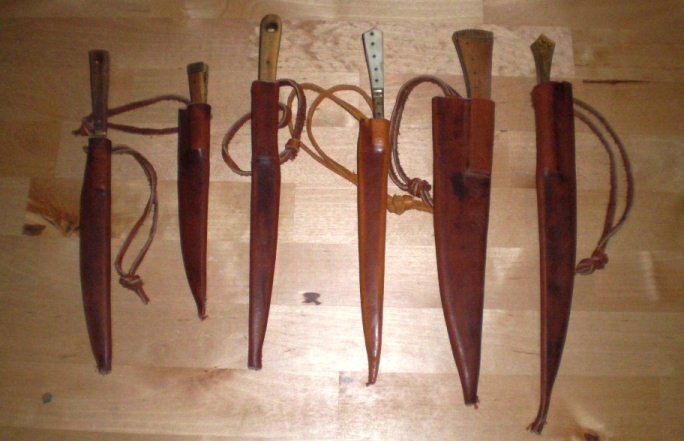
Another batch of medieval knives reproductions... They are not perfect, but it was fun making them.
They have usual construction, with riveted handles made of brass combined with bone or wood.
(Sorry for crappy pictures, I shall make some fotos during daylinght.)


 Attachment: 63.27 KB
P1010525.JPG


 Attachment: 76.69 KB
P1010526.JPG

View user's profile Send private message
Josh Wilson


Location: WV
Joined: 01 Nov 2010
Reading list: 1 book

Posts: 143

PostPosted: Sun 16 Dec, 2012 1:56 pm    Post subject:         Reply with quote

Very nice! Did you forge the blades yourself?
View user's profile Send private message
Radovan Geist


Location: Slovakia
Joined: 19 Aug 2010
Likes: 5 pages

Posts: 399

PostPosted: Sun 16 Dec, 2012 10:22 pm    Post subject:         Reply with quote

strictly speaking, they were not forged:) They were grinded and then quenched and tempered. But one day I will finally build my forge, and then... Happy
View user's profile Send private message
Perry L. Goss


Location: Missouri
Joined: 15 May 2004
Likes: 2 pages

Posts: 114

PostPosted: Mon 17 Dec, 2012 5:40 am    Post subject: "not perfect" blades...         Reply with quote

Radovan:

Nice work. There is something about the..."not perfect" gear. It has its own appeal. Not everyone could have a full plate armour, not everyone could have a silver hilted Samuel Bell bowie.

I like them!
View user's profile Send private message
Radovan Geist


Location: Slovakia
Joined: 19 Aug 2010
Likes: 5 pages

Posts: 399

PostPosted: Mon 17 Dec, 2012 6:20 am    Post subject:         Reply with quote

thank you for encouraging words! In fact, there is a certain level that you can achieve with angle grinder, then one would need more sophisticated tools:) At the same time, "uebung macht den meister", so I just keep on tryin´ Happy
View user's profile Send private message
Leo Todeschini
Industry Professional


Location: Oxford, UK
Joined: 12 Nov 2006
Likes: 1 page

Spotlight topics: 1
Posts: 1,731

PostPosted: Mon 17 Dec, 2012 3:51 pm    Post subject:         Reply with quote

Looking good.
www.todsworkshop.com
www.todcutler.com
www.instagram.com/todsworkshop
https://www.facebook.com/TodsWorkshop
www.youtube.com/user/todsstuff1
View user's profile Send private message Visit poster's website
Radovan Geist


Location: Slovakia
Joined: 19 Aug 2010
Likes: 5 pages

Posts: 399

PostPosted: Wed 19 Dec, 2012 12:51 pm    Post subject:         Reply with quote

...and here is another one, just finished. It is my first "serious" attempt for a tang construction. Handle is a combination of brass, bone and rose-wood.

Doing this project, I have stumbled onto one problem: how to cold-peen the tang, without damaging the blade? The best I came up with was wrapping the blade in a sheet of paper and clawing it really hard in a vice. Is there possibly a better method? Any advice appreciated... thanks.


 Attachment: 68.99 KB
P1010525.JPG


 Attachment: 56.36 KB
P1010526.JPG

View user's profile Send private message
Dustin R. Reagan


Joined: 09 May 2006

Posts: 264

PostPosted: Wed 19 Dec, 2012 2:32 pm    Post subject:         Reply with quote

Radovan Geist wrote:

Doing this project, I have stumbled onto one problem: how to cold-peen the tang, without damaging the blade? The best I came up with was wrapping the blade in a sheet of paper and clawing it really hard in a vice. Is there possibly a better method? Any advice appreciated... thanks.


Nice knives! They look like they came straight out of the river Thames! =]
Really, i think you nailed the handle construction dead-on on a lot of those knives (I especially like the really skinny, delicate handles).

A couple options for holding the blade in a vice without damage:

-Leather-faced jaws.
-Brass, Aluminum or Lead inserts for your vice jaws (basically any soft metal).
View user's profile Send private message
Radovan Geist


Location: Slovakia
Joined: 19 Aug 2010
Likes: 5 pages

Posts: 399

PostPosted: Thu 20 Dec, 2012 3:28 am    Post subject:         Reply with quote

thank you! i have a piece of thick leather from an old belt, somewhere in my workshop, that should work well. thanks again!
View user's profile Send private message
Radovan Geist


Location: Slovakia
Joined: 19 Aug 2010
Likes: 5 pages

Posts: 399

PostPosted: Sun 17 Mar, 2013 11:57 pm    Post subject:         Reply with quote

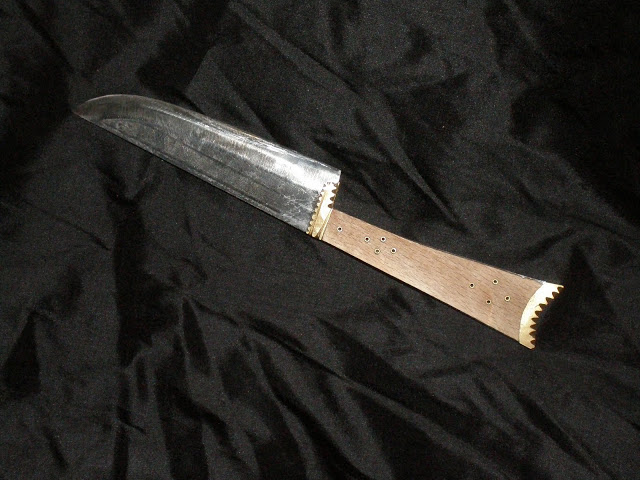
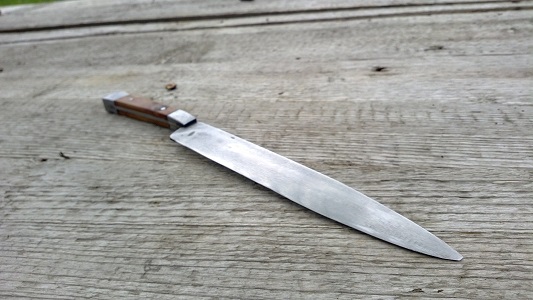
Dear all, let me contribute with my latest creations. The first one is a large cooking knife. It still needs some polishing on its blade, and I will probably re-shape the handle - so please take it as a work in progress:)
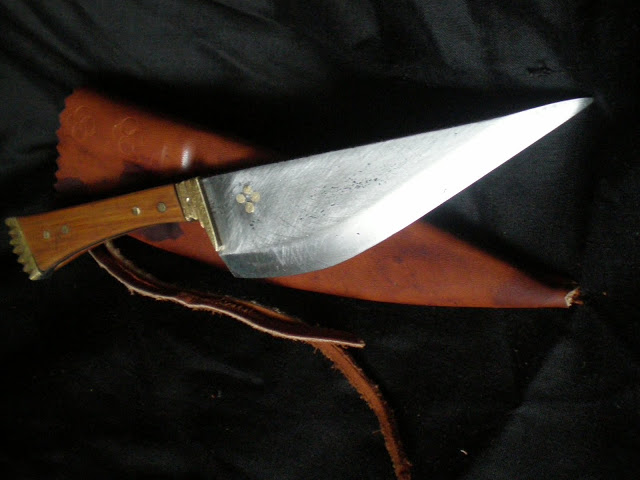
The second one was for my fiend´s birthday. I wanted to make it more special (and try a new technique), so it has a brass inlay work on its blade. It´s not perfect, but I´m rather happy with the result.


 Attachment: 86.35 KB
large-knife1.JPG


 Attachment: 57.06 KB
knife-with-brass-inlay1.JPG

View user's profile Send private message
Radovan Geist


Location: Slovakia
Joined: 19 Aug 2010
Likes: 5 pages

Posts: 399

PostPosted: Sun 05 May, 2013 10:59 pm    Post subject:         Reply with quote

After a while I managed to finish two more knives. The first one is a slender eating knife, inspired by some 15th cent German examples, with full-brass scales. The method was rather un-sophisticated (scales are riveted, not soldered), but I more or less like the result.

The second one is a larger eating knife, with brass and horn scales and some brass decoration. Here I´d like to ask for your advice: how would you polish horn to a high gloss? I was working with a sand paper, but achieved only this "satin look". Thanks in advance...


 Attachment: 97.58 KB
brass-handle-1.jpg


 Attachment: 126.47 KB
brass-handle-2.jpg


 Attachment: 73.56 KB
noz-rohovina-1.jpg


 Attachment: 92.97 KB
noz-rohovina-2.jpg


 Attachment: 96.79 KB
noz-rohovina-3.jpg

View user's profile Send private message
Tjarand Matre


Location: Nøtterøy, Norway
Joined: 19 Sep 2010

Posts: 159

PostPosted: Mon 06 May, 2013 2:29 am    Post subject:         Reply with quote

Really nice details!
View user's profile Send private message Send e-mail
Justin King
Industry Professional


Location: flagstaff,arizona
Joined: 12 Apr 2004
Reading list: 20 books

Posts: 551

PostPosted: Mon 06 May, 2013 6:56 am    Post subject:         Reply with quote

Horn finishes well with sandpaper and steel wool, I usually sand to about 600p and then polish with 000 steel wool. Very nice work by the way!
View user's profile Send private message
Radovan Geist


Location: Slovakia
Joined: 19 Aug 2010
Likes: 5 pages

Posts: 399

PostPosted: Mon 06 May, 2013 10:06 pm    Post subject:         Reply with quote

thank you. i did use sandpaper, but I shall try steel wool.
View user's profile Send private message
Bjorn Hagstrom


Location: Höör, Skane
Joined: 25 Oct 2007
Likes: 1 page
Reading list: 8 books

Posts: 355

PostPosted: Tue 07 May, 2013 1:02 am    Post subject:         Reply with quote

Lovely, lovely knives. One can't possibly have too many knives..
There is nothing quite as sad as a one man conga-line...
View user's profile Send private message MSN Messenger
Radovan Geist


Location: Slovakia
Joined: 19 Aug 2010
Likes: 5 pages

Posts: 399

PostPosted: Thu 06 Jun, 2013 8:04 am    Post subject:         Reply with quote

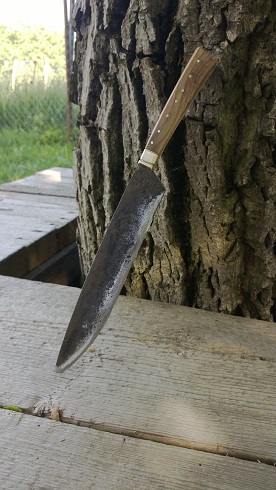
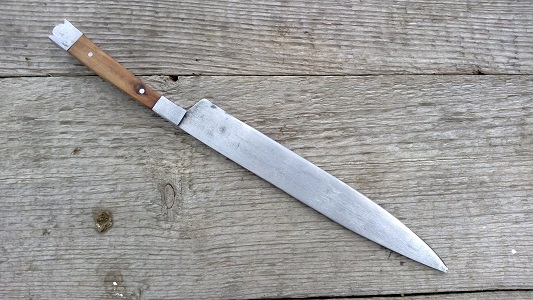
...and here´s another one. this time a larger cooking knife.Shape was inspired by some 15th cent. artwork.
The blade was made from a scrap piece of rusted metal, which was probably a broken blade from grass-cutter. I found it laying in the corner of our garden. I have cleaned it chemically and mechanically, but it still retains a "rustic look" (I know that it´s often just a code-word for "not very well-kept" Happy)
The scales are from brass and elm, riveted by solid brass rivets. The knife still needs a sheath, but it will have to wait for a smaller brother, to make a nice cooking-set. All comments and criticism are welcome.


 Attachment: 81.58 KB
cooking_knife_1.jpg

View user's profile Send private message
Radovan Geist


Location: Slovakia
Joined: 19 Aug 2010
Likes: 5 pages

Posts: 399

PostPosted: Tue 12 Nov, 2013 10:51 pm    Post subject:         Reply with quote

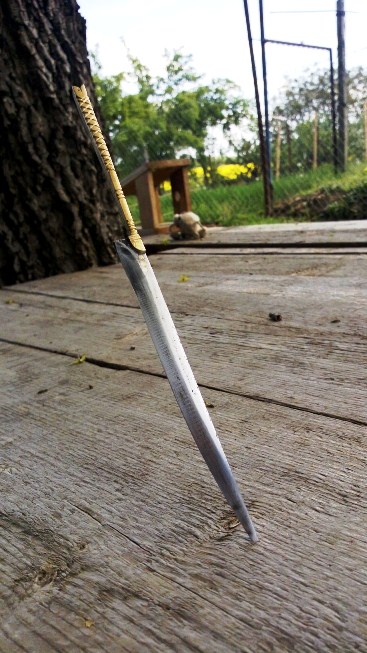
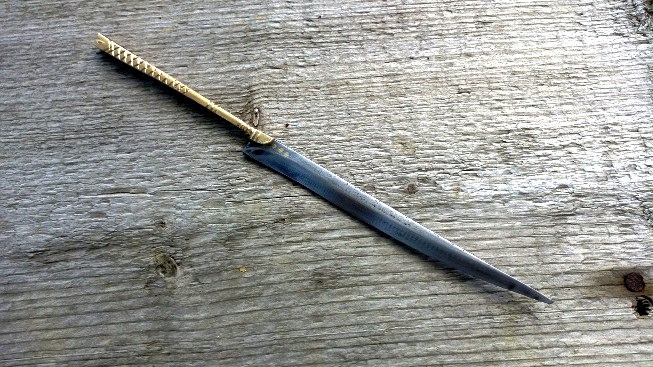
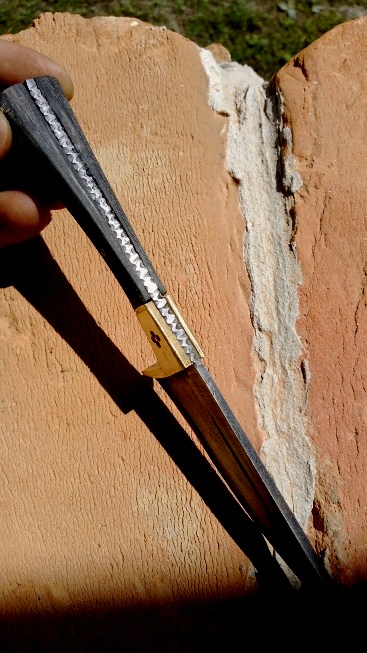
I´ve finished another one. This one will be part of a separate project of "upgrade" on one of my Langes Messer (a new handle, scabbard and a by-knife with pricker), but given the number of projects waiting on my work-bench, I don´t think it could materialise very fast:)
However, until then I have a rather large knife (27 cm), with a bolster and a butt from mild steel and a pear-wood handle treated with oil. Pins are from mild steel.


 Attachment: 102.24 KB
diy-byknife-messer-1.jpg


 Attachment: 79.7 KB
diy-byknife-messer-2.jpg

View user's profile Send private message
Kai Lawson


Joined: 26 Aug 2010
Likes: 7 pages

Posts: 589

PostPosted: Wed 13 Nov, 2013 4:06 pm    Post subject:         Reply with quote

That 'friend's birthday knife' and the knives immediately following it have really neat shapes--were they historically inspired?
"And they crossed swords."
--William Goldman, alias S. Morgenstern
View user's profile Send private message
Radovan Geist


Location: Slovakia
Joined: 19 Aug 2010
Likes: 5 pages

Posts: 399

PostPosted: Wed 13 Nov, 2013 10:42 pm    Post subject:         Reply with quote

Thanks Kai, yes they were inspired by different pieces found in artwork. My main source was this database: http://tethys.imareal.sbg.ac.at/realonline/
Some of the blades were also inspired by originals - here my main source is Herman Historica auctions.
View user's profile Send private message
Julien M


Location: Austin TX
Joined: 14 Sep 2005

Spotlight topics: 1
Posts: 1,086

PostPosted: Sun 19 Jan, 2014 2:51 am    Post subject:         Reply with quote

Was browsing around for your past work Radovan and I think it's really excellent. You have an eye for eating knife design for sure.

It's funny because I recall you said on another of your topic that your work was amateurish (found it: "I have to stress that it´s just very amateurish, learning by doing exercise"). Well you, lean fast! so I really don't agree as the above knives tell me otherwise. Your Bauerwehr makes the point even more. They also tell me you are comfortable with most of the techniques needed to achieve a pro level project (pinning, riveting, cutting and shaping a blade, heat treatment).

The one thing that is a bit of a let down is your finish (blade and sometimes the sides of your wooden handle are a bit rought), which is really awkward as it is the easiest part really. It looks like you are in a hurry to finish Happy Granted finishing is often very boring but well worth the effort. You work mostly with an angle grinder, and it leaves grinding marks.

Short answer: you need a belt grinder. I have no room for a backstand at present, but I am finishing blades and hilt components with a small 20£ aldi hand held belt sander, that has attachments to clamp it on a workbench belt facing up. I thought little of it when I bought it when grocery shopping, but I would be unable to complete most of my projects without it. I just bought quality belts on ebay, grit 40 would deal with those grind marks with little efforts. It has variable speed. Now this piece of equipment would make any professional blade smith have a good laugh, but what the hell - it does the job. I've done scabbard cores with it, shaped mild steel guards (angle grinder+this to refine and finish).

Sandpaper also does the trick, but will take more efforts. I use sanding sponge preferably, they speed up the work.
Otherwise clamp you blade on a long wooden slats that will extend beyond your workshop. Use double side adhesive to secure your sandpaper to a piece of hard wood that you will hold with both hands pressing on your blade. Then back and forth with a little oil...boooring yes. but this will work Happy

Hope the above will help. In any case I'll follow your projects with great interest.

Cheers,

J
View user's profile Send private message


Display posts from previous:   
Forum Index > Historical Arms Talk > A handful of knivesDIY Project
Page 1 of 2 Reply to topic
Go to page 1, 2  Next All times are GMT - 8 Hours

View previous topic :: View next topic
Jump to:  
You cannot post new topics in this forum
You cannot reply to topics in this forum
You cannot edit your posts in this forum
You cannot delete your posts in this forum
You cannot vote in polls in this forum
You cannot attach files in this forum
You can download files in this forum


All contents © Copyright 2003-2024 myArmoury.com — All rights reserved
Discussion forums powered by phpBB © The phpBB Group
Switch to the Basic Low-bandwidth Version of the forum