| Author |
Message |
|
Radovan Geist
|
 Posted: Mon 28 Oct, 2013 5:26 am Post subject: DIY: baselard and rondel Posted: Mon 28 Oct, 2013 5:26 am Post subject: DIY: baselard and rondel |
 |
|
A while ago I have started to work on two daggers for late 14th century kit - an I-hilt baselard, and a rondel. I did not strive to re-create any particular historical piece, just wanted to make two plausible daggers that would fit to that historical period.
Blades were cut and shaped with angle-grinder from spring-steel, hardened and tempered. I wanted to finish them in summer, but did not have time, so they waited on the shelve for some months.
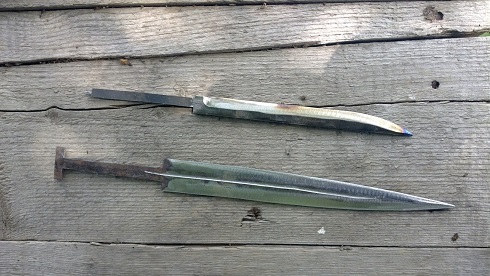
First picture shows them rough-cut, before initial polishing. Baselard is 40+ cm long; it has blade with a diamond cross-section and fuller extending to two-thirds of its length. As you see on the first picture, fuller was somewhat wavy - that´s a disadvantage of making it with an angle grinder free-hand. I have later corrected it manually with files.
Rondel is 35 cm long, with single-edge blade. I have later added a short false edge extending some 4 cm from the tip.
First picture shows both blades rough-cut, before initial polishing, second after hardening and tempering.
Last Sunday I managed to spend some few hours in the workshop, so more pictures will follow.
 Attachment: 86.94 KB Attachment: 86.94 KB
Attachment: 95 KB

|
|
  |
 |
|
Radovan Geist
|
| Posted: Tue 29 Oct, 2013 10:57 pm Post subject: |
|
|
here are some pictures of progress on the baselard. I did not take photos during the "production" itself, as my phone ( = camera) was broken, but:
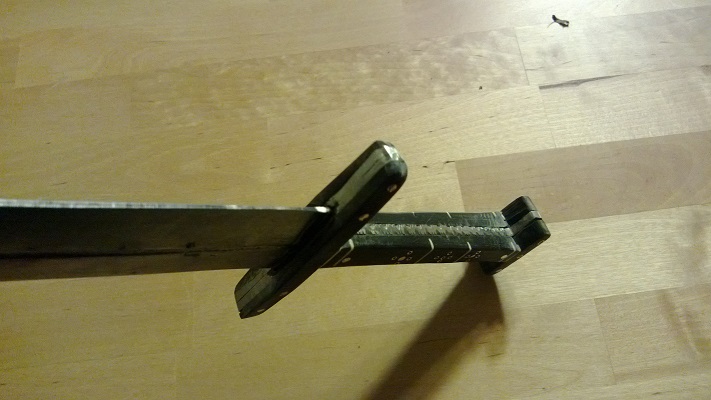
1. after some initial cleaning and polishing I´ve made an iron core of the lower guard. It´s made from two halves, sandwiched around the blade and riveted. The construction is visible on the first picture.
2. then I did some filework on both sides of the handle.
3. I have cut (with hacksaw) blocks of horn, shaped them roughly with files, and riveted on the handle and guard. I´ve used bi-metal rivets, with brass core and a thin copper wrapping. there were four rivets used for the lower guard, four on the handle, and three on the upper "pommel" part. See picture 2 - rivets on the handle are already smoothed, those on the crossguard are still rough.
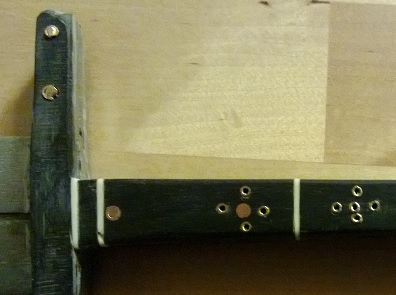
4. then I´ve shaped the handle again and smoothed it a bit with files. I´ve decided to make it more flashy (after all, this will be for the civilian kit), so I´ve added some thin bone inserts and tubular brass rivets (they are not functional). making these thin bone rivets was a real pain - I had to cut a thin layer from bone (with hacksaw) and smooth them with files and sandpaper. I tried to make them just a little bit broader than the slots that were cut to the horn - horn is little "plastic" so this should hold the inserts securely, but I have still used also a drop of glue. I will need more practice with that as the result is not perfect, as you can see on pictures 2 and 3...
5. After that I have smoother and polished it again with files and sand paper. See picture 3.
There is still a long way to go from here - I will try to correct some flaws on the handle with files, then try to polish it to as high shine as possible (and the same for the blade), and make a nice scabbard. So more pictures will follow.
I´m also working (more slowly) on the rondel, so I will post some pictures of that later.
Any thought or suggestions are welcome.
Attachment: 97.79 KB
Attachment: 37.78 KB
Attachment: 100.97 KB
|
|
|
|
|
|
Radovan Geist
|
| Posted: Wed 30 Oct, 2013 10:50 pm Post subject: |
|
|
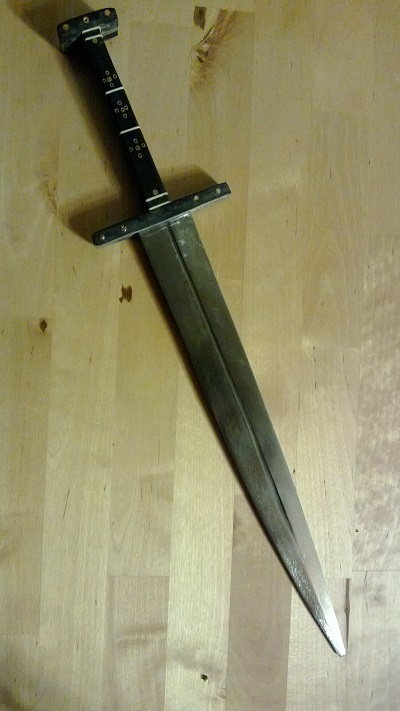
after spending some 2-3 hours on cleaning and polishing, here´s the result (it´s rather dark as I took the picture in the morning before heading off to work, I will take another in better light later).
It´s not fantastic, but at least I got some experience that I could use on later projects - especially on how to make a better fuller, and how to work with horn, which is a fantastic material, but could get tricky as it shows jut too visibly every flaw and scratch.
The next step is scabbard, but before that I will first finish the rondel dagger. I have already started to work on it, some more pictures will follow soon.
Attachment: 231.39 KB
[ Download ]
|
|
|
|
|
|
Radovan Geist
|
| Posted: Sun 03 Nov, 2013 10:27 pm Post subject: |
|
|
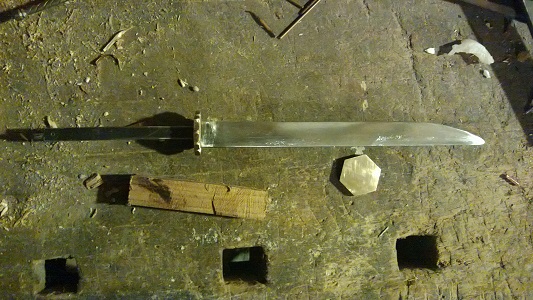
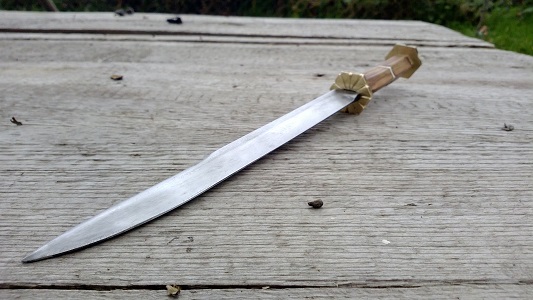
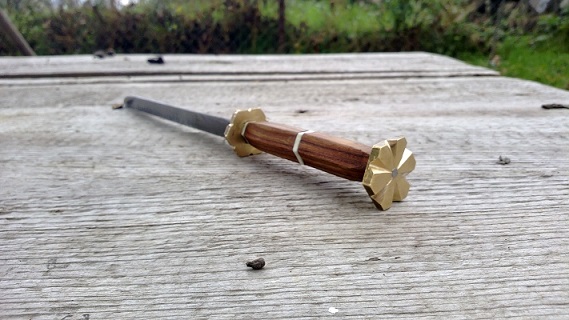
now, time has come to move on with a second one - rondel dagger.
For the handle, I have decided to use a combination of brass, bone and dark wood. I´ve used it on another project, and I like the colour contrast of white bone and dark wood (elm).
- First, two hexagonal brass discs were cut, and a block of wood (picture one - one of the discs is already on the blade).
- I have shaped the discs with files, giving them a "floral design" that could be seen on some originals (unfortunately, no specific picture, but it will be visible on the final piece).
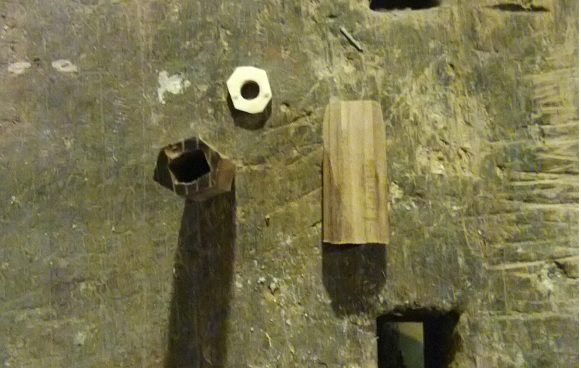
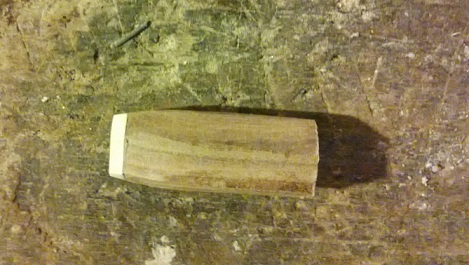
- The block wood has been shaped to hexagonal cross-section with my small belt grind, and the tang-hole was drilled through. Then I´ve cut the handle to halve, as I intend to place a bone spacer in the middle (and two more between the handle and discs). Tang hole has been shaped with files to fit the tang, and spacers from bone has been made (picture 3)
- Then I have glued the bone spacers to both wooden halves, pressed, and when they dried I have shaped and smoothed them on belt grinder and with a sand paper (picture 3 shows one of the halves)
now, with all parts finished I only need to assemble it, correct any flaws with a sand paper, and coat it in oil.
Attachment: 106.56 KB
Attachment: 87.88 KB
Attachment: 60.05 KB
|
|
|
|
|
|
Radovan Geist
|
| Posted: Sun 10 Nov, 2013 10:53 pm Post subject: |
|
|
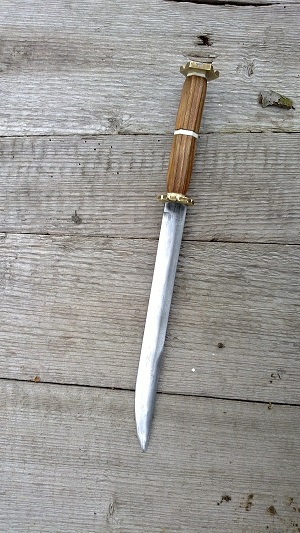
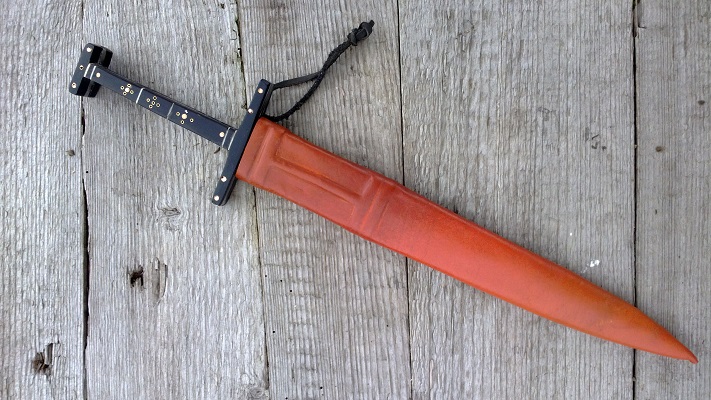
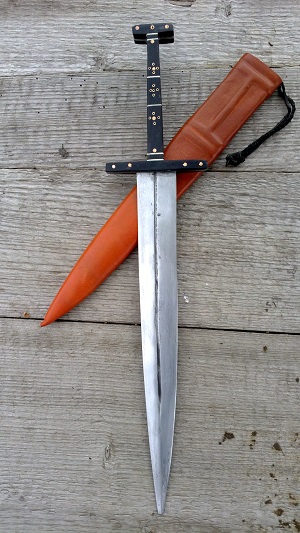
Last week I had few spare hours to finish the rondel, and do scabbard for the baselard. Here are the pictures, scabbard for rondel dagger is in the making.
I´m not very happy with the rondel - the handle is not really symmetric, and after assembling the whole thing I found out that the filework on the brass rondels could have been done differently (it looks quite crude). However, this was the first try on this kind of dagger, so next time it´d be (hopefully) better:)
The scabbard is constructed from two layers of leather. I´ve used risers (strips of 2mm leather glued on the first layer) to replicate the "linear" pattern of the handle. Again, it was the first time I´ve tried to play with risers. It could have been better (lines are not as crisp as I wanted them to be), but I was a good experience. I will use something similar on the rondel scabbard.
Attachment: 100.73 KB
Attachment: 82.06 KB
Attachment: 93.18 KB
Attachment: 161.33 KB
Attachment: 97.18 KB
|
|
|
|
|
Julien M

|
| Posted: Sun 19 Jan, 2014 3:07 am Post subject: |
|
|
Not a single comment on these...shame!
Both are quiet nice, and ambitious projects to take on.
The baselard construction seems a bit unorthodox to me (the sandwich guard - most I believe had quillons extended on the anvil from the blade outwards) and the hilt seems a bit bulky as a result.
Why didn't you cut the quillons when you outlined the blade blank? (I suppose you did not have enough room on you steel sheet?). Did you do the fueler with your angle grinder? Might have benefited from some refinements with a dremel tool.
I like your rondel quiet a bit. Yes the handle is a bit asymmetric, but most originals exhibit such oddities.
Anyway very inspiring stuff, and looking forward to your take on that parrying dagger - sword breaker you're working on.
Cheers
J
|
|
|
|
|
|
Radovan Geist
|
| Posted: Sun 19 Jan, 2014 10:46 pm Post subject: |
|
|
Hi Julien,
thank you for your comments - and compliments.
Sandwich construction: yes, you are right. I was limited by the width of material available. Yet, on the other hand, when I was doing my research, I´ve stumbled upon some historical blades that did not have any quillons extending from the blade - I´m attaching one image from HH. My interpretation was (I could be wrong) that they were "sandwiched" . It is just a guess, of course. Also, some other reproductions use similar method, including this wonderful repro by Leo Todeschini: http://www.myArmoury.com/review_tod_bwbaselard.html
But you are probably right that extending quillons were more common, and I might make another "proper" piece when I get a wider sheet.
Fueler: It´s not something I´m especially proud of on this dagger. I´ve done this blade a while back and it was just laying in my workshop, so there are far too many imperfections. Yes, it was done by an angle grinder, but I would have done it differently now. In fact, when working on the last bunch of blades, I´ve made a little gadget that helps me to keep the line straight. I was trying to refine it with files, but I was only partially successful. I don´t have a dremel tool yet, but I´m deffinitely planning to buy one soon - for other projects.
Thank you for suggestions and comments, Julien. It´s learning by doing, and feedback is an important resource.
|
|
|
|
|
|
Radovan Geist
|
| Posted: Thu 20 Mar, 2014 11:50 pm Post subject: |
|
|
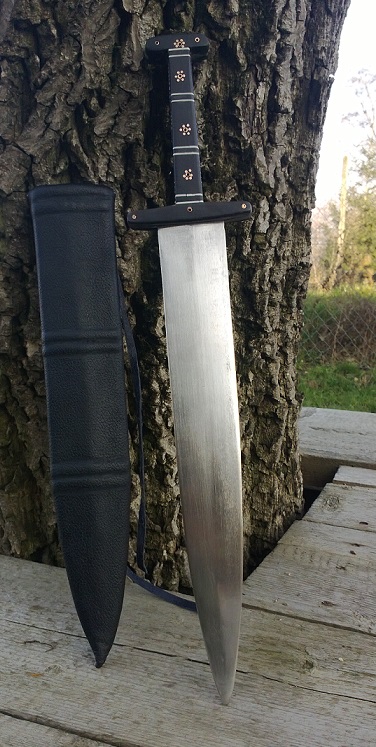
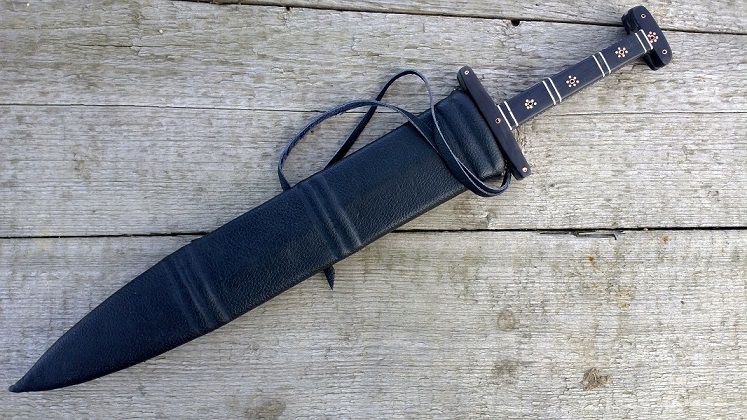
I got a chance to work on another baselard, very similar to that first one, and it was a good opportunity to learn from past mistakes and try to do some things better than the last time. Here is the result.
Some differences between those two weapons are visible, some are less so:
- the second blade has a diamond cross-section and it´s made sharp - I did not have to bother with fueler and could work more on a blade geometry. This one has a more pronounced distal taper, going from 5mm close to the hilt to 3 mm near the middle.
- on the second dagger, thicker pins that are actually holding the scales together are hollow and made from a rolled sheet of copper alloy, decorative pins are from a copper alloy rod (so I have decided not to use brass tubing to be more "authentic")
- decorations on the handle are arranged a bit differently, but that´s just a detail.
- scabbard is black and it has a wooden core.
Attachment: 150.69 KB
Attachment: 189.3 KB
|
|
|
|
|
|
|
You cannot post new topics in this forum
You cannot reply to topics in this forum
You cannot edit your posts in this forum
You cannot delete your posts in this forum
You cannot vote in polls in this forum
You cannot attach files in this forum
You can download files in this forum
|
All contents © Copyright 2003-2026 myArmoury.com — All rights reserved
Discussion forums powered by phpBB © The phpBB Group
Switch to the Basic Low-bandwidth Version of the forum
|

