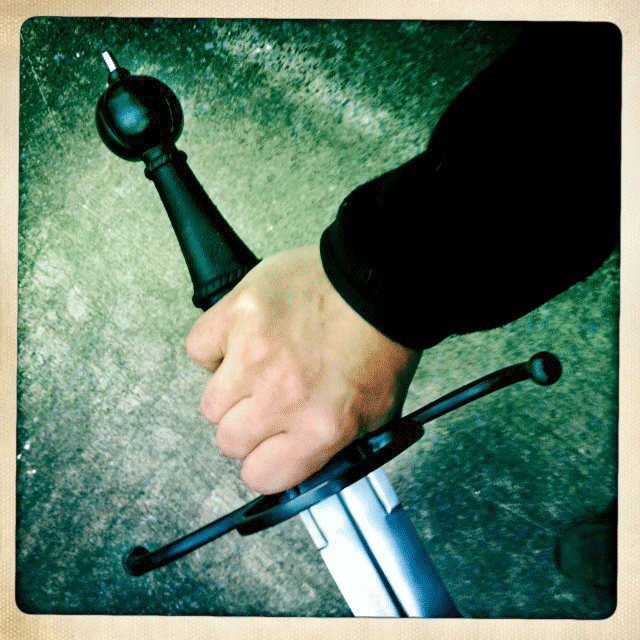
In the hand
 Attachment: 185.25 KB


Hey Sean, nice work!
Please stop fussing about with these sepia philters and show us real pictures :)
Cheers,
J
Please stop fussing about with these sepia philters and show us real pictures :)
Cheers,
J
| Julien M wrote: |
| Hey Sean, nice work!
Please stop fussing about with these sepia philters and show us real pictures :) Cheers, J |
That's just the Hipstamatic iPhone app--the camera that's always in my pocket. I'll have proper DSLR shots after assembly :D
Assembly is complete! This piece is finished! No time for photos until next week, but here are some construction shots of the peening. Maybe those will be of interest to folks.
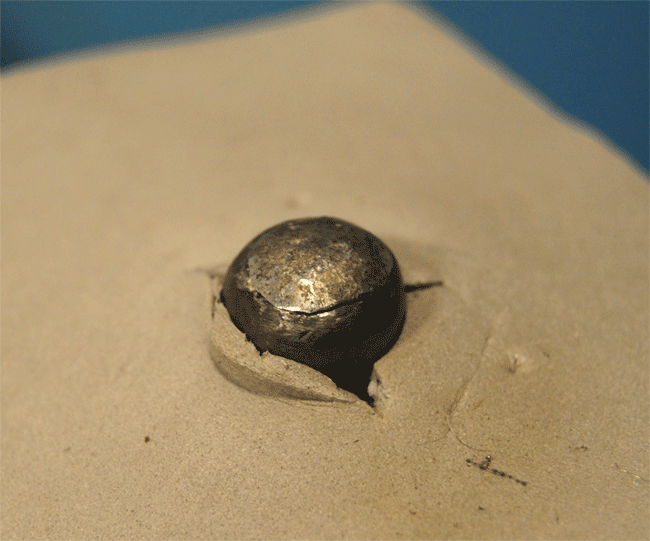
Previous experience with peening Windlass tangs was not happy. I found them to be extremely hard. I successfully hot-peened the last one I used, but that presents its own difficulties related to the rest of the hilt components. I make sure everything fits well/tightly, but I do still use JB weld on all components, and burning that up isn't fun. Also, using my little propane torch .25" from a large piece of steel (pommel) makes it very difficult to get the tang up to a useful temp. This time I wrapped a damp rag around the tang of the bare blade and heated the last inch of the tang to orange and kept it there for about a minute. Then I let it cool on its own in the hopes that this would take out some of the hardness. A few days later, after mounting and securing all of the hilt elements, I peened the tang and found it to be of perfect hardness for this--neither too soft nor too hard. You can see in the first photo below, just after peening, that there's no cracking at the edges and I was able to give it almost its final shape using only the hammer. The second photo shows the peen and nut after a small amount of light filing and sanding.
With that final finishing done to my satisfaction, I de-greased and blued the area to match the rest of the hilt.
By the way, the stuff through which the peen emerges here is just cheap craft foam sheeting that I use for patterning chapes and such. It's just enough to shield the pommel from deflected or stray hammer strikes during peening, and from file marks and abrasion during the final finish.
NOTE: The rough assembly shot above still shows the original tang length. I did NOT peen that much tang! I cut it to about .25" above the nut before drawing out the hardness and peening. I also ground down the threads of the tang and inside the nut so that the nut would move freely on the tang.
 Attachment: 201.39 KB
 Attachment: 224.59 KB
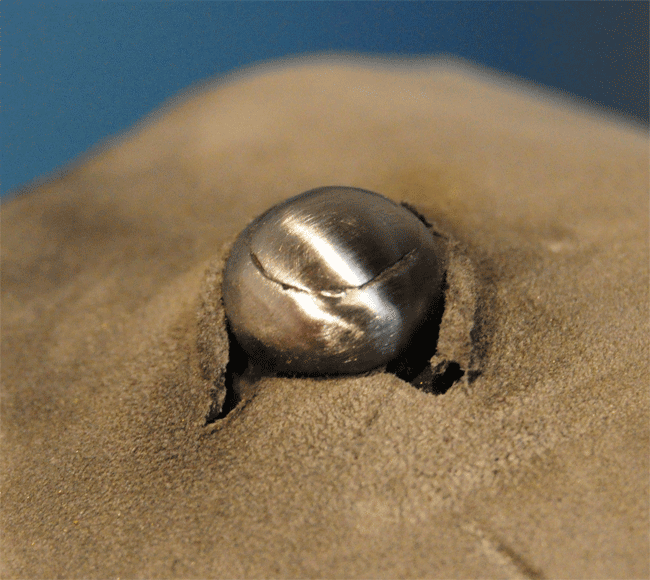
Previous experience with peening Windlass tangs was not happy. I found them to be extremely hard. I successfully hot-peened the last one I used, but that presents its own difficulties related to the rest of the hilt components. I make sure everything fits well/tightly, but I do still use JB weld on all components, and burning that up isn't fun. Also, using my little propane torch .25" from a large piece of steel (pommel) makes it very difficult to get the tang up to a useful temp. This time I wrapped a damp rag around the tang of the bare blade and heated the last inch of the tang to orange and kept it there for about a minute. Then I let it cool on its own in the hopes that this would take out some of the hardness. A few days later, after mounting and securing all of the hilt elements, I peened the tang and found it to be of perfect hardness for this--neither too soft nor too hard. You can see in the first photo below, just after peening, that there's no cracking at the edges and I was able to give it almost its final shape using only the hammer. The second photo shows the peen and nut after a small amount of light filing and sanding.
With that final finishing done to my satisfaction, I de-greased and blued the area to match the rest of the hilt.
By the way, the stuff through which the peen emerges here is just cheap craft foam sheeting that I use for patterning chapes and such. It's just enough to shield the pommel from deflected or stray hammer strikes during peening, and from file marks and abrasion during the final finish.
NOTE: The rough assembly shot above still shows the original tang length. I did NOT peen that much tang! I cut it to about .25" above the nut before drawing out the hardness and peening. I also ground down the threads of the tang and inside the nut so that the nut would move freely on the tang.


nice work on the peen, i gotta say that yeah i did peen over hardened steel before to repair a blade for someone - what a pain! can't wait to see this blade all finished!
did you use chamois leather again?
| Gary B. Ledford wrote: |
| did you use chamois leather again? |
GUILTY :blush:
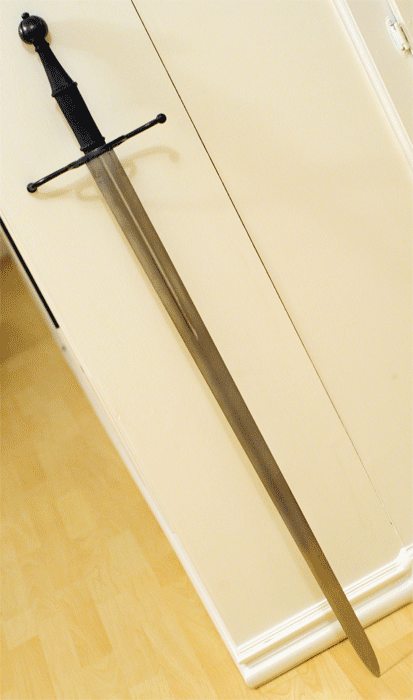
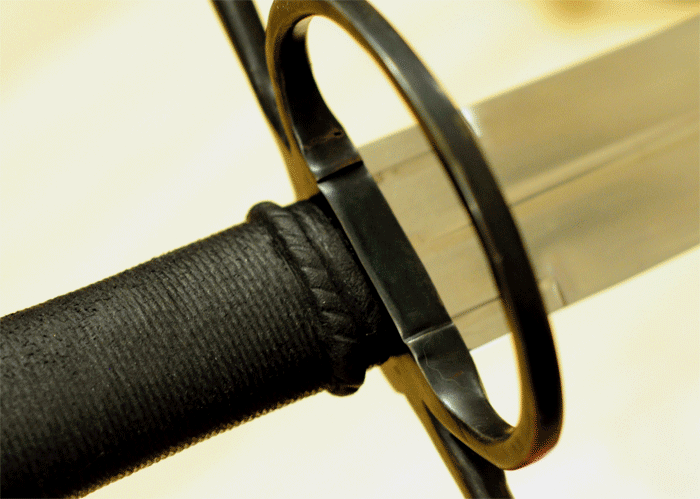
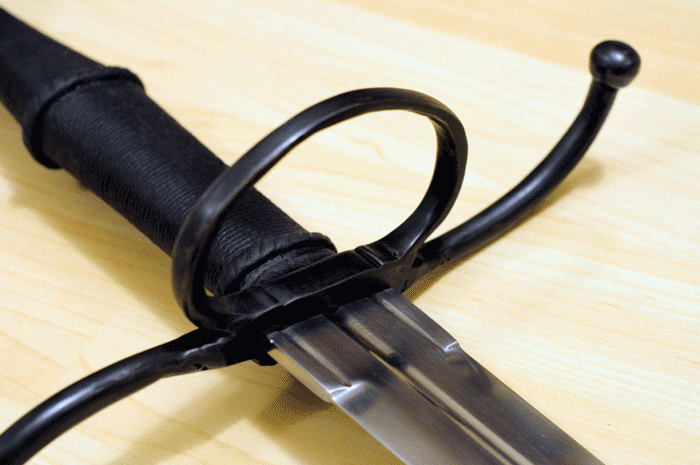
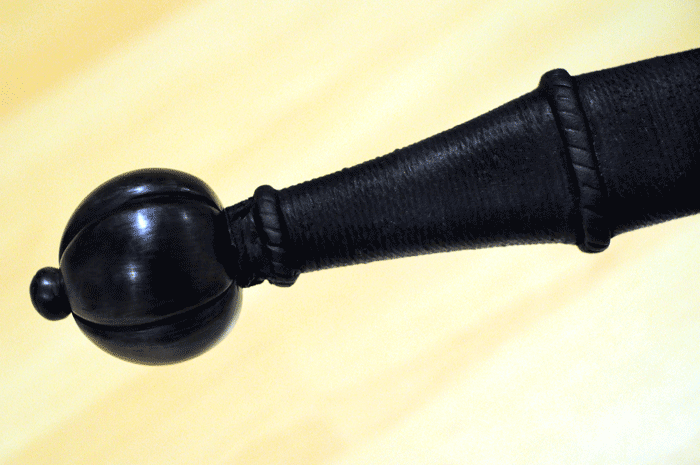
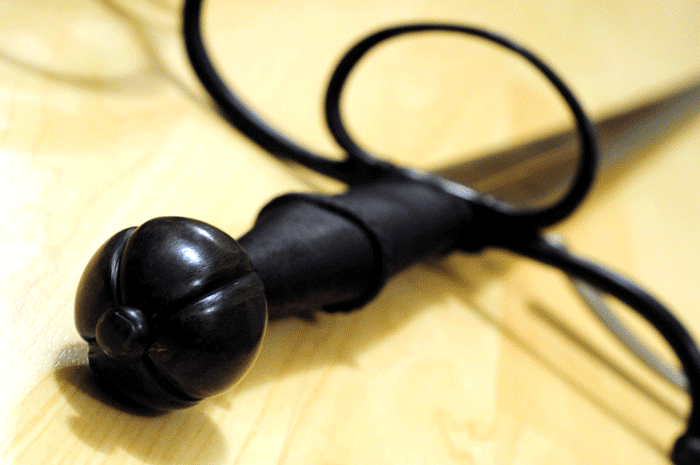
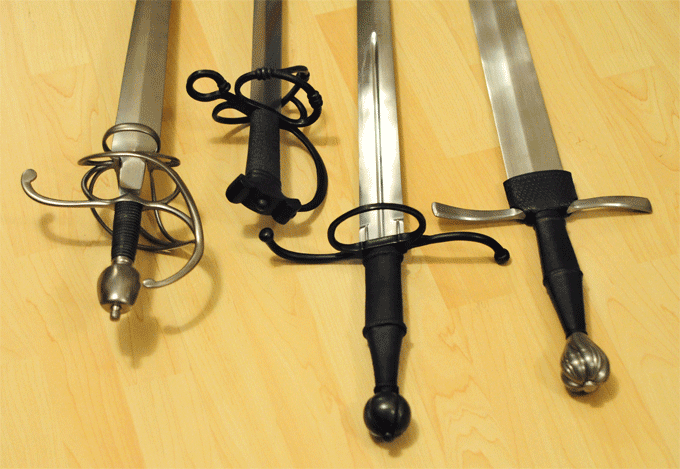
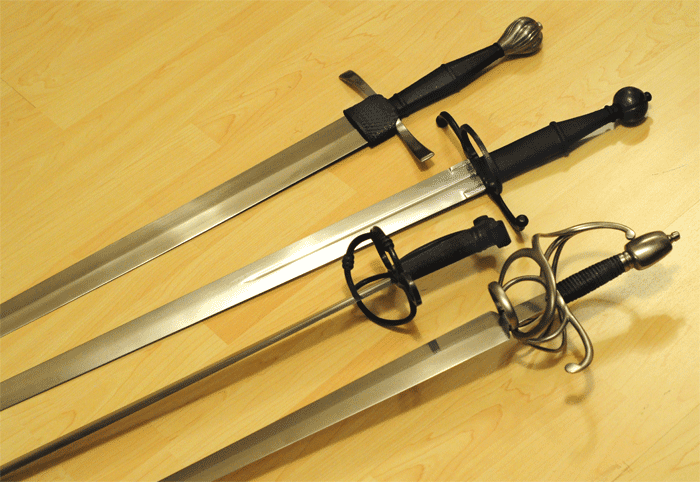
Still haven't had time/opportunity to get out and do better photos, but these will give a pretty good idea of what I ended with, and how it fits in my collection.
 Attachment: 166.16 KB
 Attachment: 135.78 KB
 Attachment: 166.18 KB
 Attachment: 190.2 KB
 Attachment: 157.02 KB
 Attachment: 187.09 KB
 Attachment: 213.99 KB


:eek:
o man - i think i'm becoming a big fan of blacked out look.
o man - i think i'm becoming a big fan of blacked out look.
| Daniel Wallace wrote: |
| :eek:
o man - i think i'm becoming a big fan of blacked out look. |
Not hard to do and, fortunately, not hard to reverse. This is Birchwood-Casey Perma Blue, as usual.
Very nice work, Sean! I like it!
Regards,
Thomas
Regards,
Thomas
I like it a lot Sean, very true to your source material.
ps: Ditch the bloody chamois! :)
ps: Ditch the bloody chamois! :)
| Julien M wrote: |
| I like it a lot Sean, very true to your source material.
ps: Ditch the bloody chamois! :) |
:blush: Meh. Dries hard, takes a polish and costs about $1 per grip.
| Sean Flynt wrote: |
|
:blush: Meh. Dries hard, takes a polish and costs about $1 per grip. |
yes, but I have my doubts about whether it will hold up to regular use.
Sean: beautiful work as always! I love how your creations are usually so radically different from all of the production swords out there, and even many of the customs (the ones that we get to see, at least), yet are always representative of a particular time and/or place. This gives each one such a distinct personality rarely seen in other pieces. Love it!
Absolutely gorgeous work. Makes me all inspired to go and try out similar projects, even as it fills me with despair that I could never hope to emulate the results.
| Gary B. Ledford wrote: | ||
yes, but I have my doubts about whether it will hold up to regular use. |
having un-done at least one if these and one A&A grip, I have no concerns about durability. as a test, get some chamois and try to tear it. the bigger question is about the adhesive. i use woodglue, which is water soluble, while Albion and some others use epoxy [CORRECTION: Albion uses hide glue for their wraps]. i'm sure epoxy is more durable in theory, but is probably a step farther away from historical construction.
Last edited by Sean Flynt on Fri 05 Oct, 2012 8:40 am; edited 1 time in total
| Sean Flynt wrote: |
| having un-done at least one if these and one A&A grip, I have no concerns about durability. as a test, get some chamois and try to tear it. the bigger question is about the adhesive. i use woodglue, which is water soluble, while Albion and some others use epoxy. i'm sure the epoxy is more durable in theory, but is probably a step farther away from historical construction. |
Last thing I want is to distract people from another great looking project but I have used chamois on more than one occasion for my very first swords upgrades.
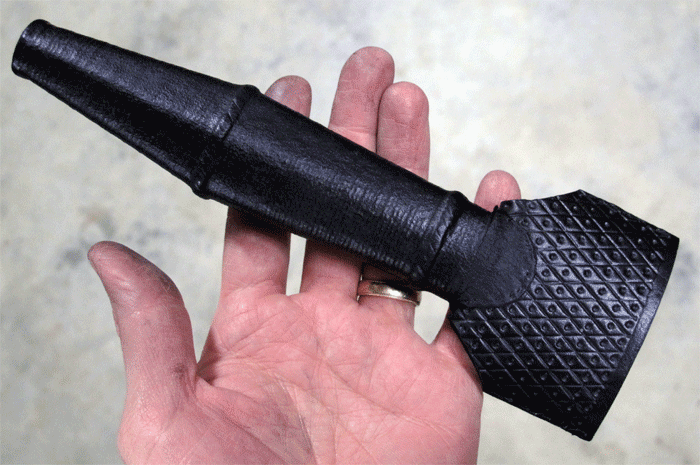
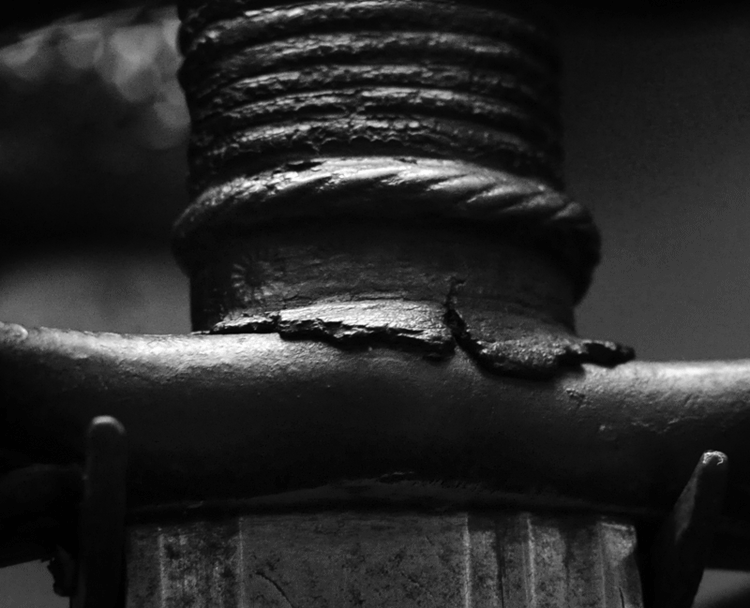
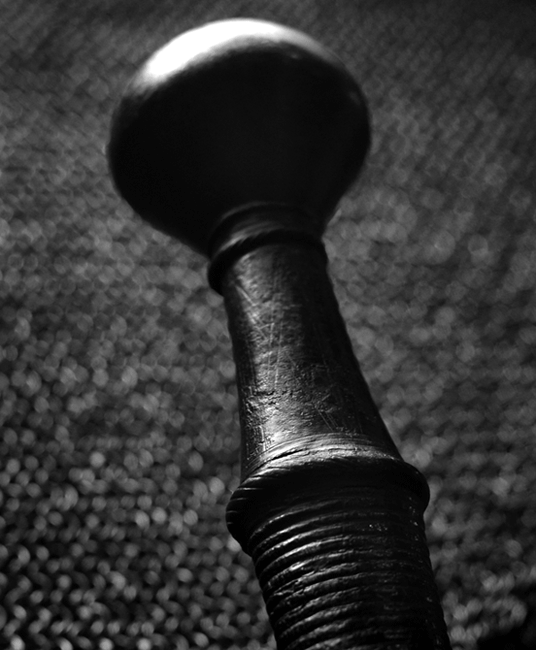
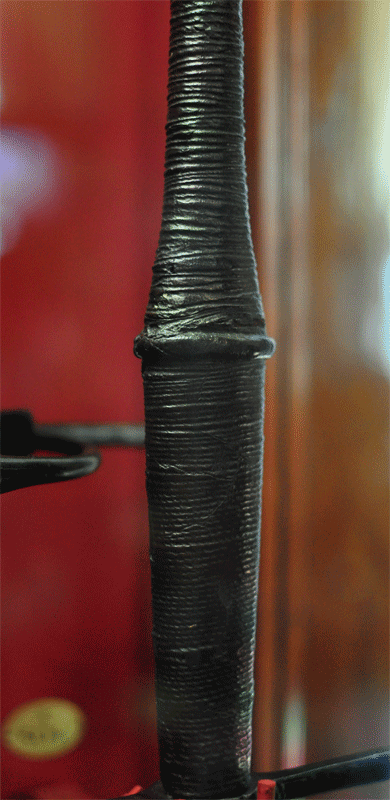
I have also tripped these grips to replace the chamois with veg tan leather. If glued with wood glue, it will have to be sanded to come off so I would not be worried about it coming loose anytime soon. However I dislike chamois because: it tends to sweat dye back on your palms (maybe you have found a finish product to prevent that Sean) but mainly because it won't take tooling nor won't remember surface impression for very long so details will be shallow. I would be concerned to take a chamois grip wrapped sword outside by a rainy day. Below an old project of mine, a coustille. Picture one is chamois, picture 2 is veg tan. Surface details are better, polish is better too on veg tan, or at least in my opinion. Oh and one thing, chamois does not smell very good :) All in all Sean, I do think you deserve top grain leather. You know I got mine on ebay for next to nothing, so maybe you'll get lucky.
http://www.myArmoury.com/talk/download.php?id=23518
http://www.myArmoury.com/talk/files/img_1616_...m__173.jpg
Water: I think this is a valid concern with my construction. My wraps are thoroughly waxed and usually burnished, so I think you'd have to soak them to see a problem. Water will bead on my grips. However, sweaty hands, regular use and infrequent maintenance would have some effect. I recently got a VERY used Albion Squire Line sword with a blade like a saw, and all traces of the grip wrap were long gone. Use breaks down wraps. No question about it. That was true historically, too, and this is the easiest part of the sword to replace as needed. One thing I do to improve durability is place the leading edge of the overlapped seam so that it falls under the fingers when the sword is gripped. In other words, the hand is always pulling the grip in the direction of the wrap rather than against it.
Malleability: I saturate my wraps with wood glue. The stuff oozes out as I'm binding the wrap. When the piece is dry enough to remove the wrap, it will still take impressions but won't spring back. As it dries further, it freezes the impressions, so that one would really have to try to erase them. There is no cord underwrap on the grips shown above and below, and I have burnished the whole grip with a secret custom tool (i.e., the barrel of a Sharpie marker) to compress the leather, which helps seal it and eliminate the matt surface if would have otherwise. It would take a great deal of work to eliminate the cord impressions this way, but it can be done. Tooling and elaborate embossing are really out of the question, though, without some kind of spongy substrate (as in the case of my roped risers). It would not be possible to cut designs into this very thin material.
Selection: I carefully select the portion of the skin I use for wraps, as the surface can vary dramatically, from very fine to very coarse.
Dye : It takes some rubbing for my grips and scabbards to mark hands, etc. after they're thoroughly hardened and polished. This can be a problem, but I think it might have more to do with technique than materials. I use Feibing's dye, and it can rub off if the final piece is not finished properly. I haven't solved that problem entirely, but I think the solution is to thoroughly rinse the leather after dyeing and then burnish, polish and buff it after it's hard.
Matching: The place where you can really see a difference between the chamois and top-grain is if you make a chappe. The flap of chamois grip wrap that's stitched to the heavier top grain leather of the chappe can't quite match the finish of the chappe because it's harder to burnish as it has no hard surface below it, as the grip does. In the photo below you can see that the chamois grip and chappe have a higher polish than the flap. I'm sure there's a way to fix that but it doesn't concern me too much.
I'm no evangelist for chamois, but after taking note of antique grip leather in all stages of preservation, I find that chamois can give a credible look if care is taken in the finishing. The catch is that it takes more work to get a decent finish, so you're spending labor instead of cash.
Those just tuning in shouldn't mistake this process for the suede-look grip covering that makes most of us nauseous. :D
 Attachment: 167.57 KB
 Attachment: 248.55 KB
 Attachment: 247.94 KB
 Attachment: 146.21 KB
Malleability: I saturate my wraps with wood glue. The stuff oozes out as I'm binding the wrap. When the piece is dry enough to remove the wrap, it will still take impressions but won't spring back. As it dries further, it freezes the impressions, so that one would really have to try to erase them. There is no cord underwrap on the grips shown above and below, and I have burnished the whole grip with a secret custom tool (i.e., the barrel of a Sharpie marker) to compress the leather, which helps seal it and eliminate the matt surface if would have otherwise. It would take a great deal of work to eliminate the cord impressions this way, but it can be done. Tooling and elaborate embossing are really out of the question, though, without some kind of spongy substrate (as in the case of my roped risers). It would not be possible to cut designs into this very thin material.
Selection: I carefully select the portion of the skin I use for wraps, as the surface can vary dramatically, from very fine to very coarse.
Dye : It takes some rubbing for my grips and scabbards to mark hands, etc. after they're thoroughly hardened and polished. This can be a problem, but I think it might have more to do with technique than materials. I use Feibing's dye, and it can rub off if the final piece is not finished properly. I haven't solved that problem entirely, but I think the solution is to thoroughly rinse the leather after dyeing and then burnish, polish and buff it after it's hard.
Matching: The place where you can really see a difference between the chamois and top-grain is if you make a chappe. The flap of chamois grip wrap that's stitched to the heavier top grain leather of the chappe can't quite match the finish of the chappe because it's harder to burnish as it has no hard surface below it, as the grip does. In the photo below you can see that the chamois grip and chappe have a higher polish than the flap. I'm sure there's a way to fix that but it doesn't concern me too much.
I'm no evangelist for chamois, but after taking note of antique grip leather in all stages of preservation, I find that chamois can give a credible look if care is taken in the finishing. The catch is that it takes more work to get a decent finish, so you're spending labor instead of cash.
Those just tuning in shouldn't mistake this process for the suede-look grip covering that makes most of us nauseous. :D


Last edited by Sean Flynt on Fri 05 Oct, 2012 8:55 am; edited 1 time in total
| Sean Flynt wrote: |
| having un-done at least one if these and one A&A grip, I have no concerns about durability. as a test, get some chamois and try to tear it. the bigger question is about the adhesive. i use woodglue, which is water soluble, while Albion and some others use epoxy. i'm sure the epoxy is more durable in theory, but is probably a step farther away from historical construction. |
Albion uses a hide glue for the leather on their grips. They may use another product for the two wooden halves of the grip itself.
Page 3 of 4
You cannot post new topics in this forumYou cannot reply to topics in this forum
You cannot edit your posts in this forum
You cannot delete your posts in this forum
You cannot vote in polls in this forum
You cannot attach files in this forum
You can download files in this forum
All contents © Copyright 2003-2006 myArmoury.com — All rights reserved
Discussion forums powered by phpBB © The phpBB Group
Switch to the Full-featured Version of the forum
Discussion forums powered by phpBB © The phpBB Group
Switch to the Full-featured Version of the forum