I started my second sword project yesterday and it will be another XVa/Castillion inspired sword. This one is for a myArmoury client who has asked for more width at the guard and a little more meat towards the tip (compared to my last one, the Errant, which can be seen here: http://www.bigrockforge.com/blog/?p=372
[ Linked Image ]
[ Linked Image ]
[ Linked Image ]
Wrought iron pommel will be modeled after this:
[ Linked Image ]
And wrought iron cross guard will be thus:
[ Linked Image ]
I will post more pictures as things develop.
This is a learning experience for me, so feel free to critique (and encourage) along the way....
I edited the first post as I had accidentally put in the wrong image for the cross guard example....
Okay I forged some fittings today. Forging big fittings from wrought iron is always a pain since it's usually in a form that isn't convenient. For example.. here is my pommel:
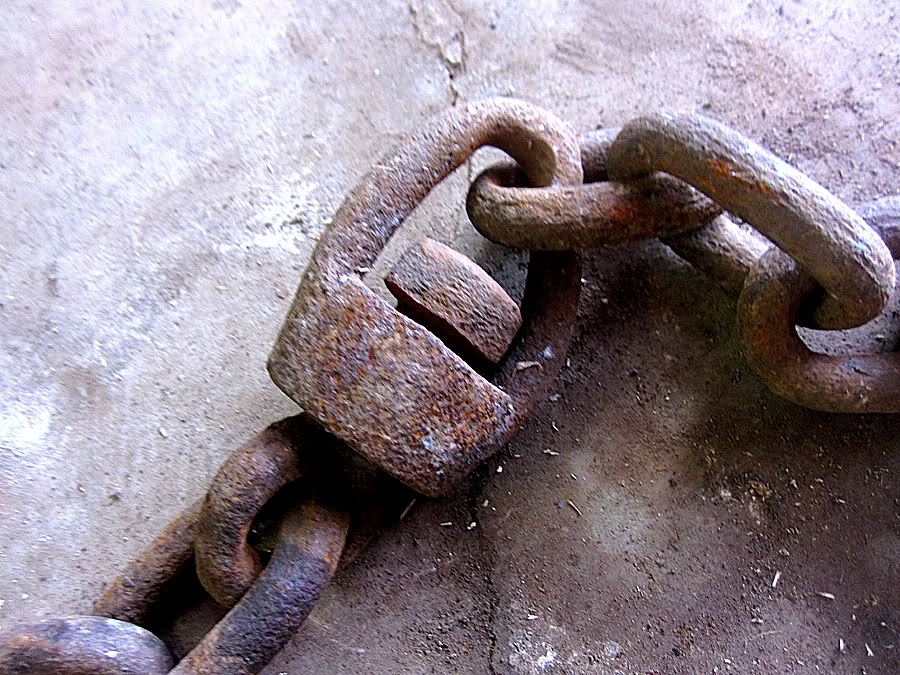
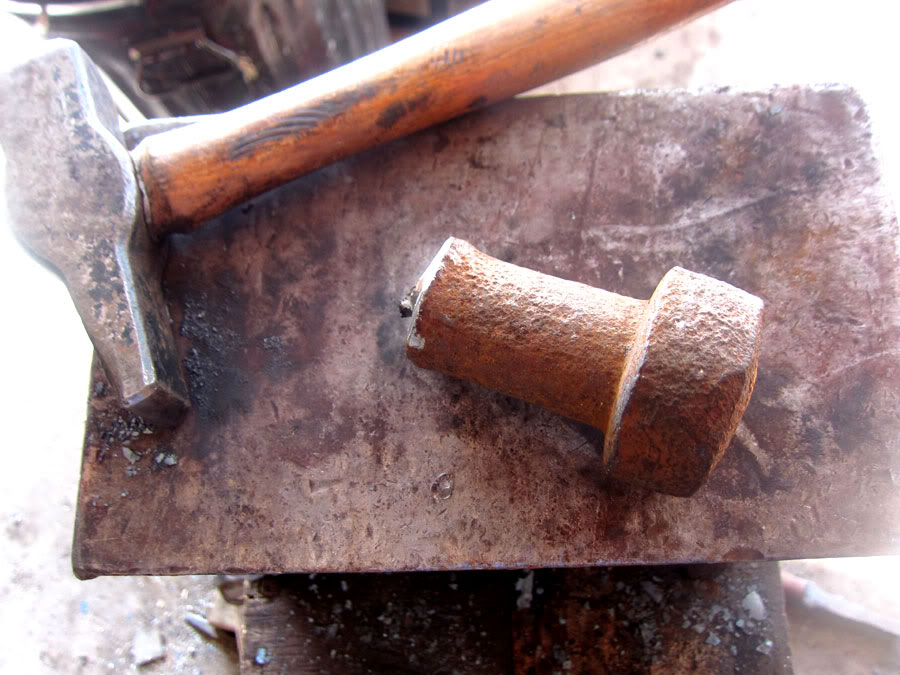


Forging down big pieces of wrought like that with my press almost always leads to hot shorting and crumbling as the sides of the iron cool faster than the core resulting in splitting and cracking. So I just get it close and then grind the rest of the profile. I actually made two pieces from what you see in the last picture... one a bit more massive than the other. It's important to get the right counter balance for the proper handling of the sword.. so I may end up using one or the other depending on the weight I need.
The cross guard will be easier to manage since I can forge it from a 1/2" round bar of wrought. My client ended up deciding on an alternate guard style you can see....

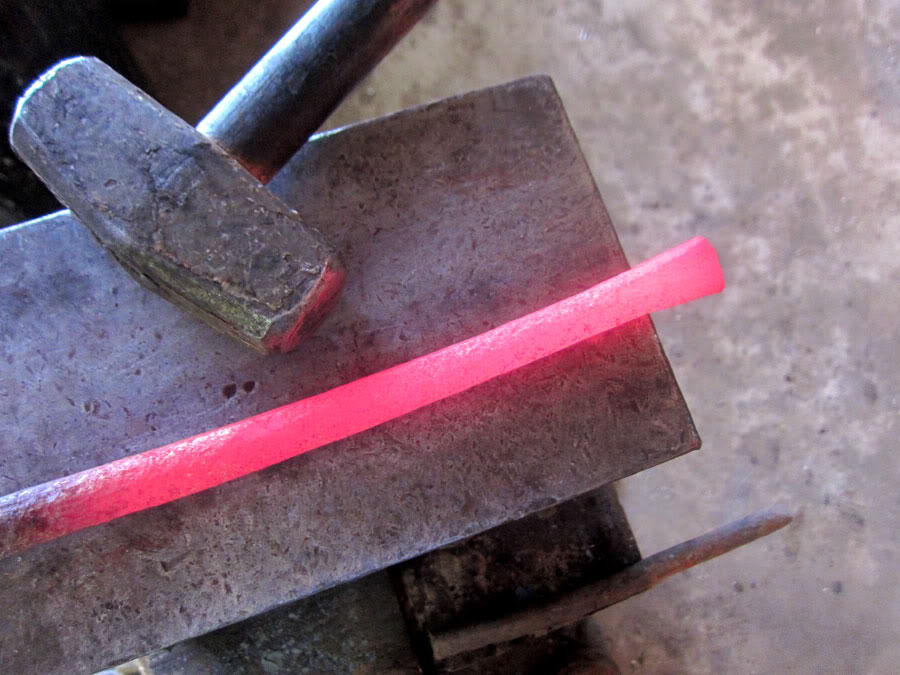

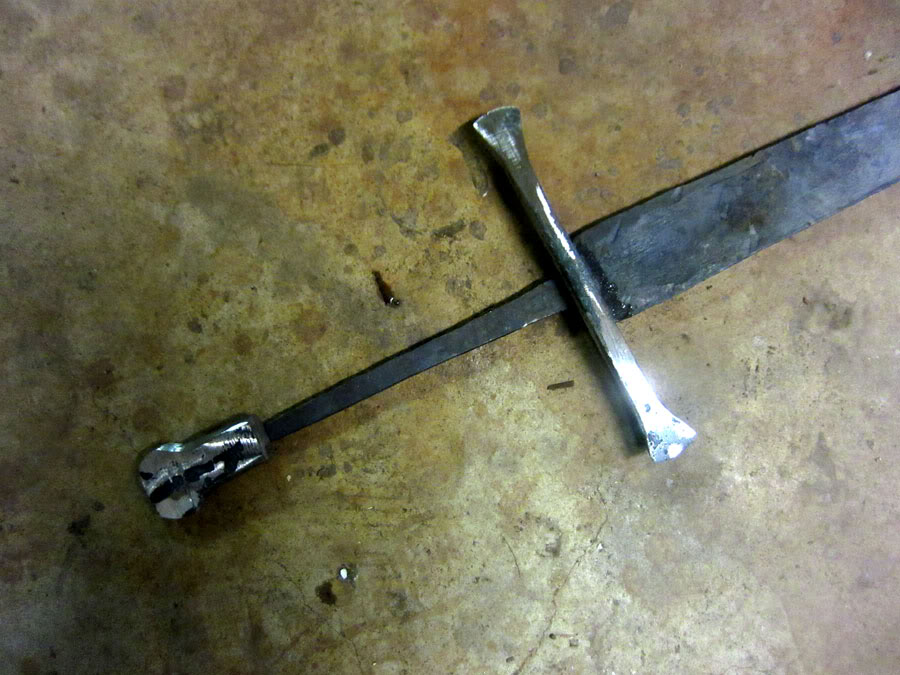
There is still a lot of shaping that needs to be done on those as well as milling the slot and drifting the tang hole, etc. But I was running the forge today so I wanted to get a head start on the fittings...
Hopefully I can do some grinding on the blade tomorrow....


Forging down big pieces of wrought like that with my press almost always leads to hot shorting and crumbling as the sides of the iron cool faster than the core resulting in splitting and cracking. So I just get it close and then grind the rest of the profile. I actually made two pieces from what you see in the last picture... one a bit more massive than the other. It's important to get the right counter balance for the proper handling of the sword.. so I may end up using one or the other depending on the weight I need.
The cross guard will be easier to manage since I can forge it from a 1/2" round bar of wrought. My client ended up deciding on an alternate guard style you can see....


There is still a lot of shaping that needs to be done on those as well as milling the slot and drifting the tang hole, etc. But I was running the forge today so I wanted to get a head start on the fittings...
Hopefully I can do some grinding on the blade tomorrow....
Looking good Scott! I've seen some of your previous projects, so I have high hopes for this one. I'll be watching with interest.
Looking fantastic, Scott. And your previous sword is gorgeous. It's very much "You."
(And now after nearly a year, I'm getting around to shooting the actual Ehud scene...)
(And now after nearly a year, I'm getting around to shooting the actual Ehud scene...)
Thanks folks!
Looking forward to seeing Ehud again! I still need to get your other stuff on my website. Getting to the point I may actually have a sword gallery on my website!
Looking forward to seeing Ehud again! I still need to get your other stuff on my website. Getting to the point I may actually have a sword gallery on my website!
Not much work on the sword today but I finally photographed the scabbard from the Errant as it is shipping tomorrow. :-(
[ Linked Image ]
[ Linked Image ]
Did some more work on fittings this morning....
I forged some curvature into the cross guard and then traced it on some graph paper to check for symmetry, etc...

I decided to work on the other pommel piece out of concern for the mass in the first piece. I'm just trying to forge this into a rough shape and then go for a lot of grinding. At this point.. it mostly needs a little more width to get the flaring I want (refer to the picture at the beginning of the thread).

To get the width I just put a shallow fuller in with the press and then flatten:


And some hand forging as well...

Now the piece of wrought has all the dimension I need to grind it to the final shape AND hopefully have the mass I need to counterbalance the blade.
I also straightened the blade and scribed my center-line with height gauge to begin grinding the blade. Since I'm doing less forging to shape this time, I will use an angle grinder to hog material off towards the center-line..
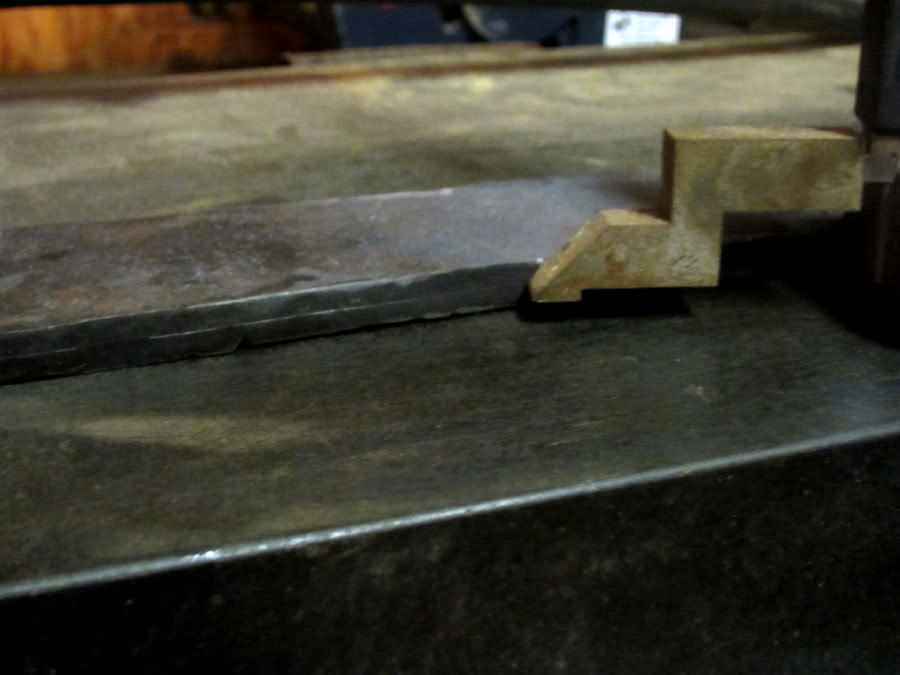
Hopefully I will post some grinding pictures later.....
I forged some curvature into the cross guard and then traced it on some graph paper to check for symmetry, etc...

I decided to work on the other pommel piece out of concern for the mass in the first piece. I'm just trying to forge this into a rough shape and then go for a lot of grinding. At this point.. it mostly needs a little more width to get the flaring I want (refer to the picture at the beginning of the thread).

To get the width I just put a shallow fuller in with the press and then flatten:


And some hand forging as well...

Now the piece of wrought has all the dimension I need to grind it to the final shape AND hopefully have the mass I need to counterbalance the blade.
I also straightened the blade and scribed my center-line with height gauge to begin grinding the blade. Since I'm doing less forging to shape this time, I will use an angle grinder to hog material off towards the center-line..

Hopefully I will post some grinding pictures later.....
That scabbard looks great with that grip. Nice work Scott.
Always interesting to see these kinds of in progress and making of Topics. :D :cool:
I'm always amazed watching threads like this. I have just begun modifying some hanwei pieces and I have enough trouble fitting a grip to a tang. This is inspirational to watch, thank you for posting.
Thanks for the comments folks.
Did a lot of work today.. more pictures later.
Blade is just about ready for heat treat and I just couldn't leave the pommel alone with the hammer. It makes me cry seeing good old iron turn to dust.....
Matthew .. it's the things like fitting a grip onto a tang that are really the important little details. It might not SEEM as difficult as forging a sword or hand forging fittings... but it's perfection in all those little details that add up to a sword that will have lasting value.
Lots of work today.....
I had to keep hammering on that dang pommel due to fear of losing too much weight grinding it... So more forging to shape:

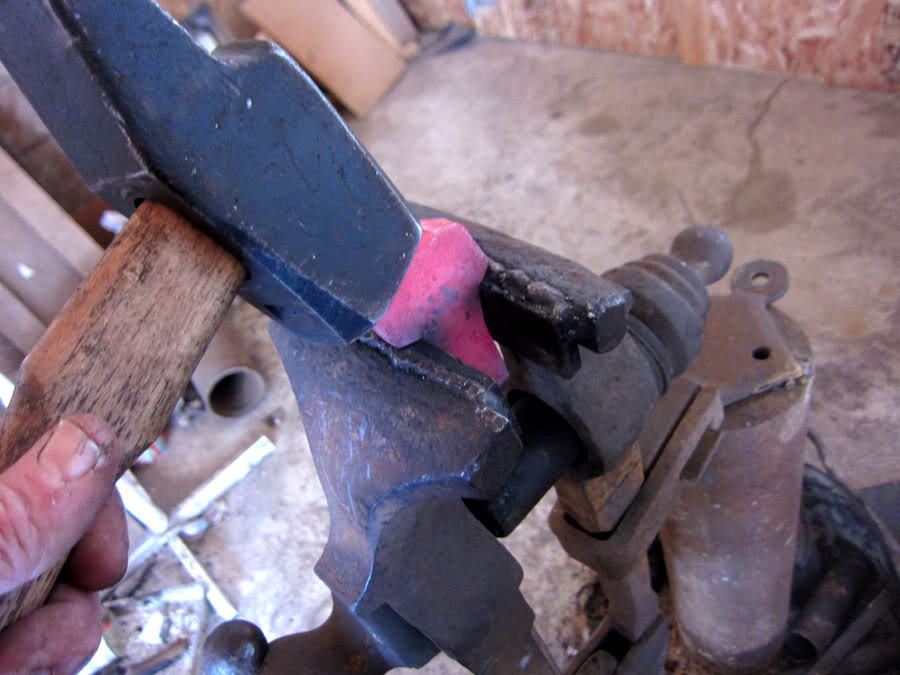
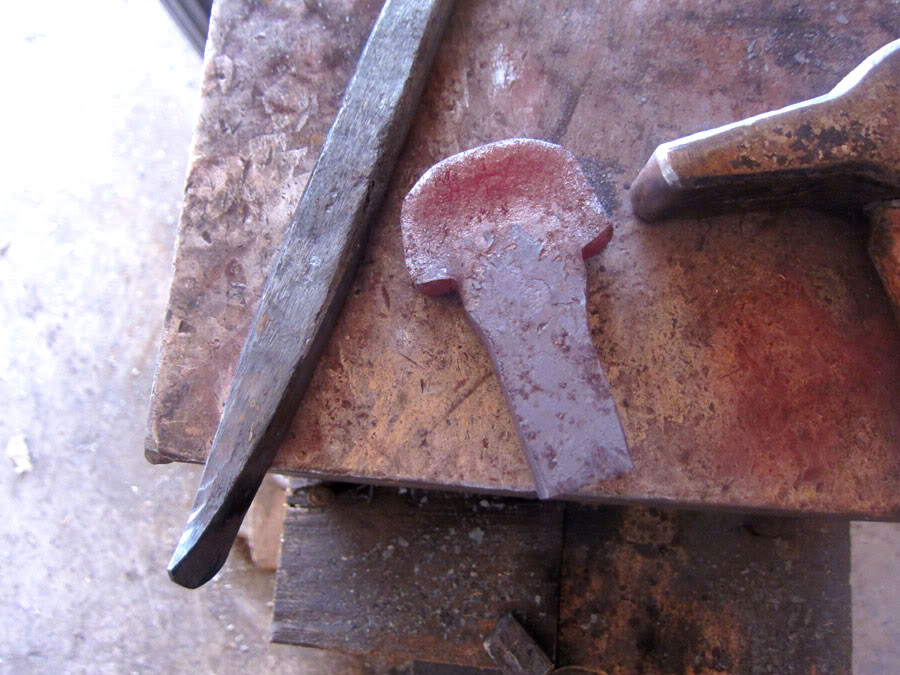
After cleaning up a bit...

And I got most of the grinding done today. I start by grinding the bevels a bit and then switch to establishing the flats and distal taper. Distal taper will be fine tuned right before heat treat.

Getting the shoulders (mostly) even with an old file guide. After heat treat I will fine tune with my good carbide lined guide.

Here is where it is now... almost ready for heat treat. Just need to address the center line, true up the edges and fine tune distal taper. It is very important with blades this long to have everything equal and symmetrical in as many dimensions as you can work with to avoid twists and warpage.
This picture was taken before the additional forging of the pommel:
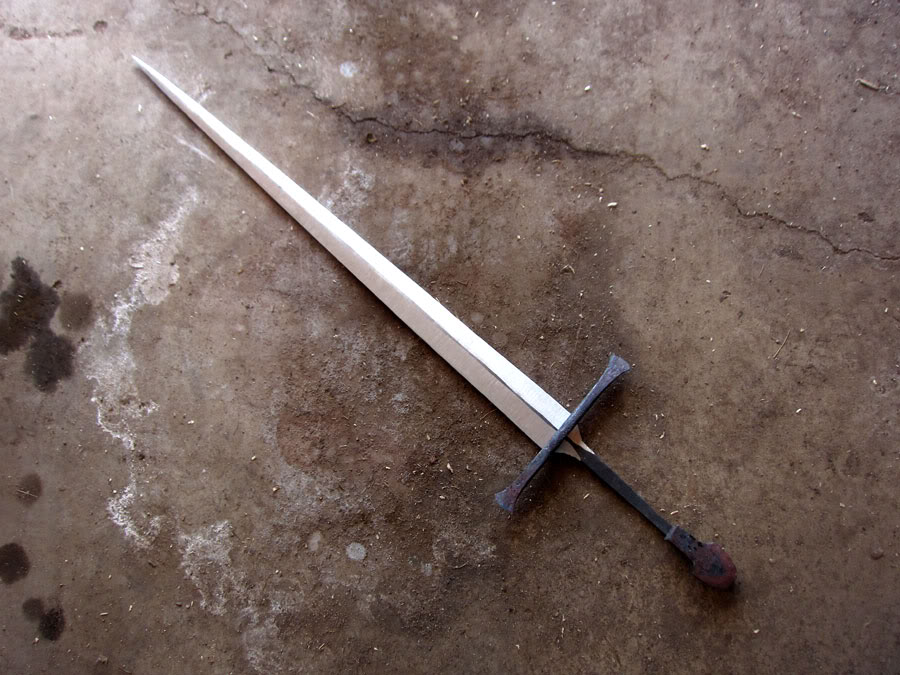

By the way.... not sure how long I'm going to be making the handle.. so don't pay attention to where the pommel is in those pictures.
I had to keep hammering on that dang pommel due to fear of losing too much weight grinding it... So more forging to shape:


After cleaning up a bit...

And I got most of the grinding done today. I start by grinding the bevels a bit and then switch to establishing the flats and distal taper. Distal taper will be fine tuned right before heat treat.

Getting the shoulders (mostly) even with an old file guide. After heat treat I will fine tune with my good carbide lined guide.

Here is where it is now... almost ready for heat treat. Just need to address the center line, true up the edges and fine tune distal taper. It is very important with blades this long to have everything equal and symmetrical in as many dimensions as you can work with to avoid twists and warpage.
This picture was taken before the additional forging of the pommel:


By the way.... not sure how long I'm going to be making the handle.. so don't pay attention to where the pommel is in those pictures.
Looking good there Scott! Nice work.
Thanks Ben!
Here is what I did while the sword was going through it's many tempering cycles in an attempt to correct some warpage.
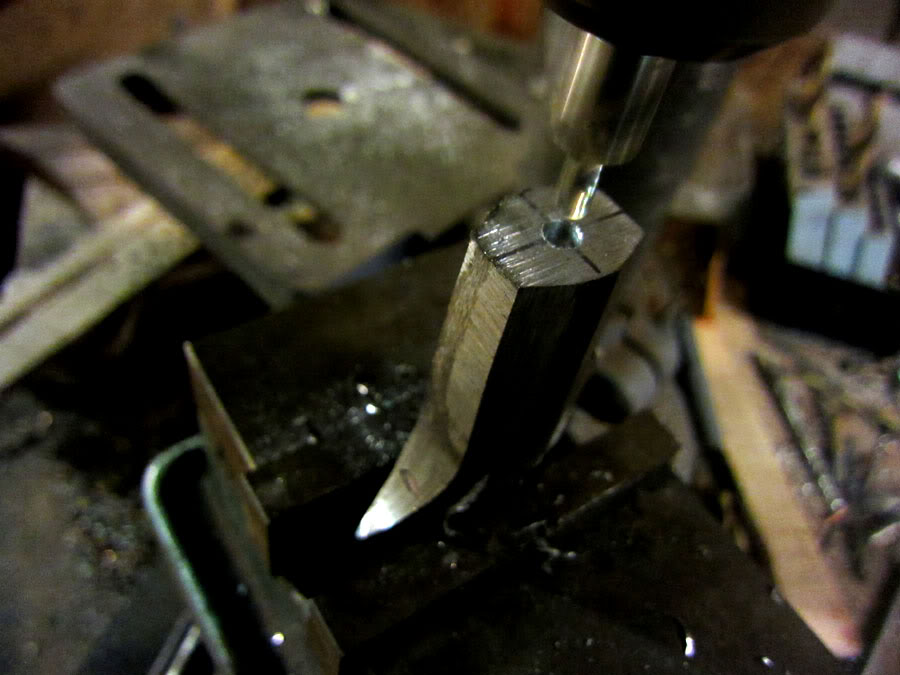
I drilled out the pommel to accept the tang. At this point.. I just have a hole drilled through.. but I will mill out a recessed, square slot for a portion of the tang... and the rest will be round and peened through the bottom. The recessed square keeps the pommel from spinning. This was the deepest hole I've ever drilled and had to do it from both sides and I was thrilled to see the two holes meet up.
I also milled out a slot in the guard (which I actually did right before the quench). I made it smaller than the thickness of the blade so that I could hot drift it through thereby getting a nice swell in the guard in the center. T

Here I am hotting drifting the guard. I was pleased with how well this went and snug and level the guard is.

And here is the first 'kink' I had to work out after the quench:
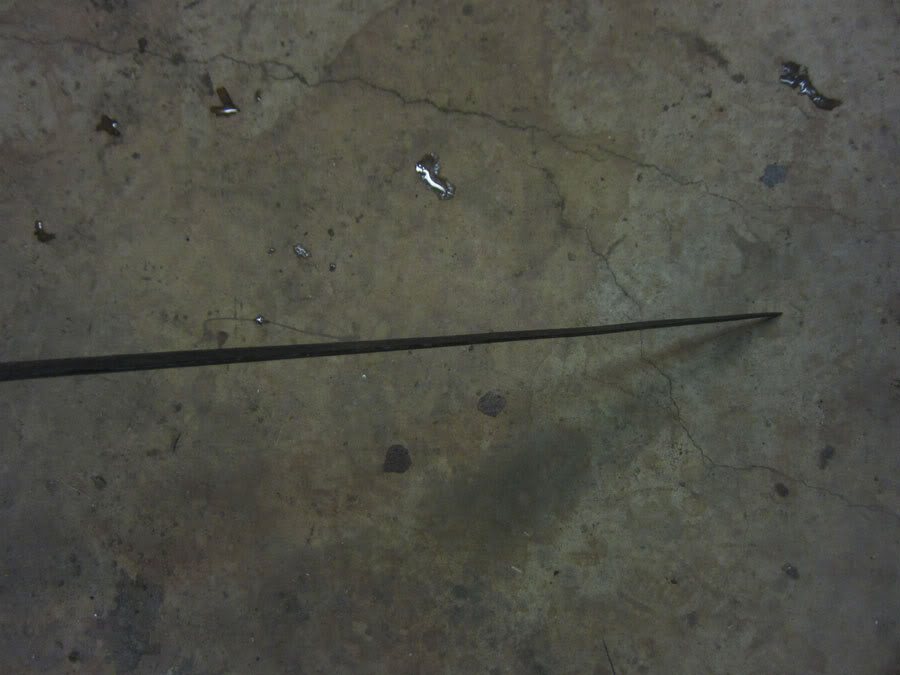
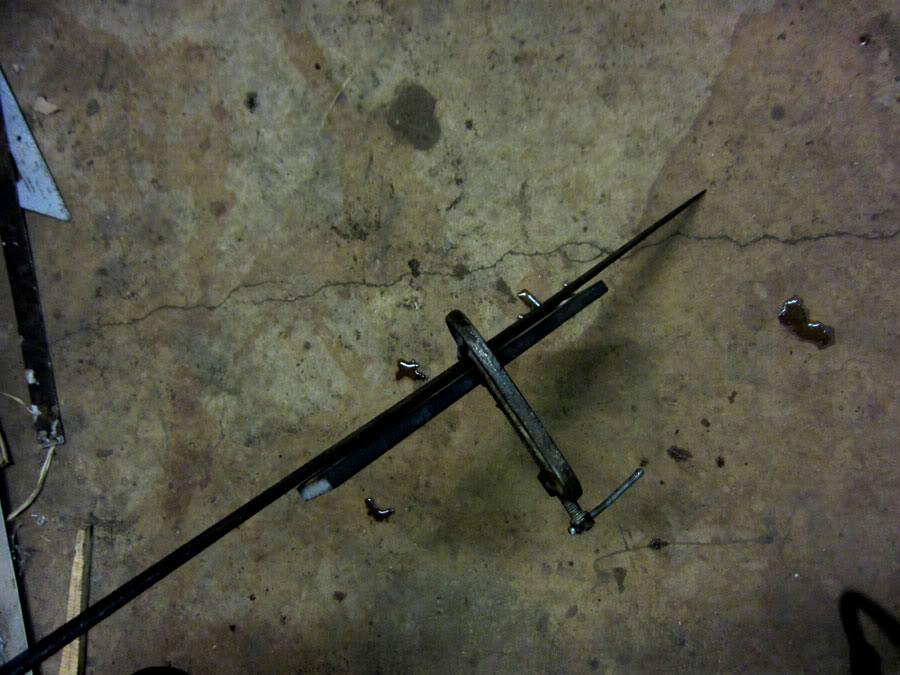
To fix it, I clamped it to a straight piece of steel with a shim on one side and then soaked in the temper oven for 2 hours (425F).
This one corrected nicely on the first try due to the thinner cross section. The one I'm dealing with now is 3 inches above the tang where the steel was 3/8". I'm giving it one more shot. If it doesn't work, then re-grind to fix any of the uneven areas that probably caused it and then quench again.
Here is what I did while the sword was going through it's many tempering cycles in an attempt to correct some warpage.
I drilled out the pommel to accept the tang. At this point.. I just have a hole drilled through.. but I will mill out a recessed, square slot for a portion of the tang... and the rest will be round and peened through the bottom. The recessed square keeps the pommel from spinning. This was the deepest hole I've ever drilled and had to do it from both sides and I was thrilled to see the two holes meet up.

I also milled out a slot in the guard (which I actually did right before the quench). I made it smaller than the thickness of the blade so that I could hot drift it through thereby getting a nice swell in the guard in the center. T

Here I am hotting drifting the guard. I was pleased with how well this went and snug and level the guard is.

And here is the first 'kink' I had to work out after the quench:

To fix it, I clamped it to a straight piece of steel with a shim on one side and then soaked in the temper oven for 2 hours (425F).

This one corrected nicely on the first try due to the thinner cross section. The one I'm dealing with now is 3 inches above the tang where the steel was 3/8". I'm giving it one more shot. If it doesn't work, then re-grind to fix any of the uneven areas that probably caused it and then quench again.
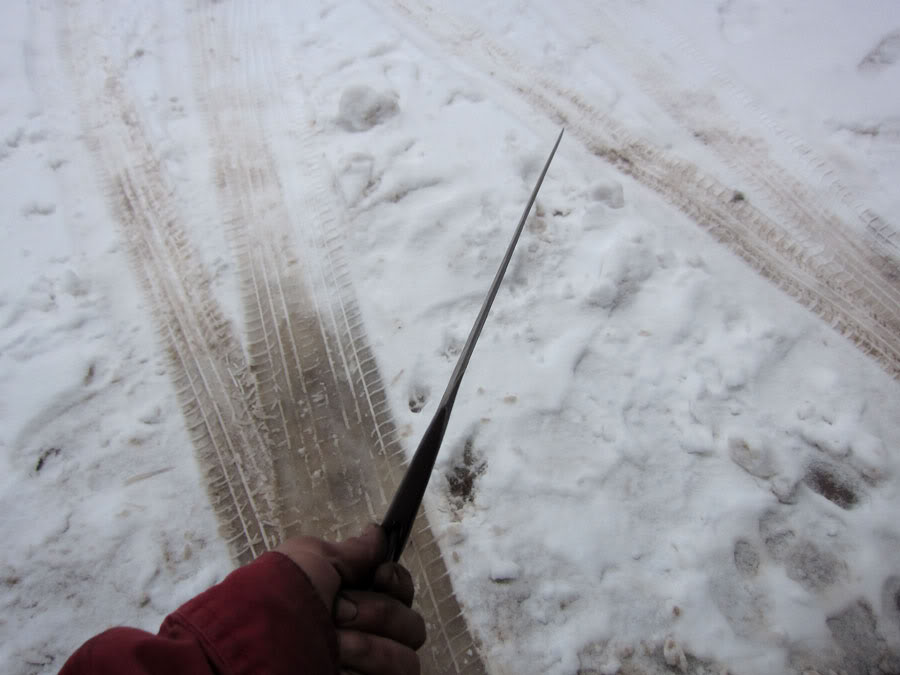
Well I finally got that blade straight. It's most a grinding job now to get things nice and symmetrical. Five tempering cycles and then figuring out the best clamping method did it...


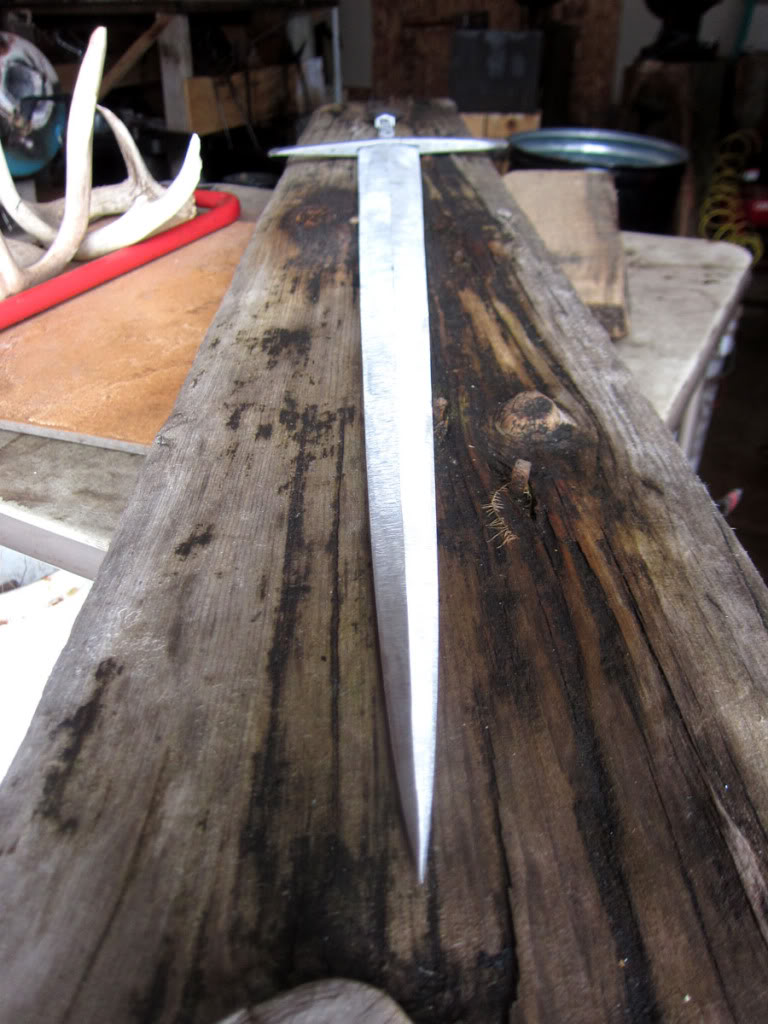
Also did more shaping of the cross guard and fitting of the pommel to the tang. Still have more shaping on the guard.. and I won't do the final shaping of the pommel until the whole sword is together. That way I can remove weight if I need to as well as make sure the shape of the pommel is true to the rest of the sword. I also might end up shortening the length between the pommel and guard.... too long.


Tomorrow I do clean-up grinding on the sword and finish sanding.
As of now the bare blade is 2 lbs 3 oz, 32" from start of blade to tip, 2 3/8" wide, 3/8" thick at tang. Blade weight is 3 lbs 9 oz with pommel and guard. This will come down with further finishing, guard and pommel shaping.


Also did more shaping of the cross guard and fitting of the pommel to the tang. Still have more shaping on the guard.. and I won't do the final shaping of the pommel until the whole sword is together. That way I can remove weight if I need to as well as make sure the shape of the pommel is true to the rest of the sword. I also might end up shortening the length between the pommel and guard.... too long.


Tomorrow I do clean-up grinding on the sword and finish sanding.
As of now the bare blade is 2 lbs 3 oz, 32" from start of blade to tip, 2 3/8" wide, 3/8" thick at tang. Blade weight is 3 lbs 9 oz with pommel and guard. This will come down with further finishing, guard and pommel shaping.
If you dont mind me asking, is the blade length similar to its inspirational source?
Also, commercial stock or one of your own bars from salvaged iron/steel ?
Looks fab btw.
Also, commercial stock or one of your own bars from salvaged iron/steel ?
Looks fab btw.
Hi... Thanks for the comments...
It is 1 inch shorter than Albion's Castellan.. but I recall that it falls within the range... albeit on the short side.
As to steel... This is a low manganese variety of 1075 that I get from Aldo Bruno.. the New Jersey steel baron. I like it due to it's shallow hardening attributes, beautiful hamon and crazy alloy banding. Seems like a good modern version of a primitive steel.
Someday I hope to get enough bloomery steel etc. to make a whole sword blade... It would probably be a pattern welded Viking sword when it happens.
As with most "watch the progress" threads, I've been following this one with great interest. Of course, this one has been watched with greater interest than most since the sword in progress will eventually find its way into my hands.
I was a little slow on the original "Errant". However, when Scott replied that he was interested in doing a second sword, similar, but with some tweaks based on lessons learned the first time around and a few revised ideas, I couldn't resist! We talked about his vision, and what he was thinking of doing as well as my preferences and thoughts on the direction of the project. Since this wasn't an instance of me approaching a craftsman with a specific example in mind, I was more than happy for Scott to lead.
He explained that his inspiration came from the Castillon find, in particular the Type V/V1 (?) pommel, and he wanted to use some of his reclaimed wrought for the furniture. I thought this sounded like a terrific idea! As for the use of the wrought, if you haven't had the opportunity to explore Scott's webpage, you need to do so - the phrase "sustainable lifestyle" is what really stuck with me and I believe a good summary of his philosophy towards the work he does. I'm not an expert on the matter by any means, but I suspect 500/600 years ago, you didn't let good iron go to waste, and you didn't use all of your best steel for hilt furniture for the weapons used by the not-so-elite. So the idea of the reclaimed wrought used in this project just makes so much sense to me.
Y'all may note that the cross is different than what was initially discussed - that was because of me. While the style 5-esque cross I asked for is not consistent with the styles in the inspiration swords, research indicated that it was plausible and I liked the idea of the straight cross with rounded over, flared ends - reminiscent of an axe blade - together with the rounded, flared fishtail pommel. To me, this configuration puts me in mind of the "Alisee" variant of the cross pattee, and, at least to my eye, will be a very striking visual. And, on the topic of "visual", Scott and I have discussed some "bling" that will be incorporated in the finished sword, but I won't go into that now, you'll just have to keep on coming back :lol:
While I've eagerly watched my in-box for progress pics and just dropped my jaw a little further with each one, my favorite picture so far is the point-on view a couple of posts up - that view up the blade just leaves me speechless...
Oh, and the progress pic showing the cross being curved, then straightened back out, well, that sort of results from an accountant not being able to properly free-hand a straight line when he's sketching out his thoughts on how he thinks the cross should look. :blush: I'm just glad Scott didn't have to completely start it over, although I hate to think of the time he must have had to take to curve it, then straighten it back out...
This will be my first custom sword. I'm really enjoying the experience and seeing the progression, and I'm glad that the myArmoury community is able to experience it with me - thanks for that, Scott.
And, now, the journey continues.....
Thanks for the note Victor. That guard curvature change was 2 heats...so no big deal. :-) Forging wrought is like playing with playdough. This has been a fun project and you've been great to work with. Working closely with clients is what I love... But rarely get to do. I have a feeling this will yet be another reason that I change my focus into sword work.
Well I had to take break this weekend due to my wife's birthday... but I did spend some time getting started on the blade finish. The plan is to do another 'draw file' finish with antique patina. I start by removing all the machine lines with a 150 grit EDM stone. Then I go to 150 grit sand paper.... and leave it at that for a hand rubbed coarse finish that, to me, reminds one of draw file marks.

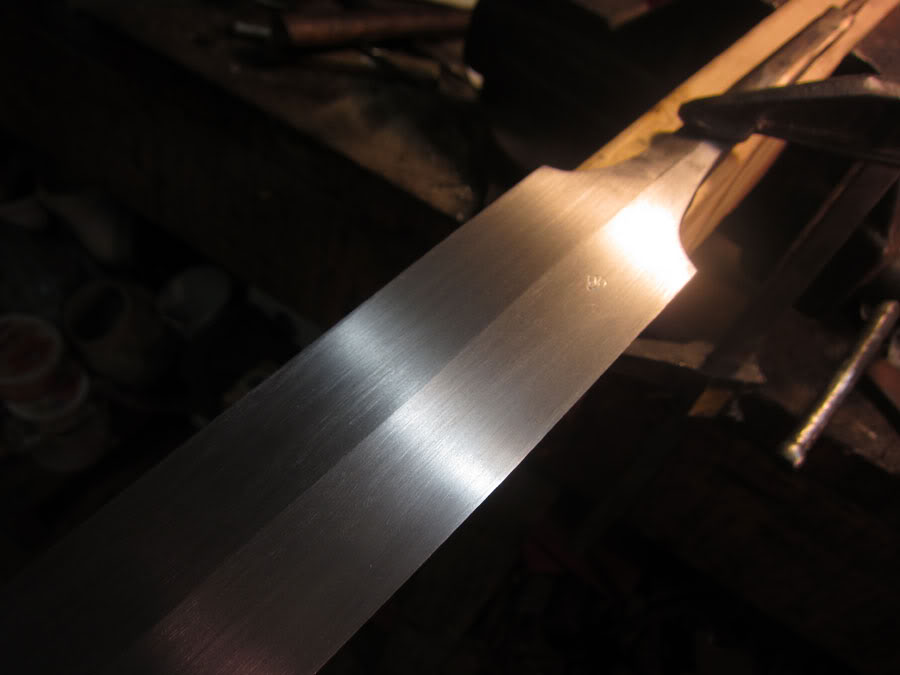
Well I had to take break this weekend due to my wife's birthday... but I did spend some time getting started on the blade finish. The plan is to do another 'draw file' finish with antique patina. I start by removing all the machine lines with a 150 grit EDM stone. Then I go to 150 grit sand paper.... and leave it at that for a hand rubbed coarse finish that, to me, reminds one of draw file marks.


Page 1 of 3
You cannot post new topics in this forumYou cannot reply to topics in this forum
You cannot edit your posts in this forum
You cannot delete your posts in this forum
You cannot vote in polls in this forum
You cannot attach files in this forum
You can download files in this forum
All contents © Copyright 2003-2006 myArmoury.com — All rights reserved
Discussion forums powered by phpBB © The phpBB Group
Switch to the Full-featured Version of the forum
Discussion forums powered by phpBB © The phpBB Group
Switch to the Full-featured Version of the forum