Info Favorites Register Log in
myArmoury.com Discussion Forums

Forum index Memberlist Usergroups Spotlight Topics Search
Forum Index > Historical Arms Talk > Knife forging with Owen BushDIY Project Reply to topic
This is a standard topic  
Author Message
William M


Location: Buckinghamshire , England
Joined: 01 Dec 2004
Likes: 1 page
Reading list: 7 books

Posts: 267

PostPosted: Sun 21 Aug, 2011 11:32 am    Post subject: Knife forging with Owen Bush         Reply with quote

Hey all,

Just thought I would share my experience with the knife smithing course I attended, hosted by Owen Bush at his forge in Kent. There were 4 other students on the course.
It was really quite cold and everything was covered in frost all day so I quite enjoyed heating myself up by the forge but sadly the forge work only took about a third of the time, although by the time I had finished both blades my arms were seriously low on energy and I could get about two or three hits in between heats!

The course was for 3 days, and we all got stuck in within an hour after quickly sketching out our designs on the anvil and learning how to operate the forges and how to shape the steel.

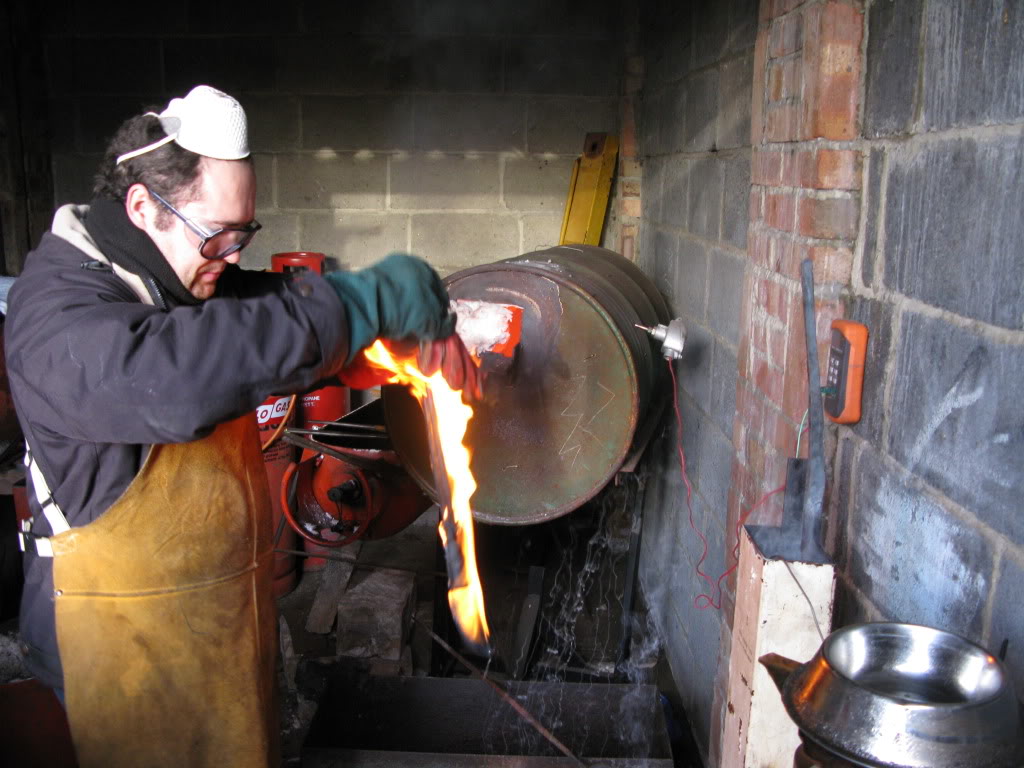
The forge had 3 working coal forges and two gas forges. I personally much preferred the coal forges as the gas forges were too slow although they did heat up the blades nice and evenly where as the coal forges had a tendency to burn the tip if you were not careful due to the heat being much more intense and not being able to see the blade when buried in the coal.

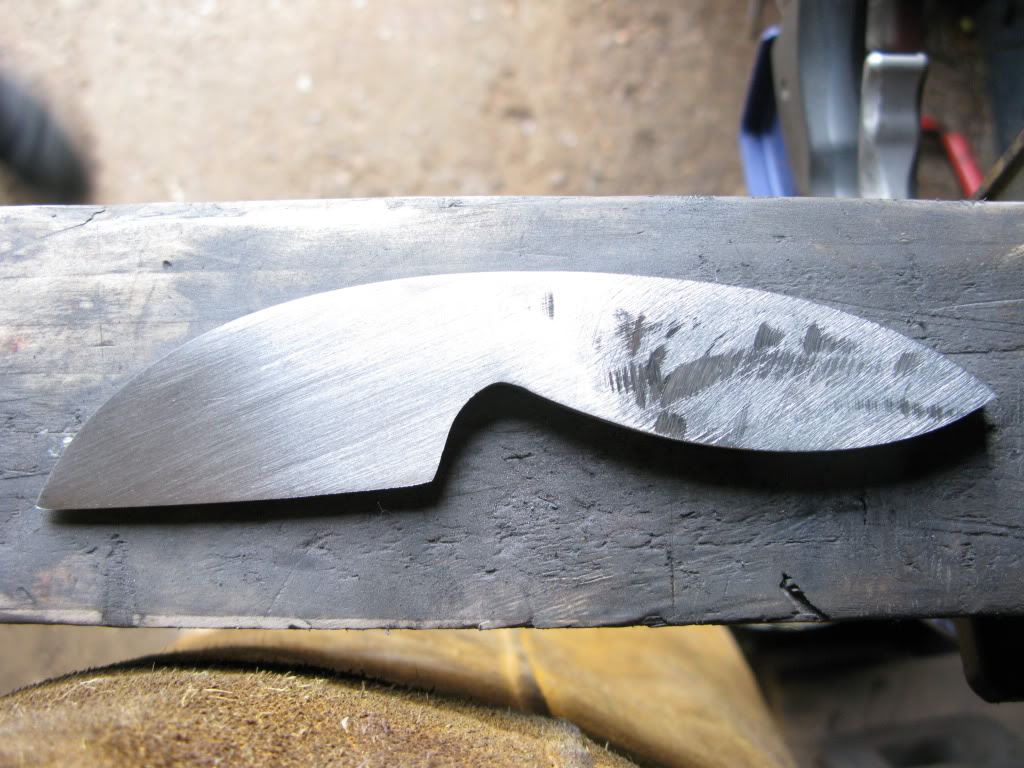
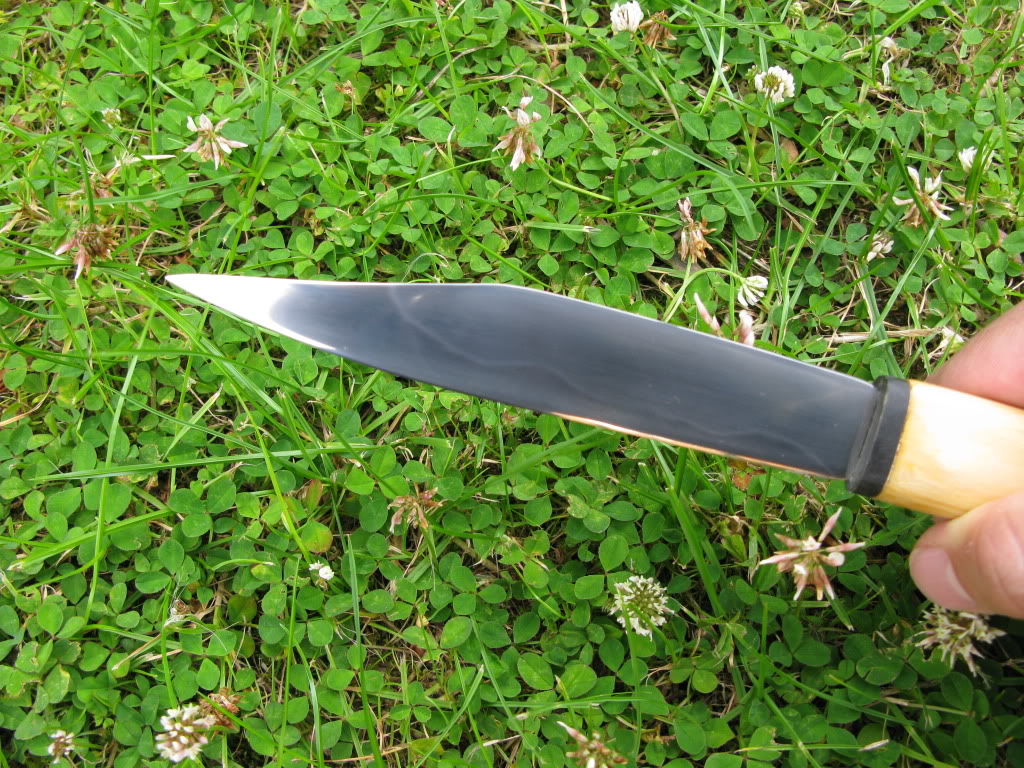
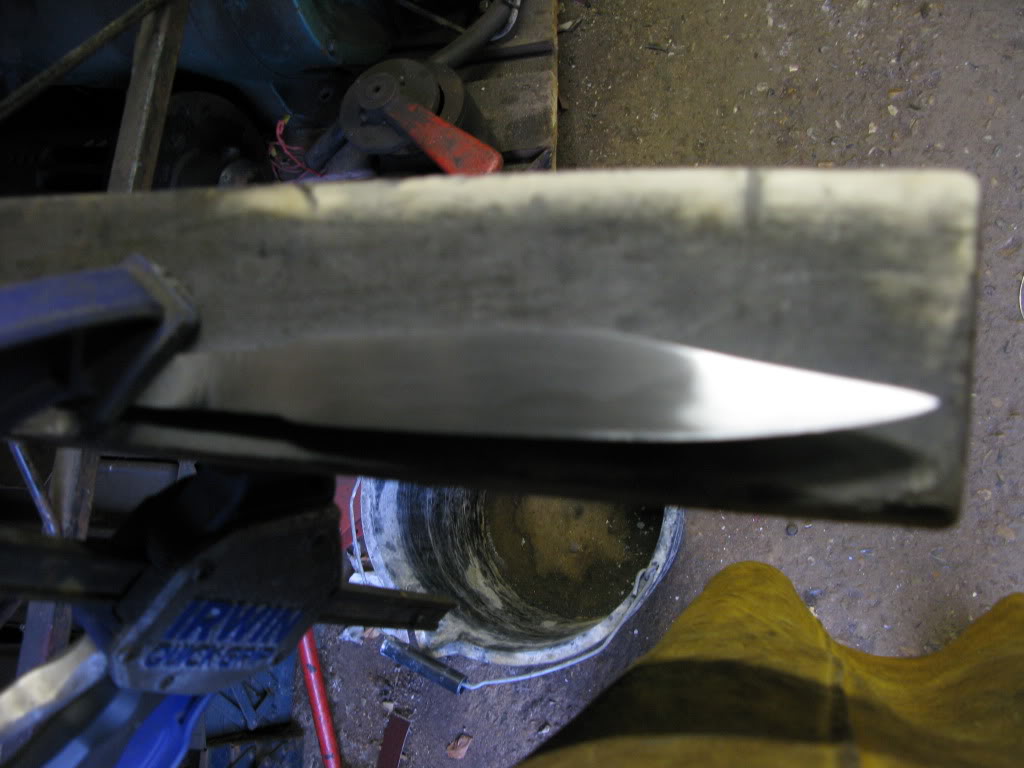
I decided to make a seax as my first blade and to also give it a hamon. I was terrified that the hamon process might crack the blade, but luckily the oil quench was gentle. The blade is currently in a rough polish so it is really hard to photograph the hamon, but it is there. For the second blade I used a different steel, I forget the name but it was really tough to forge but was very easy to grind, which was good due to the unusual shape, which I am told is a wharncliffe blade.

The course was intense with many of us willing to work the way through lunch as the 3 days was barely enough time. I think though that my designs may
had been a bit too ambitious as I was the most pressed for time and was frantically working on the blades while everybody were packing up and driving back home on the
last day.

I learned a lot through the course, especially the heat Treatment and normalisation processes, which was new to me. I would like to go again for the week long sword
course and perhaps one of the hammerin's as I really enjoyed myself.

I can highly recommend the course to anybody here, as it really is something different to being a collector who critiques blades, to knowing how to make one and all the work that it entails. You do not need to have any experience in either working a forge or anything about blade.

I think if I were to go again, I would probably make a longer seax and a bushcraft knife.

The photos below firstly document the creation of my seax and then the warncliffe blade.

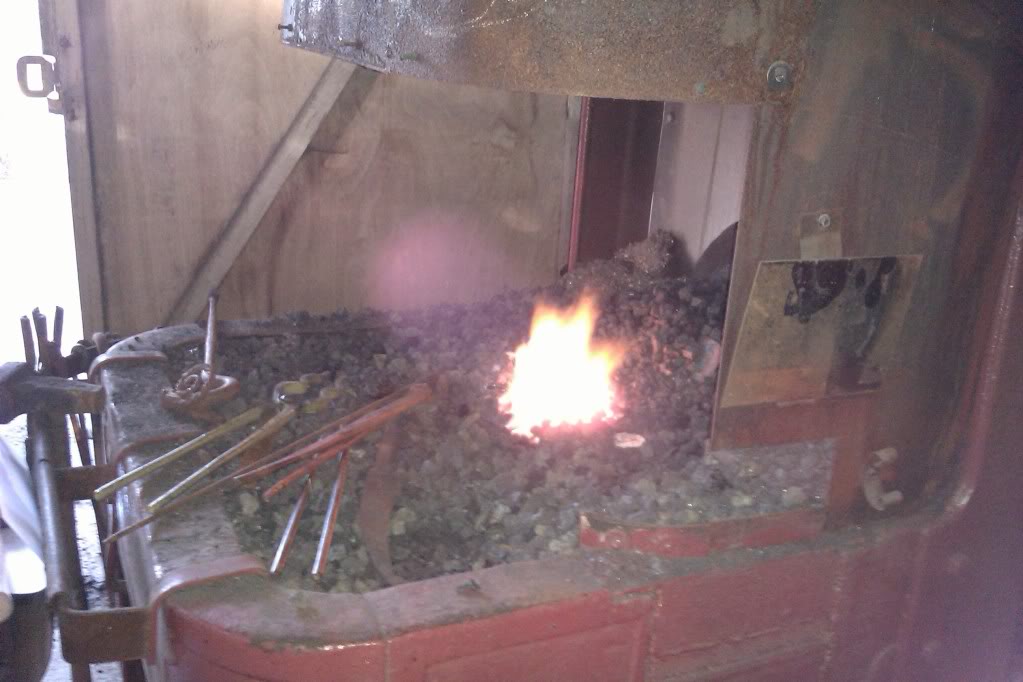
My Forge

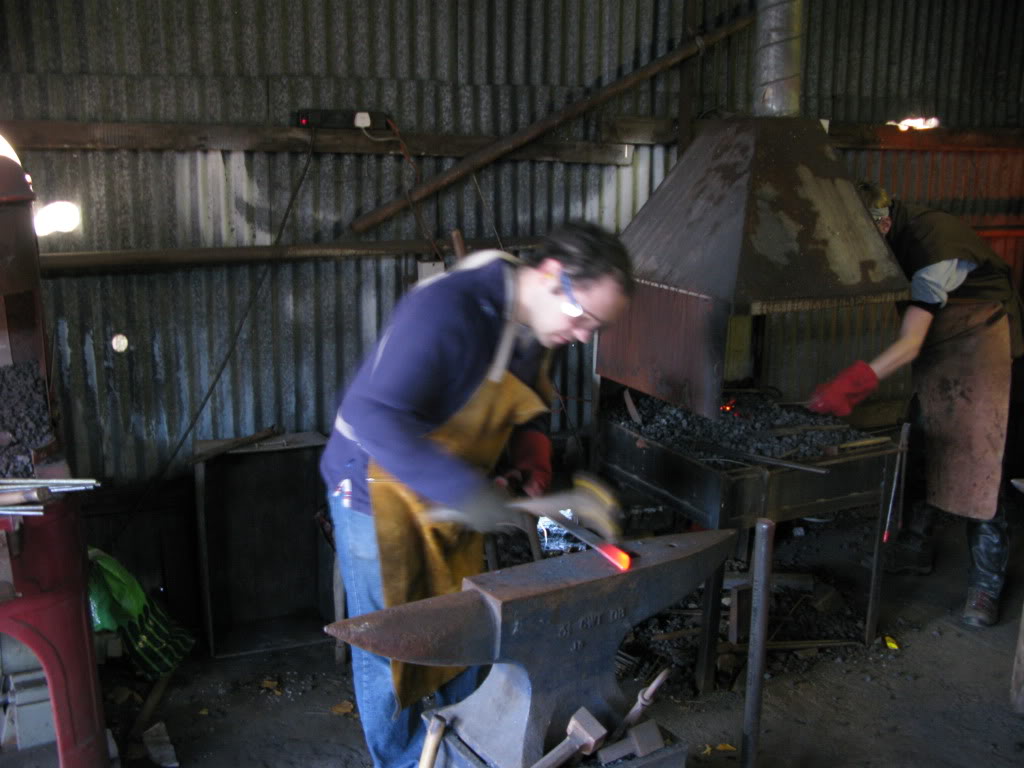
Working the metal


Hammering the point

Seax is starting to take shape!
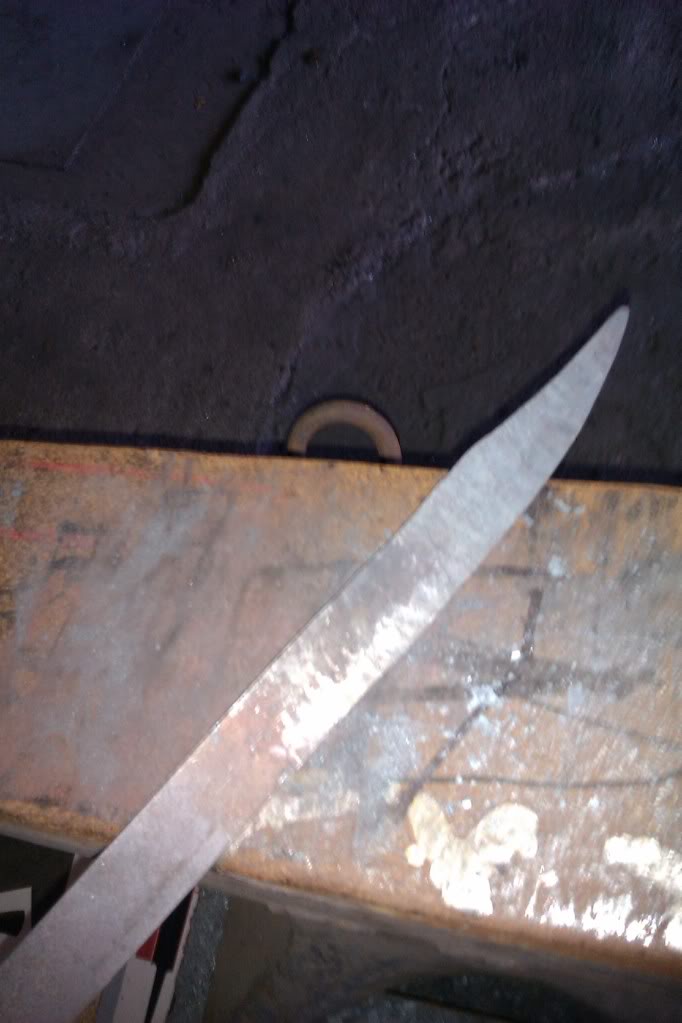

Seax with a clipped tang.
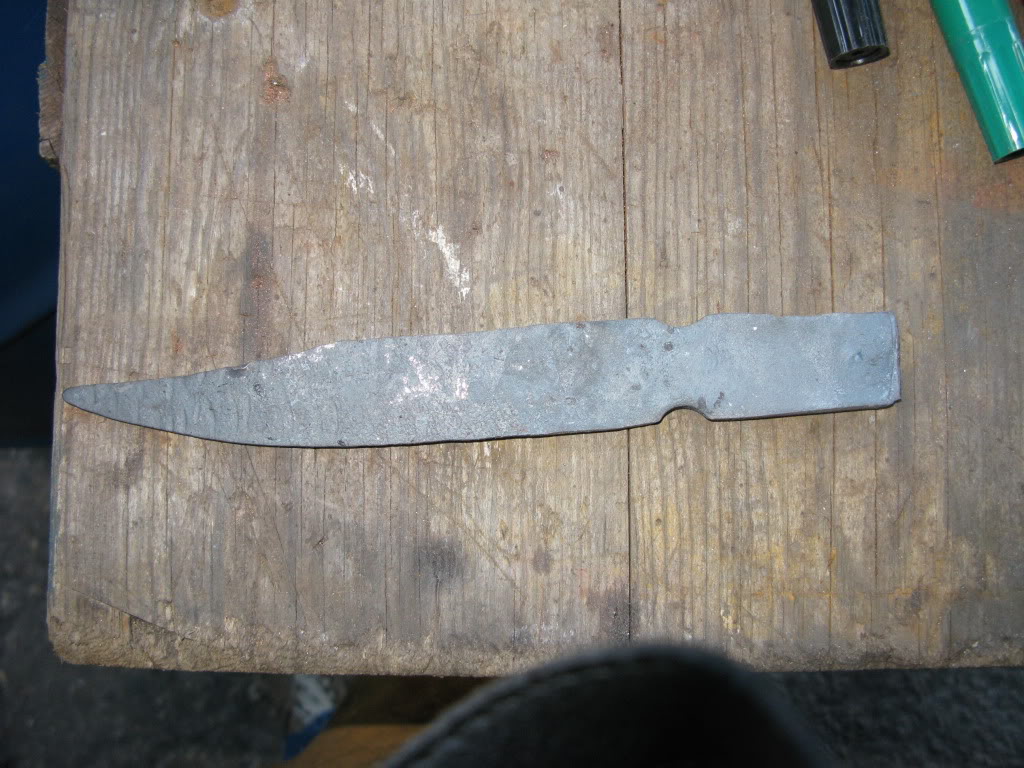

Bit more forging to be done...
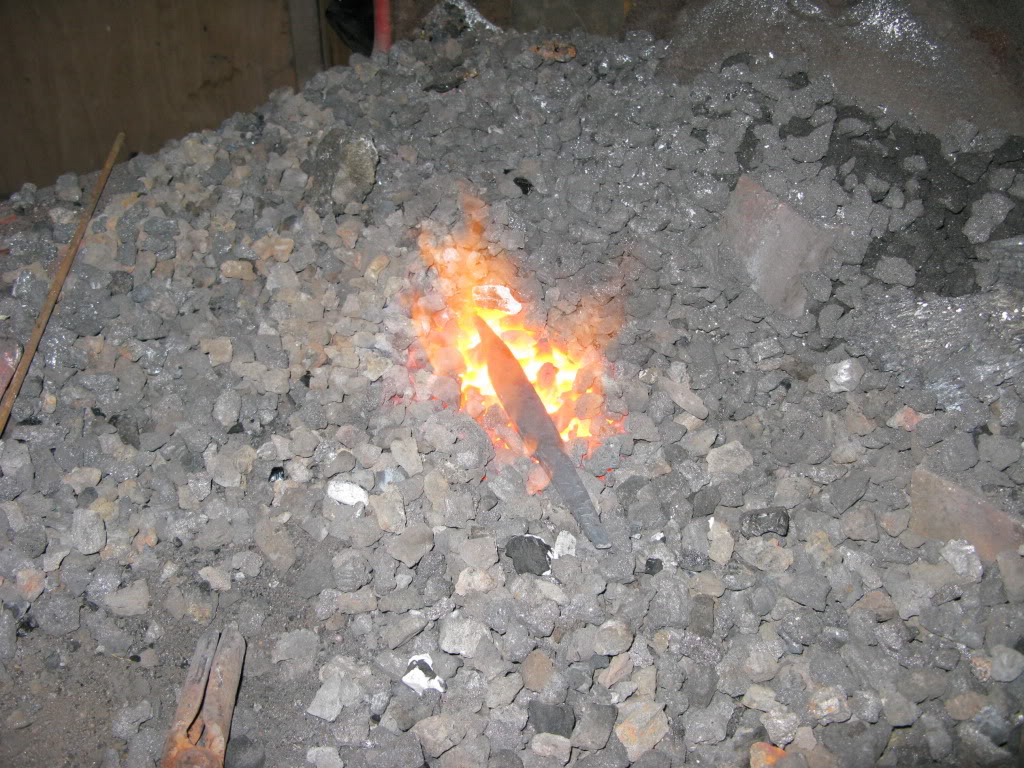


Drawing out the tang


Starting to look good!
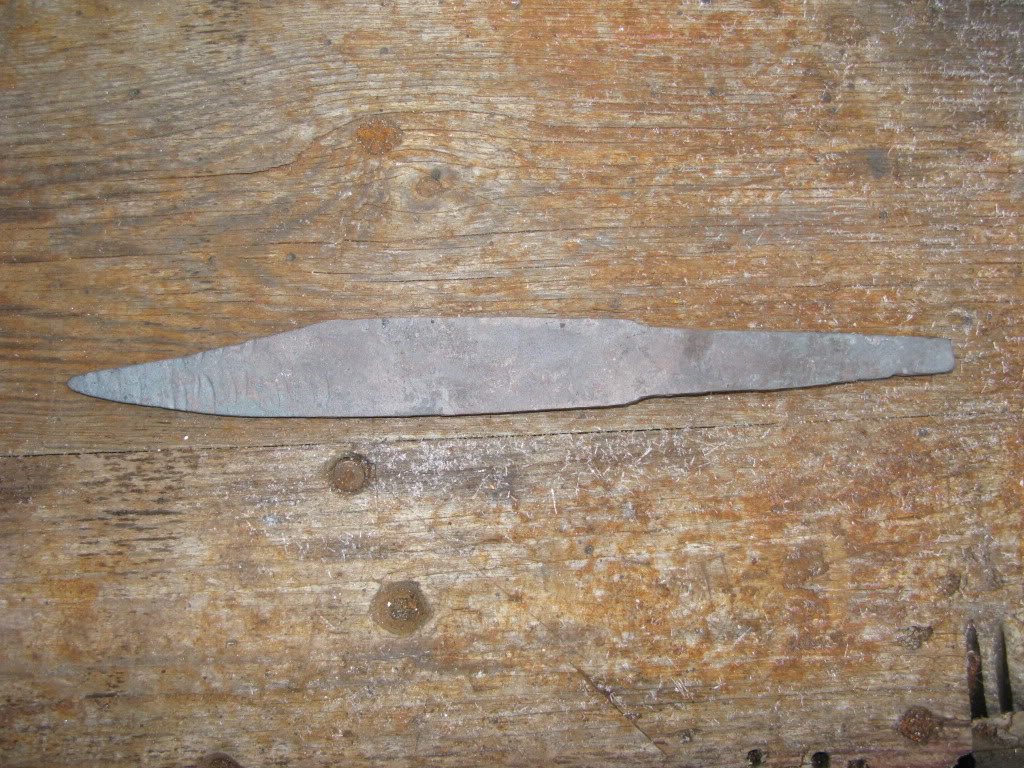

Using an angle grinder, I remove the top layer.
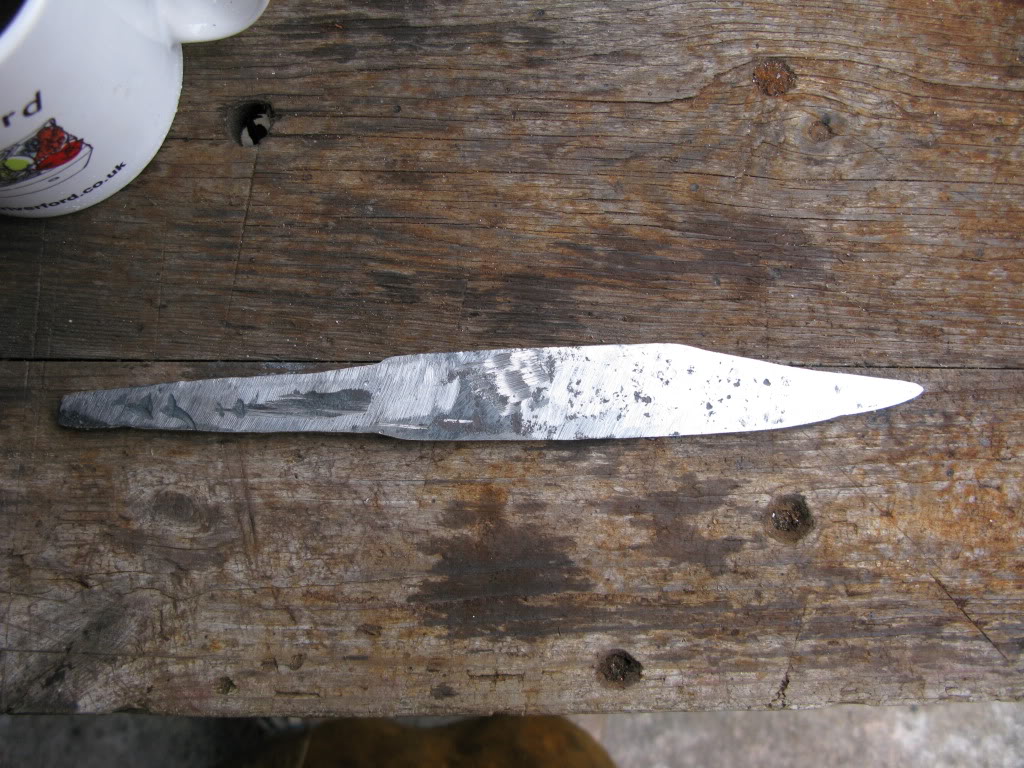


After the first run with the belt grinder.
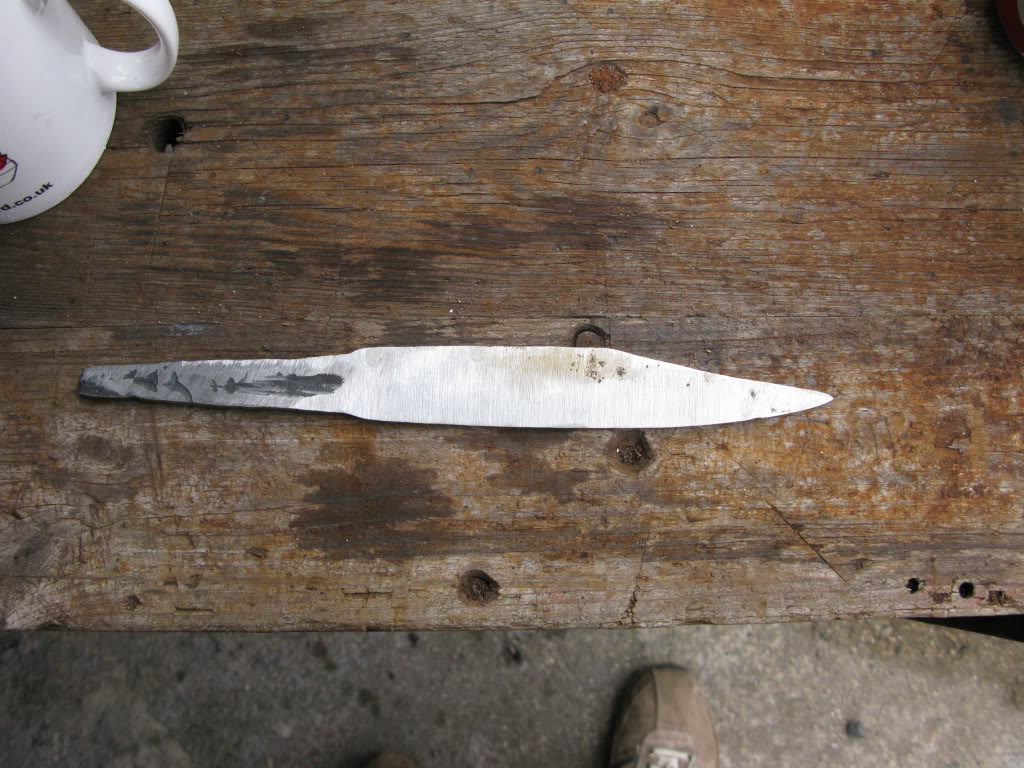

Next up was some filing to flatten the blade.
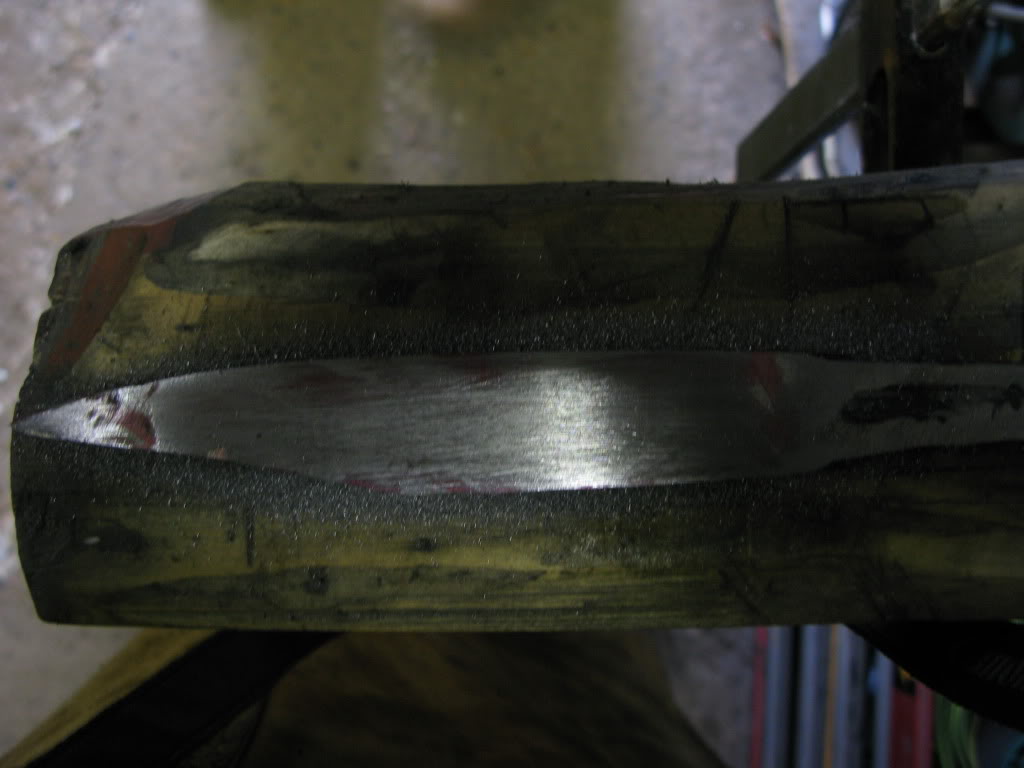

Looking good despite the blurry photo! Sadly I didn't get any photos of the hamon process.
View user's profile Send private message MSN Messenger
William M


Location: Buckinghamshire , England
Joined: 01 Dec 2004
Likes: 1 page
Reading list: 7 books

Posts: 267

PostPosted: Sun 21 Aug, 2011 11:35 am    Post subject:         Reply with quote

OK on to my next blade, the Wharncliffe.

This blade required a lot of work on the belt grinder as opposed to the seax, which had more forge time. This was great as I am able to experience both sides of the common methods of construction, which are stock removal and forging.

After forging out the tip It was straight to the angle grinder to get in the basic shape.


Quenching the blade as I like my blades spicy! haha..


The blade after some time with the belt grinder and hand files.
View user's profile Send private message MSN Messenger
William M


Location: Buckinghamshire , England
Joined: 01 Dec 2004
Likes: 1 page
Reading list: 7 books

Posts: 267

PostPosted: Sun 21 Aug, 2011 11:38 am    Post subject:         Reply with quote

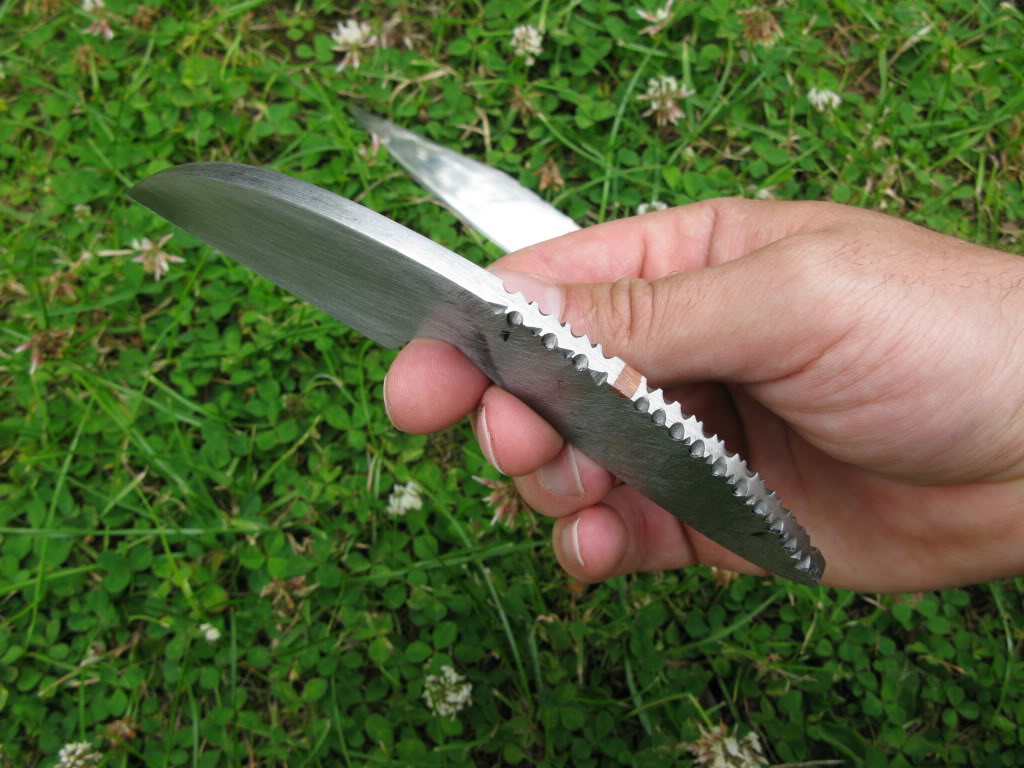
I knew I would want to do some filework on the tang of the wharncliffe so when I heat-treated and quenched this blade, I made sure that only the blade would be hardened so the tang is nice and soft to file. If you try and do some filework on a hardened tang you will go through a lot of files, so bewarned!

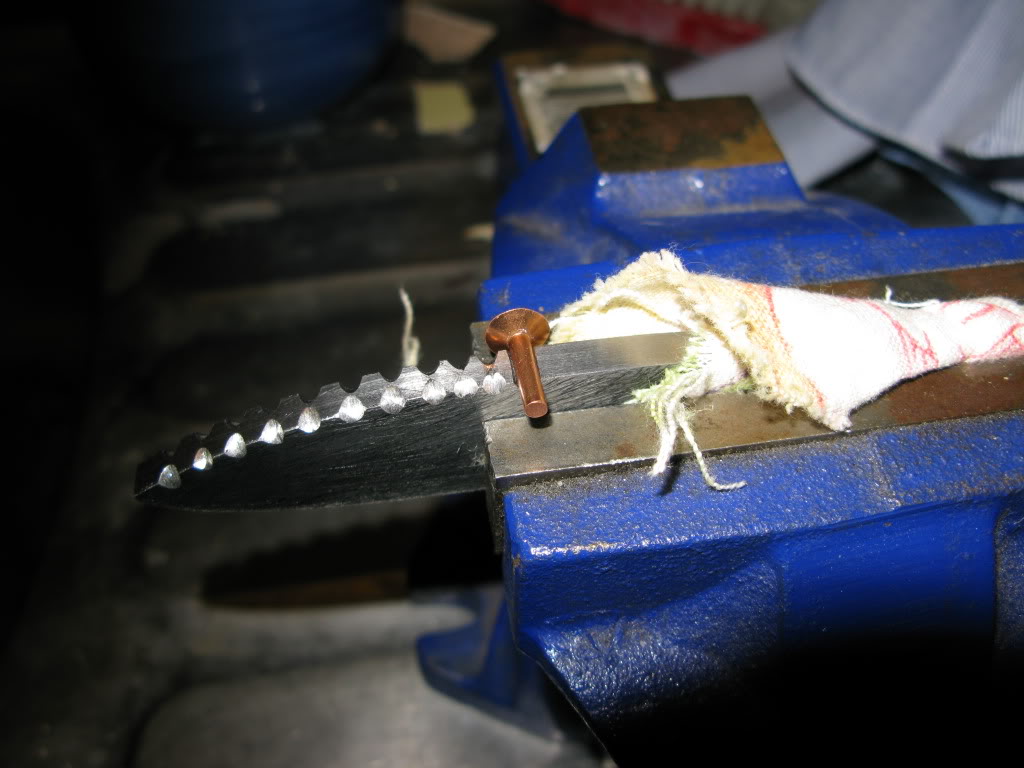
When it came to filing I made a bit of a mistake in making a simple horizontal cut. It looked a bit rubbish compared to the rest of the work, so in order to make it pretty I decided to try and put some inlay it!

It is actually pretty easy when doing it on the tang. The key point is that you need to make sure that you have the base wider than the top part of the hole, so that the metal will stay in and not pop out. Kind of like a blunt pyramid.

I found an old piece of brass to use, looks like an old rivet.

So to start I first heated the brass to try and soften it but it didn't work all that well as it cooled far too quickly.
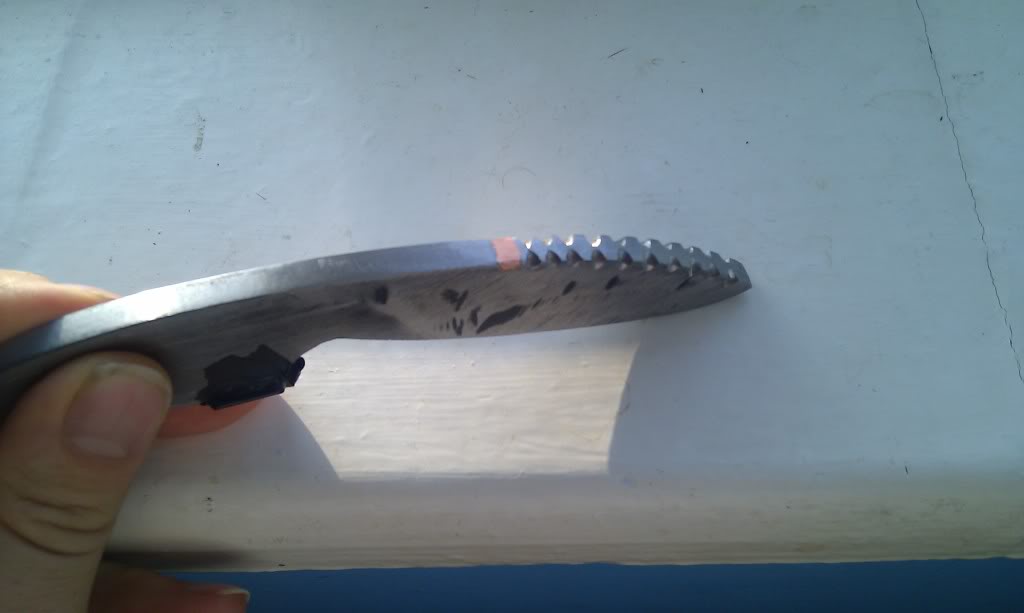
In the end I found cold hammering did the job just fine! You need to be very precise with the hits but I am happy with my first inlaying work. Next up I need to file it a bit more to make it more flush with the tang and then continue with a vine pattern going up to the blade.


View user's profile Send private message MSN Messenger
William M


Location: Buckinghamshire , England
Joined: 01 Dec 2004
Likes: 1 page
Reading list: 7 books

Posts: 267

PostPosted: Sun 21 Aug, 2011 11:42 am    Post subject:         Reply with quote

Continuing and tidying up the filework on the blade... Now I just need to drill some holes and fit on the horn scales.

View user's profile Send private message MSN Messenger
William M


Location: Buckinghamshire , England
Joined: 01 Dec 2004
Likes: 1 page
Reading list: 7 books

Posts: 267

PostPosted: Sun 21 Aug, 2011 11:54 am    Post subject:         Reply with quote

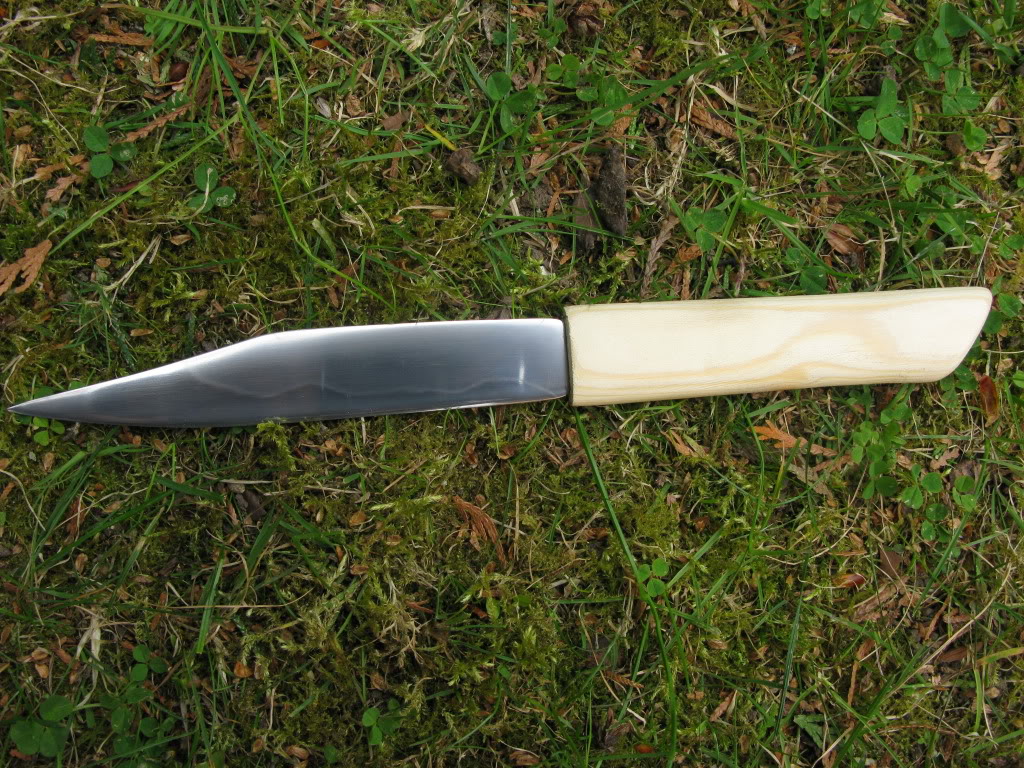
Here is a shot of the seax nicely polished up with a basic handle. I was wanting to use some exotic wood, but I grew impatient in my search and in the end I used part of an old bed!

This isn't bad and is historical but I yearned for something a bit more fancy.


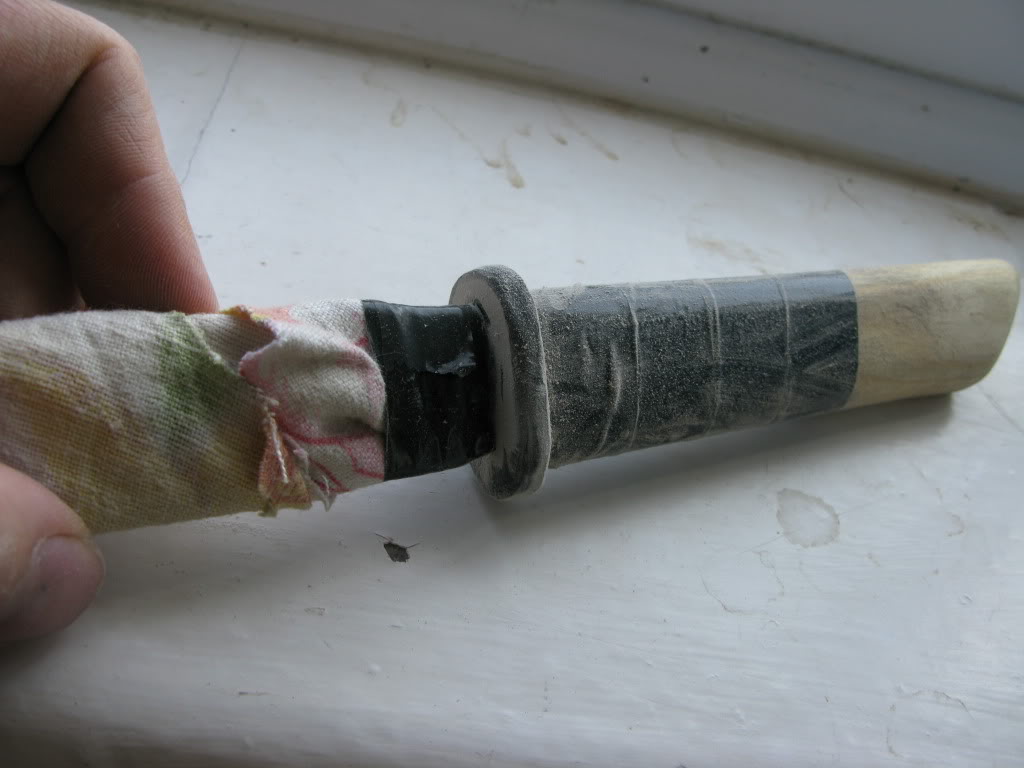
So I decided I would fit in a horn bolster using the horn left over from the scales on the wharncliffe knife.
Using a dremel I slowly shaped the horn to become flush with the wooden handle. Burning horn really stinks so do this outside!


View user's profile Send private message MSN Messenger
William M


Location: Buckinghamshire , England
Joined: 01 Dec 2004
Likes: 1 page
Reading list: 7 books

Posts: 267

PostPosted: Sun 21 Aug, 2011 12:43 pm    Post subject:         Reply with quote

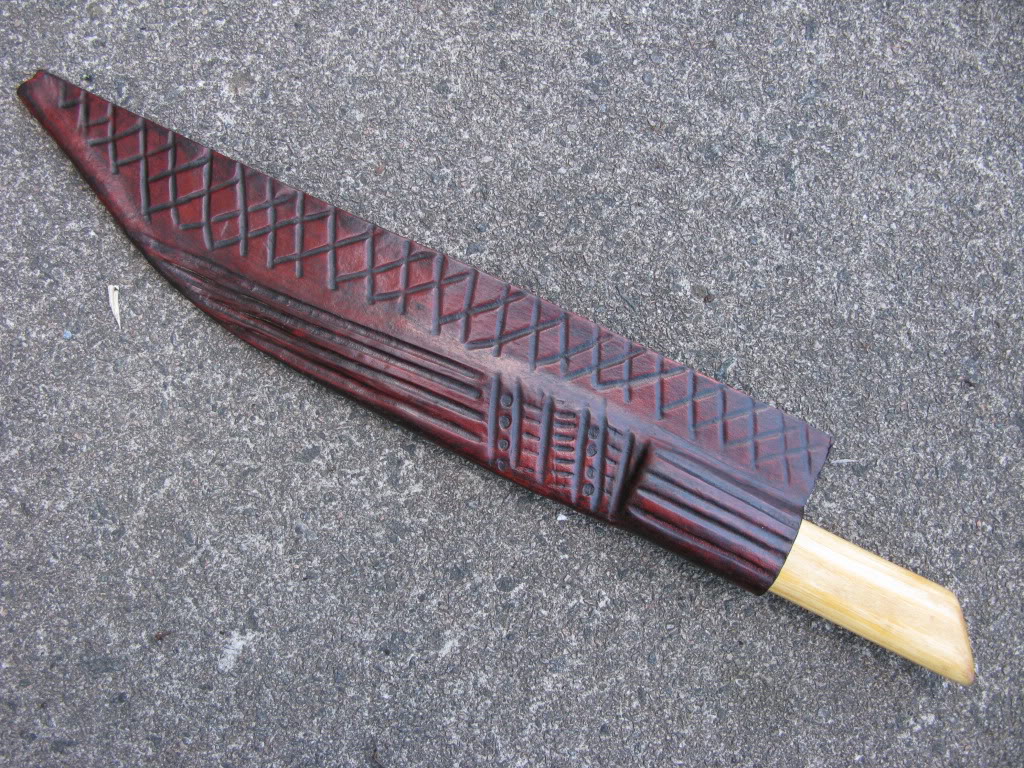
Part of my fasination with Seax's are the sheaths. I really like how they are edge up with the metal spine and I knew I had to have one for my knife. After searching around online it looked like I would be spending quite a bit of cash in commissioning the sheath to be made for me, I have never worked with leather before so this seemed like the best option.
The price put me off so I decided to plunge into the deep end and make a sheath myself.

Unfortunately I could not find any decent tutorials online on how to make a seax sheath, so I had to learn as I went along.

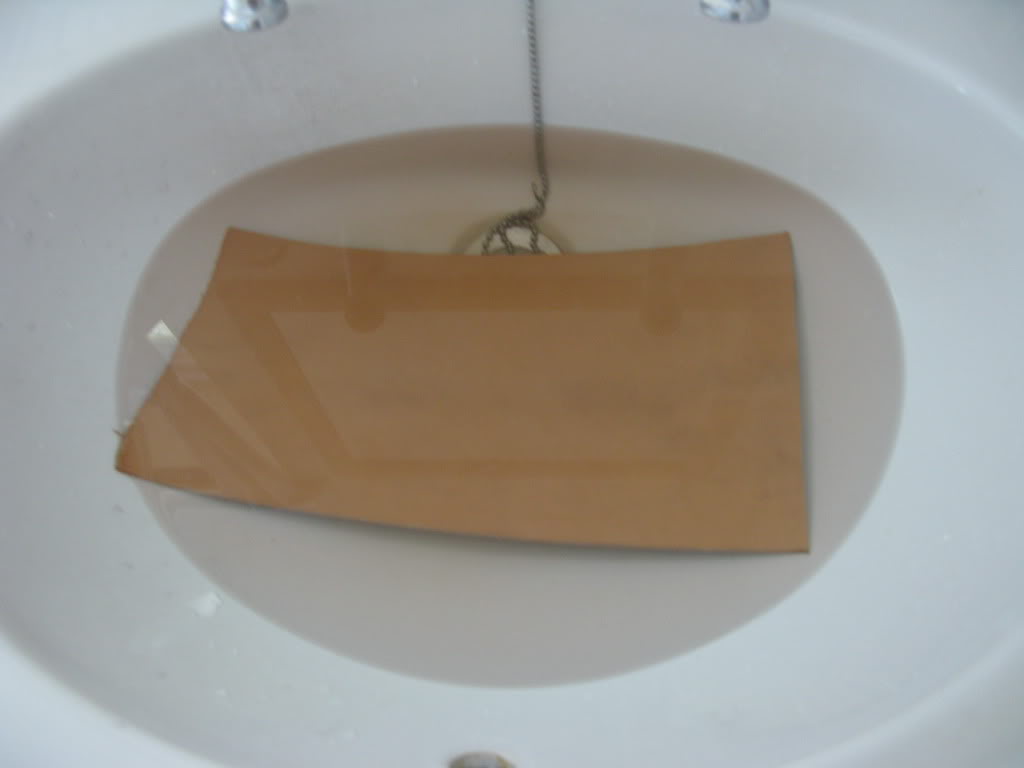
Firstly I bought some veg-tanned leather and cut out a suitable square.


Next up I soaked the leather in water.


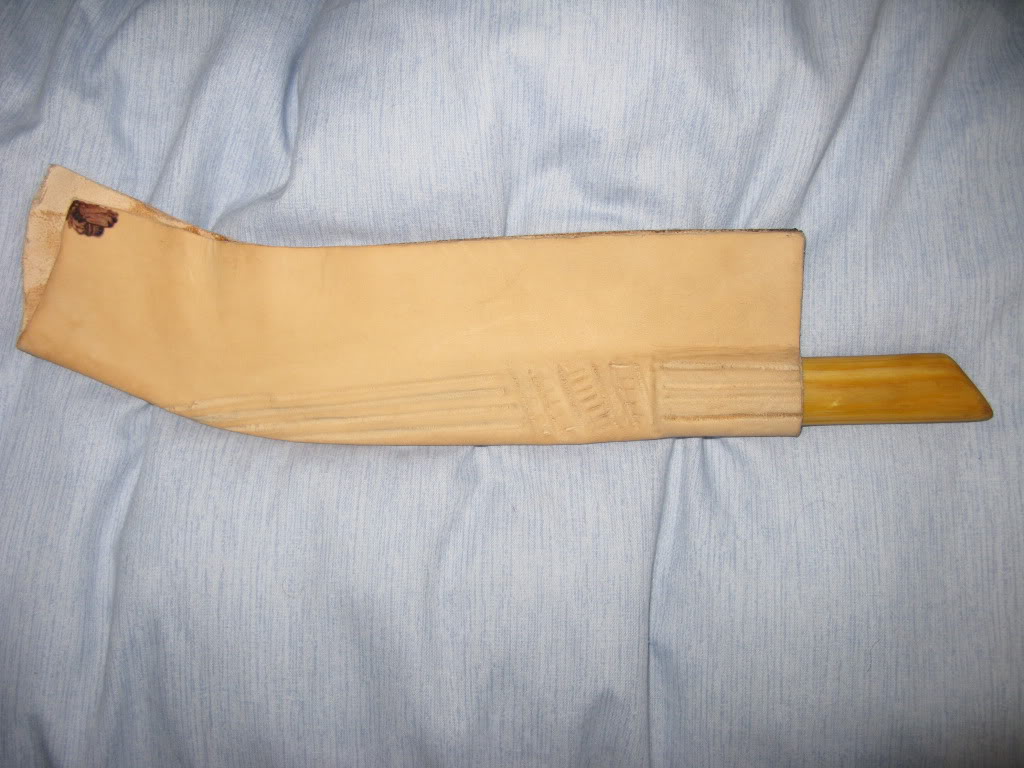
I wrapped the blade in cling-film and wet-formed the leather around the blade. I also scratched some channels into the leather for decoration.


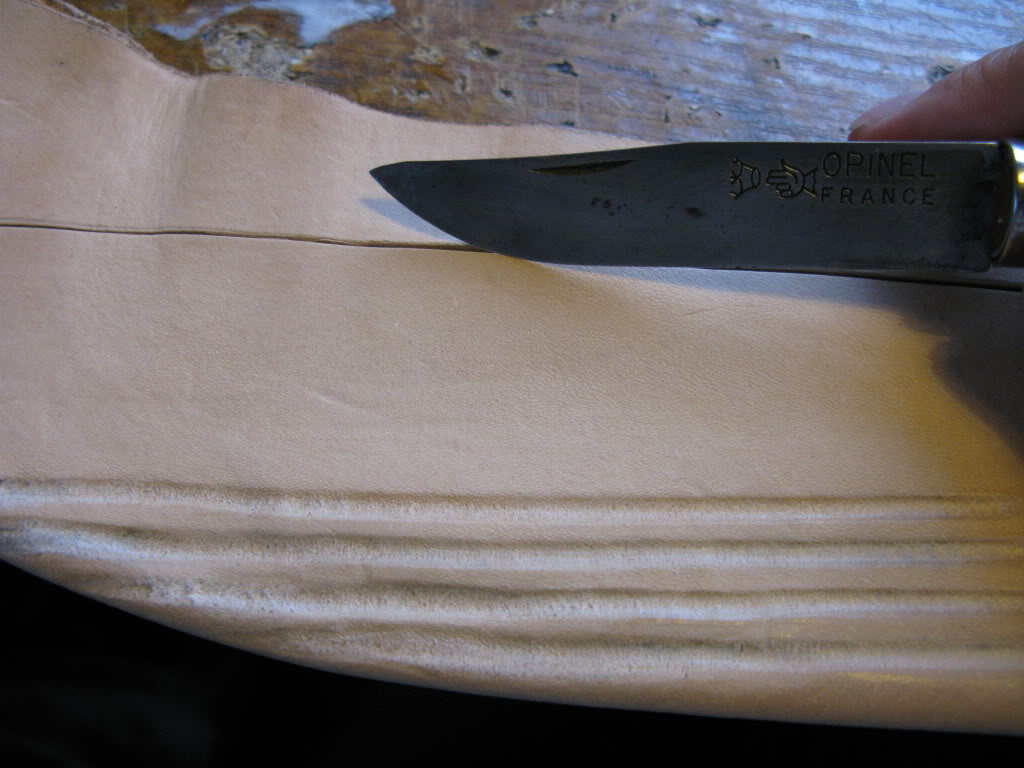
I marked out and cut the leather to where I will have the metal strip. I used an opinel knife as the blade has a very thin cross section, which worked out the best.


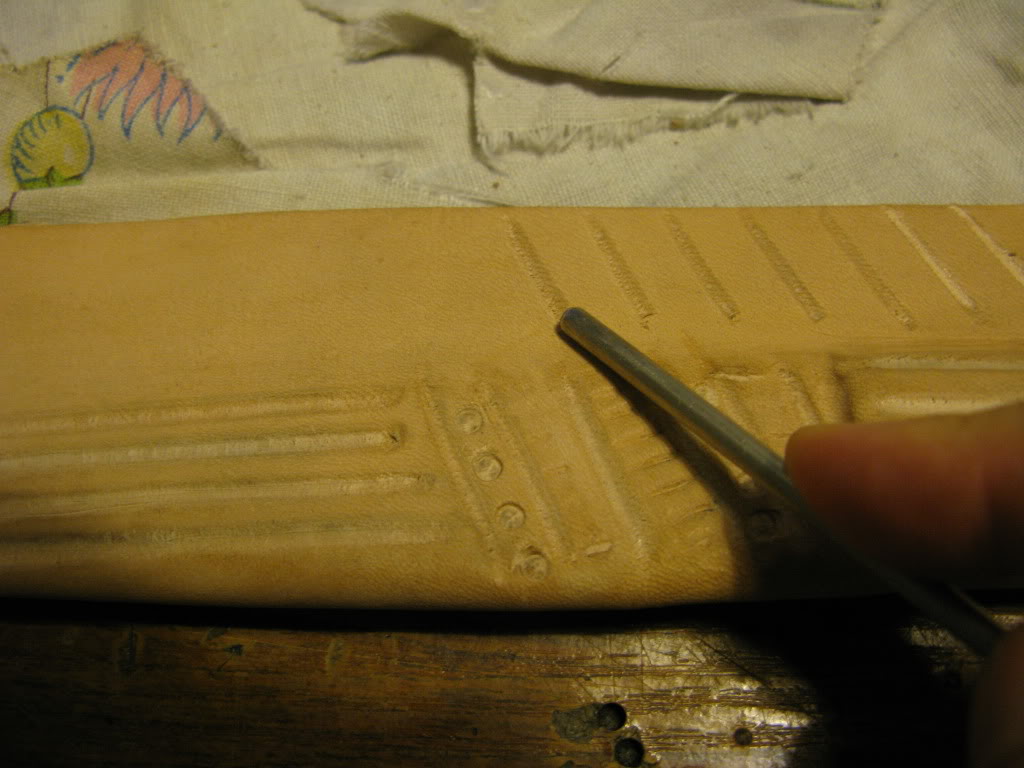
I found that I could scratch in the channels and designs much better when the leather was dry. I used a small piece of metal rod with a semi-rounded edge. It worked well enough.


Once I was happy with the fit and form of the sheath I dyed it using water-based dye. I made sure I had latex gloves as to prevent accidental staining of my hands.
View user's profile Send private message MSN Messenger
William M


Location: Buckinghamshire , England
Joined: 01 Dec 2004
Likes: 1 page
Reading list: 7 books

Posts: 267

PostPosted: Sun 21 Aug, 2011 12:53 pm    Post subject:         Reply with quote

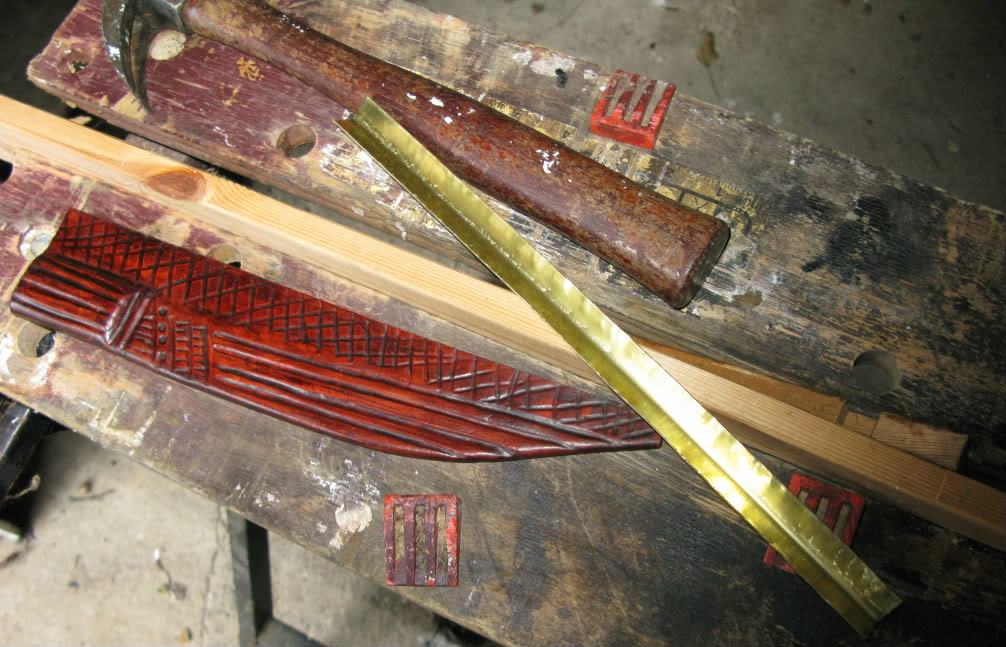
I am currently up to making the metal spine. I have chosen brass as the metal but I am not sure as to what is historically correct.

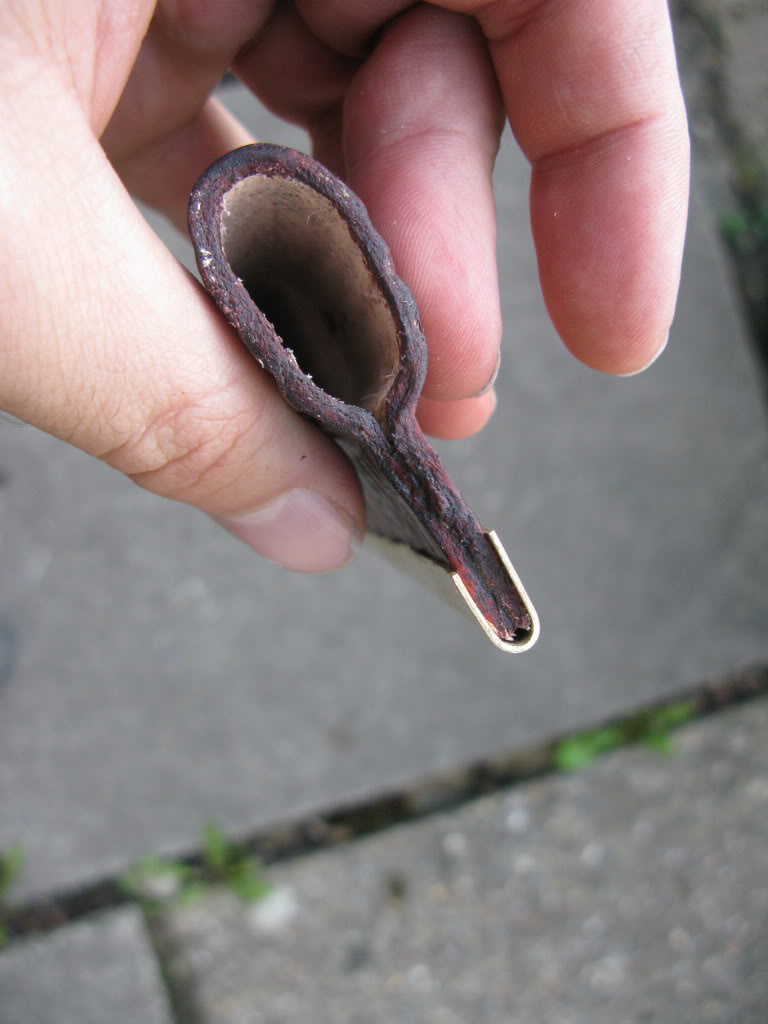
Using some flat wood to bend the metal and a hammer I have bent the metal down the spine. This is not easy getting a nice and even bend with equal sides.


This isnt too much of a bad fit, I think I will shiv the leather and make a more rounded edge so that the leather will fit all the way up to the top of the metal spine. Also I will use a file and reduce the long edge so they are running parallel.


I will need to cut the metal more to fit the sheath and also put in some decoration. I am not sure how to do it yet, but I am thinking maybe a chisel or a dremel drill. Once that is done I will look into finding some metal rings and pins to finish off the metal spine.

View user's profile Send private message MSN Messenger
Matthew Stagmer
Industry Professional


Location: Maryland, USA
Joined: 23 Jan 2008

Posts: 493

PostPosted: Thu 25 Aug, 2011 6:23 am    Post subject:         Reply with quote

Thanks for sharing. Always neat to see how others do things. Nice work!
Matthew Stagmer
Maker of custom and production weaponry
Youtube.com/ThatWorks
View user's profile Send private message Visit poster's website
William M


Location: Buckinghamshire , England
Joined: 01 Dec 2004
Likes: 1 page
Reading list: 7 books

Posts: 267

PostPosted: Mon 12 Nov, 2012 3:22 am    Post subject:         Reply with quote

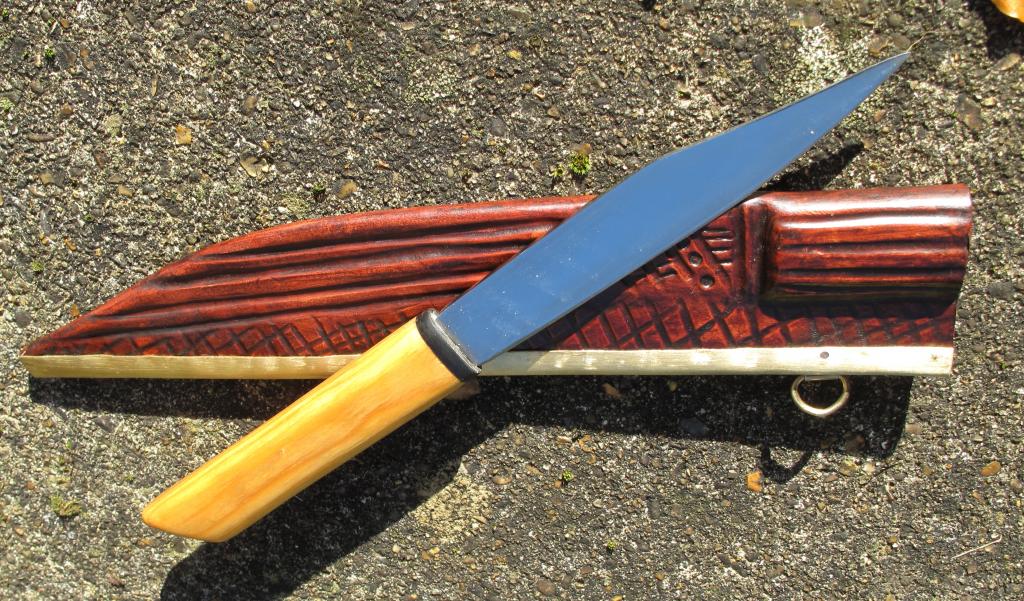
Quick update to say that I have now finished the seax.
It has taken a while to finish, I think I need to gain a finish to the end mentality. I really really HATE drilling brass/bronze. The more you drill it, the harder it becomes! Gah.. well anyways it took seemingly forever to just drill two holes, so I think thats where im going to stop. The brasswork looks OK so I think thats it for the scabbard as the metal spine is on very tight.


View user's profile Send private message MSN Messenger
Daniel Wallace


Location: Pennsylvania USA
Joined: 07 Aug 2011

Posts: 580

PostPosted: Mon 12 Nov, 2012 8:18 am    Post subject:         Reply with quote

man that's a heck of an opportunity to have. i'm jealous - i'm wishing i could just give up about 2 weeks of work and jump over to the U.K. and jump into some of these classes.
View user's profile Send private message
Tim Lison


Location: Chicago, Illinois
Joined: 05 Aug 2004
Likes: 1 page
Reading list: 6 books

Spotlight topics: 1
Posts: 1,606

PostPosted: Mon 12 Nov, 2012 2:40 pm    Post subject:         Reply with quote

Great stuff! The seax looks great and the classes sound intense. Did you finish the other knife?
View user's profile Send private message
William M


Location: Buckinghamshire , England
Joined: 01 Dec 2004
Likes: 1 page
Reading list: 7 books

Posts: 267

PostPosted: Wed 20 Mar, 2013 10:45 am    Post subject:         Reply with quote

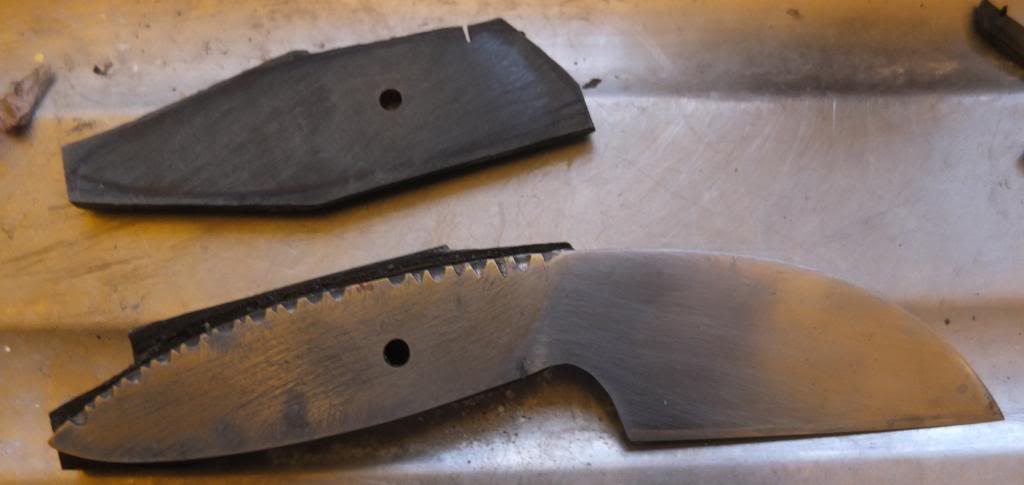
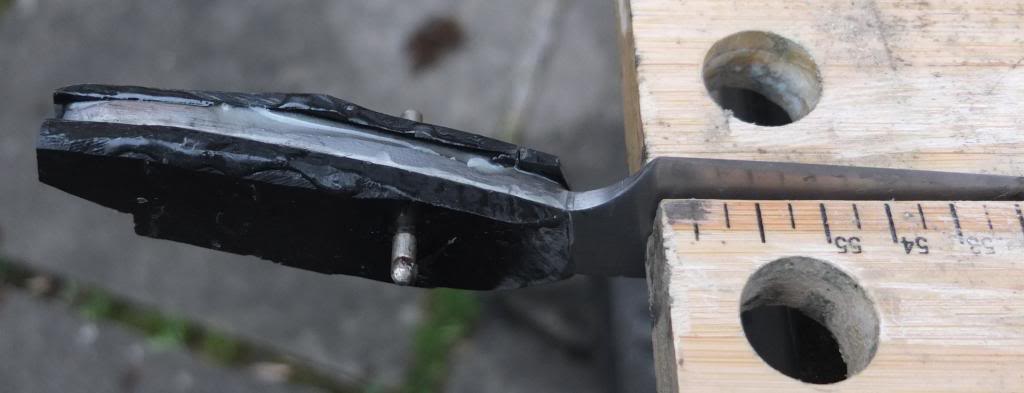
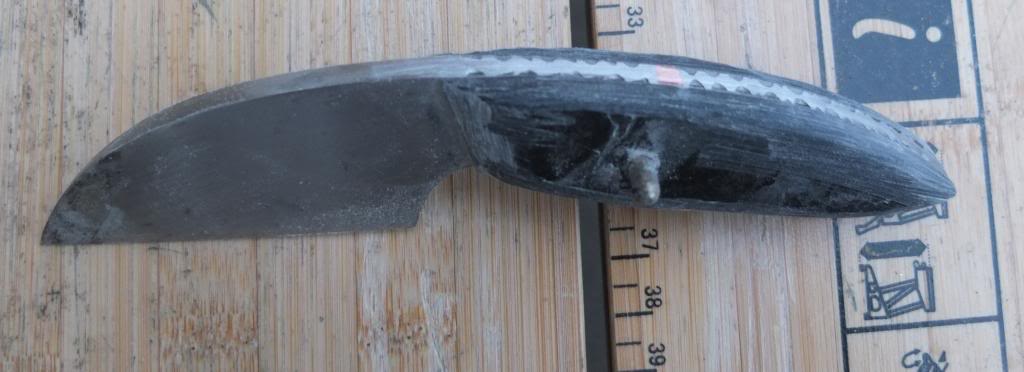
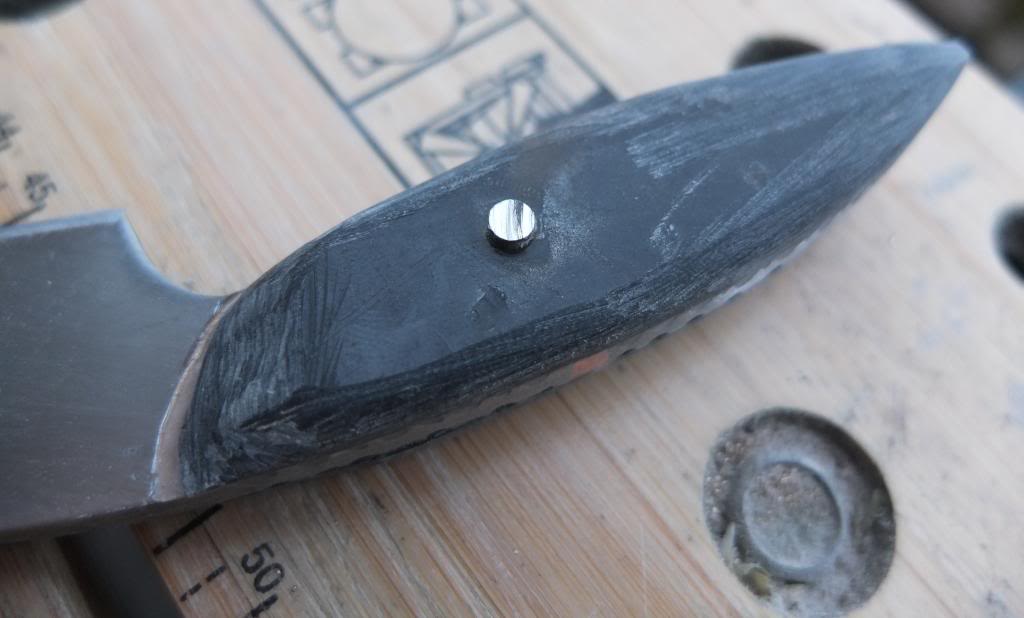
Not yet! Only recently I have gone ahead and started making the handle. I have nearly finished with the next step polishing the horn up to a high gloss.

Cut the horn pieces to a rough shape.


Epoxy the horn onto the tang, with a nickel silver rod going through.


Using a dremel grinding attachment, I grind away the excess horn.


I use a dremel circular saw to cut down the rod before going back to the grinding attachment to flush it out.


Using a small diamond file I soften the edges and generally smooth the horn out. After this I have been using a variety of sandpaper to polish.
Currently I am up to 150grit and will go as high as I can before using abrasive polishing cream, which hopefully should give it a glossy finish.
View user's profile Send private message MSN Messenger
William M


Location: Buckinghamshire , England
Joined: 01 Dec 2004
Likes: 1 page
Reading list: 7 books

Posts: 267

PostPosted: Tue 27 Aug, 2013 6:35 am    Post subject:         Reply with quote

Just thought I would post a quick update on the knives.


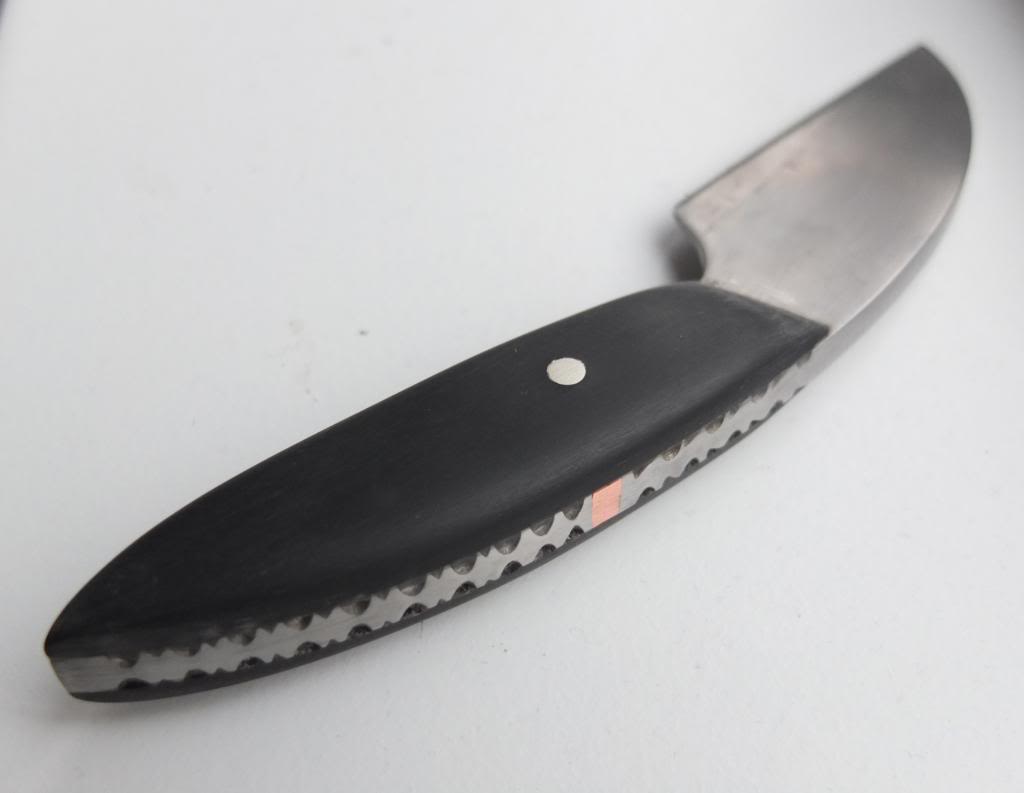
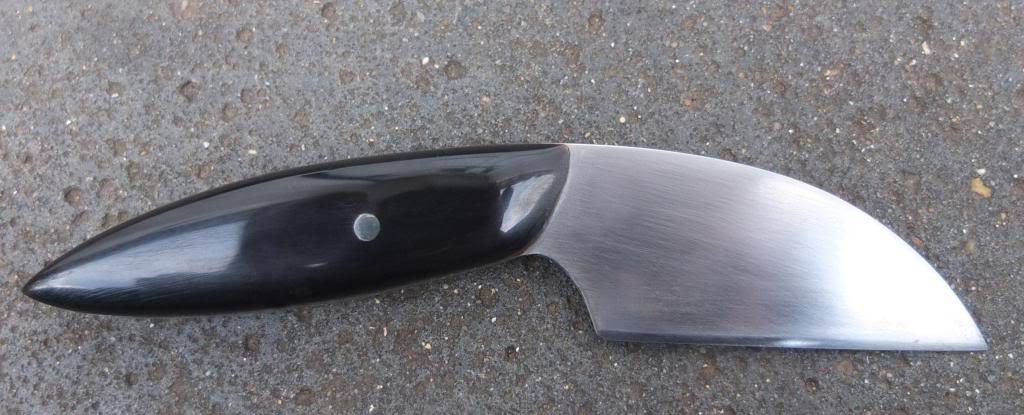
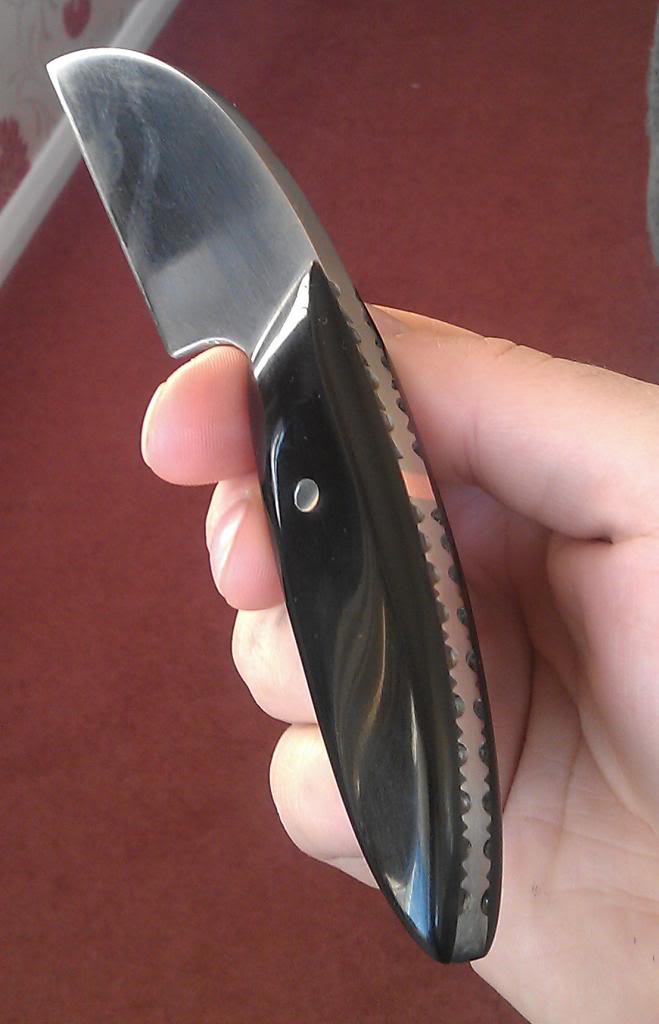
The grip is now finished with the wharncliffe knife, but I think I need to do a little bit more work on the edge as I am not 100% happy with it yet. I am finding it quite difficult to get a decent edge without a belt sander.

For the next stage I think I need a little help! I have no idea as to what design I should create the scabbard/sheath. I have seen some drop scabbards but the blade is perhaps a bit too curved for that. I am not sure....


View user's profile Send private message MSN Messenger
Alex Cerioli


Location: Italia
Joined: 26 Aug 2013

Posts: 24

PostPosted: Tue 27 Aug, 2013 8:12 am    Post subject:         Reply with quote

I love the filework! Happy

It reminds me a little bit of what I'd ordered on my maresciàll knife:

View user's profile Send private message


Display posts from previous:   
Forum Index > Historical Arms Talk > Knife forging with Owen BushDIY Project
Page 1 of 1 Reply to topic
All times are GMT - 8 Hours

View previous topic :: View next topic
Jump to:  
You cannot post new topics in this forum
You cannot reply to topics in this forum
You cannot edit your posts in this forum
You cannot delete your posts in this forum
You cannot vote in polls in this forum
You cannot attach files in this forum
You can download files in this forum


All contents © Copyright 2003-2024 myArmoury.com — All rights reserved
Discussion forums powered by phpBB © The phpBB Group
Switch to the Basic Low-bandwidth Version of the forum