Info Favorites Register Log in
myArmoury.com Discussion Forums

Forum index Memberlist Usergroups Spotlight Topics Search
Forum Index > Off-topic Talk > Sewing a doublet Reply to topic
This is a standard topic  
Author Message
Aleksei Sosnovski


Joined: 04 Mar 2008

Posts: 313

PostPosted: Wed 27 Apr, 2011 10:59 pm    Post subject: Sewing a doublet         Reply with quote

I am planning to sew a set of 15 century clothes and have a question about sewing garments that have linings (for example doublets). How should I make seams? It is a little bit difficult for me to explain what exactly I want to know, but I will try.

I have some experience with sewing, but so far my goal was to make things that worked. Now i want to make as historically accurate things as possible. When I was sewing my padded arming doublet I made all pieces separately, wrapped all edges so no padding or cut edges was visible and then joined the pieces using "butt seam" so that they look same on inside as on outside. Result was very good. The seams are flat and therefore cause no discomfort. The only problem is that the stitching is clearly visible (see attached photo). Stitching thread may also be prone to wearing out but i haven't had this problem yet. But I am not sure that it is the right technique to use. Basically I can think of 3 different options:
- sew lining and outer layer pieces together to form 2 separate garments, insert one inside another and then sew together at wrists, collar and other edges
- sew each piece of outer layer with corresponding piece of lining leaving a small gap, turn inside out, close the gap and then join resulting 2-layered pieces together with same seam I used on my arming doublet
- do as described in the previous option but sew the pieces together with "normal" seam (so that seams are not flat but some material sticks to the inside). Can I use one of the above-described options, or is there a completely different proper way for doing it?

Thanks in advance for help.
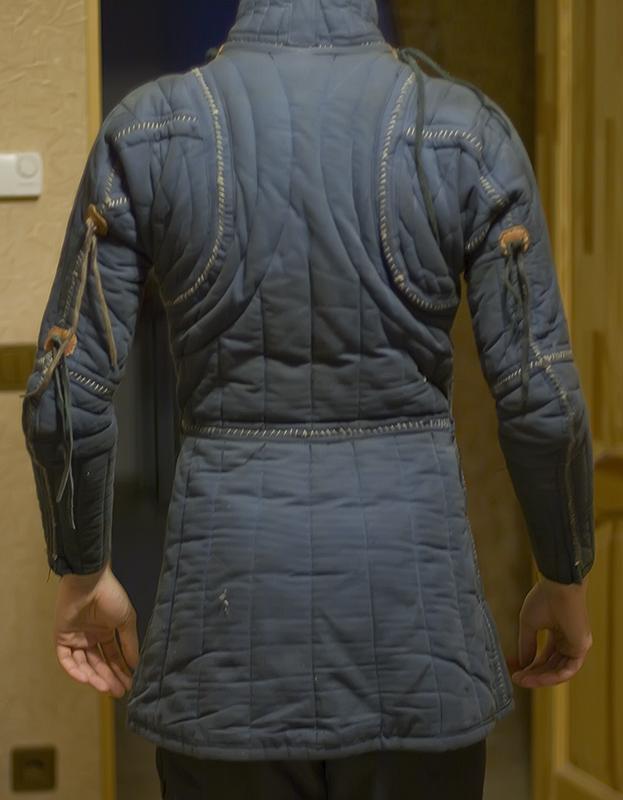


 Attachment: 46.84 KB
26.JPG

View user's profile Send private message Send e-mail
Thomas R.


Location: Germany
Joined: 10 May 2010
Likes: 4 pages
Reading list: 17 books

Posts: 396

PostPosted: Wed 27 Apr, 2011 11:20 pm    Post subject:         Reply with quote

Hi Aleks,

you could try a in german called "Kappnaht", as shown in the picture. You sew the pieces together with a normal running stitch, then you fold them like in the picture and sew along the second fold with a seaming stitch (not shown in picture). The result is a very enduring and flat seam on which both sides can't fray. Such seams were used throughout the medieval era.

http://www.handarbeitswelt.de/files/uBastelfr...rechts.JPG

Thomas

http://maerenundlobebaeren.tumblr.com/
View user's profile Send private message Visit poster's website
Glennan Carnie


Location: UK
Joined: 23 Aug 2006

Posts: 289

PostPosted: Thu 28 Apr, 2011 4:09 am    Post subject:         Reply with quote

Aleksei,

It's nice to see a properly fitted garment for a change, rather than an off-the-shelf one.

I don't think the problem is with what you're doing, but with how you're doing it.

Whipping (semi) finished panels together into a complete garment seems to have been a common technique for construction; and the results match extant garments and the artwork of the period.

When you join panels try putting them outside faces together first, then whip them, then open out the seam flat. This should hide much of the visible stitching.

Next, medieval garments were constructed by trained tailors, who spent literally years learning to hand sew to a very high standard. The stitching should be tiny - almost invisible. I would aim for about 8 stitches to the inch (3 stitches / cm) or higher, with stitches no more than a few mm long.

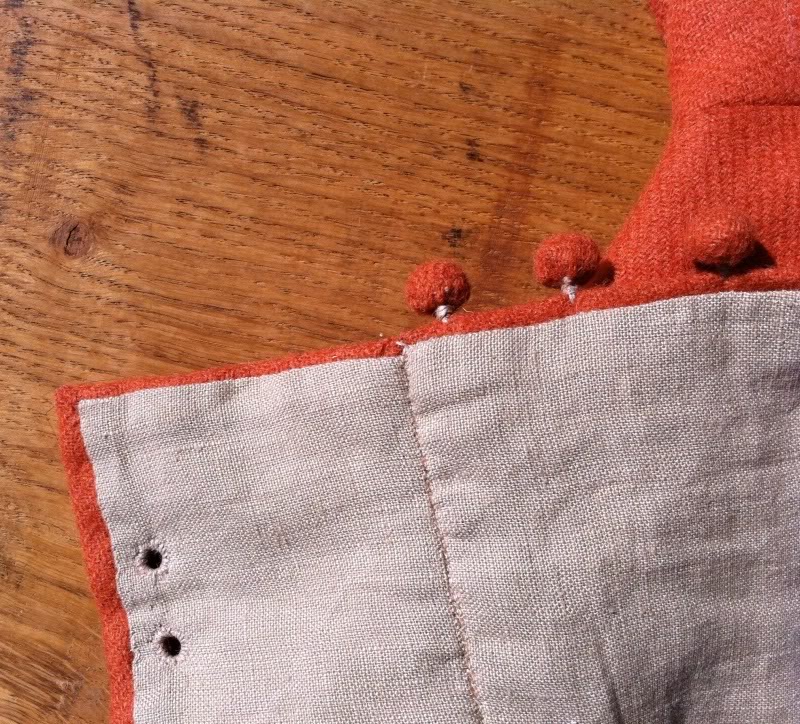
Below is a close-up of my Tudor doublet. It is constructed in the same way as yours. You can see (or, rather, you can't see!) how fine the stitching is; and how flat the seams lie.

View user's profile Send private message
Christopher Treichel


Location: Metro D.C.
Joined: 14 Jan 2010

Posts: 268

PostPosted: Thu 28 Apr, 2011 5:33 am    Post subject:         Reply with quote

where did you get the pattern for that one? I really like some of the earlier patterns where everything is fitted to a specific portion of the body...
View user's profile Send private message
Dan Rosen


Location: Providence
Joined: 21 Jan 2010

Posts: 98

PostPosted: Thu 28 Apr, 2011 10:08 am    Post subject:         Reply with quote

Glennan,

Is there any chance you could post more pictures of the lining/construction?

Thanks,

-Dan

-Dan Rosen

"One day there will be no more frontier, and men like you will go too."
View user's profile Send private message
Mikael Ranelius


Location: Sweden
Joined: 06 Mar 2007

Posts: 252

PostPosted: Thu 28 Apr, 2011 10:44 am    Post subject:         Reply with quote

If you want to pice together i lined garment there are two period ways I would recommend:

1) Sew both lining and outer fabric at the same time, i.e. you simultaniously stitch through four layers, then press the double seam allowances apart and hem-stitch them in place. The finished result will look something like this on the inside of the garment.

2) Another method is to fold the raw edges of the lining and outer fabric in towards each other, then stitch a "zig zag" running-stitch through the layers as illustrated here. The finished result will appear like this on the inside of the garments.
View user's profile Send private message
Aleksei Sosnovski


Joined: 04 Mar 2008

Posts: 313

PostPosted: Thu 28 Apr, 2011 10:47 am    Post subject:         Reply with quote

Christopher Treichel wrote:
where did you get the pattern for that one? I really like some of the earlier patterns where everything is fitted to a specific portion of the body...


Is it a question to me? I took a pattern of pourpoint of Charles de Blois (can be foud for example here http://www.personal.utulsa.edu/~marc-carlson/cloth/blois.html) and simplified by removing all the small pieces. So I basically have 4 pieces for the body (front left, front right, upper back and lower back) and 4 pieces for each sleave. (lower arm, upper arm and 2 wedges that expand part of the sleave that is joined to the body)
View user's profile Send private message Send e-mail
Tristán Zukowski


Location: Poughkeepsie, NY
Joined: 29 Oct 2009

Posts: 41

PostPosted: Thu 28 Apr, 2011 11:11 am    Post subject:         Reply with quote

Aleksei Sosnovski wrote:
Christopher Treichel wrote:
where did you get the pattern for that one? I really like some of the earlier patterns where everything is fitted to a specific portion of the body...


Is it a question to me? I took a pattern of pourpoint of Charles de Blois (can be foud for example here http://www.personal.utulsa.edu/~marc-carlson/cloth/blois.html) and simplified by removing all the small pieces.


There is also info for the de Blois pourpoint at http://www.cottesimple.com/

Tristan P. Zukowski
Longsword (KdF) Instructor, New York Historical Fencing Association
Longsword (KdF) Instructor, Sword Class NYC
View user's profile Send private message
Glennan Carnie


Location: UK
Joined: 23 Aug 2006

Posts: 289

PostPosted: Thu 28 Apr, 2011 1:25 pm    Post subject:         Reply with quote

Dan Rosen wrote:
Glennan,

Is there any chance you could post more pictures of the lining/construction?

Thanks,

-Dan


My pleasure!

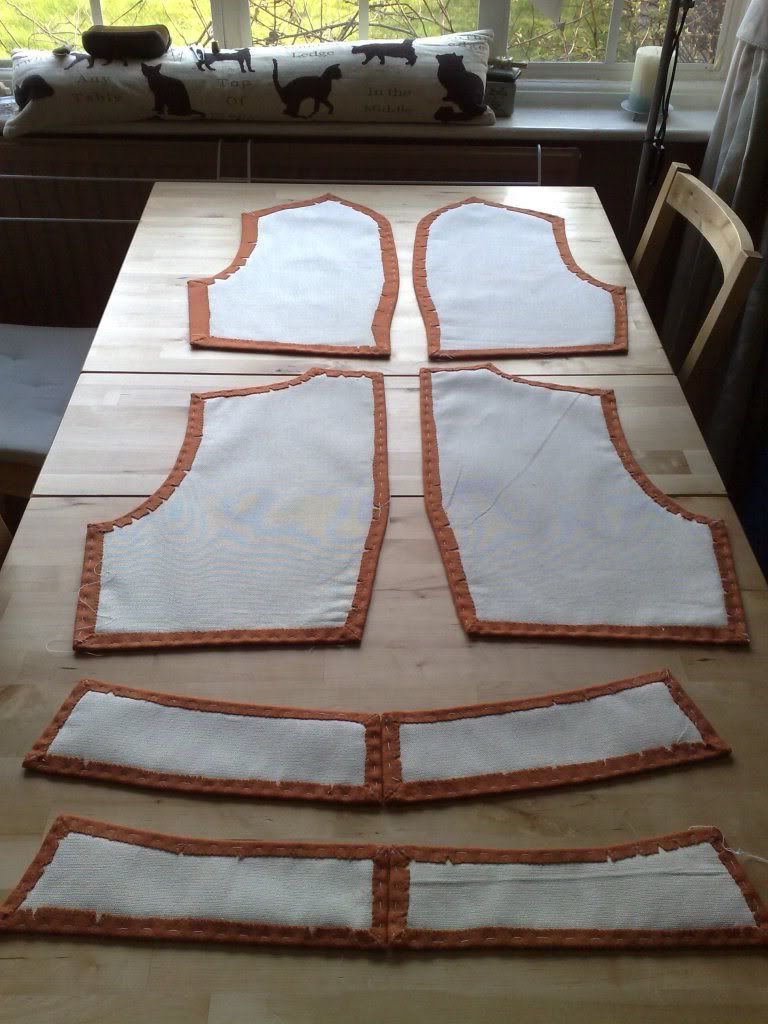
The interlining defines the 'pattern' of the garment. The interlining is taken directly from a fitted body block.
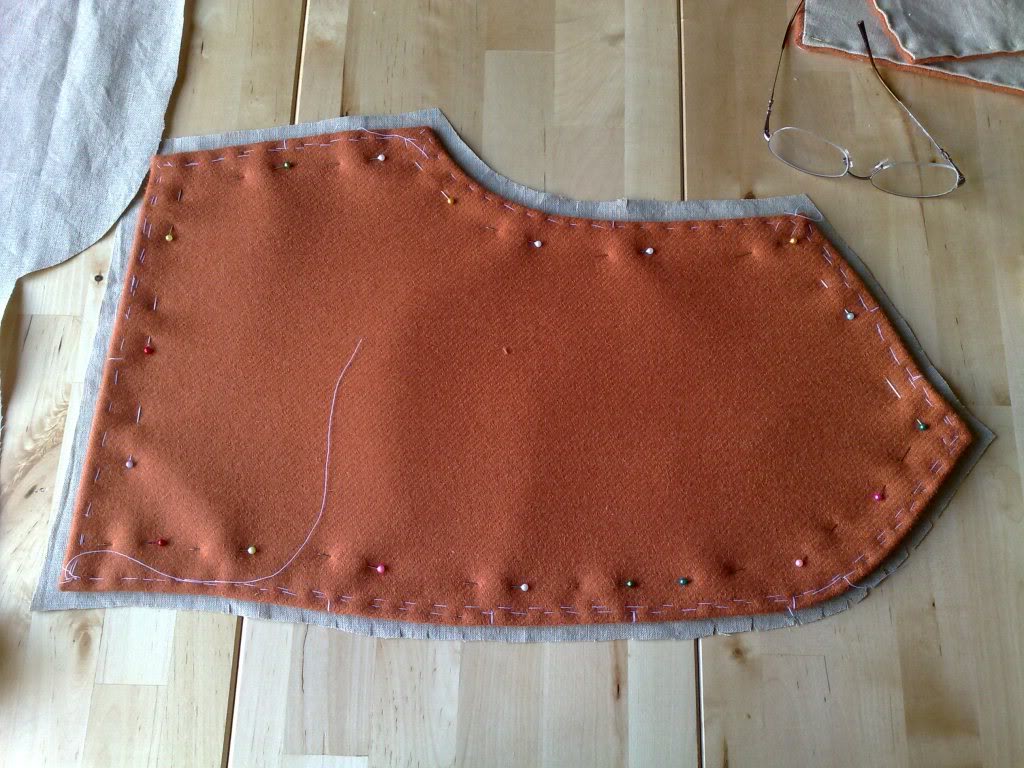
The outer shell is stitched to the interlining to give it support (although we've no evidence for this technique)


All the body panels. note how short the body is compared to the size of the arm hole (the waist of the doublet sits at the natural waist, just under the ribs, not the modern, trouser, waist)


Cutting the lining, using the shell/interlining as the 'pattern':


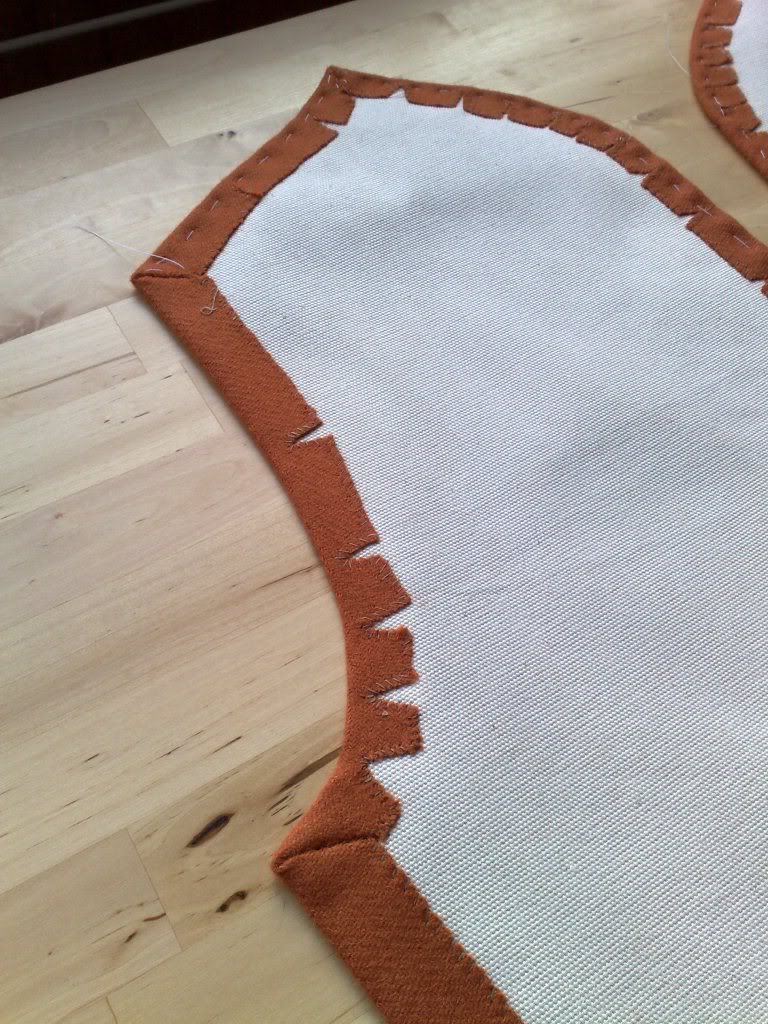
Sewing down the lining; but only on the open edges (those that aren't joined to another panel)


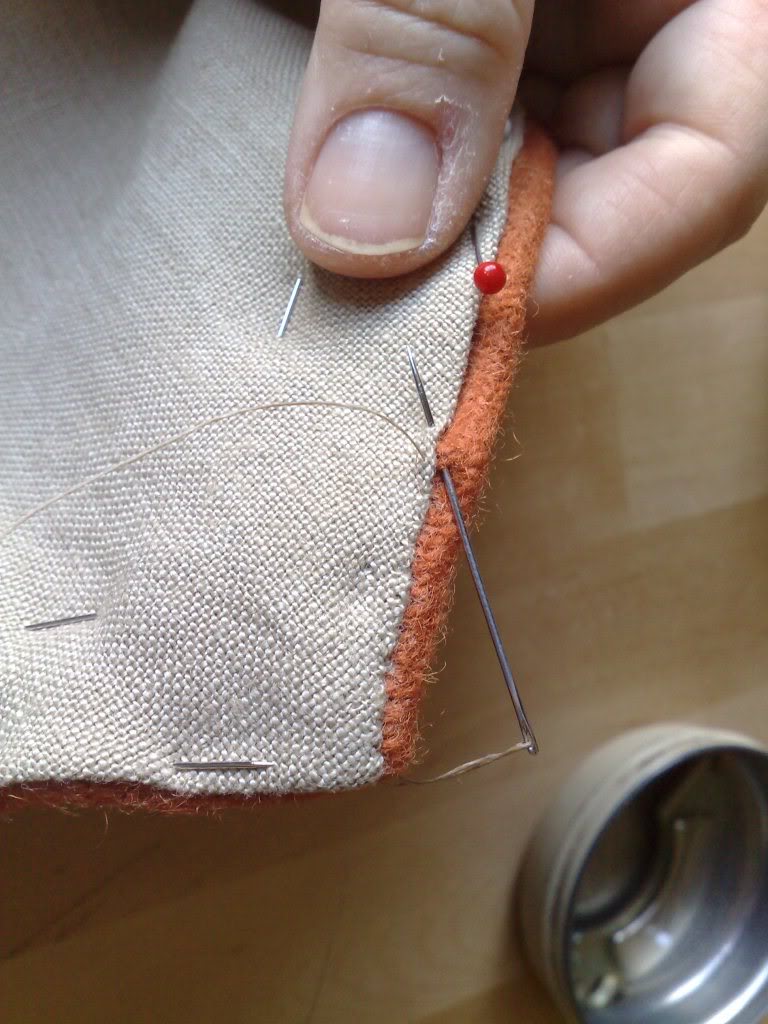
An alternative edging technique - stab stitching the open edges:


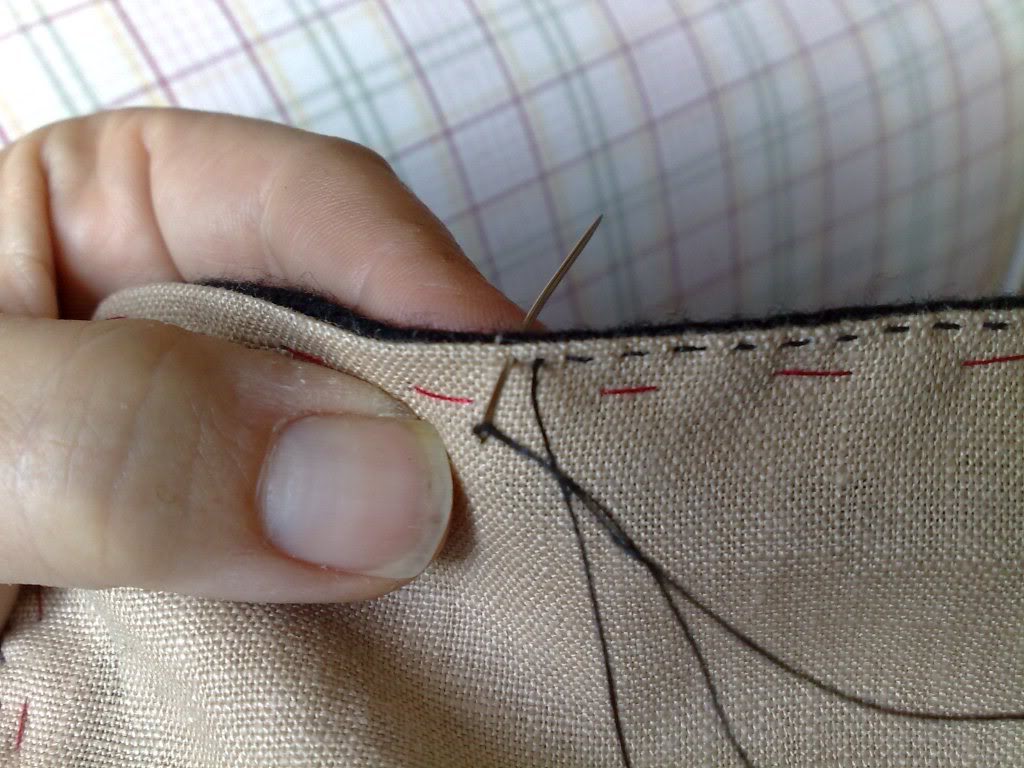
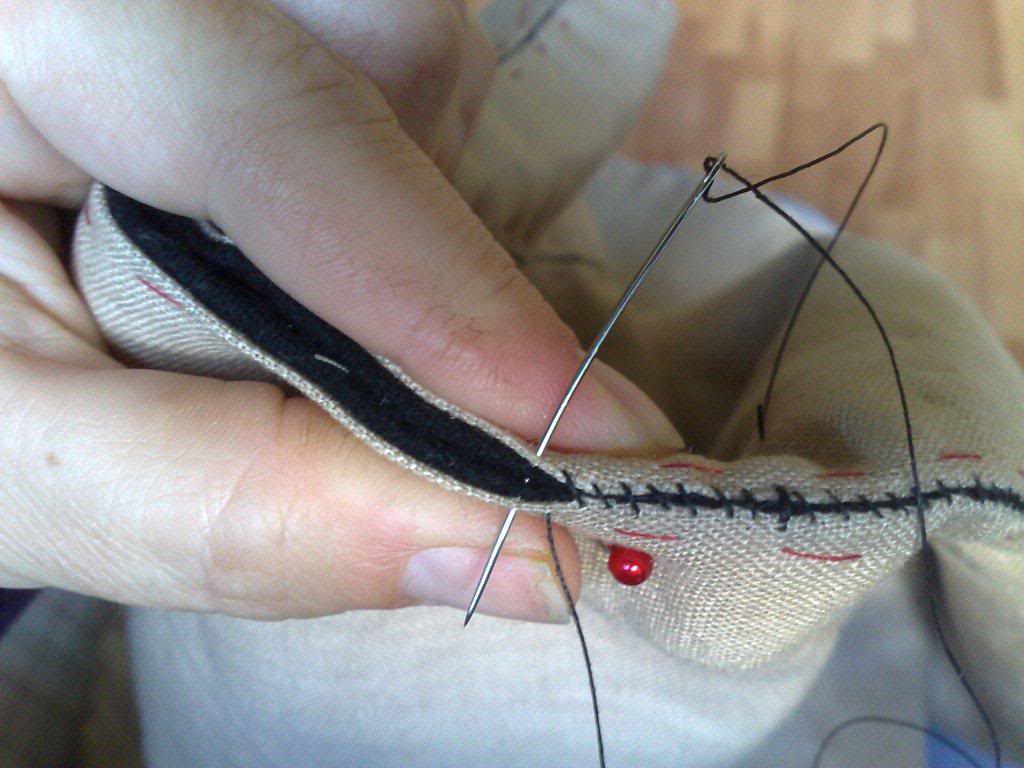
Whipping the panels together. Note the panels are held shell-to-shell:


This technique can also be used for quilted garments, too. The interlinings (padding) can be quilted in the panel, and just short of the panel edges. Only the shell and lining need to be caught in the joining seam.

Katrin Kania, in her book "Kleidung im Mittelalter" states that the Charles of Blois garment was made and quilted in panels, then joined (although she doesn't state how the panels were joined!)

Hope that's useful.
View user's profile Send private message
Christopher Treichel


Location: Metro D.C.
Joined: 14 Jan 2010

Posts: 268

PostPosted: Fri 29 Apr, 2011 5:22 am    Post subject:         Reply with quote

For best fit I would actually recommend baste/sewing the liner on to the person. It takes longer but is probably the only way to get a 100% spot on fit. I make clothes for 16th and 18th century and some of the 18th century clothes such as the breeches, weskit and coat need to be extremely form fitting in order to move with the body and not constrict.

Your pictures are very fascinating and thank you for the links... I have made some farsetto so far for some Italian sets but those seem much simpler than what you are working at.
View user's profile Send private message
N Cioran


Location: Toronto
Joined: 21 Nov 2010

Posts: 72

PostPosted: Fri 29 Apr, 2011 7:26 am    Post subject:         Reply with quote

There are a couple of paintings from the fifteenth century that show an alternate panel construction. The outer of each panel is cut wider than neccessary, then sewn together and folded over the lining so that it shows through on the inside of the garment. I suspect that this would allow the garment to be unpicked and refitted if neccessary, extending its lifespan.

I know I have the pics somewhere, I just need to track them down...

Thanks
Cole
View user's profile Send private message
Aleksei Sosnovski


Joined: 04 Mar 2008

Posts: 313

PostPosted: Fri 29 Apr, 2011 11:55 pm    Post subject:         Reply with quote

I am glad that a thread started by me gathered so much valuable material. Special thanks to Glennan for his excellent photos. I have already started sewing a new "pourpoint" (vest-like thing to tie my leg armor to). It's not historically accurate, but is a good thing to train proper sewing techniques on. Making these tiny stitches drives me mad, especially considering that I have to push/pull my needle with pliers because the fabric is very dense, but the result is well worth the effort.
View user's profile Send private message Send e-mail


Display posts from previous:   
Forum Index > Off-topic Talk > Sewing a doublet
Page 1 of 1 Reply to topic
All times are GMT - 8 Hours

View previous topic :: View next topic
Jump to:  
You cannot post new topics in this forum
You cannot reply to topics in this forum
You cannot edit your posts in this forum
You cannot delete your posts in this forum
You cannot vote in polls in this forum
You cannot attach files in this forum
You can download files in this forum


All contents © Copyright 2003-2024 myArmoury.com — All rights reserved
Discussion forums powered by phpBB © The phpBB Group
Switch to the Basic Low-bandwidth Version of the forum