Info Favorites Register Log in
myArmoury.com Discussion Forums

Forum index Memberlist Usergroups Spotlight Topics Search
Forum Index > Makers and Manufacturers Talk > Shear Steel Seax.. Work in Progress.. Complete! Reply to topic
This is a standard topic  
Author Message
Scott Roush
Industry Professional


Location: Washburn, WI
Joined: 27 Jan 2011

Posts: 452

Feedback score: None
PostPosted: Mon 31 Jan, 2011 3:32 pm    Post subject: Shear Steel Seax.. Work in Progress.. Complete!         Reply with quote

I am new to this forum and new to this genre of bladesmithing, but this stuff is the reason I got into bladesmithing to begin with. I just got sidetracked on knives for a while. This project is opening new horizons for me and I'm just excited to be finally making these sort of things. Many of you are also on the Fogg forum I see, so you will be familiar with this.

Anyway.. for those who are not.. I just returned from Ric Furrer's 'Shear Madness' workshop where I learned to make shear steel. In case you are not informed on this.. it is basically a way of making high carbon steel by carburizing wrought iron by bathing it in a carbon rich media under high temperatures. This type of steel goes back into the depths of time and was an important type of steel for the making of swords, knives and tools up until the development of the modern Bessemer process. So it is a very 'period correct' steel for many of the weapons on this forum. I'm sure there are many, many of you that are much better informed on this subject.. but if I didn't put it... somebody would ask anyway!

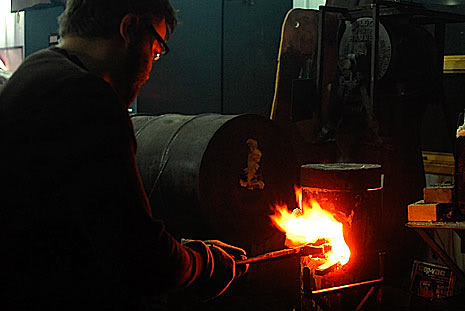
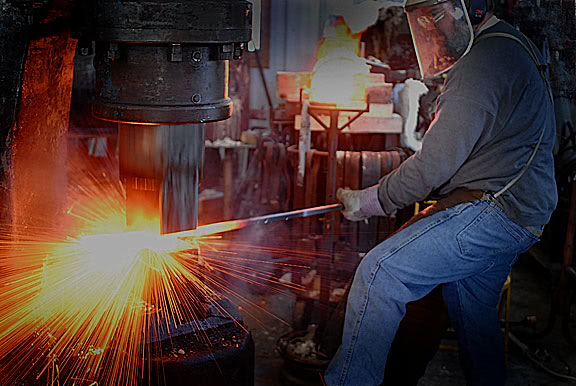
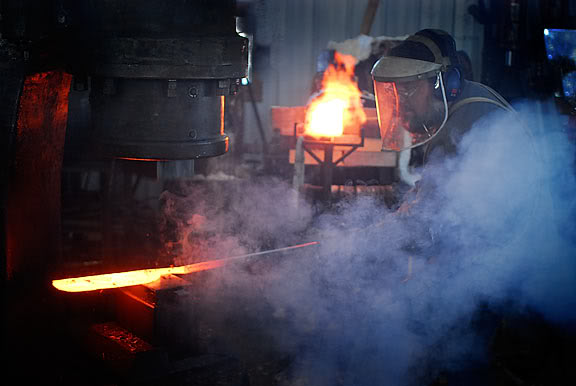
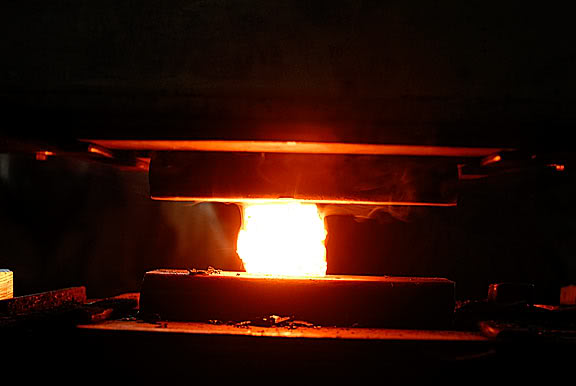
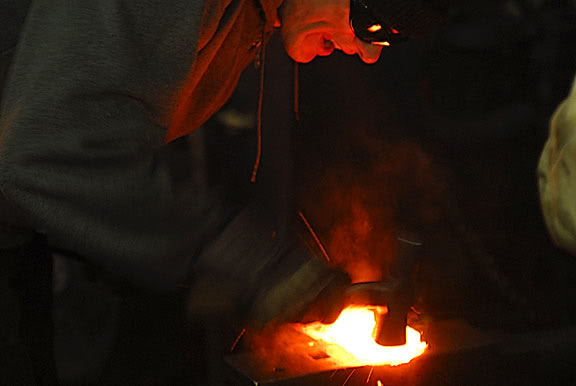
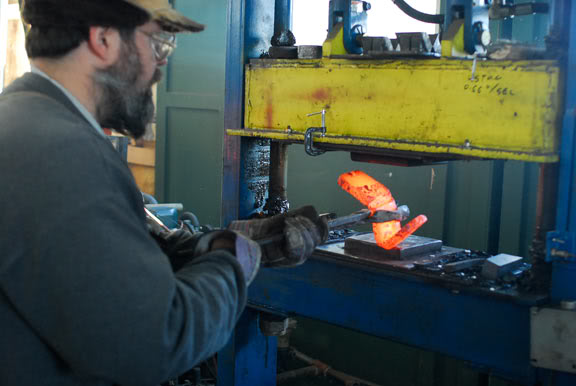
So here are some pictures of us working in Ric's shop in Sturgeon Bay. The other students in the class were Michael Pikula, Jason Mather and Jared Stiers (did I get that spelling right?).

The process basically comprises putting pieces of wrought iron into a welded can with charcoal and placing the whole thing in a forge for a long time. The wrought iron then becomes 'blister steel' which is then stacked, forge welded together, drawn out, cut, stacked, drawn out, etc.. this is done three times to get 'triple refined' shear steel. The whole process refines the slag and other impurities as well getting the carbon evenly distributed.


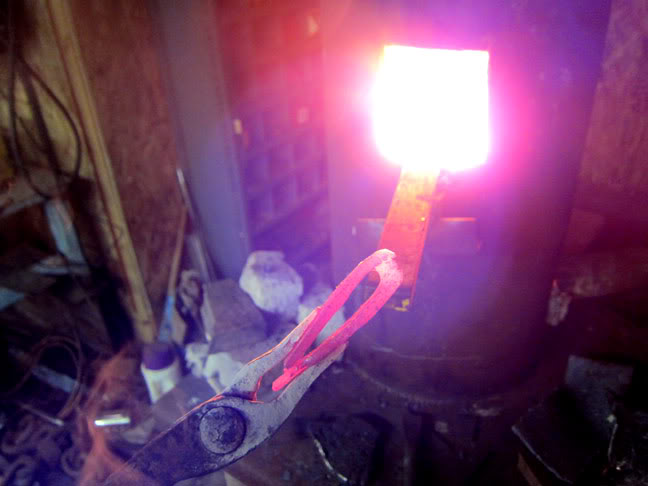
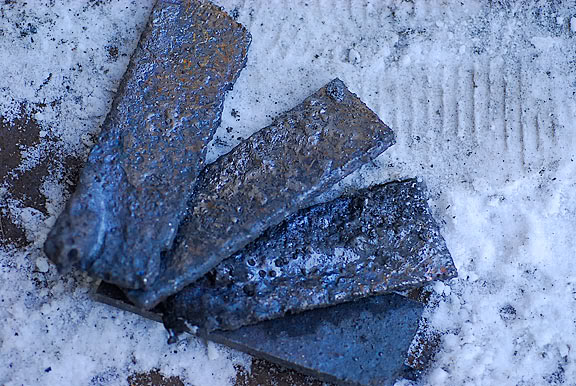
These are now blister steel:


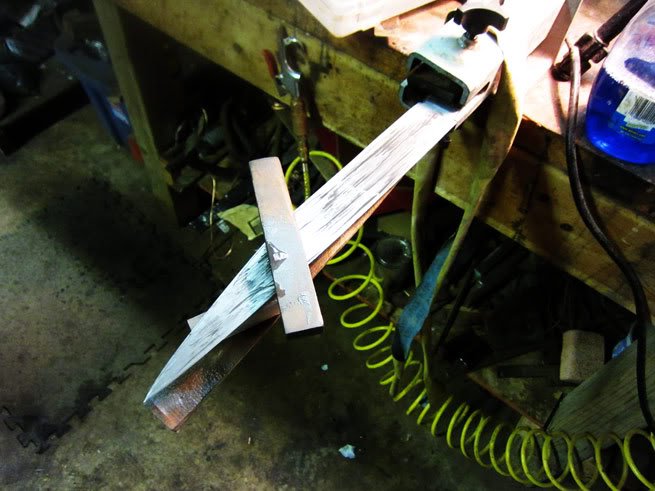
These pictures show my work with the billet I brought home from Ric's... and are in my shop...


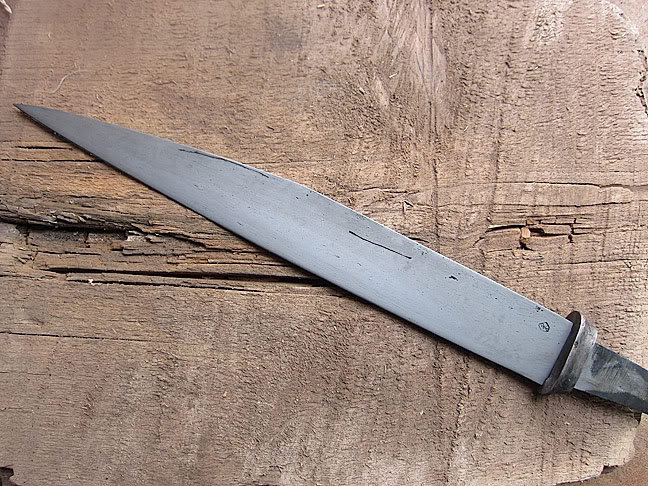
This is the blade and some conceptual ideas... Since I'm new to the history of these things I decided it would be best to pick and choose elements from different periods.. but the blade is 14". I've since greatly changed the scabbard idea.. as it didn't make sense to do it 'riding style'....
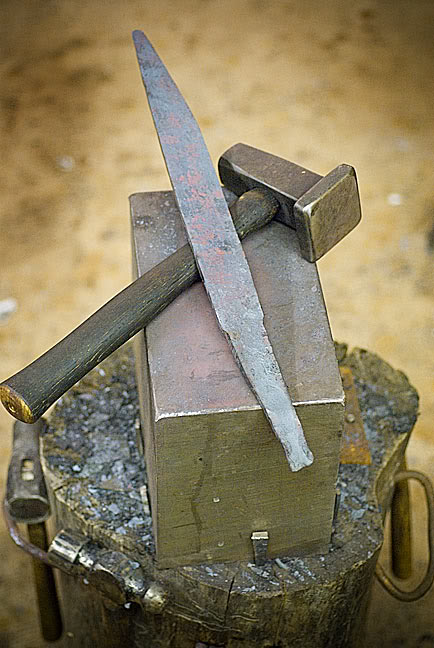


This is blade before the quench and some 'pre-etching' to see what kind of pattering was going on...
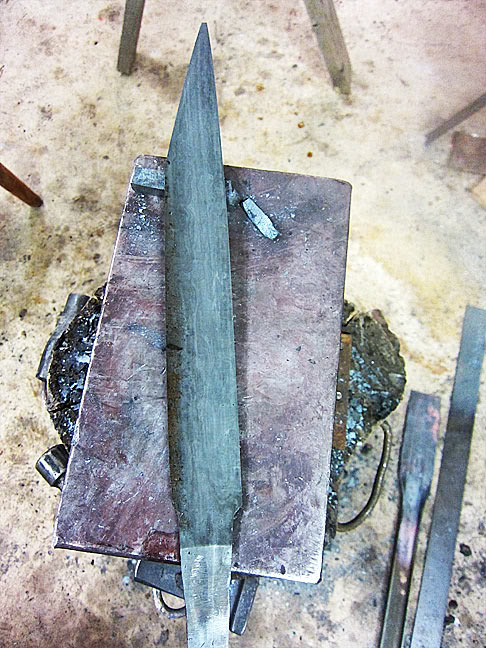


This a test blade I did to determine heat treat parameters before quenching the big one.... it ended up hardening nicely after a few false starts (and will be made available for purchase as well!)
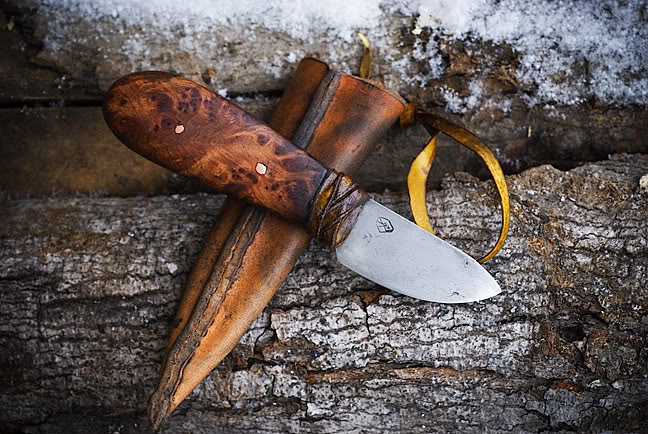
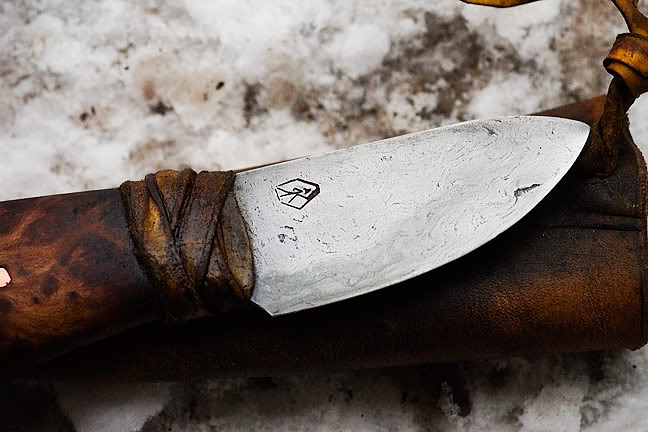


Anyway.. I hope this is interesting and I will post more a bit later.

http://www.bigrockforge.com


Last edited by Scott Roush on Wed 02 Feb, 2011 4:52 am; edited 1 time in total
View user's profile Send private message Visit poster's website
Michael Pikula
Industry Professional


Location: Madison, WI
Joined: 07 Jun 2008

Posts: 411

Feedback score: None
PostPosted: Mon 31 Jan, 2011 5:12 pm    Post subject:         Reply with quote

I met Scott at the shear madness class and he is one to keep an eye out for and see where his work goes. He has an excellent world view and understands what the material is doing. I would be happy to share my shop space with him, and eager to see what kind of work inspires! I just got done welding by double refined shear, made in the same class, with some W2 to make into some wire for a project I am working on. Ric is an excellent instructor, if anyone is thinking about taking a class with him I would say do it! I am planning on another, and look forward to learning even more then I did the first time around. Keep us posted on the seax and I hope it turns out better then expected Happy
View user's profile Send private message Visit poster's website
Scott Roush
Industry Professional


Location: Washburn, WI
Joined: 27 Jan 2011

Posts: 452

Feedback score: None
PostPosted: Mon 31 Jan, 2011 5:59 pm    Post subject:         Reply with quote

Thanks a lot Michael... can't wait to see what you do with your stuff...

And ditto on the words for Ric's course.... so much fun and knowledge being thrown around. And tools.

More pictures...

Here I am forging down some bloomery steel given to me by Randy Skidmore... a great smelter and metalsmith. I will use this for a pommel cap.


Here I'm forging the wrought iron ring straps for the scabbard...


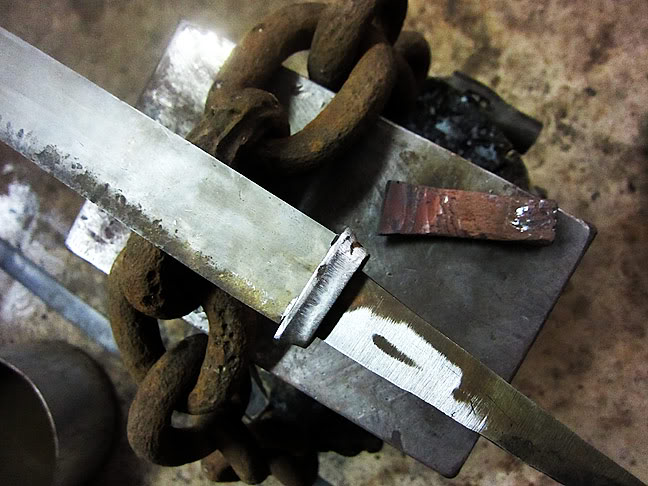
Fitting the guard forged from the wrought iron chain seen below the blade


Polishing the blade after final grinding after the quench.


Before finishing I wanted to do some edge testing by chopping on white oak. I got some edge chipping so it went back to the temper oven for a bit more drawing back...


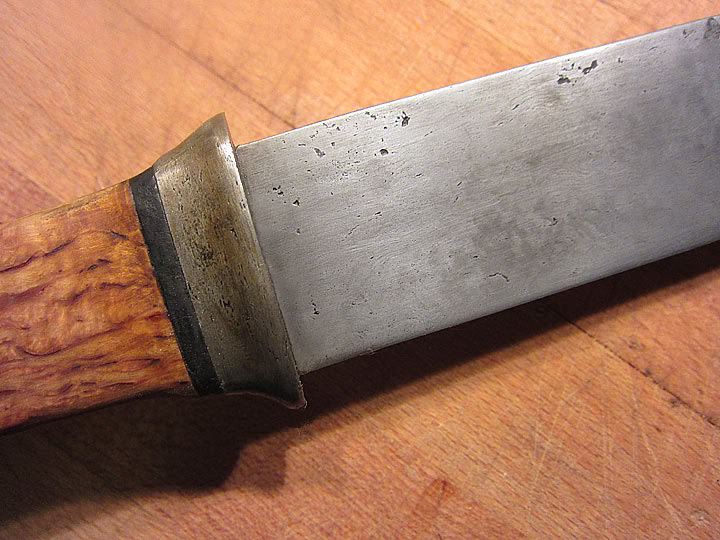
Here is it is with final polish and etch. Guard is finished and etched in a ferric chloride/copper solution to give the iron a coppery patina. Came out lovely.


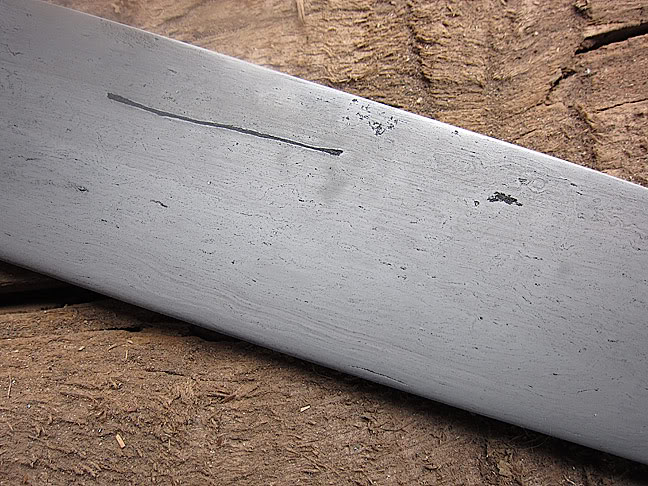
There are a couple of scars on the blade left over from fixing some weld failures with an angle grinder. I just didn't want to waste any more steel by grinding em away.... but they were getting close...

So.. that catches me up. I just got my wood today.. which is Masur birch root burl... native to Scandinavia. Smaller than I thought so I will have to figure out what to use for spacer material.... deer antler maybe....

http://www.bigrockforge.com
View user's profile Send private message Visit poster's website
Scott Roush
Industry Professional


Location: Washburn, WI
Joined: 27 Jan 2011

Posts: 452

Feedback score: None
PostPosted: Wed 02 Feb, 2011 5:00 am    Post subject:         Reply with quote

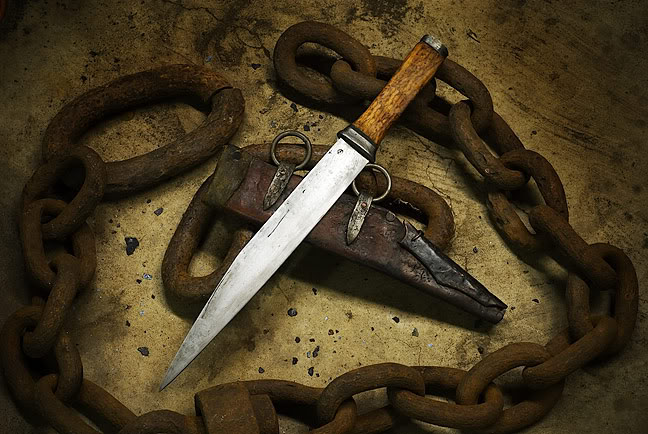
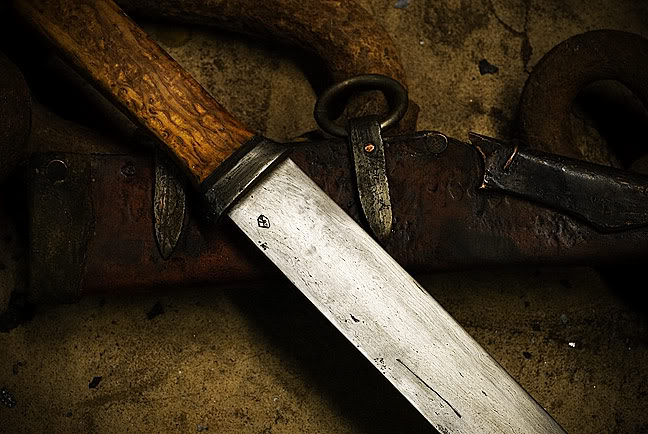
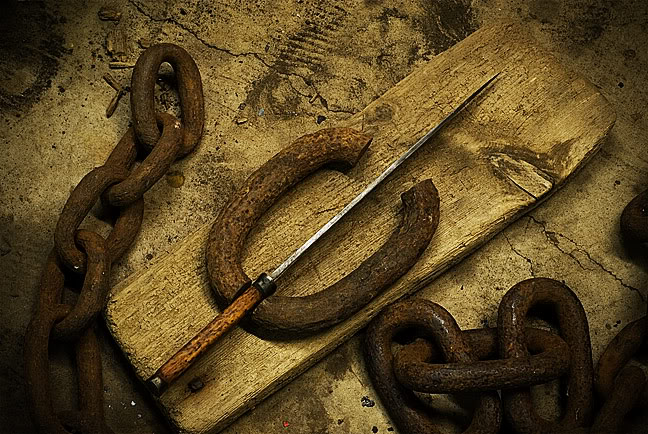
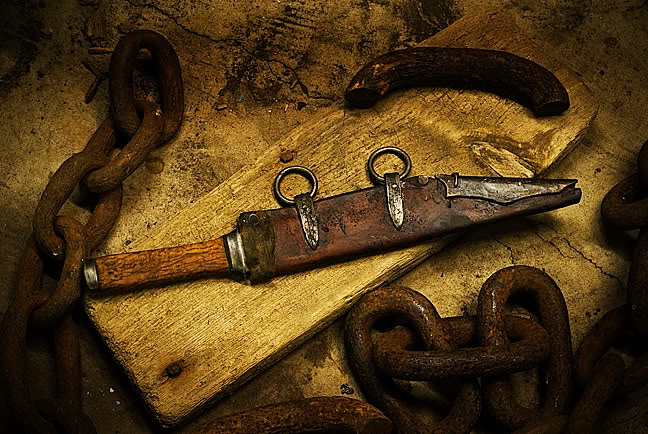
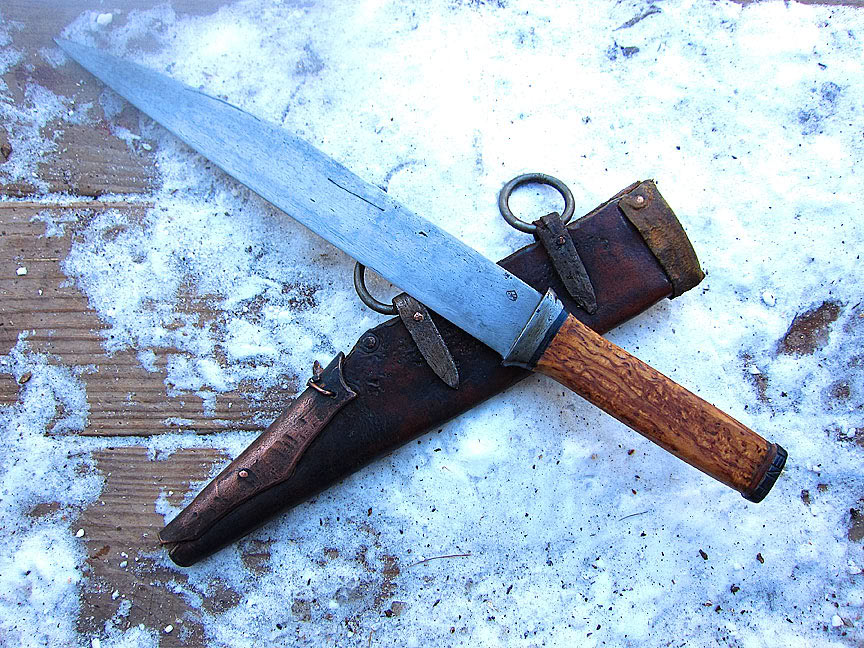
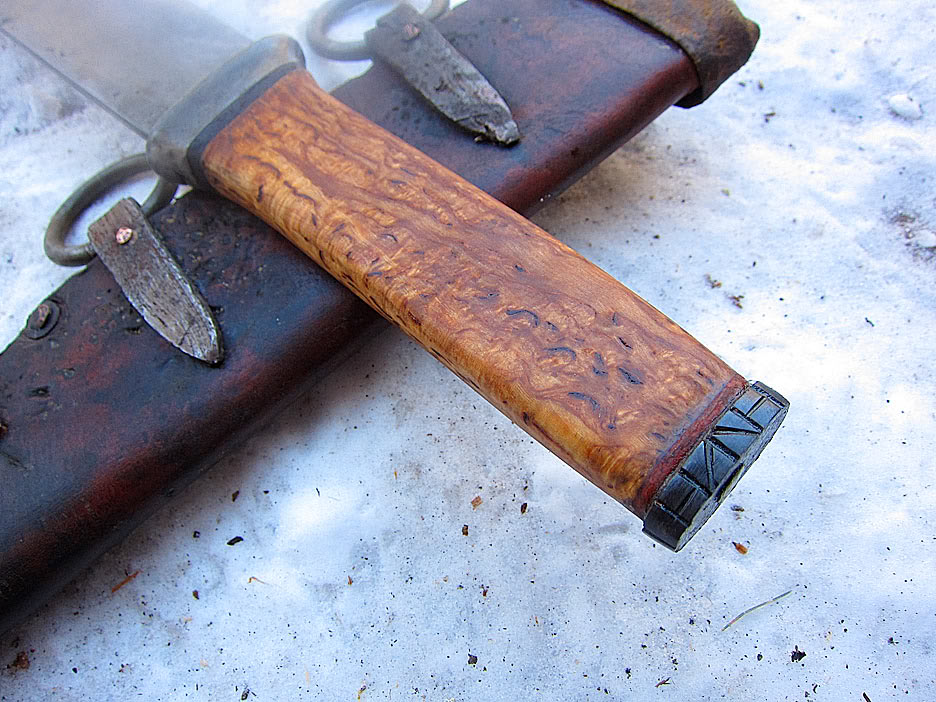
So here it is....14" blade, 19 1/4" over all length, Masur birch burl handle slightly swept back, anchor chain wrought fittings etched in copper/ferric chloride and back stained with liver of sulphur, leather spacer. Scabbard with forged anchor chain fittings, cold forged copper, and home brain tanned doe skin liner... for a comfy, secure, scratch-free fit.


This was fun to make and it is a joy to hold. It fills me with a strange 'Joy of Battle' feel when holding it. I'm really looking forward to learning more about these and exploring historical designs. I'm also very much looking forward to learning a bit of carving and wire inlay for future projects. My next project will be a smaller seax based on a more accuraet historical design, but with a 'relic' look to it.

I have a new website and I'm still learning how to upload... but please feel free to PM me inquires for the purchase of this blade and scabbard. I'm also open to finding a patron for forging the remaining bit of billet into a custom piece. Again.. feel free to contact me.

Thank you for looking and I hope you enjoyed it!

http://www.bigrockforge.com
View user's profile Send private message Visit poster's website
Perry L. Goss


Location: Missouri
Joined: 15 May 2004
Likes: 2 pages

Posts: 113

Feedback score: None
PostPosted: Wed 02 Feb, 2011 7:12 am    Post subject: Scott's shear steel         Reply with quote

Scot:

Thank you, informative. Interesting process. Wish I had power driven hammers! Oh well.

Nice different approach. Always good to see different approaches being taken and different styles used. A lot of what we see is picture perfect.

It may have been in there, but my eyesight isn't what it used to be and computers do not help. Any idea on the hardness of the material?

Again, thank you
View user's profile Send private message
Scott Roush
Industry Professional


Location: Washburn, WI
Joined: 27 Jan 2011

Posts: 452

Feedback score: None
PostPosted: Wed 02 Feb, 2011 7:45 am    Post subject:         Reply with quote

Perry... I wish I had power hammers too (although a press is in my near future I hope). The pictures with the hammer and press were at Ric's shop. The guillotine on my anvil in my shop is MY power hammer. It actually works great for drawing out.

Yeah.. my stuff is never really 'perfect'. But hopefully 'aesthetically imperfect': wabi sabi.

Thanks for taking the time to comment.

http://www.bigrockforge.com
View user's profile Send private message Visit poster's website
Scott Roush
Industry Professional


Location: Washburn, WI
Joined: 27 Jan 2011

Posts: 452

Feedback score: None
PostPosted: Wed 02 Feb, 2011 9:33 am    Post subject:         Reply with quote

Oh... and as to hardness... I mentioned it above a little bit. It skated a file after a few temps of trying to figure things out... and it held up pretty well to white oak chopping after figuring out the temper. I can't honestly say that it performs as well as my Aldo 1084 or 15n20... but it just doesn't have all of the alloys that help with grain refinement that you find in modern steels.
http://www.bigrockforge.com
View user's profile Send private message Visit poster's website
Perry L. Goss


Location: Missouri
Joined: 15 May 2004
Likes: 2 pages

Posts: 113

Feedback score: None
PostPosted: Wed 02 Feb, 2011 11:59 am    Post subject:         Reply with quote

I think one of the most interesting articles is the one by Craig from A & A in the Features [?] section; "Ground or pound". Or something like that.

I have "played" enough on my own back when my health permitted it and watched artists enough to realize the difficulty involved in the making of weapons and armour. Truely a gift.

Thank you.

Scottish: Ballentine, Black, Cameron, Chisholm, Cunningham, Crawford, Grant, Jaffray, MacFarlane, MacGillivray, MacKay-Reay/Strathnaver, Munro, Robertson, Sinclair, Wallace

Irish/Welsh: Bodkin, Mendenhall, Hackworth

Swiss: Goss von Rothenfluh, Naff von Zurich und Solland von Appenzel
View user's profile Send private message
Benjamin Rial


Location: Northern Minnesota
Joined: 28 Jan 2011
Likes: 10 pages

Posts: 144

Feedback score: None
PostPosted: Wed 02 Feb, 2011 1:56 pm    Post subject:         Reply with quote

Hey Scott, excellent thread and a beautiful piece of work! I had heard of shear steel and blister steel before, but haven't had the time to look into it very deeply. Your post has been very informative! Thank you and keep up the good work.
"The only thing new in this world is the history we don't know."-Pres. Harry S. Truman

www.forgedintime.com

Vel Arte, Vel Marte
View user's profile Send private message Visit poster's website
Scott Roush
Industry Professional


Location: Washburn, WI
Joined: 27 Jan 2011

Posts: 452

Feedback score: None
PostPosted: Mon 07 Feb, 2011 6:19 pm    Post subject:         Reply with quote

So I'm making some modifications to this piece. Something has been bugging me about the handle.. so I've removed the wrought iron pommel and have done some light re-shaping of the handle.. and I've begun to construct a copper piece to complement the copper plate on the scabbard. I will polish off some of the sulphur blackening on the scabbard copper. I'm also going to do some light geometric carving on the pommel cap.

This piece is up for sale. I'm asking $650 for it once the pommel is complete... including the scabbard. I will also consider working with somebody on the handle design if there is an interested buyer (that is if you get to me before I start work!). I will also consider a separate price for the blade without the scabbard if there is any interest in that regard.

I'm also seeking a buyer who would be interested in having a blade made from the rest of the shear steel billet that I have. If a larger blade is desired, I can forge weld wrought iron.. either butt it onto the spine or do a 3 layer laminate with the shear as the core.

If anybody is interested in having the shear made into either a traditional Early American trade knife or Bowie, I currently have a 'credit' with John Cohea to have a spectacular rawhide sheath made for it (http://jmcknives.blademakers.com/). if you are not familiar with his work, please take the time to look at his website. He does incredible, detailed work on his sheaths.

http://www.bigrockforge.com
View user's profile Send private message Visit poster's website
Scott Roush
Industry Professional


Location: Washburn, WI
Joined: 27 Jan 2011

Posts: 452

Feedback score: None
PostPosted: Thu 10 Feb, 2011 6:04 pm    Post subject:         Reply with quote

So here is the next iteration on the pommel...


The filework is my take on 'runic inspired' geometrical adornment. This is what I will consider my first step towards doing more elaborate work on my handles as I learn more about this genre of bladesmithing.


Also.. here is a detail image which shows a little better the complex hamon that formed spontaneously during the quench of this blade. The dark splotches are the outer boundary of the 'storm'. As you can see, it got pretty close to the edge near the guard/blade junction. That area does skate a file..but I'm sure it isn't as hard as the rest of the blade.


http://www.bigrockforge.com
View user's profile Send private message Visit poster's website
Richard Furrer
Industry Professional


Location: Sturgeon Bay, WI
Joined: 11 Jun 2004

Posts: 77

Feedback score: None
PostPosted: Fri 11 Feb, 2011 7:45 am    Post subject:         Reply with quote

Benjamin Rial wrote:
Hey Scott, excellent thread and a beautiful piece of work! I had heard of shear steel and blister steel before, but haven't had the time to look into it very deeply. Your post has been very informative! Thank you and keep up the good work.


Hello Benjamin,
Scott did indeed do a good job with this posting..and the blades.

You may find this interesting:
http://www.doorcountyforgeworks.com/Steel_Making.html
second and third video down
..and I am also doing another class in May.."Shear Madness 2"...one of the students coming this time is in Minnesota.

Just a thought.
Ric

Ric Furrer
Sturgeon Bay, WI
www.doorcountyforgeworks.com
View user's profile Send private message Visit poster's website
Stuart Thompson


Location: Walton-on-the-Naze
Joined: 15 Feb 2010

Posts: 118

Feedback score: None
PostPosted: Fri 11 Feb, 2011 10:13 am    Post subject:         Reply with quote

Amazing stuff!!
sverð er manni vargr, af bardaga er dýrð, í dauða er dýrð.
View user's profile Send private message
Scott Roush
Industry Professional


Location: Washburn, WI
Joined: 27 Jan 2011

Posts: 452

Feedback score: None
PostPosted: Thu 17 Feb, 2011 12:46 pm    Post subject:         Reply with quote

this seax is sold pending payment....
http://www.bigrockforge.com
View user's profile Send private message Visit poster's website
Michael Pearce
Industry Professional


Location: Seattle, Wa.
Joined: 21 Feb 2004

Posts: 365

Feedback score: None
PostPosted: Fri 18 Feb, 2011 6:48 am    Post subject:         Reply with quote

Very Cool Project- thanks for sharing this with us!
Michael 'Tinker' Pearce
-------------
Then one night, as my car was going backwards through a cornfield at 90mph, I had an epiphany...
View user's profile Send private message Send e-mail Visit poster's website


Display posts from previous:   
Forum Index > Makers and Manufacturers Talk > Shear Steel Seax.. Work in Progress.. Complete!
Page 1 of 1 Reply to topic
All times are GMT - 8 Hours

View previous topic :: View next topic
Jump to:  
You cannot post new topics in this forum
You cannot reply to topics in this forum
You cannot edit your posts in this forum
You cannot delete your posts in this forum
You cannot vote in polls in this forum
You cannot attach files in this forum
You can download files in this forum


All contents © Copyright 2003-2024 myArmoury.com — All rights reserved
Discussion forums powered by phpBB © The phpBB Group
Switch to the Basic Low-bandwidth Version of the forum