Info Favorites Register Log in
myArmoury.com Discussion Forums

Forum index Memberlist Usergroups Spotlight Topics Search
Forum Index > Off-topic Talk > You can make riveted mail!DIY Project Reply to topic
This is a standard topic  
Author Message
Christopher VaughnStrever


Location: San Antonio, TX
Joined: 13 Jun 2008
Reading list: 1 book

Posts: 382

PostPosted: Tue 12 Oct, 2010 1:51 pm    Post subject: You can make riveted mail!         Reply with quote

I have been in the persuit of making riveted mail for a couple of years now. I Only need voiders for certain areas for my 15th century kit. And I have not had the funds to simply buy the best (Or close to best) Riveted mail. I also refuse to buy the india made mail. With a lack of funds; yet with many resources I have finally been able to make what I never thought I'd be able to make.

Warning! --

My rivets may look like crap-O-la'.... But! The small size that I am making, Oh my goodness It doesnt matter. Up close yea the rivets look horrific, but look at it from 2 feet away and you wont notice a thing. I Need the weight reduction more than anything else, my current "voiders" weigh in at around 25~30lbs (yea voiders... They are 3/8 10gauge butted stainless steel) As long as the mail functions properly which I will be perfoming tests on at a later time (One test in its natural soft state as I have heated them to red heat and slowly let them cool. And the second test by heating them and quickly cooling them by quenching them in water) Iwill be happy with the end product.

I like the feel, I like the look, and I love the weight. I am tired of searching all over the net and not finding pictorial support to what I plan to do. I have found bits of answers here and there with one main source providing all the typed material I could need. here is the link, you most likely knew about this one...
http://www.forth-armoury.com/research/round_r...maille.htm

For wire costs go to www.theringlord.org/ 15lbs of 18gauge costs $25 but then shipping from Canada cost another $25, so $50 for wire. Total cost of wire and materials will be on the final post.

I am using 18gauge mild steel wire. I am using a 5/16 mandrel and by flattening the rings it gets close to 3/8 -- 9mm ID
(1) Mandrel = $10 //4x4 and 2x4 can find scrap pieces $0 or buy them for $10 //Torch (will be adressed later) $20 //
=$40 so far

Ok first have your mandrel, buy a mild steel rod 5/16 bend the end of the bar into the handle seen below, not impossible you will need a good table a small torch and a hammer (with no torch just use alot of leverage to bend it. Then you will need to make the wooden frame get a 2x4 and a couple of small 4x4 pieces. use 3" screws to secure the 4x4 pieces to the 2x4 a wah~la' screw a 5/16 hole through each 4x4 so that the 5/16 rod will slide through and your good to go.


Drill a tiny hole into your mandrel so that you can get that 18gauge wire started. and then rotate that handel to make your coil.


Here is the coil and wire shown together.


(2) Snips $10~15 Depending on size.

You will need snips to cut the rings off. Use a grinder to make it eaiser to get those snips in on the wire. Bigger leverage means its eaiser to cut


(3) Grinder $15 for the bit and pack of 5 blades

You can buy a grinder with circular blades that you can attach to a regular drill. This will come in handy for other things on this project


Pull the wire apart and cut--So that there is an overlap


Experience and learning from such defines maturity, not a number of age


Last edited by Christopher VaughnStrever on Tue 12 Oct, 2010 2:03 pm; edited 2 times in total
View user's profile Send private message
Christopher VaughnStrever


Location: San Antonio, TX
Joined: 13 Jun 2008
Reading list: 1 book

Posts: 382

PostPosted: Tue 12 Oct, 2010 1:55 pm    Post subject:         Reply with quote

the rings are a bit open


so lets close them up a tad


(4) A torch nosel $15~35 //A propane canister $4 // Mapp gas $8 can be used but not a have to

Lets get our torch


(5) you can get a stainless steel bowl for $3 and beat the bottom end into a bowl (I heard this lets the steel cool slower which is better) Though you can also use a coat hanger to put the rings on which is free and probably isnt going to do any harm

And use it...


(6) Thick steel plate $10

Attached to a 4x4 makes a great striking surface


(7) i dont know the name look at the picture $7

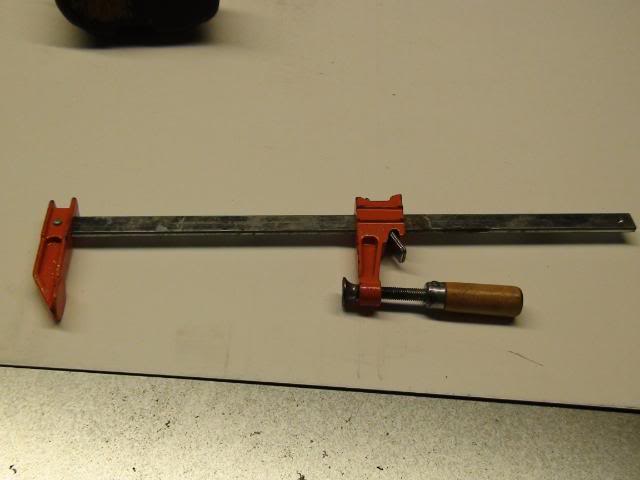
Use on of these to clamp the 4x4 block down. it helps by not jumping around and lesse'ns the vibrations when hammering...

Experience and learning from such defines maturity, not a number of age


Last edited by Christopher VaughnStrever on Wed 13 Oct, 2010 7:30 am; edited 3 times in total
View user's profile Send private message
Christopher VaughnStrever


Location: San Antonio, TX
Joined: 13 Jun 2008
Reading list: 1 book

Posts: 382

PostPosted: Tue 12 Oct, 2010 2:16 pm    Post subject:         Reply with quote

Ok, lets make a mark in your steel block so that your rings will sit steady while you hammer them. I only grinded a small area where the overlap of the rings would sit. This helps when flattening the whole ring because the whole ring will be able to sit flat. notice as it looks as I grinded an entire circle for the whole ring, this is simply "wear and tear" from hitting rings over and over on the same mark.
See i told you you were gonna need that grinder, it still has more purposes to come.


Now any hammer can work just fine. You do not need a ball-peen hammer (though it does make you feel better with one)
But, before that you need something to hold the ring down with

(8) $9 for a steel rod //And $5 for a "Midget" hacksaw //or avoid the $5 and use your Grinder to cut that thing off

Do not worry about cutting the rod with a "slant" As you hammer the piece over and over the small cut off rod will smoothen out


This rod Has been hammer'd already, When first cut, it will be nice and flat and round


In case you want to see the exact details of that steel rod


(9) Ball Peen Hammer $7~$10 //Or find any hammer lying around the house to negate this cost.
Please use ear plugs, they are cheap $2 for a handful //Or else start to go deaf in time

Lets get to hammering, place your steel stake onto the ring overlap, Apply alot of pressure onto the ring with the steel stake And Strike the over lap only.


(10) Pliers $3~$6 //Any pliers work fine you dont have to drill holes in them or anything. Find a pair of pliers around the house to skip this cost.

If not enough pressure is applied the stake may skip and will cause the ring to seperate, do not panic its an easy fix. Put your ring in between your pliers and apply small pressure to allign the ring over lap(Even if this ovlap is not perfect dont worry, when you flatten the ring you wont notice.. look here


Think of this next process as a circle, your starting point is the overlap. Start your work going to your left. And end your work on the overlap.

Put the ring back in the grinded area on your steel plate, give the overlap a hard strike.
After that use the stake to flatten the left side of the ring (Not the over lap) Then flatten the right side of the ring (not the over lap) and then give that over lap another hard hit. The purpose is to flatten the whole ring, and if you perform these steps in the same repeated pattern you will get continous good results and you will start to work faster.


Heres your flat ring...

Experience and learning from such defines maturity, not a number of age


Last edited by Christopher VaughnStrever on Wed 13 Oct, 2010 8:02 am; edited 2 times in total
View user's profile Send private message
Thom R.


Location: Tucson
Joined: 26 Jul 2007
Reading list: 30 books

Posts: 630

PostPosted: Tue 12 Oct, 2010 3:59 pm    Post subject:         Reply with quote

This is cool..... was wondering what you were up to with your mail project! Did you just snip to create overlap by eye?

I ask because as you know I have been on a parallel track. I am wondering whether I could use a wood mandrel that was slightly oval such that I could just rip the coil with the cutting blade on the dremel straight down a line, then squeeze the rings together so that the wire overlaps and yet the rings are still circular.
View user's profile Send private message
Christopher VaughnStrever


Location: San Antonio, TX
Joined: 13 Jun 2008
Reading list: 1 book

Posts: 382

PostPosted: Wed 13 Oct, 2010 5:59 am    Post subject:         Reply with quote

Hey Tom, I have to run a few errands (just got into work) and when I get back I'll answer your questions with more detail

in the mean time...

A wood mandrel is not a good idea, wood warps and will distort your rings. Unless you used a sepreate wood mandrel for every coil which would get costly, I do like the oval idea though. Even then oval would become very difficult to mold the wire around to mtch the that oval shape, but not impossible.

many people Cut the ring then Close the ring. I dont like this idea so much because cutting 18gauge wire Is Super easy to snip apart, a dremel cutting blade is over kill and could potentily cost a few bucks for replacing blades, but do-able for some people.

My one tip would be "don't worry so much about perfect circular rings. The end piece will look awsome with a rough feel as each ring may appear slighlty imperfect of a perfect circular shape.

Experience and learning from such defines maturity, not a number of age


Last edited by Christopher VaughnStrever on Wed 13 Oct, 2010 8:17 am; edited 1 time in total
View user's profile Send private message
Sander Marechal


Location: The Netherlands
Joined: 04 Dec 2009
Reading list: 17 books

Spotlight topics: 1
Posts: 671

PostPosted: Wed 13 Oct, 2010 7:10 am    Post subject:         Reply with quote

Christopher VaughnStrever wrote:
More updates to come in a few hours


Your few hours were up hours ago! Big Grin I'm anxious to see the rest.

The Knights Hospitaller: http://www.hospitaalridders.nl
View user's profile Send private message Send e-mail Visit poster's website
Christopher VaughnStrever


Location: San Antonio, TX
Joined: 13 Jun 2008
Reading list: 1 book

Posts: 382

PostPosted: Wed 13 Oct, 2010 8:58 am    Post subject:         Reply with quote

Ok sorry about that Loooooong few hours delay but lets get back to things shall we

Now that we have a flat ring we have to make the punch... This is what I hated and spent days upon funds trying to figure a soulution. That original thread that is linked in the first post gives the best answer (Of which I recieved the knowledge of being able to type this), here is the part number...

It is a Dremel™ “engraving cutter”, part number 105 Or you can buy part number 106
heres the thing Part number 105 and 106 come in a $15 engraving package. Lowes sells that package. Lowes does sell part number 107 by itself but that part is too weak for some reason, it breaks. Or you can go to Home depot and buy part number 106 for $4 here is a link incase you need to order it online. But go ask your hardware store they may be able to order the parts in for you and therefore you will negate shipping costs....
http://www.homedepot.com/webapp/wcs/stores/se...key=Search

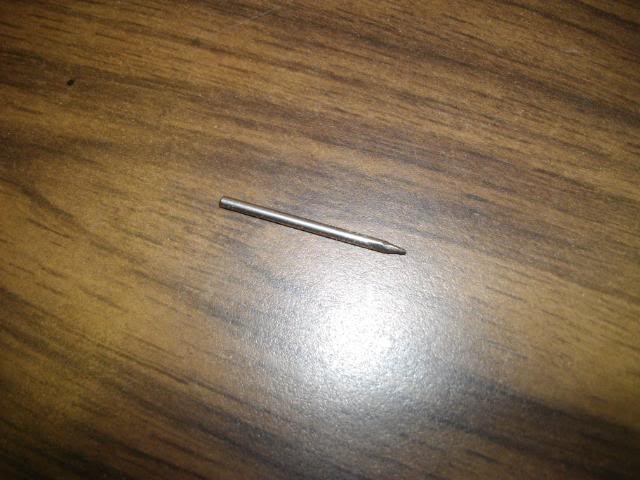
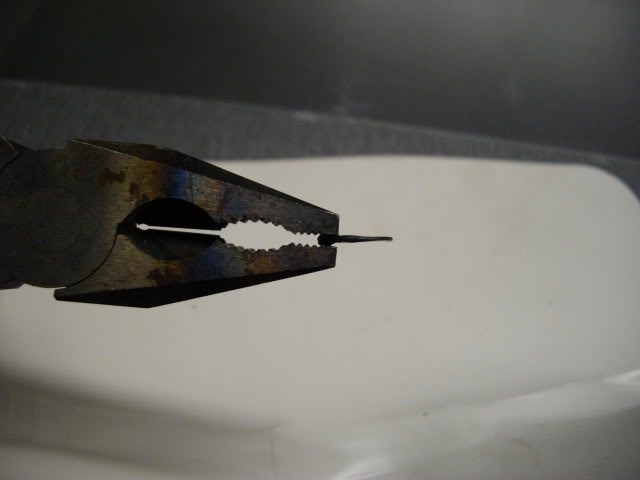
Now that you went to the link and saw the item, go buy it, that round ball on the tip, snap it of with your pliers It is very easy to do so, you will notice that the flat end is perfect to start slitting holes in your rings, After 30 or even far less rings you will find that the end of that punch will snap off! Dont panic, Use your grinder that I keep telling you "that you will need" and grind (taper) off the sides, dont even grind the tip much at all, here is a look...


You can see that the punch is Flat rather than a point, If you grind your punch to a point it will break over and over


Before you can use that punch, you will need to drill a hole in your steel plate

(11) 1/16 drill bit $3~$4


And then drill that hole..


Now remember how you hammered the ring overlap about 6 times? (Twice in each step) Well you propably work harden'd that overlap. make it soft again and you can eith just heat up all the overlaps (Which I wouldnt do) Or just put the rings on your coat hanger or your bowl and heat them all up in one bunch. Be sure to heat them All up, I made the mistake and missed some and well they broke my punches (I call them punches but they actually split the metal.
I like holding the small punch (rather stick the punch into something longer) Because I need to be accurate and with it small it fits in my fingers and does the job. Remember Accurate, Consistent, Repition = Good results and you will quicken your pace in no time
Line it up... get ready...


Tap twice, take the punch away and see how far it went into the ring, not all the way?


and another look...


Then hammer easily, dont smash your ring up, Or your fingers. Just tap that punch. You will feel in your hands when the punch splits the ring. This step is like the rest, the work just flows eaisly in time


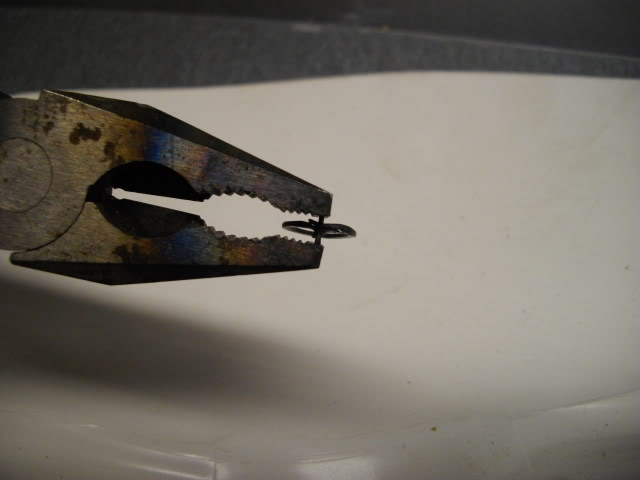
Notice here how I have the pliers holding the overlap of the ring very close to the hole just made. When you take the ring off of the punch the ring will not come away easily. I have found that by holding the ring with the pliers at that spot and then slowly and gently rocking the punch with my other hand the ring will eventually loosen and come free without breaking the punch.


What a day, Mug of Ale... bar-b-cue Smokin... and making some mail... These days I enjoy....

Experience and learning from such defines maturity, not a number of age


Last edited by Christopher VaughnStrever on Wed 13 Oct, 2010 1:38 pm; edited 3 times in total
View user's profile Send private message
Christopher VaughnStrever


Location: San Antonio, TX
Joined: 13 Jun 2008
Reading list: 1 book

Posts: 382

PostPosted: Wed 13 Oct, 2010 9:06 am    Post subject:         Reply with quote

Ok so here is the hole that was made... You cannot see it in the picture, but where the hole is, on the opposite side the metal from the ring is still there, it simply protrudes out a bit. We did not remove metal as that can and will make the overall integrity weaker.


You will next need tiny 20gauge mild steel wire to make rivets out of. This item is at lowes and home depot

(12) Rivet Wire $11 For more then you will need

This stuff is brittle in that by bending the wire it will snap, therefore it must be heated so that you can use it as a rivet


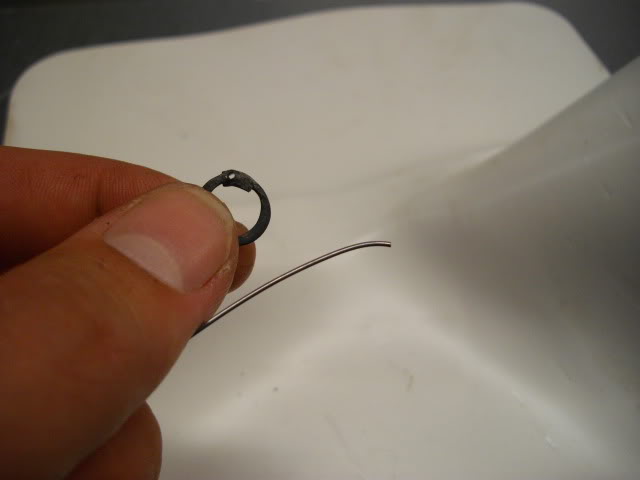
Here is wire and ring in hand..


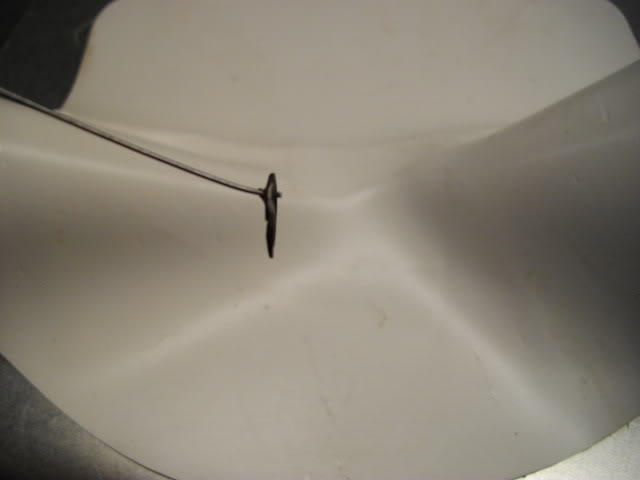
Put the wire through the hole...


Snip off excess wire like so... Dont worry about too much wire making up the rivet it will all be crushed


And there is your soon to be rivet


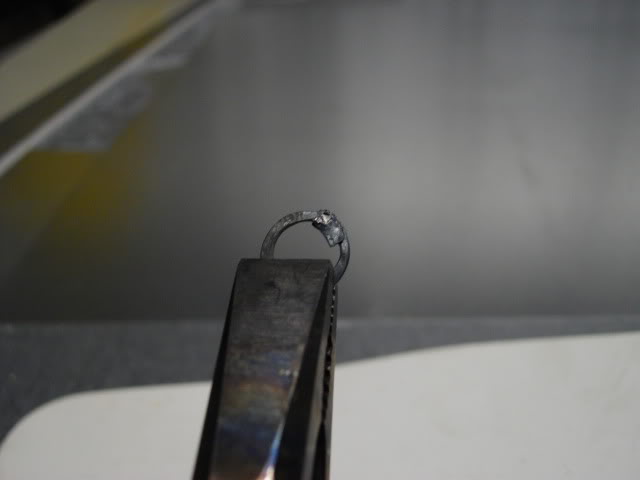
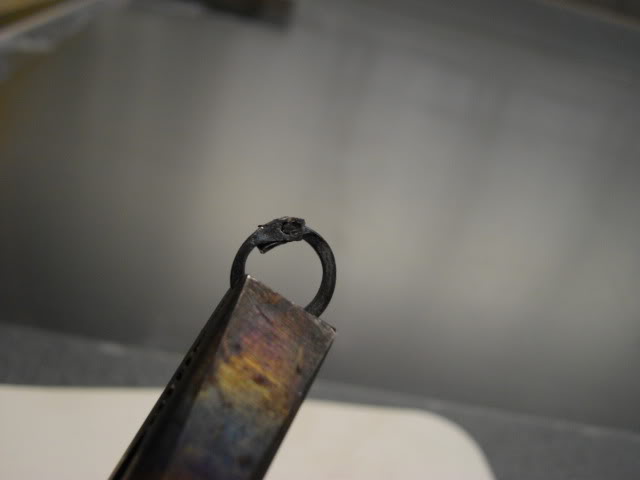
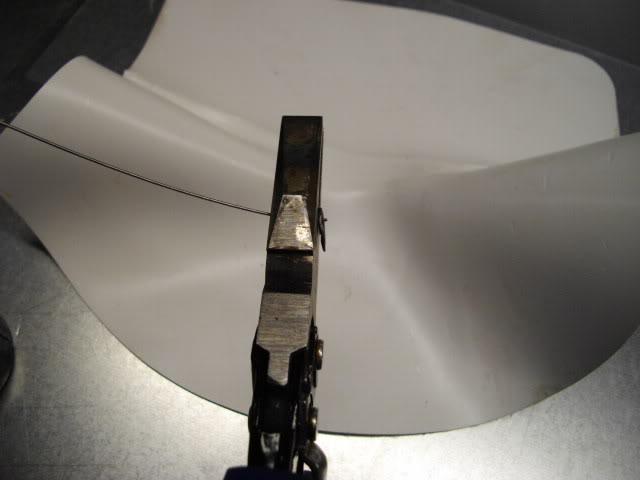
I just used the torch to heat up the rivet. The trick here is to be quick and close the pliers on the rivet while it is still red from the torch... This picture shows the rivet cooling


You do not need to drill holes in your pliers, just smash the rivet. if you do I hope you can find a drill bit small enough... and I hope that you can transfer the red heated ring and rivet onto the exact position to get it right, cause it is too hard for me..


Smash...


Now it may look un-even but as i am going to be sewing these pieces to padded areas I am not bothered by it. If i was stupid enough to wear this against my skin (Or any mail against my skin) Then I would feel the need for further re-refinement.

If the ring over lap is too un-even for you just use your pliers to make the overlap more so even. Its metal you can form it.
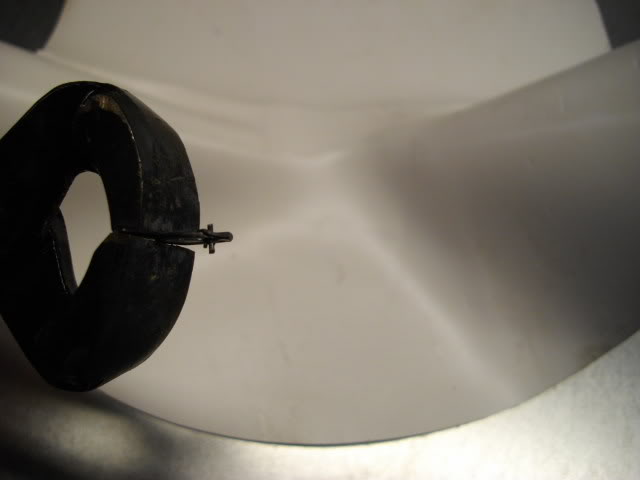
And here is both sides of the ring...


Experience and learning from such defines maturity, not a number of age
View user's profile Send private message
Christopher VaughnStrever


Location: San Antonio, TX
Joined: 13 Jun 2008
Reading list: 1 book

Posts: 382

PostPosted: Wed 13 Oct, 2010 12:04 pm    Post subject:         Reply with quote

Now I hope you have a knowledge base to attach these rings in a 4-in-1 pattern... If not then request on this thread that I make that and I will....

here is the finished look up close...
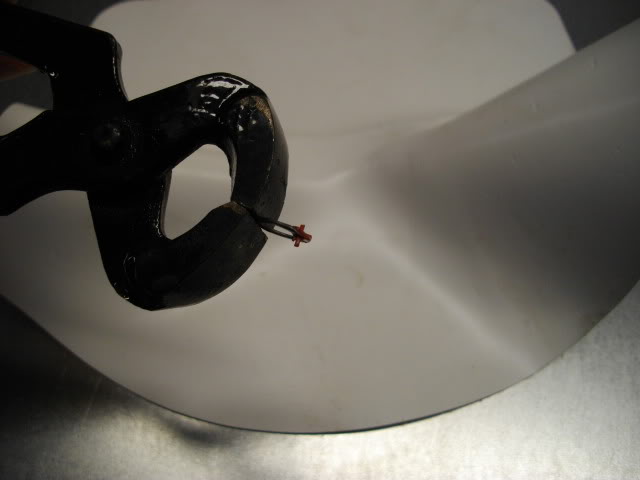

And from 2~3 feet away. Just as if someone you were walking by would see...


Another view...


I have not assembled my full required piece(s) As I am making voiders for my arms, rear legs, and lower buttocks

I hope you have enjoyed, and can come away feeling that it is possible for even a novice to be able to craft riveted mail...

So the price... Assuming you have a power drill...

Total cost $120 If you were able to use things (hammer, 2x4, 4x4, and other small items)
Total cost if you had to buy everything mentioned $164
+$50 for 15lbs of mild steel wire

Either way you look at it.... Its cheaper to make it then buy it, Even if your just buy voiders... But of course it will take time to make it all. Have fun

Experience and learning from such defines maturity, not a number of age
View user's profile Send private message
Sam Gordon Campbell


Location: Australia.
Joined: 16 Nov 2008

Posts: 678

PostPosted: Wed 13 Oct, 2010 6:18 pm    Post subject:         Reply with quote

Awesome, now I just need the time and patience to build a hauberk over 2-3 years Laughing Out Loud
Member of Australia's Stoccata School of Defence since 2008.
Host of Crash Course HEMA.
Founder of The Van Dieman's Land Stage Gladiators.
View user's profile Send private message
Scott Hrouda


Location: Minnesota, USA
Joined: 17 Nov 2006
Likes: 15 pages
Reading list: 87 books

Posts: 643

PostPosted: Fri 15 Oct, 2010 7:24 pm    Post subject:         Reply with quote

Thank you for the very detailed post Christopher. It should be a great help to those who have the urge for a little DIY. I experimented with riveted mail a long while ago and ended up with a patch about the size in your final photograph. Then, I saw something else shiny and got distracted. Blush
...and that, my liege, is how we know the Earth to be banana shaped. - Sir Bedevere
View user's profile Send private message


Display posts from previous:   
Forum Index > Off-topic Talk > You can make riveted mail!DIY Project
Page 1 of 1 Reply to topic
All times are GMT - 8 Hours

View previous topic :: View next topic
Jump to:  
You cannot post new topics in this forum
You cannot reply to topics in this forum
You cannot edit your posts in this forum
You cannot delete your posts in this forum
You cannot vote in polls in this forum
You cannot attach files in this forum
You can download files in this forum


All contents © Copyright 2003-2024 myArmoury.com — All rights reserved
Discussion forums powered by phpBB © The phpBB Group
Switch to the Basic Low-bandwidth Version of the forum