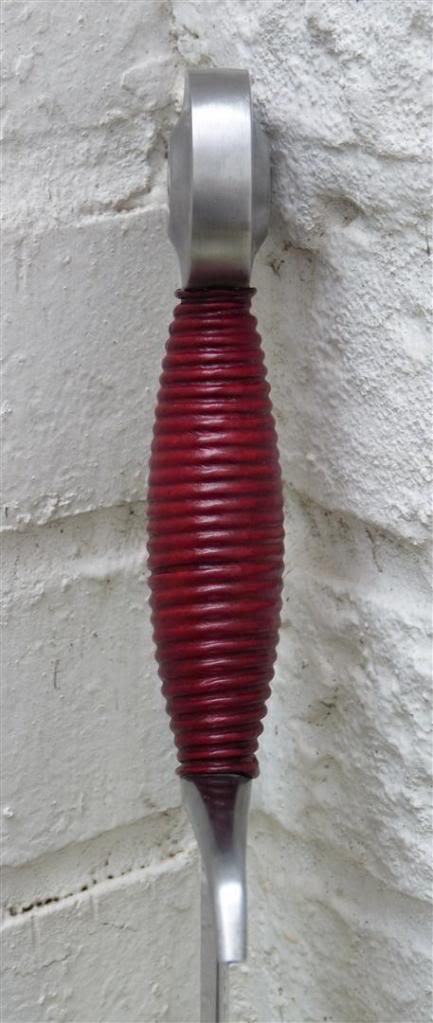
For having tried chamois before I got my hands on a cheap veg tan leather supply, I know that it can be tricky to handle.
There is something I want to try at some point...maybe not orthodox but it might work to bring out the pattern of a grip or tooling in leather...or even out colour between different leathers. I used to paint miniatures, and I used a technique called ink wash to bring out details in a model (basically a heavy dilution of a slightly darker colour than the base colour). I wonder if that could work on leather but that could potentially bring a bit of depth as the darker colour sets only in the recesses. Just something to think about and try at some point.
Julien,
That’s fantastic, especially for a first attempt. I can’t wait to see what number 20 looks like. Do you have any plans for the scabbard yet?
That’s fantastic, especially for a first attempt. I can’t wait to see what number 20 looks like. Do you have any plans for the scabbard yet?
Hey Ryan,
Thanks mate!
Yes I do, I always have some scabbard design in mind especially when I'm sitting in the office :)
I want the all thing for that one: tolled leather, metal throat (steel), metal shape (steel), home made steel buckles too. I started on a poplar core, and once it's done, I'll test the balance of the sword against my hip making it hang from cords before deciding for a final design. It is not a long nor heavy sword, so a single suspension point from below the scabbard mouth might be enough, if not, I'll make another anchorage point in the middle, with a metal bracket. It's going to be red to match the grip, that I'm sure of.
Cheers,
J
Julien,
your sword is looking great .
Thanks for the write up , I am always amazed at the results that can be achieved in a week of damned hard work.
At the end of the class I give an option of finishing (as in handle assembling the sword) and most people do just that. Julien had a very specific sword in his mind at the begining of the class and decided to come and spend an extra day or two getting it rite and I think he has .
I'll post up some pictures of the class and if any more pictures come in .
Achieving something like this as a first sword is quite a feat julien you should be proud .
I find this class incredibly satisfying to teach. It brings together my knowledge as a craftsman as well as calling on the ability to gently coerce the near impossible out of people which I learned working as an engineer on scrap heap challenge (UK junk yard wars).It was a fun week of hard graft !!!
thanks to all the students for a great week .
All the best Owen
| Owen Bush wrote: |
| Achieving something like this as a first sword is quite a feat julien you should be proud . |
Thanks Sensei :)
Well I have to confess I am a bit!...as my goal for the course was initially to grasp a few basis skills related to the craft, but it did so much more and ending up with a such a sword was not something I expected. It is an humbling experience too, as I am now in a much better position to appreciate the amazing work that you experienced smiths out there are able to produce. So again thanks for a huge leap forward and looking forward to come back to the shop for more.
Cheers,
Julien
Wow, Julien, and everyone else, your swords look great. Owens course is looking more and more tempting.
| Julien M wrote: |
Also, I think aesthetically it suits the sword really well and I don't regret the extra amount of effort it took at all.
 |
My eye continues to be drawn to this particular photograph over all others. I can't get over the beautiful symmetry and proportions. :)
Just finished a poplar scabbard core for the sword.
Once I have a design in mind, I'll move on to leather work. I want metal lockets for this one (a single one below the scabbard throat with a ring on each side, as the sword is not very long nor heavy). I'll probably mix influences from earlier scabbards (with a round end at the guard, extending above the wood core, a feature typically found on XIIIth and XIVth century scabbards, but with mountings and belt suspensions belonging to the XV century. I have seen this configuration on occasions on period art and I think it should fit this sword well.


Once I have a design in mind, I'll move on to leather work. I want metal lockets for this one (a single one below the scabbard throat with a ring on each side, as the sword is not very long nor heavy). I'll probably mix influences from earlier scabbards (with a round end at the guard, extending above the wood core, a feature typically found on XIIIth and XIVth century scabbards, but with mountings and belt suspensions belonging to the XV century. I have seen this configuration on occasions on period art and I think it should fit this sword well.


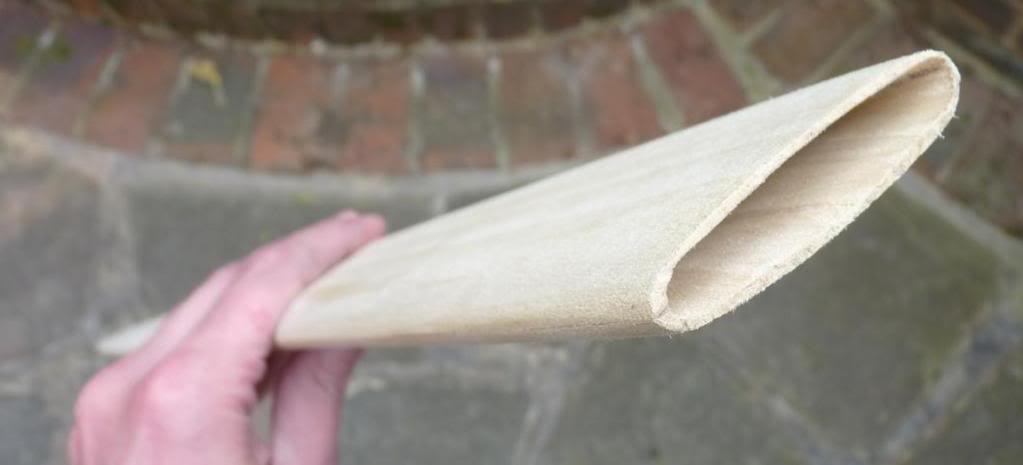
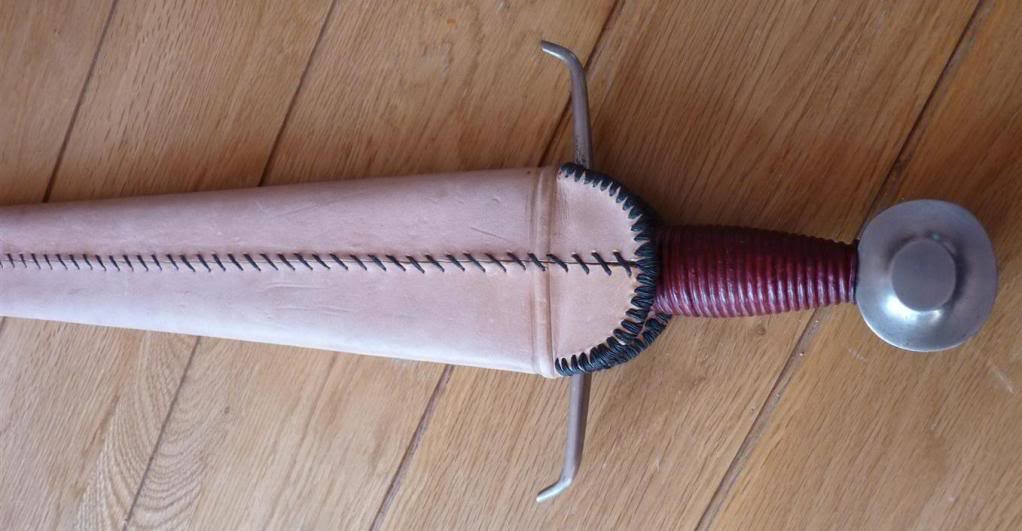
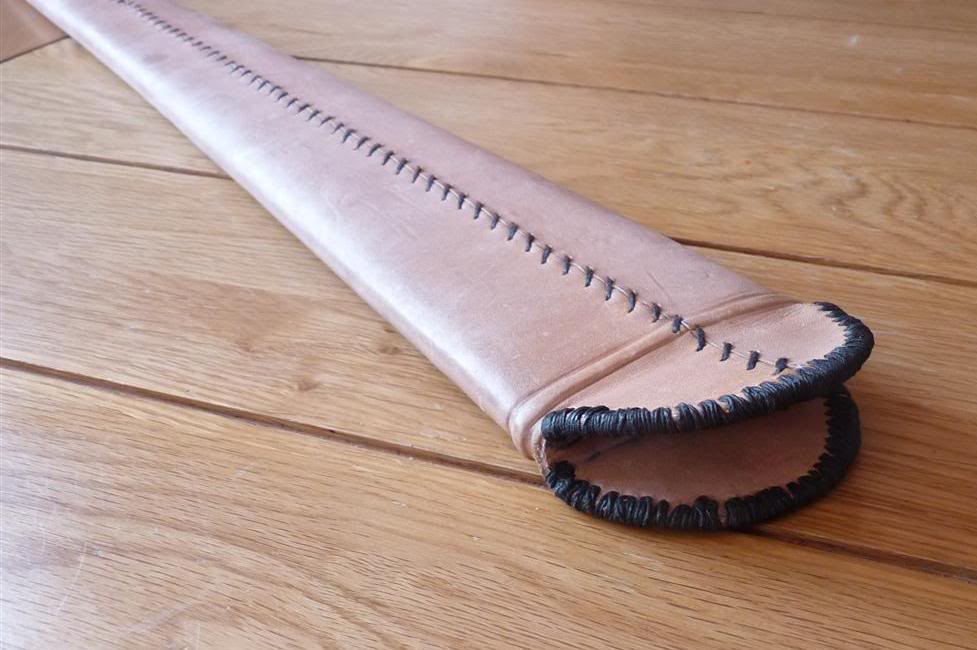
At last a project in the works! Made significant progress on the scabbard these past 2 days. Leather has been cut to size, molded, added a riser, and cut sideways to produce a "roping effect". Cut the piece of leather for the inside of the flap and sewed back and around.
I'm happy with it so far, and I'm getting ready for the most extensive tooling I've done so far (I want this scabbard to be decorated in the knife sheath fashion, with dragon beasts, Gothic arches and so on. Now it's all very good, I've got my design on paper...but the more tooling the more chances to mess it up (especially since I'm working with virtually anything but leather carving tool since I can't manage to work with regular swivel knives, it just does not work for me. So anything goes, ranging from clay wooden tools, nails scissors, mostly wax carving tools and more often than not ending up grabbing the first thing at hand, which often is the tip of a kitchen knife.. Leather is not a very forgiving material to say the least...it will remember the slightest mistake.
As a matter of fact I was two steps away from stripping the core back to bare in a moment of rage. Had just finished spending 4 hours cutting the leather and stitching the back, forming a nice raiser and then proceeded immediately to ruin it with these uneven and messy incisions on the top raiser. I blame my tools (and the fact that I need better bloody glasses these days)! as I can't get around using a common swivel knife (the ones with the U end, to rest your finger on it). Eventually after overworking the leather, sanding it (!) I managed to achieve a result likely to come out well after dying and polishing...but it came very close to a complete disaster. If was not fully satisfied with this raiser, I'll change my design, will remove the cord and get rid of it, and make a metal mount with a ring on each side to cover it instead of using a leather strip to hang the sword. Both work well aesthetically on paper.
Pictures attached below. Let me know what you think!


I think it's great, i love thin wooden cores
looking forewards to the leather work
looking forewards to the leather work
| Ben Anbeek wrote: |
| I think it's great, i love thin wooden cores
looking forewards to the leather work |
Thanks Ben, appreciate your comment as your own scabbards are absolutely top notch.
Changed my design again in the last 5 minutes. I wanted two suspensions point, but hanging the sword to test made it obvious that one suspension below the throat it the way to go (the sword is very light and the typical scabbard knot is enough to hold the scabbard leaning slightly forward for an easy draw).
One hour of carving. I'm very slow as try to figure out the best tools and making up the technique as I go along. Best combination for me appears to be swivel knife (after all I've said about those...I'm not holding it as it is intended to though) and clay wooden tip to open the cut).

Lovely start Julien, it is already a damn good scabbard and if it gets drenched in the level of decoration I suspect you will do it will be a stunner.
To be honest I hate swivel knives and most of my tools are dental or surgical rather than leather.
Give me a call and we can arrange an evening for you to come up and I will show you the metalwork side.
Tod
To be honest I hate swivel knives and most of my tools are dental or surgical rather than leather.
Give me a call and we can arrange an evening for you to come up and I will show you the metalwork side.
Tod
Absolutely stunning work all around, Julien.
Thanks Einar!
Cheers Tod. That's an offer I will find very hard to turn down!
You can bet I'll be in touch soon :)
Cheers Tod. That's an offer I will find very hard to turn down!
You can bet I'll be in touch soon :)
Beautiful! And I was going to use that exact same design on a scabbard chappe! You beat me to it!
| Owen Bush wrote: |
| Julien,
your sword is looking great . Thanks for the write up , I am always amazed at the results that can be achieved in a week of damned hard work. At the end of the class I give an option of finishing (as in handle assembling the sword) and most people do just that. Julien had a very specific sword in his mind at the begining of the class and decided to come and spend an extra day or two getting it rite and I think he has . I'll post up some pictures of the class and if any more pictures come in . Achieving something like this as a first sword is quite a feat julien you should be proud . I find this class incredibly satisfying to teach. It brings together my knowledge as a craftsman as well as calling on the ability to gently coerce the near impossible out of people which I learned working as an engineer on scrap heap challenge (UK junk yard wars).It was a fun week of hard graft !!! thanks to all the students for a great week . All the best Owen |
Congratulation for your skills as a teacher, you really squeezed out the impossible from newbies.
On the technical side, how did you obtain the diamond shape section on Julien's blade? Was it by grinding or from some special tooling or hammering technique?
| Bruno Giordan wrote: |
| On the technical side, how did you obtain the diamond shape section on Julien's blade? Was it by grinding or from some special tooling or hammering technique? |
Hi Bruno, Not sure your question is addressed to me or to Owen, but I'll clarify. Owen did not obtain the diamond shape section on my blade, I did (that's the point and the beauty of the course, you will do it yourself from scratch to finish!)
The technique taught by Owen involves a mix of both (I describe to all thing in detail in the original post). I spent 2 or 3 days on the anvil to set the basic geometry, then rough grinding, then heat treatment, then fine tuning/final grind, then polishing.
Lovely and impressive!
| Julien M wrote: | ||
Hi Bruno, Not sure your question is addressed to me or to Owen, but I'll clarify. Owen did not obtain the diamond shape section on my blade, I did (that's the point and the beauty of the course, you will do it yourself from scratch to finish!) The technique taught by Owen involves a mix of both (I describe to all thing in detail in the original post). I spent 2 or 3 days on the anvil to set the basic geometry, then rough grinding, then heat treatment, then fine tuning/final grind, then polishing. |
Hi Julien, my question was wether Owen has developed any special technique to set correctly most of the blade geometry before grinding.
I have understood that you did the hammering/grinding, but presumably you have been using techniques developed by Owen, which is what I was interested into.
This because I'm trying to devise a mean to do so by using half diamond shaped dies (not distally tapered), I just do not want to reinvent the wheel in the case somebody has already done it ...
Wow. The trip of a lifetime and you got a new toy out of the deal! Good for you! Thanks for sharing the journey here. Very very interesting.
Page 3 of 3
You cannot post new topics in this forumYou cannot reply to topics in this forum
You cannot edit your posts in this forum
You cannot delete your posts in this forum
You cannot vote in polls in this forum
You cannot attach files in this forum
You can download files in this forum
All contents © Copyright 2003-2006 myArmoury.com — All rights reserved
Discussion forums powered by phpBB © The phpBB Group
Switch to the Full-featured Version of the forum
Discussion forums powered by phpBB © The phpBB Group
Switch to the Full-featured Version of the forum