Great stuff Sean! I really really like this one.
Facet grip, clean pattern on the rainguard...you have not looked for the easiest approach and it really paid off. That's exactly the kind of work that draws me back to my workbench :) really looking forward to see the sword complete.
If you are willing to share, could you post a pict of you custom swivel knife?
Cheers,
J
| Julien M wrote: |
| Great stuff Sean! I really really like this one.
Facet grip, clean pattern on the rainguard...you have not looked for the easiest approach and it really paid off. That's exactly the kind of work that draws me back to my workbench :) really looking forward to see the sword complete. If you are willing to share, could you post a pict of you custom swivel knife? Cheers, J |
Thanks! I meant to get a shot of my chisel setup and forgot to do it. I'll get that ASAP and post. I thought folks might appreciate that trick :D
Looking good Sean!!! That pattern on the rain guard reminds me of a quilting pattern of a Byzantine soldiers kavadion (gambeson). Can't wait to see it finished!!!
| Luke Zechman wrote: |
| Looking good Sean!!! That pattern on the rain guard reminds me of a quilting pattern of a Byzantine soldiers kavadion (gambeson). Can't wait to see it finished!!! |
You can see it in a military context in the Triumph of Maximilian, too. It's probably one of those simple patterns that transcends culture, like the cup and ring.
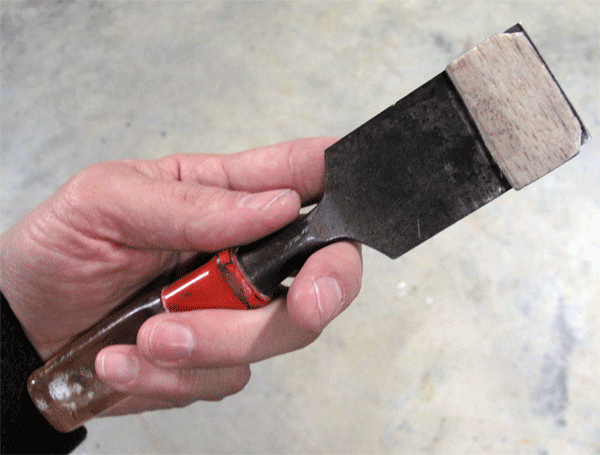
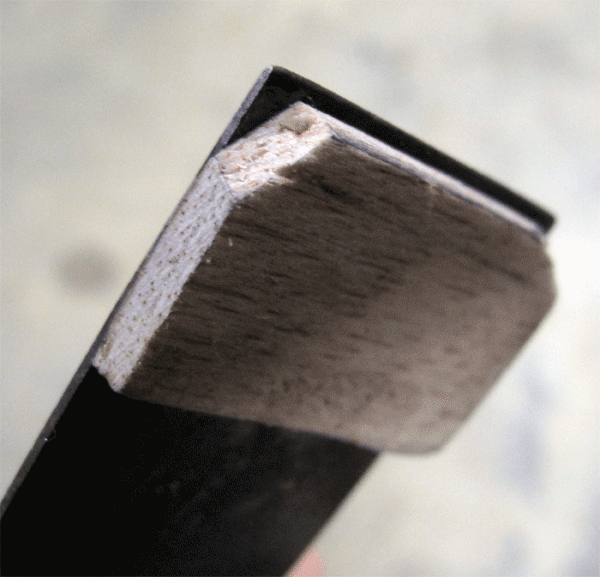
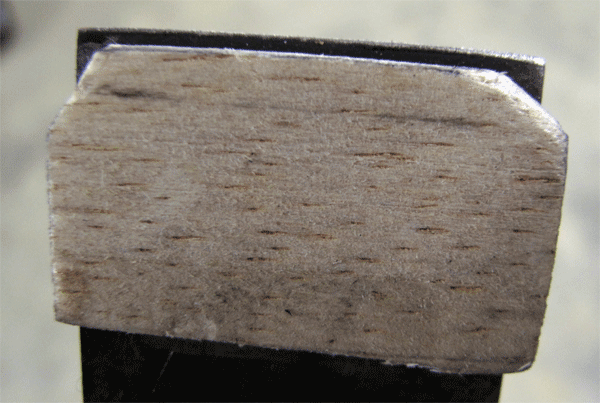
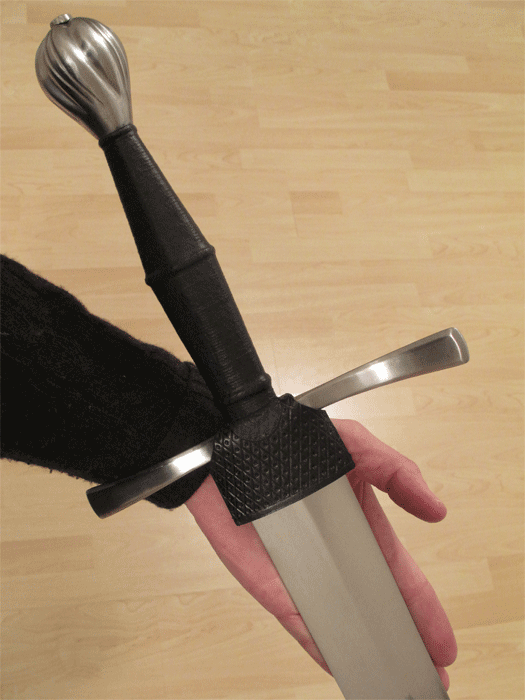
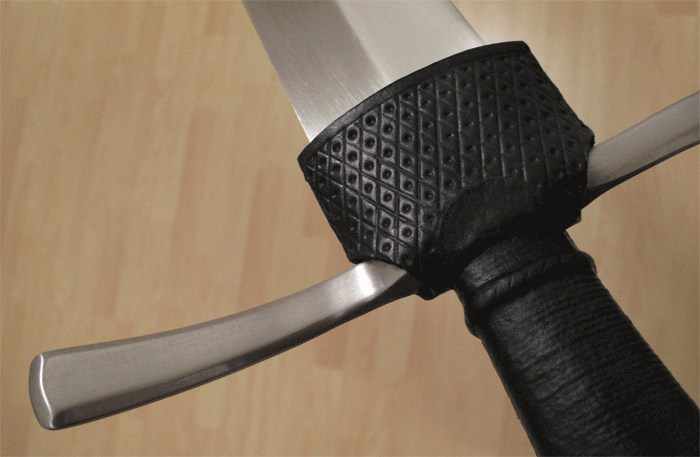
Here's the chisel I rigged for the leatherwork on the chappe. All you really need is a thin strip of wood. I used this piece as I found it just because it was the right thickness (about .25"). I clipped the corners so I could more easily see the ends of the blade--those have to be placed precisely so they don't stray into the horizontal band at the bottom of the chappe.
 Attachment: 133.21 KB
Attachment: 154.63 KB
Attachment: 119.84 KB
ah nice technique on the chisel - thanks for sharing that tip! I like how your project is turning out. nicely done all around. you really have gotten the chappe making down. looks good.
not to hijack but here is where I am with mine. I am going for more of a Dordogne River find look with style 11 cross. have been trying to figure out a facted pear pommel but in the end I think I am going to keep the original and mate it with the t-11 cross, waist the upper part of the grip, new cord wrapped leather cover grip, with wire wrap on that waisted upper half.

not to hijack but here is where I am with mine. I am going for more of a Dordogne River find look with style 11 cross. have been trying to figure out a facted pear pommel but in the end I think I am going to keep the original and mate it with the t-11 cross, waist the upper part of the grip, new cord wrapped leather cover grip, with wire wrap on that waisted upper half.
That's an impressive cross! Tell us how you made that....
make it? :lol: its my usual hacker job on an old windlass cross (can't remember the name of the sword). it was a fantasy scottish claymore SLO. too big for anything until this one. but is appropriately proportioned with this fat type XVIIIa. I had it in mind when I bought the Erbach and I think it works aesthetically. All of my 15th c stuff is 9 and 11 crosses with J, V, and T pommels. (Albion Constable for example). I thought it would be cool to add a beater Windlass sword for less than 200 bucks to the mix.
I have another one of these I am going to do as a fantasy sword as well for friend who is into that kind of stuff. as you mentioned - I think it's one of the better Windlass blades in awhile. tr
I have another one of these I am going to do as a fantasy sword as well for friend who is into that kind of stuff. as you mentioned - I think it's one of the better Windlass blades in awhile. tr
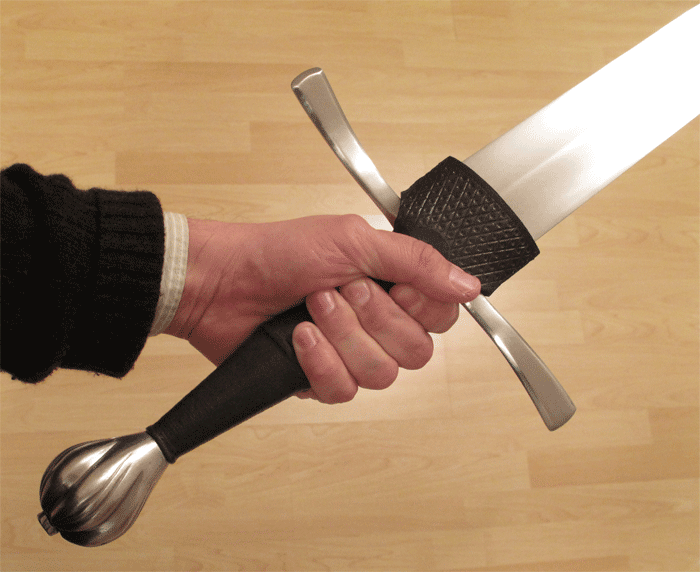
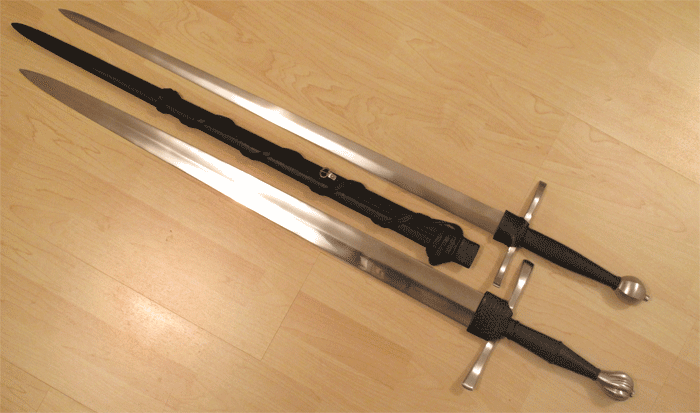
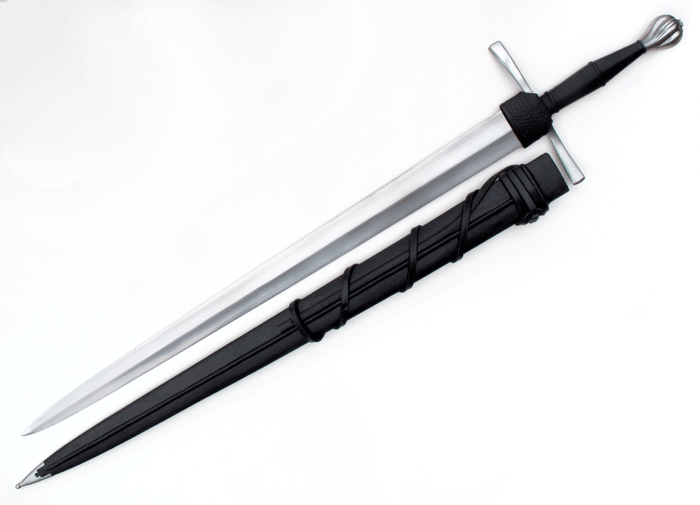
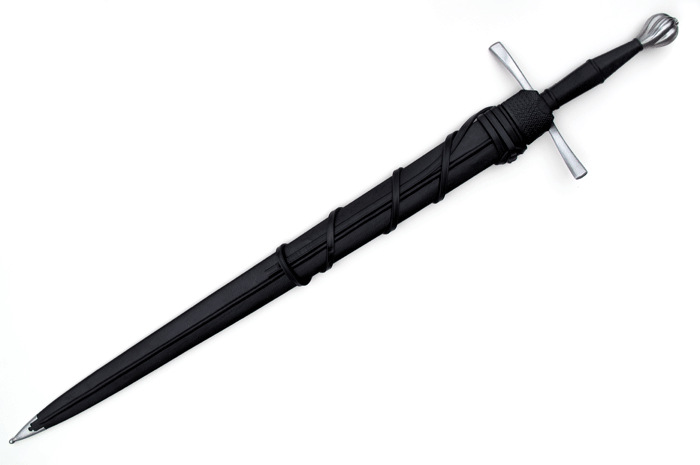
The sword is finished but for some minor finish work on the peen block. Here are a few quick shots. I'll get a proper series of photos after I finish the scabbard and suspension--maybe another week or two. You can see the difference between my last Type XVIII project--a riding sword--and this war sword. Similar length and style, but very different in the hand. Both feel right for the blade type. This broad blade feels very authoritative but well-balanced.
Attachment: 182.93 KB
Attachment: 173.31 KB
Attachment: 171.21 KB
Attachment: 160.14 KB
Last edited by Sean Flynt on Tue 02 Feb, 2010 8:24 am; edited 2 times in total
that is some brilliant work Sean!
I am green with artistic jealousy. I keep meaning to try my hand at some sword modifications, but then I realize that I don't have the equipment to re-peen the hilt, I get too nervous about bending a cross, etc.
It's great to see your work so I can get the itch to try it again for myself.
I am green with artistic jealousy. I keep meaning to try my hand at some sword modifications, but then I realize that I don't have the equipment to re-peen the hilt, I get too nervous about bending a cross, etc.
It's great to see your work so I can get the itch to try it again for myself.
Thanks! Peening scares me too. I'm still figuring it out, and I wonder if Windlass swords are not the best blades to learn with. Their tangs seem to be pretty hard. But you'd be surprised how easy it is to recurve a cross like this. All you need is a propane torch, hammer and $30 anvil from Harbor Freight. The detail work takes much longer--little files, mostly.
The way you turned that 'cheap' sword in a much more elaborate and beautiful one is just outstanding, Sean. I really like your improvments. Congratulations !
Cheers,
David
Cheers,
David
Last edited by David Etienne on Tue 02 Feb, 2010 9:36 am; edited 1 time in total
Sean,
You should catalog and publish a record of your projects. You have inspired many people on the forum to modify stuff, I think you could reach more people with a feature on your work.
Jai
You should catalog and publish a record of your projects. You have inspired many people on the forum to modify stuff, I think you could reach more people with a feature on your work.
Jai
| Jason Mather wrote: |
| Sean,
You should catalog and publish a record of your projects. You have inspired many people on the forum to modify stuff, I think you could reach more people with a feature on your work. |
Like this?
[ Linked Image ]
The Workbench: An English Tuck (Estoc)
An article by Sean Flynt
[ Linked Image ]
The Workbench: A Confederate Foot Officer's Sword
An article by Sean Flynt
Also note that there's a whole section of Spotlight Topics named "Projects and Do-it-Yourself" that keep track of a lot of these topics.
The problem with my old projects is that they're my learning projects. :D I look back and think, "why did I do it that way?" I'll know I've arrived when I can't improve from one project to the next (in other words, "never").
I find that it helps to do several similar projects in a row. You not only immerse yourself in a given period, which helps you get a feel for the aesthetic, but you also get to refine specific technical skills--re-curving a cross or making a tubular chappe are good examples of this. This has also helped me gain insight into construction and design. Do something once and it's easy to just get it done and forget about it. After the third or fourth time, I start to understand why something should be done a particular way.
Given my interests, I will probably want to learn welding eventually. That would open up some wonderful possibilities. Quick, somebody, tell me that I can get started with $50 and ten minutes of self instruction (and NOT burn my face off). :lol:
Sean, unledd you got very girly hands that seems to be a quite massive blade! Very nice job though. It's nice to see the chapes you make, they look really nice. Gives an extra touch to the whole impression of the sword.
And why would you want to weld stuff? I admit it comes in handy when you need to repair your car or stuff like that.. Learn forgewelding! Just kidding. An electrical welding machine is not that expensive and most info you need can probably be found online. Get some scrap metal and start practice. The drawback is all the slagintrusions unless one is careful. Gaswelding is better but a bit harder. Do you know any bikers or truckers? They usually know people who weld stuff :)
And why would you want to weld stuff? I admit it comes in handy when you need to repair your car or stuff like that.. Learn forgewelding! Just kidding. An electrical welding machine is not that expensive and most info you need can probably be found online. Get some scrap metal and start practice. The drawback is all the slagintrusions unless one is careful. Gaswelding is better but a bit harder. Do you know any bikers or truckers? They usually know people who weld stuff :)
Yeah, it's a big sword. Not especially long, but very broad. The hollow grinding makes it feel lighter than it looks. I haven't weighed it yet, but it'll certainly be over 3 lbs.
Where I live, probably half the people in the neighborhood can weld :D I could probably get welding done inexpensively, but there's nothing like the smell of your own burning flesh to make you appreciate the work. The challenge is a big part of the attraction in these projects. But I have a guard that could use a single weld to be more historically authentic. That would be an interesting test-project for later this year. All I would need is the weld. All cleanup and filing I can do myself.
Where I live, probably half the people in the neighborhood can weld :D I could probably get welding done inexpensively, but there's nothing like the smell of your own burning flesh to make you appreciate the work. The challenge is a big part of the attraction in these projects. But I have a guard that could use a single weld to be more historically authentic. That would be an interesting test-project for later this year. All I would need is the weld. All cleanup and filing I can do myself.
Ran out of battery before I could get oblique shots, but at least there are some of those above to get a sense of the subtleties of the cross. I decided not to make a buckle. I'm not going to be wearing the piece, but a bare scabbard looks wrong somehow so I just mounted the belt and wrapped it in authentic fashion.
Attachment: 104.03 KB
Attachment: 35.52 KB
More shots please!
This might be the best work I've seen from you here Sean...
Why stop at the buckle though??? Compared to the amount of work invested in this project this makes little sense to overlook that very last bit :)
Anyway...cheers and well done.
J
Is that belt another dog leash?
This might be the best work I've seen from you here Sean...
Why stop at the buckle though??? Compared to the amount of work invested in this project this makes little sense to overlook that very last bit :)
Anyway...cheers and well done.
J
Is that belt another dog leash?
Good work Sean!
You captured style and period nicely. You´ve got a good eye for character.
You captured style and period nicely. You´ve got a good eye for character.
Page 3 of 4
You cannot post new topics in this forumYou cannot reply to topics in this forum
You cannot edit your posts in this forum
You cannot delete your posts in this forum
You cannot vote in polls in this forum
You cannot attach files in this forum
You can download files in this forum
All contents © Copyright 2003-2006 myArmoury.com — All rights reserved
Discussion forums powered by phpBB © The phpBB Group
Switch to the Full-featured Version of the forum
Discussion forums powered by phpBB © The phpBB Group
Switch to the Full-featured Version of the forum