Info Favorites Register Log in
myArmoury.com Discussion Forums

Forum index Memberlist Usergroups Spotlight Topics Search
Forum Index > Historical Arms Talk > I Finished a Project (lots of pictures)DIY Project Reply to topic
This is a standard topic  
Author Message
Nathaniel C.


Joined: 26 Aug 2008

Posts: 45

PostPosted: Wed 04 Nov, 2009 9:44 pm    Post subject: I Finished a Project (lots of pictures)         Reply with quote

I've made a couple posts on this forum but nothing more. So I suppose you could consider this my introductory thread. I've been a member of the SBG forum for a while but I've always appreciated myArmoury as a source for slightly more academic information. As my interests broaden in that direction I figured it might be good to truly "join" this forum in earnest beyond just making an account.

So, on to what the thread is really about, my most recent project that I'd like to share.

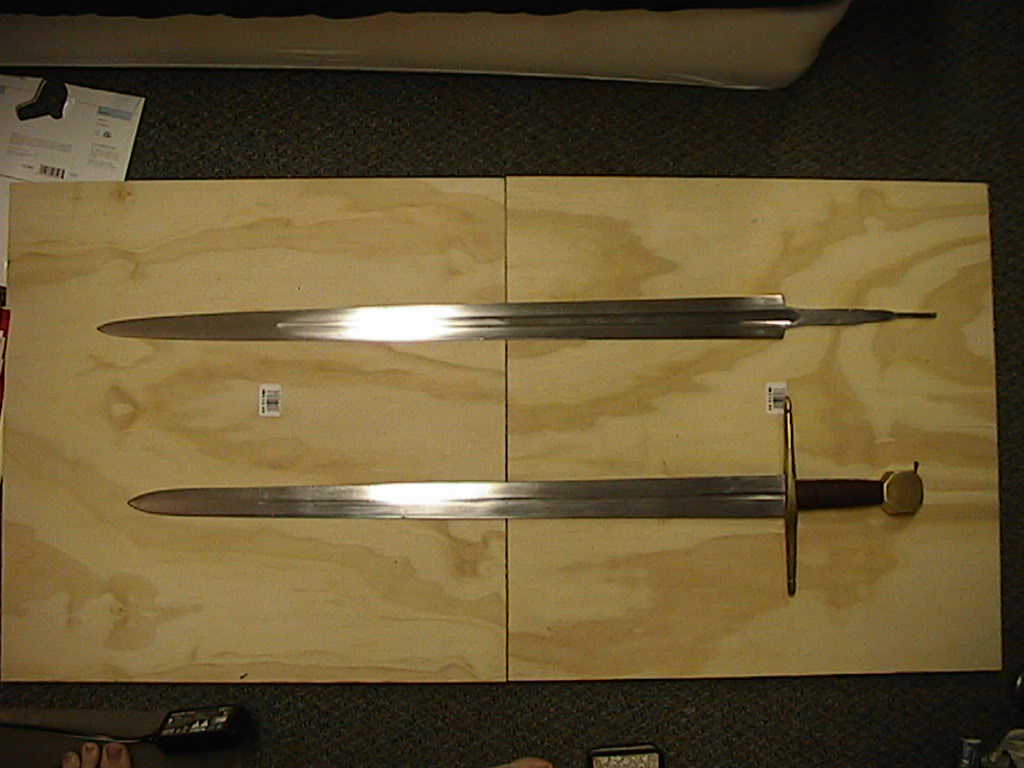
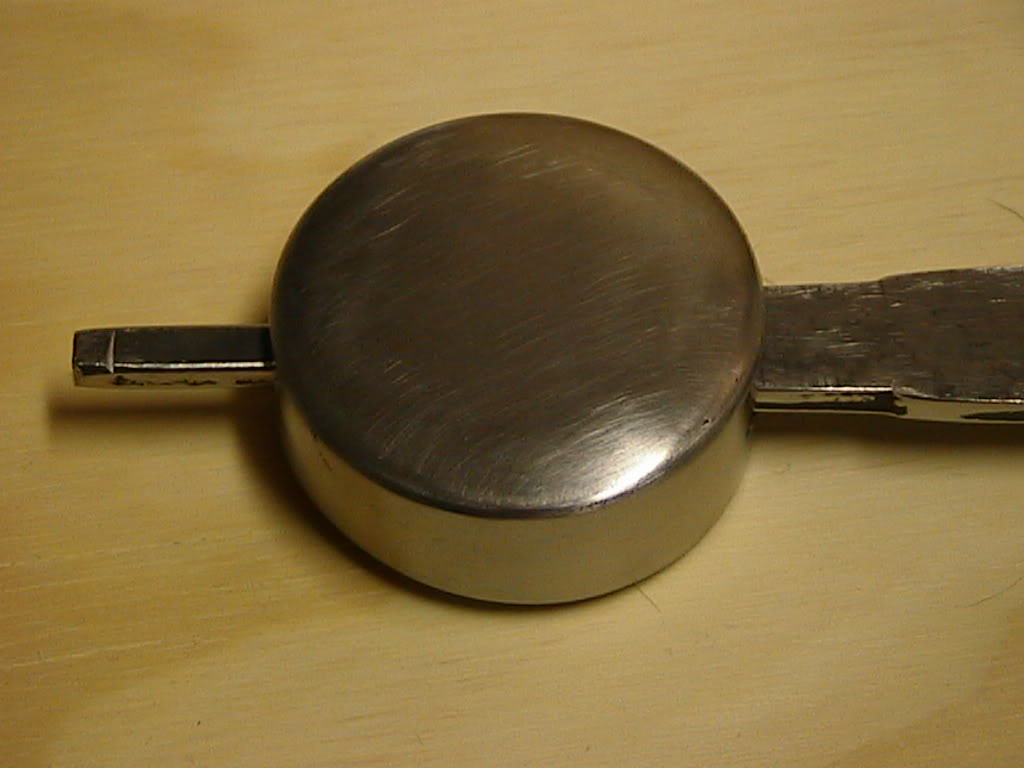
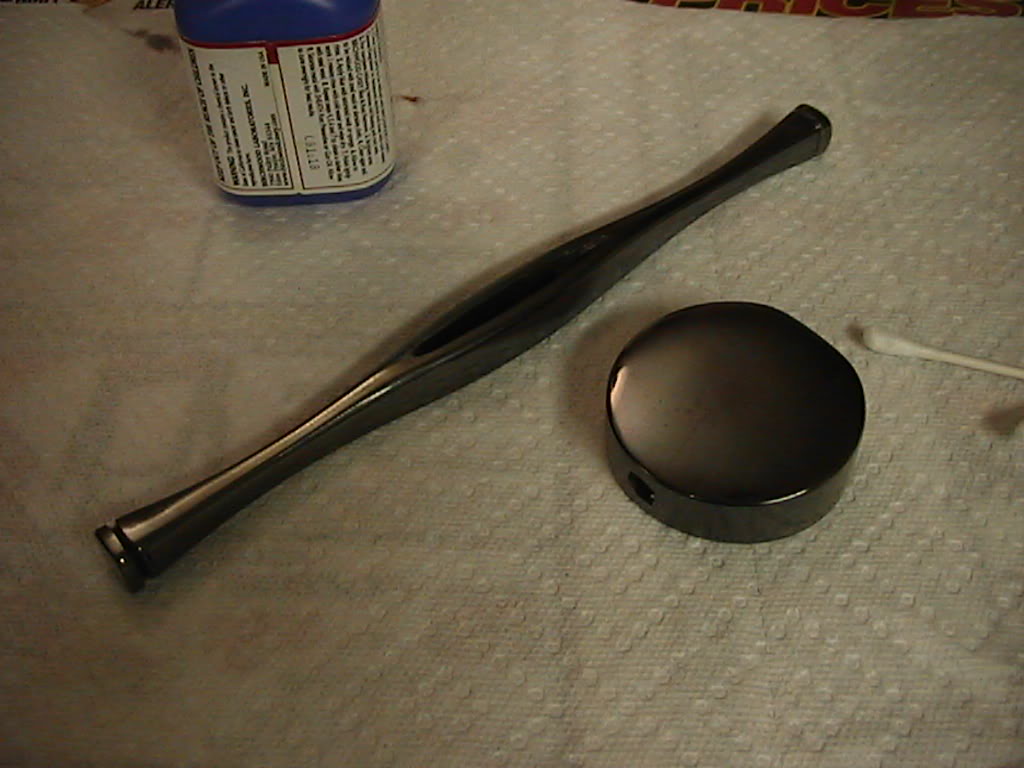
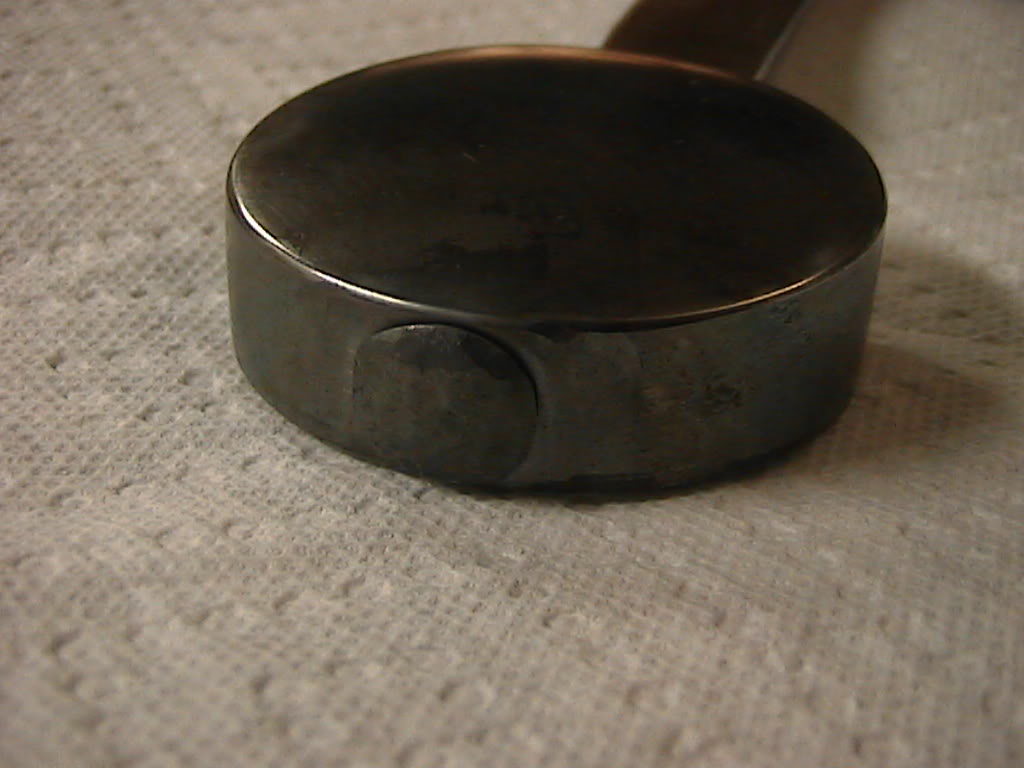
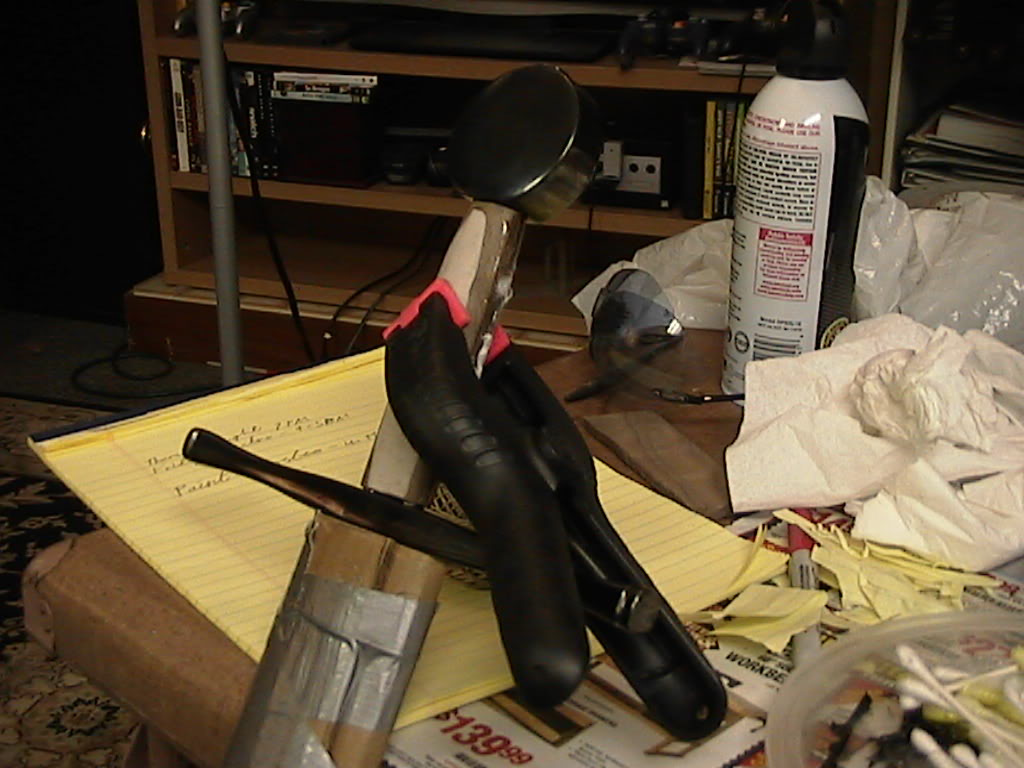
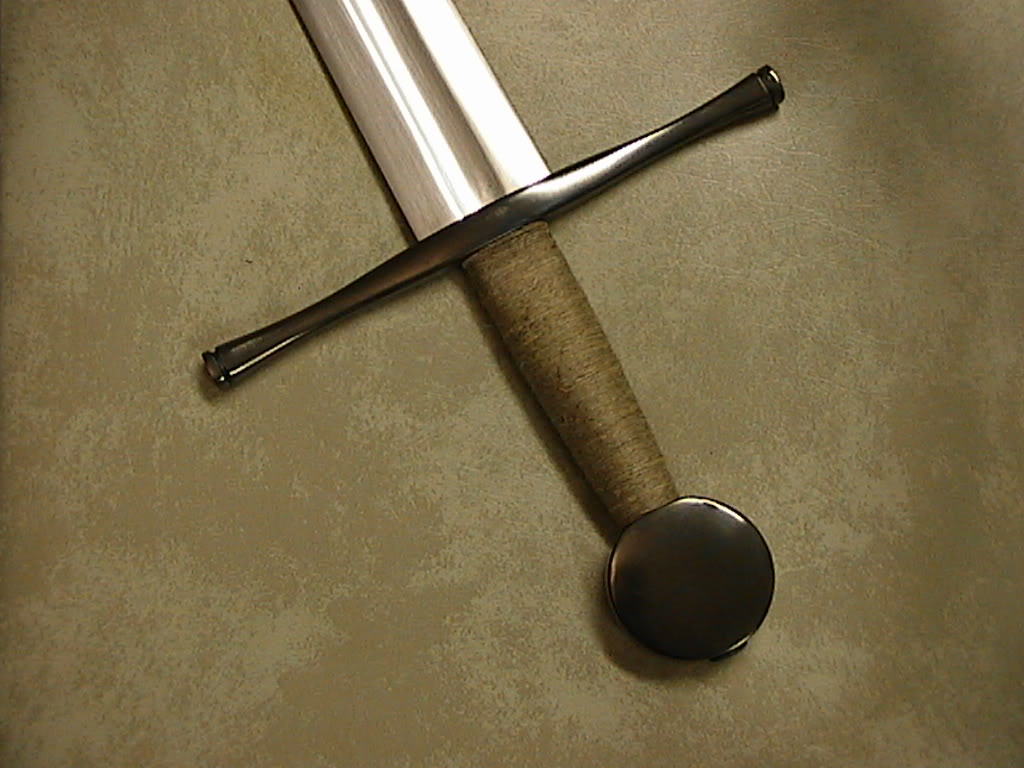
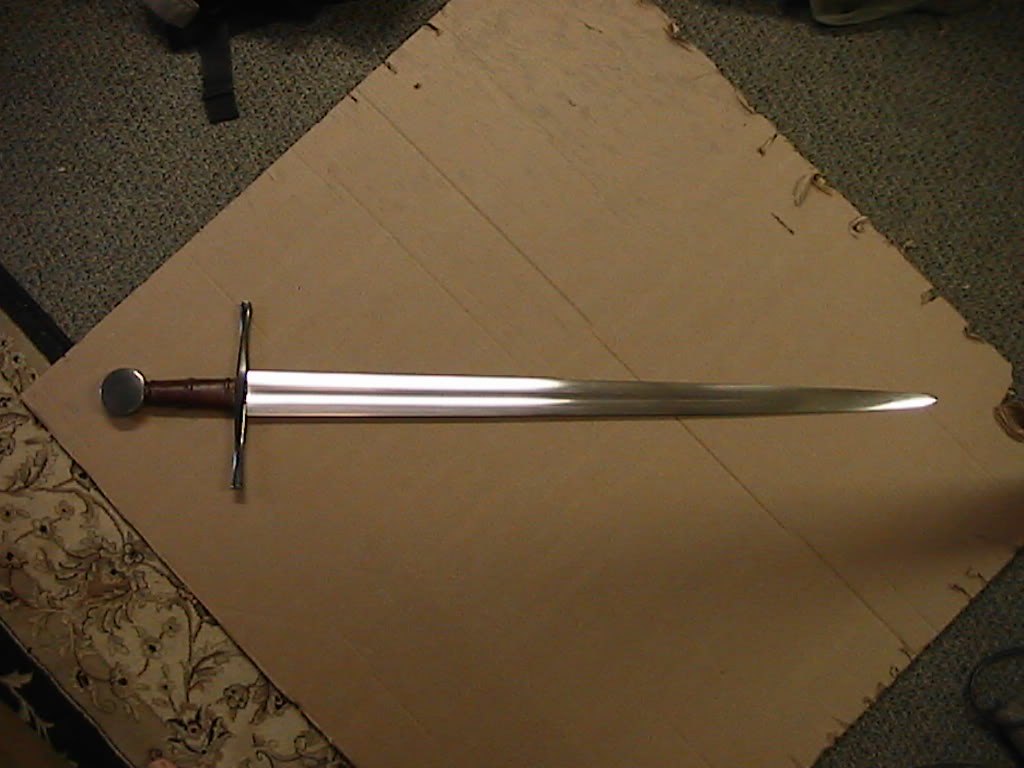
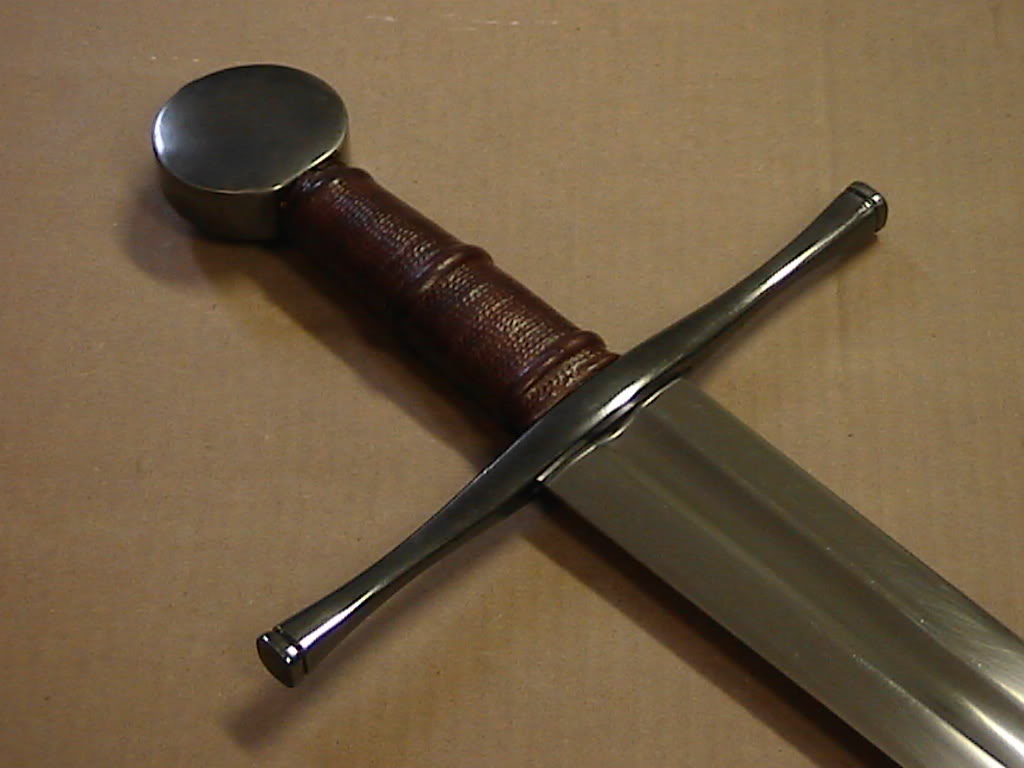
I built a sword around an old Deltin blade.

This project has taken several months. I believe I bought the blade in July on the classifieds over at the ArmourArchive. It was purchased from Andrew Young who happened to live nearby so I was able to save shipping and just go pick it up. It was a very pleasant transaction and I actually hung out and talked about swords and armour for quite a few hours. I will likely be a returning customer.

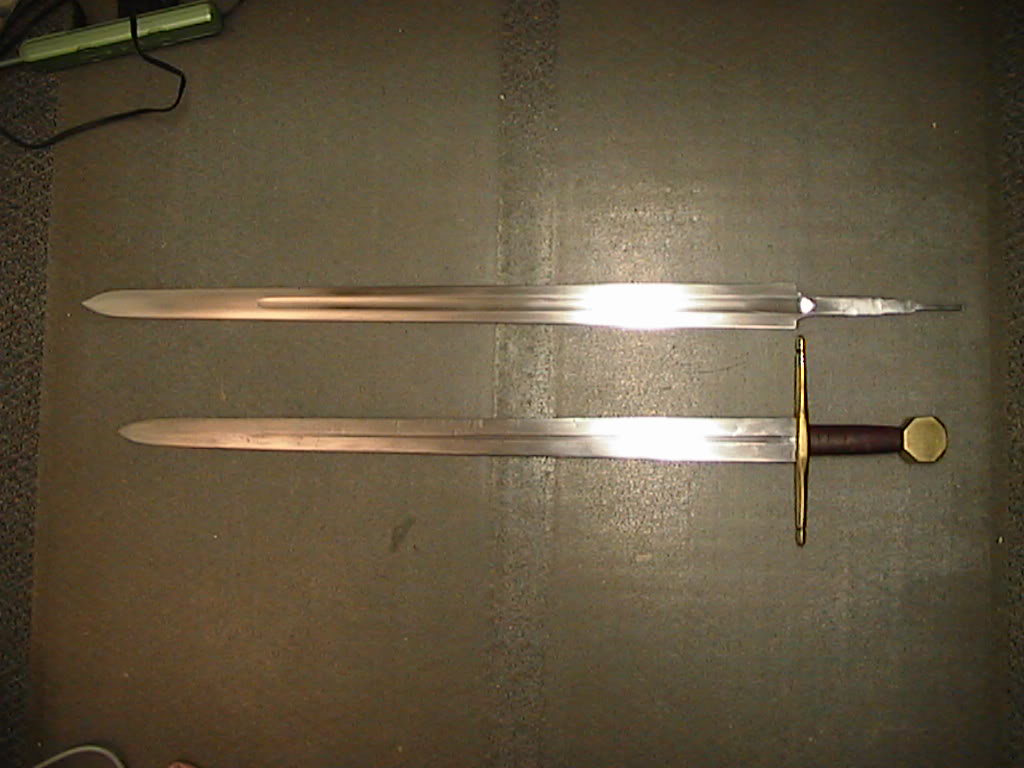
It was an older Deltin. I think they're newer ones have have better mass distribution. This blade had very little distal taper and was a good bit overweight. I decided to do a complete overhaul of the blade by regrinding it.

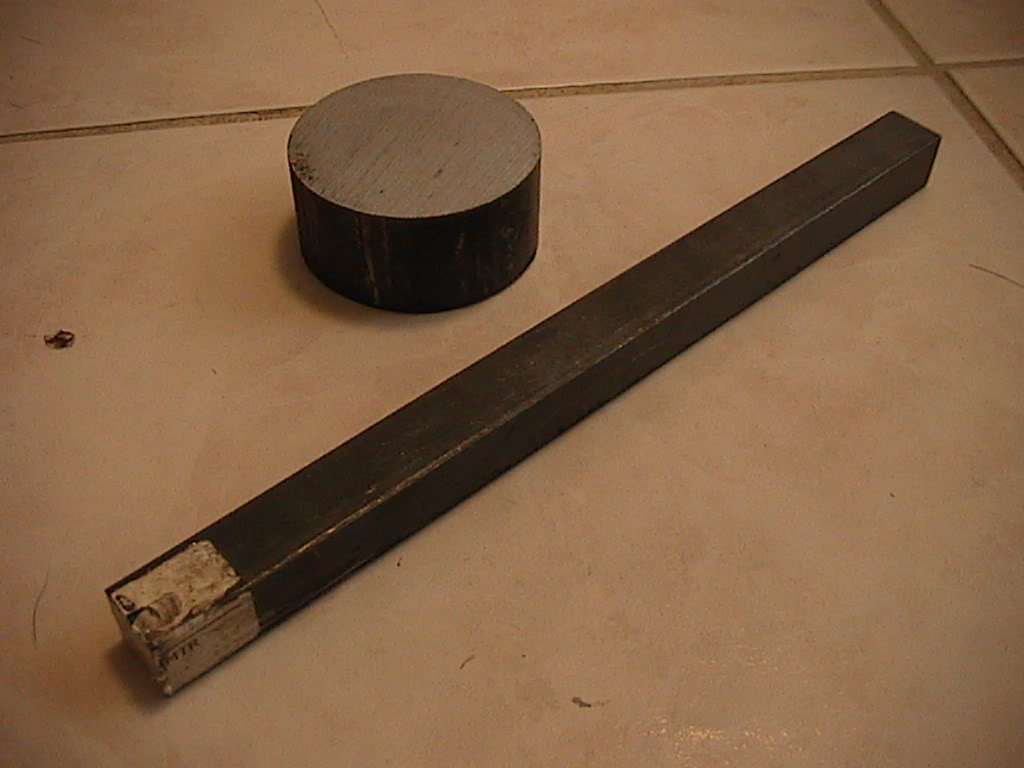
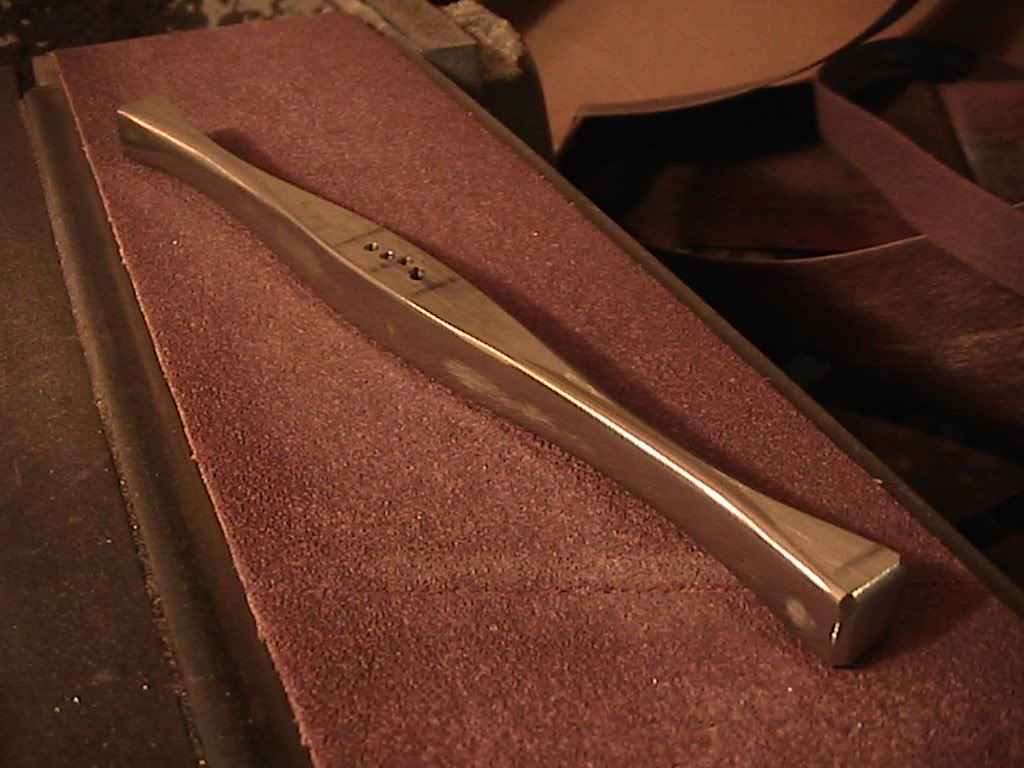
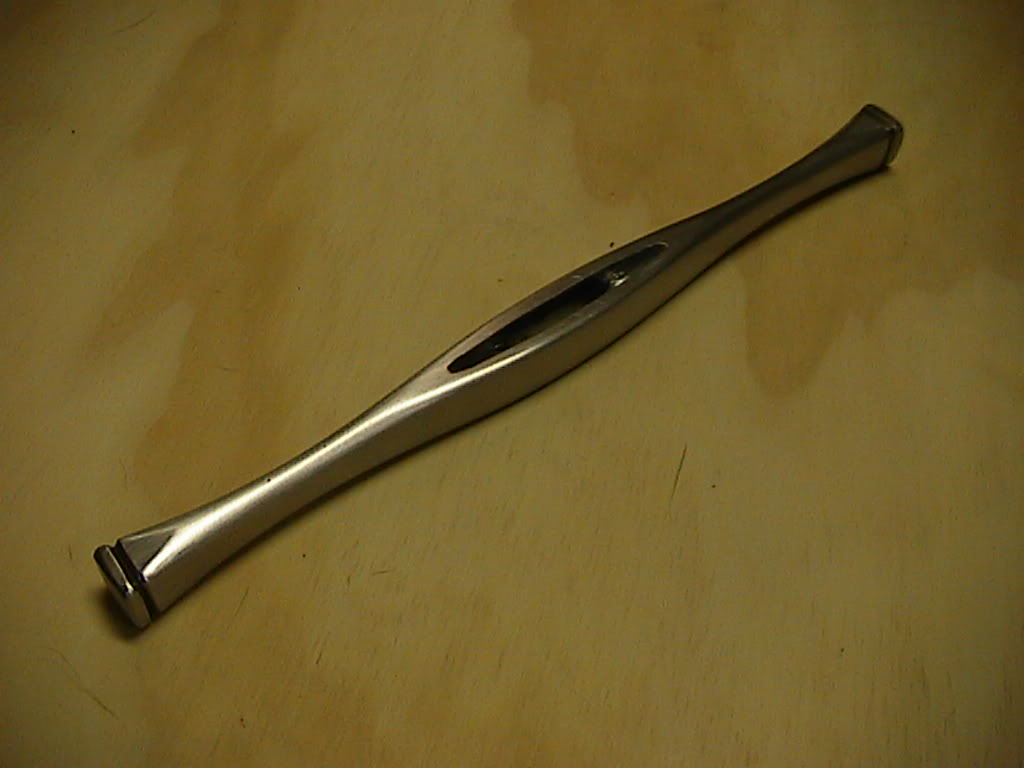
Everything else was made from scratch.

Deltin's temper is great. This blade flexes really well. Due to the taper I added most of that flex is in the last third or so. The first third of the blade has very little taper and almost no flex.

It is also very sharp and the edge geometry seems quite good to me but I don't have any high end swords to compare it to. It cuts quite well though. I took a large chunk of plywood off my stand without even realizing it. The blade didn't seem to dull at all. I think this is a good testament to Deltin's qaulity and heat treatment.

Here are the finished stats:

Weight: 2.98 lbs
POB: 4.25 inches from guard, 4.75 inches from grip
Blade: 32.5 inches
Grip: 4.25 inches
Total: 39.5 inches

More photos can be seen here: http://s675.photobucket.com/albums/vv112/NathC/Deltin/

I'd already moved the shoulder up and cut about an inch and a half off the tip before the first photo.

Oh, and feel free to ask any questions you might have.


View user's profile Send private message
Artis Aboltins


PostPosted: Wed 04 Nov, 2009 11:13 pm    Post subject:         Reply with quote

Very impressive work here! Good to see it at various stages of constructions, thanks for sharing the images.
View user's profile Send private message
Luka Borscak


Location: Croatia
Joined: 11 Jun 2007
Likes: 7 pages

Posts: 2,307

PostPosted: Thu 05 Nov, 2009 5:53 am    Post subject:         Reply with quote

Wow, it looks better than many production swords out there! Congratulations!
View user's profile Send private message
Tim Lison


Location: Chicago, Illinois
Joined: 05 Aug 2004
Likes: 1 page
Reading list: 6 books

Spotlight topics: 1
Posts: 1,606

PostPosted: Thu 05 Nov, 2009 6:23 am    Post subject:         Reply with quote

Wow! Really nice work. I love the guard.
View user's profile Send private message
Jean Thibodeau


Location: Montreal,Quebec,Canada
Joined: 15 Mar 2004
Likes: 50 pages
Reading list: 1 book

Spotlight topics: 5
Posts: 8,310

PostPosted: Thu 05 Nov, 2009 6:26 am    Post subject:         Reply with quote

Artis Aboltins wrote:
Very impressive work here! Good to see it at various stages of constructions, thanks for sharing the images.


Artis just stole my comment. Razz Was thinking the same when I scrolled down and saw " IMPRESSIVE ". Big Grin Cool

Really like the detailing file work at the ends of the guard: Simple but classy. Cool

The workmanship look really good and the aesthetic results of the finished sword is really amazing.

I assume that when you re-ground the bevels on the Del Tin that you avoided overheating the steel by cooling it when it got too hot to hold or touch with an ungloved hand ? Anyway, that's what I would do, after every few passed on the grinding belt and wipe the steel with a damp cloth. Slower working but then you don't have to re-heat treat or ruin the Del Tin heat treat.

You can easily give up your freedom. You have to fight hard to get it back!
View user's profile Send private message
Lucas LaVoy


Location: New Orleans, LA
Joined: 08 Mar 2008

Spotlight topics: 1
Posts: 33

PostPosted: Thu 05 Nov, 2009 7:25 am    Post subject:         Reply with quote

I really like the design you picked for the crossguard, it flows really well with just enough detail.
"Somewhere in la Mancha, in a place whose name I do not care to remember, a gentleman lived not long ago, one of those who has a lance and ancient shield on a shelf and keeps a skinny nag and a greyhound for racing."
View user's profile Send private message
Michael Pearce
Industry Professional


Location: Seattle, Wa.
Joined: 21 Feb 2004

Posts: 365

PostPosted: Thu 05 Nov, 2009 7:41 am    Post subject:         Reply with quote

That's a very good-looking sword! Well done. Love the guard and the handle.
Michael 'Tinker' Pearce
-------------
Then one night, as my car was going backwards through a cornfield at 90mph, I had an epiphany...
View user's profile Send private message Send e-mail Visit poster's website
Sean Flynt


Location: Birmingham, Alabama
Joined: 21 Aug 2003
Likes: 10 pages
Reading list: 13 books

Spotlight topics: 7
Posts: 5,981

PostPosted: Thu 05 Nov, 2009 7:47 am    Post subject:         Reply with quote

Beautiful! It's well-made and attractive, and an inspiration for work on an old DT blade I have.
-Sean

Author of the Little Hammer novel

https://www.amazon.com/Little-Hammer-Sean-Flynt/dp/B08XN7HZ82/ref=sr_1_1?dchild=1&keywords=little+hammer+book&qid=1627482034&sr=8-1
View user's profile Send private message Visit poster's website
Nathaniel C.


Joined: 26 Aug 2008

Posts: 45

PostPosted: Thu 05 Nov, 2009 8:16 am    Post subject:         Reply with quote

Thanks for all the complements. I'm very proud of this sword. It's probably the best piece I own.

I used a bucket of water to cool the blade every few passes. It seems to have worked fine.

I learned a lot doing this, I think my next sword will probably come out even better.
View user's profile Send private message
Dustin R. Reagan


Joined: 09 May 2006

Posts: 264

PostPosted: Thu 05 Nov, 2009 2:59 pm    Post subject:         Reply with quote

Nathaniel C. wrote:
Thanks for all the complements. I'm very proud of this sword. It's probably the best piece I own.

I used a bucket of water to cool the blade every few passes. It seems to have worked fine.

I learned a lot doing this, I think my next sword will probably come out even better.


Looks great! What method did you use to cut or hollow out the recess that the blade shoulders set down into (not the hole for the tang).

Dustin
View user's profile Send private message
Paul Watson


Location: Upper Hutt, New Zealand
Joined: 08 Feb 2006

Posts: 395

PostPosted: Thu 05 Nov, 2009 3:38 pm    Post subject:         Reply with quote

I really enjoy seeing peoples work on this site.

I like the sword as a whole but as far as individual components go I really do like the aesthetics of your cross. The curves and transitions in shape are very well done. It seems to be based on a historical type of cross but with detail and facets to it's geometry that make it unique.

I do not love the bright sword for its sharpness, but that which it protects. (Faramir, The Two Towers)
View user's profile Send private message
Maurizio D'Angelo


Location: Italy
Joined: 09 Feb 2009
Likes: 3 pages
Reading list: 3 books

Posts: 649

PostPosted: Thu 05 Nov, 2009 4:00 pm    Post subject:         Reply with quote

Historically, the re-hilt was often used. Even the fitting of a hilt, applied to a blade, bought it from a blacksmith different.
This is an excellent example. Happy
Bravo.
Ciao
Maurizio
View user's profile Send private message Send e-mail
Rodolfo Martínez


Location: Argentina
Joined: 30 Nov 2006

Posts: 347

PostPosted: Thu 05 Nov, 2009 4:10 pm    Post subject:         Reply with quote

Grat sword man. Really.
Congratulations!

¨Sólo me desenvainarás por honor y nunca me envainarás sin gloria¨
View user's profile Send private message
Michael Eging


Location: Ashburn, VA
Joined: 24 Apr 2004
Likes: 1 page

Posts: 225

PostPosted: Thu 05 Nov, 2009 4:28 pm    Post subject:         Reply with quote

Very impressive! I really enjoyed going through the pictures and seeing how you put it together. Bravo! Cool
M. Eging
Hamilton, VA
www.silverhornechoes.com
Member of the HEMA Alliance
http://hemaalliance.com/
View user's profile Send private message
Sa'ar Nudel


Location: Haifa, Israel
Joined: 02 Dec 2005
Likes: 16 pages

Posts: 361

PostPosted: Fri 06 Nov, 2009 9:59 am    Post subject:         Reply with quote

Very nice and clean work. Chapeau.
The polished pommel looks now a little plain, in comparison with the slightly worked guard. I would have considered a simple decoration to it, too.
My question: what is the outer "skin" covering the grip made of, and how did you put it on?

Curator of Beit Ussishkin, regional nature & history museum, Upper Galilee.
View user's profile Send private message Visit poster's website
Nathaniel C.


Joined: 26 Aug 2008

Posts: 45

PostPosted: Fri 06 Nov, 2009 1:04 pm    Post subject:         Reply with quote

Thanks, for the kind words.

I used a dremel cutting wheel on my drill to cut the guard slot for the shoulders of the blade. They are somewhat rounded up on the ends but this isn't really noticeable once assembled. I also liked the fact that I could taper the ends of the slot to match the cross section of the blade. I lack a milling machine so this was the best I could come up with but I think it worked rather well. And a milling machine wouldn't have been able to make those tapered ends.

The pommel does seem a little plain. I'm not sure if it comes through in the photos very well but it isn't just round. It tapers to be much thinner towards the peen.

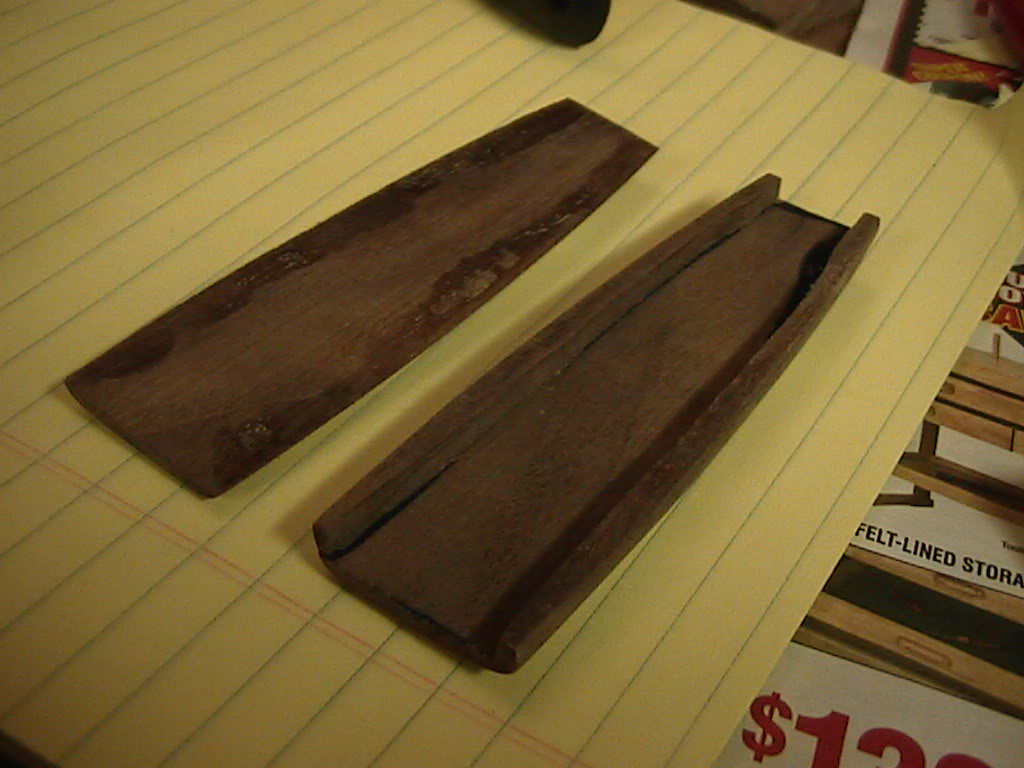
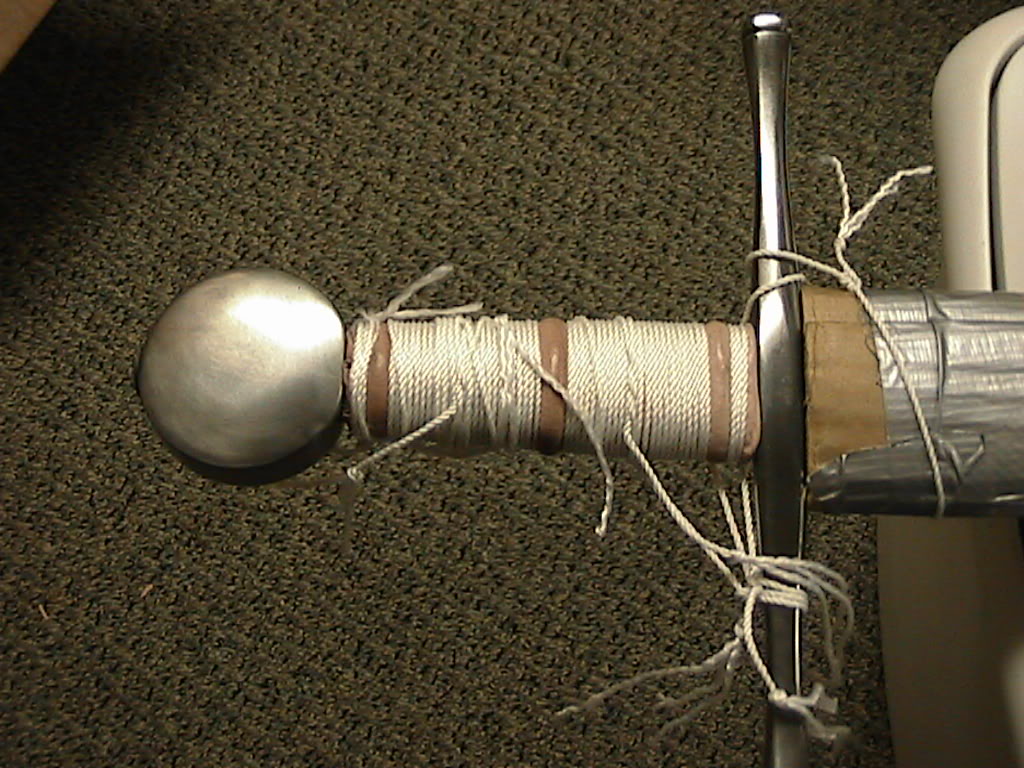
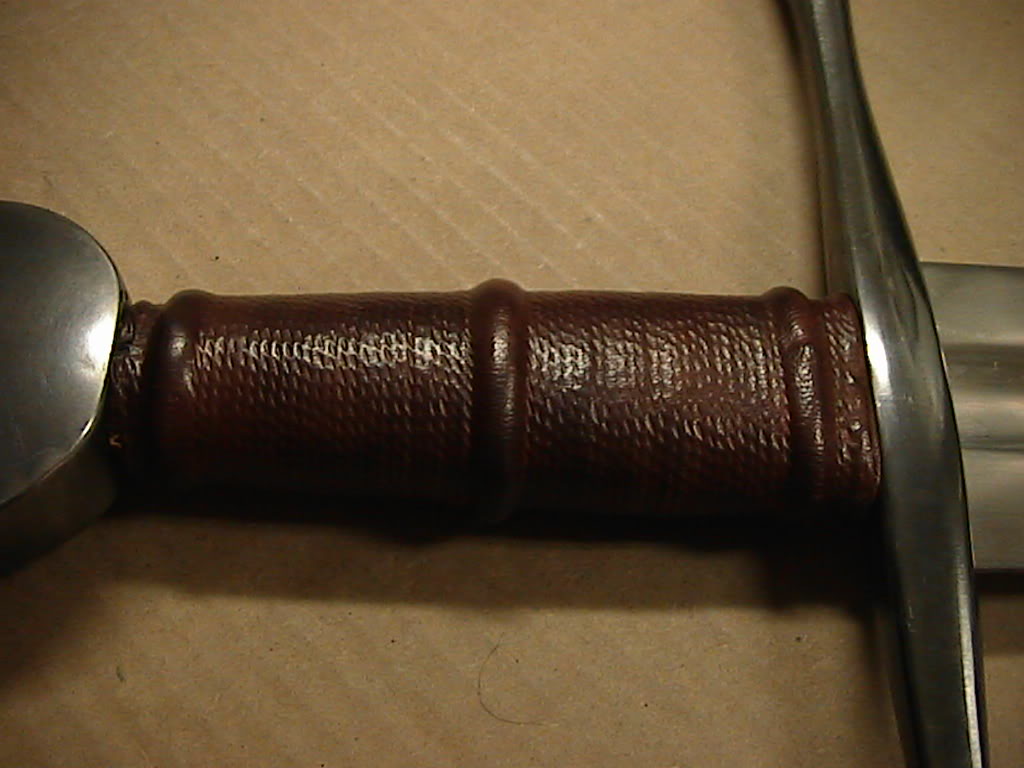
I'm not sure what you mean by "skin" so I'll cover all the bases. The wood core was made out of walnut, I think. I then used some epoxy putty to beef the grip back up because I'd sanded too much wood off. The whole thing was then wrapped in hemp thread before being wrapped in vegtan leather. The leather was suppose to be about 2 ounce. I used wood glue on the leather and then dyed it after it had dried over night. I hope that helps.

-Nathan
View user's profile Send private message
Sa'ar Nudel


Location: Haifa, Israel
Joined: 02 Dec 2005
Likes: 16 pages

Posts: 361

PostPosted: Fri 06 Nov, 2009 3:12 pm    Post subject:         Reply with quote

Nathaniel C. wrote:


I'm not sure what you mean by "skin" so I'll cover all the bases. The wood core was made out of walnut, I think. I then used some epoxy putty to beef the grip back up because I'd sanded too much wood off. The whole thing was then wrapped in hemp thread before being wrapped in vegtan leather. The leather was suppose to be about 2 ounce. I used wood glue on the leather and then dyed it after it had dried over night. I hope that helps.

-Nathan


Thank you, exactly what I wanted to know.

Curator of Beit Ussishkin, regional nature & history museum, Upper Galilee.
View user's profile Send private message Visit poster's website
Randall Moffett


Location: Northern Utah
Joined: 07 Jun 2006
Reading list: 5 books

Posts: 2,121

PostPosted: Fri 06 Nov, 2009 4:19 pm    Post subject:         Reply with quote

Nice work! It looks splendid. Veryt nice work.

RPM
View user's profile Send private message


Display posts from previous:   
Forum Index > Historical Arms Talk > I Finished a Project (lots of pictures)DIY Project
Page 1 of 1 Reply to topic
All times are GMT - 8 Hours

View previous topic :: View next topic
Jump to:  
You cannot post new topics in this forum
You cannot reply to topics in this forum
You cannot edit your posts in this forum
You cannot delete your posts in this forum
You cannot vote in polls in this forum
You cannot attach files in this forum
You can download files in this forum


All contents © Copyright 2003-2024 myArmoury.com — All rights reserved
Discussion forums powered by phpBB © The phpBB Group
Switch to the Basic Low-bandwidth Version of the forum