Posts: 199
Wed 30 Sep, 2009 11:34 am
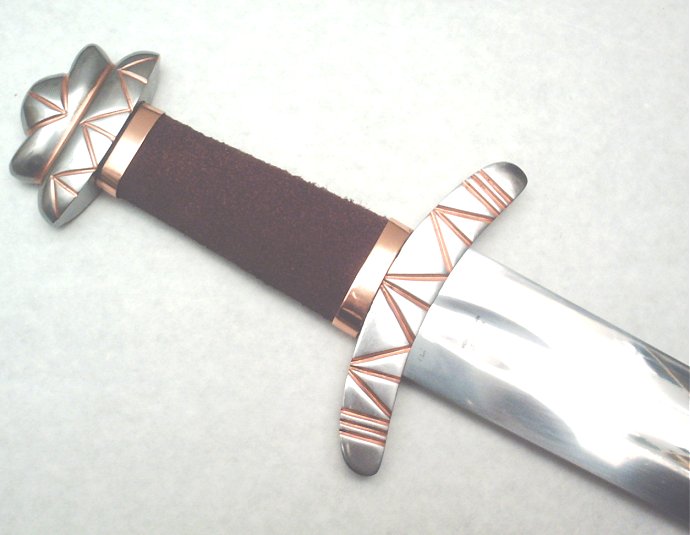
MRL Sticklestead upgrade
Posts: 199
Wed 30 Sep, 2009 1:28 pm
Comments and thoughts are more than welcome!
Posts: 292 Location: Connecticut
Wed 30 Sep, 2009 1:46 pm
I like it, and personally think it's a definite upgrade on the original look of the sword. I gave you an 8 on that account, although my personal preference would have been to dye the grip...I would have gone some shade of brown I think, although I'm torn between a deep chocolate color and a light brownish tan, just slightly darker than you have it now. The scabbard looks great the way you have it now, IMO.
Nice work.
Posts: 108 Location: Central North Carolina
Wed 30 Sep, 2009 2:40 pm
Very nice Nathan!
How did you deal with those copper rings on the grip? I've been considering buying that sword myself but have been wondering if it would give me any grief regarding a rewrap. Any insight as to the sword's construction would be most helpful.
Posts: 197 Location: Massachusetts, USA
Wed 30 Sep, 2009 5:20 pm
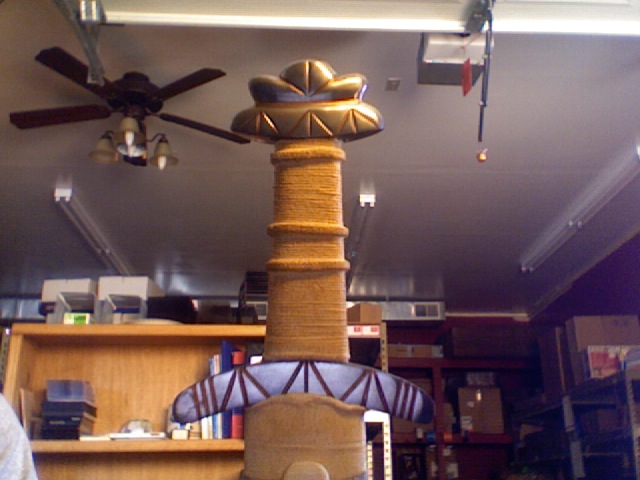
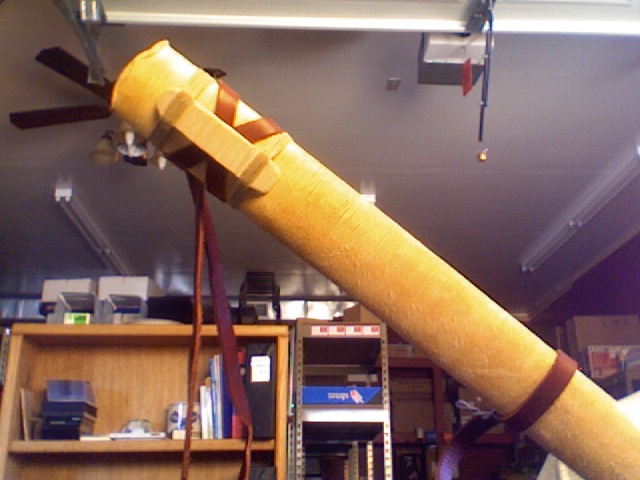
Awesome! I'm in the process of reworking my Sticklestead too. I'm going to be making a whole new scabbard for mine. Wrapped the grip in 2mm round leather cord, cut off the copper (actually copper plated zinc) rings and am in the process of replacing those with copper wire. Feels much better in the hand already. The scabbard will be covered in chamois and accented with copper wire and leather cord to match the grip.
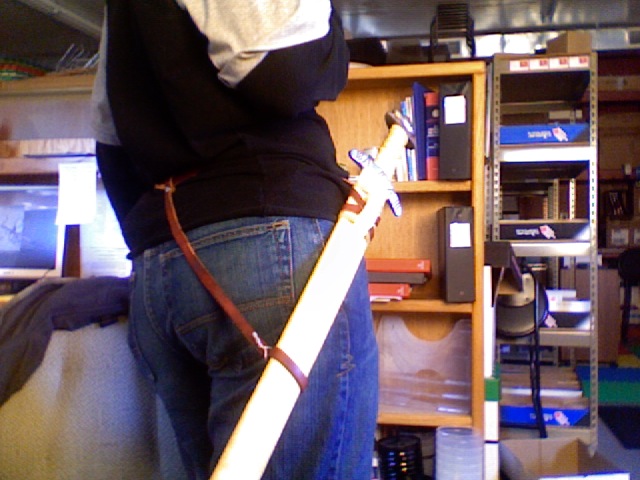
I think you did a nice job with yours. I gave it a 7, although I'm leaning more towards a 7.5. I also think that it should be died a darker color. To me, the natural chamois just looks unfinished. The risers are also a tad odd looking, but based on how the sword handles, I think that that configuration would make for a very comfortable grip. And it's how it feels that's more important. Your scabbard and belt suspension looks great. The angle and height at which the sword sits looks very comfortable and smooth. Overall, I think you did a good job with this upgrade. Very nice craftsmanship!
A couple of questions: 1) Did you keep the chape? 2) How did the stock scabbard look once the leather was pulled off? 3) Do you have a closeup of the scabbard mount loop?
Cheers,
-JM
Posts: 845
Wed 30 Sep, 2009 6:54 pm
Very nice work. Thanks for posting! :D
You
cannot post new topics in this forum
You
cannot reply to topics in this forum
You
cannot edit your posts in this forum
You
cannot delete your posts in this forum
You
cannot vote in polls in this forum
You
cannot attach files in this forum
You
can download files in this forum