to accomplish this. Total build time: about 28 hours not including time spent on finding and shopping for materials
and tools, etc. This does include all prep time, though.
Here's my step-by-step process:
*Used two planks of 36" X 6" X ¼" Spanish cedar. This was all that the wood store had that day in this dimension.
(I believe that this ultimately led to a slightly less rounded shape, but also saved me a lot of wood-working time.)
*Laid my sword down on the middle of each plank and traced the shape, then drew another line parallel about ¼" away
from the first line. Drew "depth-lines" lines that represented the thickness of the blade on the edges and on the top end
of the planks to mark how deep I needed to hollow it out.
*Used a dremmel and 80 grit sanding blocks to hollow out the shape. This was the most drudging aspect of the
whole project and took about 8-9 hours one day. The rest of the project was rather enjoyable.
*Once I was satisfied that the sword fit inside with the shapes clamped together every 8 inches, I cut out the rounded
hilt shape on top of each half and sanded it. I slid a piece of paper under the Viceroy's hilt to use as the
pattern for this.
*I put three coats of linseed oil on the inside halves, let it dry, then glued the two halves together with the sword inside.
I let it all dry overnight.
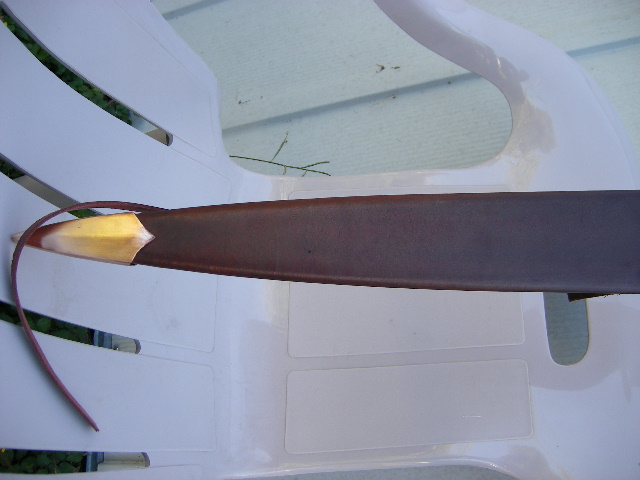
*Used the skill-saw to cut about 1/3" away from the outside drawn line for a basic shape of the wood core.
The skill-saw came very much in handy and was $30 well-spent.
*With the core in a vise and with leather strips for padding, I used a carpenter's plane to round out the shape.
Then I placed the wooden core in my lap and used 80 grit sanding block to finish off the rounded shape. This
all went rather quickly.
*Put three coats of linseed oil on the outside and let it dry. (I probably should have used more coats but I was excited
and in a hurry to finish.)
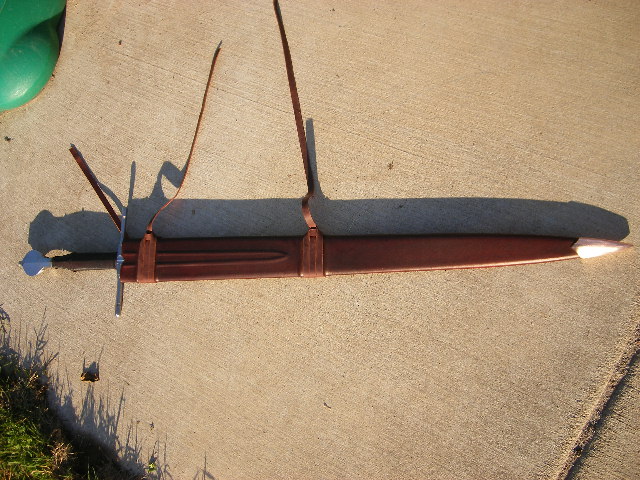
*Laid out the design for the risers and fuller shape on the wood core. I decided to use the small round circular "leather
lace" for this.
I then measured out the lace and cut it. Once I was satisfied, I glued the risers and shapes and let it dry overnight.
I had to glue each piece of leather lace and let it dry a bit before moving on to the next piece of leather
lace. I measured a little less than 2" for the distance between the risers because I knew I wanted to use ½ inch straps
for the harness. This step did not take much work, but took all day because of the drying time.
*Made a pattern on the back of the 2-3oz. rawhide by wrapping a sewing measuring tape around the core at intervals,
and adding the thickness of the leather. Measured every 2 inches (give or take) and marked with dots on the rough side
of the leather. (Mistake made here-see below.) Made a dotted diagram on either side of a straight line, then connected
the dots in a rounded sort of way.
*Cut out the diagram, then punched little holes every ¼ inch using leather punch tools. I made the pattern ½ inch longer
at the tip and 1 inch longer at the top, because I knew the leather would shrink a bit.
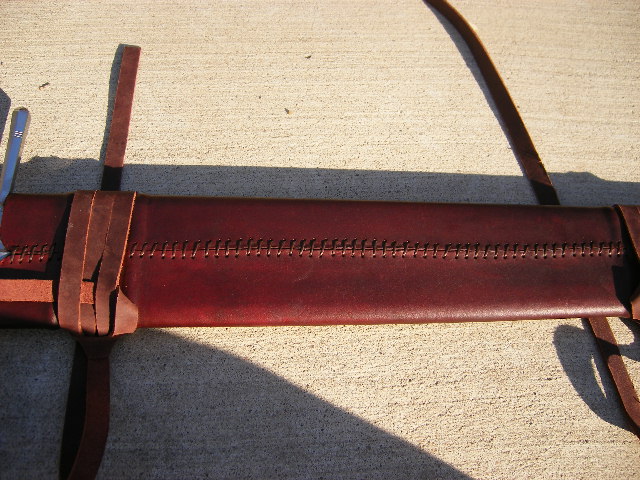
*Made the leather very damp, then sewed it up tightly starting from the tip. Every 6 inches or so, I brushed some
watered down glue onto the wood surface. Without stopping, after it was sewn up, I used a smooth laminated chopstick to sort of emboss
the leather by pushing down all around the leather lace to make the risers and fuller shape. I then pressed down all
the remaining areas of the leather and on the sides of the scabbard to round it off better, basically everywhere except
the leather lace parts. This part of the project was fun, but I think it is important to do this immediately after sewing.
You may have to dampen the leather some more during this. I then set it aside and let dry overnight.
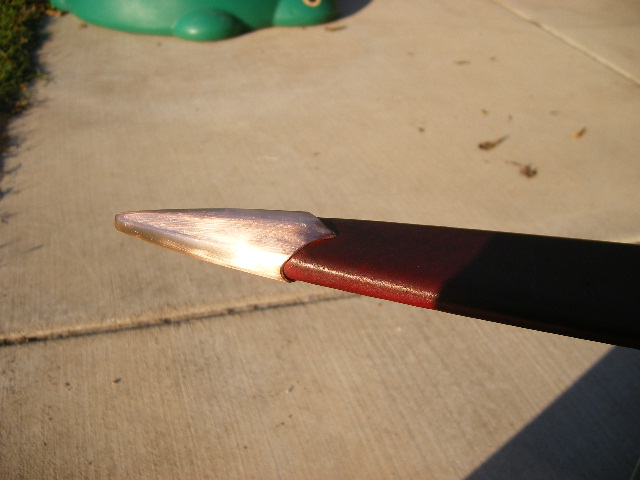
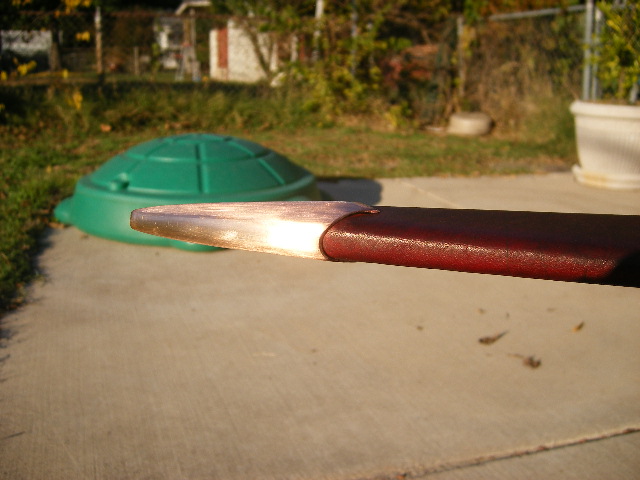
*I used the bronze chape from the Albion moat sale. This item was too big, so I had to do a lot of cutting, grinding on
the wheel, filing, and a bit of bending. I used a crème-brule torch to soften it a bit while the edge of the chape was in a
vice to slowly bend it a bit to make a better fit. It still did not fit so I had to sand the edges of the tip of the leather
scabbard. Then it was still a little off, so I slid it on and slammed the tip of the scabbard hard onto the kitchen floor
several times to force it on so that it looked ok. This all took about 3 hours and was fairly painstaking.
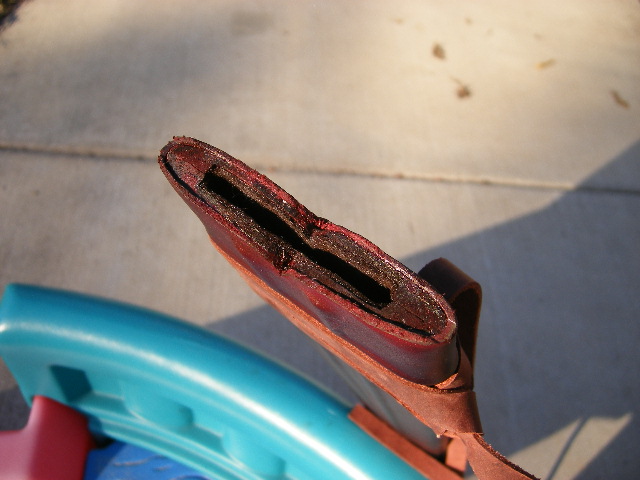
*I then carefully cut the top of the leather to match the shaped wooded part in order to match the swords hilt. About 3 hours.
*After this the sword fit loosely in the scabbard, so I carefully cut some felt and glued it inside the mouth of the scabbard- about 3 inches deep-and inserted the sword to make a tight fit. ( I may have been lucky here because the Viceroy has
that square flat ricasso. ) Hobby Lobby sells felt squares in different thicknesses and colors.
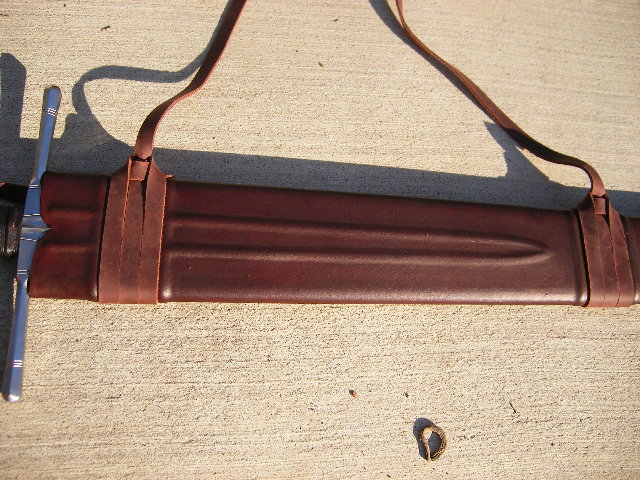
*I dyed the scabbard with Fiebing?s acrylic based maroon leather dye. I used many coats. About 30 minutes.
*I used ½ inch straps from Tandy Leather store for the harness and belt. They come pre-dyed in brown in the 60 inch-length, cut thin.
**But, I am having trouble finding buckles and strap-ends for the ½ inch size straps. I want something similar to
the photos of the Regent or the Viceroy scabbards on the Albion website. Maybe I should have made the straps
bigger like ¾ inches because it seems there is more in this size to choose from on the internet. But I thought the ½ inch size would look nice and possibly more historical. Does anyone have any ideas on where I could get buckles or strapends to fit ½ inch belts??
Mistakes made: Just before I glued the two hollowed out wood planks together, I forgot to mark the exact spot at the
end of the glued wood planks where the sword tip sits inside. Once glued, I had to guess the precise spot of
the hollowed-out sword tip area, and I was afraid that I might over-sand and mess it up. Also, when I measured the
wood core with the measuring tape, I over-measured. I thought I should add a few millimeters to account for the
risers and fuller shape, but this was a mistake. While I was sewing I realized it was going to be too loose so I cut off a
bit here and there to make it a tighter fit. This is why my stitching is a bit wavy. Also, after I sewed up the leather and
let it dry, I touched it way too much, and I think that this is why there are dark spots on it after dyeing.
Again, I want to thank all of you who posted your previous scabbard projects. It was because of your previous
postings that I was able to do this by myself.