Go to page 1, 2, 3  Next

Helmet Help Needed
I'm in the process of lining and strapping this Italian sallet and bevor. Since this is my first armour work I'd like to get some advice on a few points.

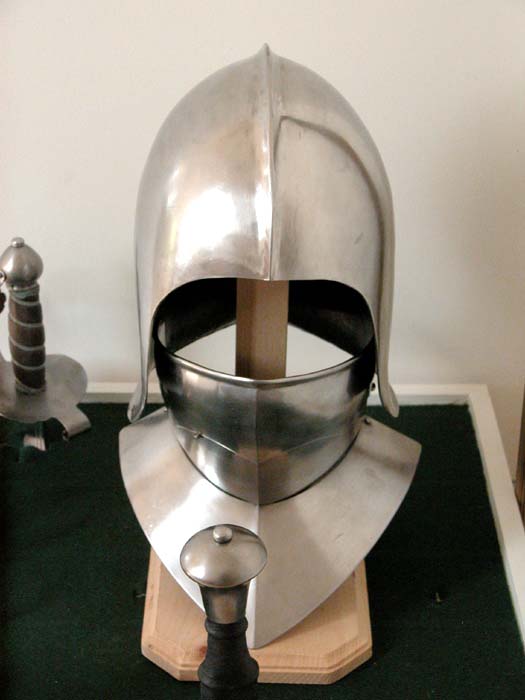
The black line around the bowl of the sallet is my guide for placing the rivets for the lining band (7 rivets on each side, plus a lower set of two rivets per side for the chin strap). Does the angle of the line appear to be historically plausible? I've looked at every original and reproduction sallet I can find but can't say for sure. There seems to be an enormous amount of variation, but I think I'm o.k. What do y'all think?

The blob of white clay in the center rivet position here represents the head size of my domed steel rivets. Again, I've seen great variety in rivet size but I'd like your opinions. Is this size within spec, historically?

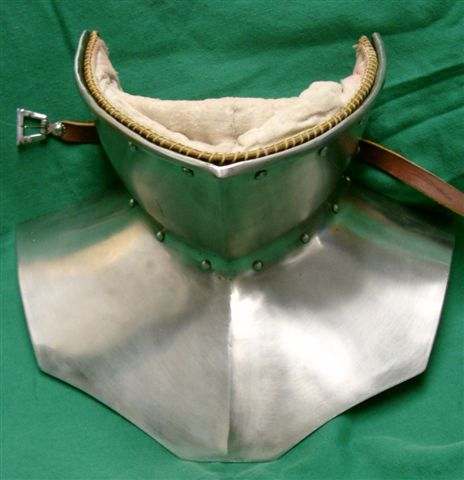
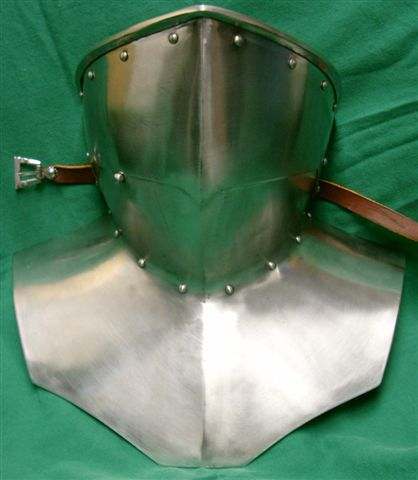
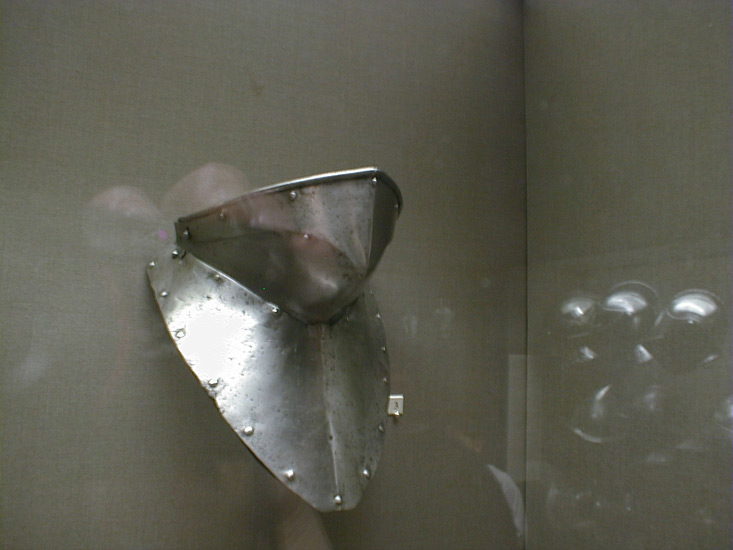
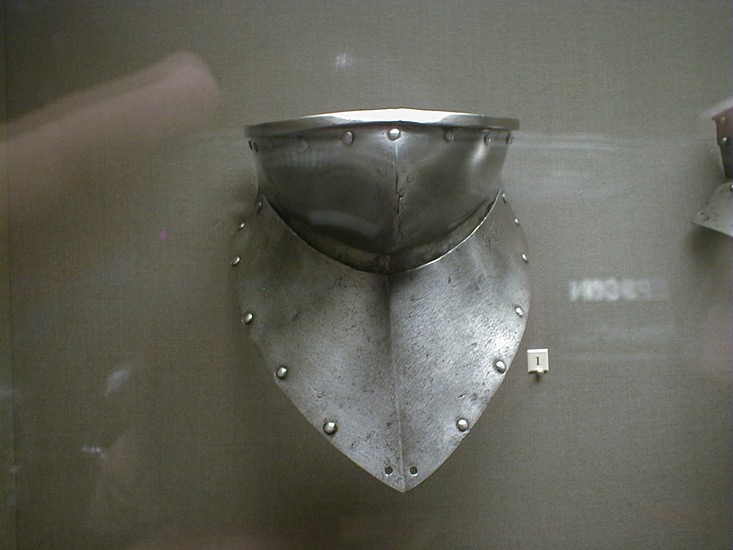
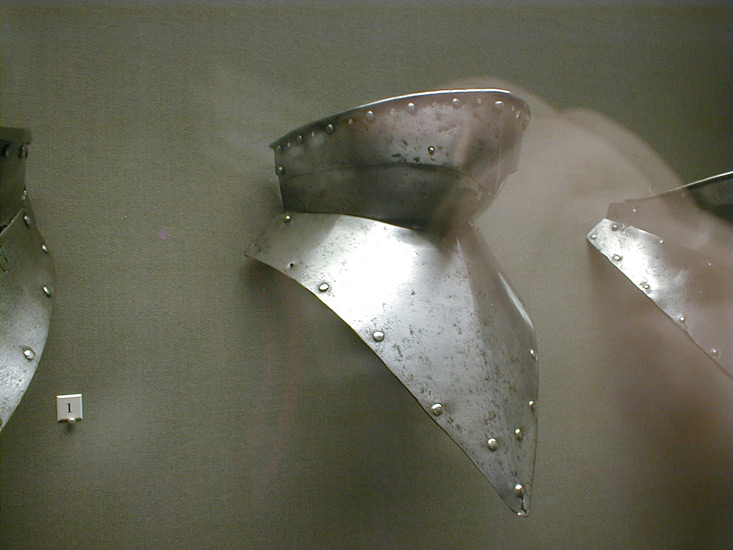
I have a few photos of lined bevors, but none that show a bevor exactly like mine (though I have seen originals of this form). The lower end of the liner should be secured by rivets at the base of the bevor's throat. That area is somewhat obscured by the lower plate of my bevor. Can anybody here show or say how the lower end of the lining should be attached in this case? (and, by the way, is the name of this piece correctly pronounced (in English) to suggest that one has a semi-aquatic mammal strapped to one's face ("BEE-vur")?

Finally, I've already done a bit of work to make this sallet more historically accurate than it was when I acquired it (removing an ahistorical visor and patching the resulting holes). It's two-piece, welded construction with a turned under lower edge, so not perfectly historical although it's looking better and better. So I'm debating whether or not to use modern round washers under the rivet peen on the lining band or make more historically appropriate square or octagonal rivets from thin steel (a relatively simple project but never to be seen.). I'm wondering if the washer choice would be a deal-breaker for living history types if I ever want to sell the piece. I'd hate to wreck the value of the piece just to avoid a couple of hours of labor. What would you do?

Thanks for any tips!


 Attachment: 56.03 KB
sallet.JPG


 Attachment: 36.11 KB
download.jpeg


Last edited by Sean Flynt on Thu 20 Sep, 2007 8:04 am; edited 6 times in total
Here's my primary example for lining my bevor (by the same fellow who made mine--Patrick Thaden). I understand how to do everything but the lower rivets since the lower part of my bevor is different. I could just put my lower rivets wherever they'll fit but I do want to hew as close as possible to the historical line. If anybody spots problems with the lining of the one shown here, that would be good to know, too.


 Attachment: 24.76 KB
bevor_down_190.jpg


 Attachment: 35.62 KB
bevor_inside_152.jpg


 Attachment: 20.87 KB
bevor_up_100.jpg

Sean,

I think your rivet positions look good. I've always pronounced it "bev-or" but I could be off base with that. This 15th armour with a barbuta has a similar rivet line so I woudn't think it would change for a sallet etc...


 Attachment: 46.48 KB
pic_feature_mil_gothic.gif

Sean, on the lower set of rivets for the bevor, you can flush rivet them so that they won't interefer with the little bit of downward play I suspect that the middle plate has in the base plate. You can use steel dome head or tinners rivets. Installing would be easier if you can clip the two rivets that join the base plate and the middle plate so that the upper assembley is free from the base. Mark and drill your holes in thier desired locations, than using a bigger bit drill ( keep the drill running slow so you have control over the depth) from the outside counter sink the holes like you would to accept a wood screw in woodworking. When you run your rivets through for piening, ( the rivet head should be on the inside with the shank protruding out the front) clip them as very close to the surface of the bevor, 'bout as close as you can get, then pien gently with a lighter hammer. The rivet shank will spread out into the counter sink allowing the surface of the plate to stay smooth, thus allowing firm afixing of the leather without interfering with plates moving. Most all of the Rhodes bevors made as articulating assembleys seem to have been done this way. After installation you can rejoin the base plate w/ the upper assembley.
Allan Senefelder wrote:
Sean, on the lower set of rivets for the bevor, you can flush rivet them so that they won't interefer with the little bit of downward play I suspect that the middle plate has in the base plate. You can use steel dome head or tinners rivets. Installing would be easier if you can clip the two rivets that join the base plate and the middle plate so that the upper assembley is free from the base. Mark and drill your holes in thier desired locations, than using a bigger bit drill ( keep the drill running slow so you have control over the depth) from the outside counter sink the holes like you would to accept a wood screw in woodworking. When you run your rivets through for piening, ( the rivet head should be on the inside with the shank protruding out the front) clip them as very close to the surface of the bevor, 'bout as close as you can get, then pien gently with a lighter hammer. The rivet shank will spread out into the counter sink allowing the surface of the plate to stay smooth, thus allowing firm afixing of the leather without interfering with plates moving. Most all of the Rhodes bevors made as articulating assembleys seem to have been done this way. After installation you can rejoin the base plate w/ the upper assembley.


Excellent suggestion! This is actually the same method I used to close the holes left by removal of the visor and its spring pin. I don't know why it didn't occur to me to simply temporarily remove the lower bevor plate and do exactly as you suggest. It's especially good to know that this method appears to have been used historically. Perfect. Many thanks, Allan!


Last edited by Sean Flynt on Thu 20 Sep, 2007 8:12 am; edited 1 time in total
Re: Helmet Help Needed
Sean Flynt wrote:
Can anybody here show or say how this type of bevor was lined historically? (and, by the way, is the name of this piece correctly pronounced (in English) to suggest that one has a semi-aquatic mammal strapped to one's face ("BEE-vur")?

Thanks for any tips!


Don't know for sure about what the " English " in period pronunciation would have been or is currently as they may in period have " butchered ", one might say, the French pronunciation of some or all " French " words borrowed/stolen from French. :p :lol:

In French I would spell it and pronounce it Bévor ( accent aigue ): That could sound like B - Vor ( But you have to pronounce B with the French sound where B and Bé would both sound exactly the same the é only making a difference with written French ).

Maybe sounding like BAY-Vor but Bay being softer that the hard English Bay ? Really hard to give an English equivalent to the sound and I don't know the " conventions " used by linguists to write down pronunciation information.

But it doesn't sound like BEE-Vor in French. I guess a phone call could solve that problem !?

Oh, the meaning of Bevor is derived from " Baver " ( the R is silent so it sounds like bavé ).
Baver mean to drool ! So basically a very colourful way of saying " A drool catcher " and not something related to the wood chomping dam building rodent ( That is the Canadian National animal:
Early fur trade and industriousness I guess :eek: :lol: )
No sweat, if you need some tinners rivets let me know.
Allan Senefelder wrote:
No sweat, if you need some tinners rivets let me know.


I bought the minimum order of 5/32" shank rivets from R.J. Leahy--600! I need approximately 34 for the entire project, so I should have a few spares if I screw up and have to start over...17 times. :lol:
Quote:
Oh, the meaning of Bevor is derived from " Baver " ( the R is silent so it sounds like bavé ).
Baver mean to drool ! So basically a very colourful way of saying " A drool catcher "


I've heard that before, I figured based on my expirience wearing them that this is a reference to how "great" the ventilation is while you have one of these on.
Quote:
I bought the minimum order of 5/32" shank rivets from R.J. Leahy--600! I need approximately 34 for the entire project, so I should have a few spares if I screw up and have to start over...17 times.


Yeah they sure do fit alot into that little container ( we get ours from McMaster/Carr, they come 600 in this little ziplock bag). You can't really get them in small project quantities. If you keep expirementing with armour you'll find uses for them. We use them just about everyplace leather is used to achieve aritculation but the plates need to sit tight against each other ( lower pauldron lames and the like).
Allan Senefelder wrote:
Quote:
Oh, the meaning of Bevor is derived from " Baver " ( the R is silent so it sounds like bavé ).
Baver mean to drool ! So basically a very colourful way of saying " A drool catcher "


I've heard that before, I figured based on my expirience wearing them that this is a reference to how "great" the ventilation is while you have one of these on.


In cold weather I would think condensation might contribute to the " drool " or in fact be mostly condensation with a bit of drool and a little added sweat ? In any case moisture from one's breath. :lol:

Linings would tend to get soaked I would think and easy replacement or cleaning might be a good thing ?

I don't think, but am not sure, that the lining in a bevor is padding to protect from impact and blunt trauma so it might be thin and light and would dry fairly quickly. Maybe just there to keep most of the moisture from the inside steel surface ?

Hot breath hitting cold metal will turn to water but a cloth barrier might just deflect the vapour without it condensating into liquid and less water/drool would accumulate !? It all sounds rather gross or at least uncomfortable and unpleasant: Maybe why the bevor might not be worn at times or at least a hinged bevor would be used to minimize the claustrophobia and maximize ease of breathing.
Allan Senefelder wrote:
If you keep expirementing with armour you'll find uses for them.


I knew I was in trouble when I looked at a box of 600 rivets and thought, "Well, I'm sure I can use those in some way." Next thing you know, I'm thinking I need a bigger anvil (with stakes, naturally) and telling myself that buying sheet steel is much cheaper than buying a finished blade and having hilt furniture custom-cast.

:eek:

Actually, I had an idea to use a notebook-size plate as the ground for a "sampler" of various armouring techniques--sliding rivets, lame construction, articulation, mail, etc. That way I could go ahead and try small bites of lots of different things without having to create a full project or worry about screwing up too badly. Having everything on a single plate would make a handy workshop reference.
Slot rivetting is easy as long as your holes are located properly. Just drill a second hole the desired distance away from the first to create the length of slot you want, using a sharpened chisel cut on either side of the desired channel so that it joins the holes forming the slot ( two circles become a long pill shaped oval) and then a little elbow grease and a file to smooth the chieled edges out.
I like this sallet..who made it?
Sean

I would go for the hand-made washers because, in my opinion, it is beautiful. The modern washers looks like... modern... When I make washers, I heat them to "fake" heat treatment. Also, I try to hammer the washer.

I think your rivet line is well placed. It allows you to install a liner.

By the way, this sallet is very well made!
Michal Plezia wrote:
I like this sallet..who made it?


This is an older Patrick Thaden piece (not representative of his current work). I acquired this in trade from our own Bill Grandy. Here's his description and "before" photos:
http://www.myArmoury.com/bill_othr_thad_sallet.html?9

I originally thought I would modify the visor but liked the plain bowl so well that I didn't see any point. I'd like it slightly better if the entire rim were turned, but no matter. It's a classic Italian celata of the late 15th c. and would also look wonderful with the full "Venetian" treatment--velvet covering and gilt copper appliques.

Thaden might not claim the piece these days (especially the visor) but I think the bowl is very elegantly shaped and the bevor is a good match, with clean lines and a crisp falling lame mechanism. This particular form was in use long after the 15th c. As I understand it, the celata ala Vennezianna (sp?) was used as a parade helmet into the 18th c.

These things are all over contemporary artwork, including (looks to me) on St. Francis in Giorgione's famous Castelfranco Altarpiece of ca. 1503.


 Attachment: 61.76 KB
430px-Castelfranco_Madonna.jpg

Olivier L-Beaulieu wrote:
Sean

I would go for the hand-made washers because, in my opinion, it is beautiful. The modern washers looks like... modern... When I make washers, I heat them to "fake" heat treatment. Also, I try to hammer the washer.

I think your rivet line is well placed. It allows you to install a liner.

By the way, this sallet is very well made!


I'm leaning that way, too. How do you make yours? I planned to mark the square washer blanks along the edge of a large sheet of thin steel, then drill them, then cut them out with shears, trim the corners and pop each with a hammer to flatten the areas turned up by the shears.
Aquatic mammal, we really could have had fun with that one... the original french term is bavière, from which the anglo-normans, who continued using french but with their own accents and evolution until the XVth century, derived bevor ( bev-or), I guess we'll have to look to other ways of attaching bee-vors... oh never mind....
I just found these!


 Attachment: 80.45 KB
Image23.jpg


 Attachment: 97.44 KB
Image21.jpg


 Attachment: 106.31 KB
Image22.jpg

Sean if you're going to make your washers you can make square, hex ( on the hexagonal ones in our collection you it looks like they started with a square and then nipped the corners off so you have four long and four short sides) or filed round. We have examples of all these in our collection.
Go to page 1, 2, 3  Next

Page 1 of 3

Jump to:  
You cannot post new topics in this forum
You cannot reply to topics in this forum
You cannot edit your posts in this forum
You cannot delete your posts in this forum
You cannot vote in polls in this forum
You cannot attach files in this forum
You can download files in this forum


All contents © Copyright 2003-2006 myArmoury.com — All rights reserved
Discussion forums powered by phpBB © The phpBB Group
Switch to the Full-featured Version of the forum