Thanks for all the interest! I thought I might go into a little more detail as to what I did for those curious:
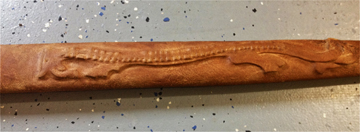
I carved the cavity for the sword blank out of two pieces of poplar, glued them together and shaped the outside with rasps, planers, and lots of patience. Once that was done, I got a thick piece of scrap leather (not sure what kind, belt leather maybe?) and cut the dragon out. I styled the dragon after the carving on the guard and pommel to tie everything together.
Then I got some leather shoe-lacing and cut little bits for the Ohgam script along the dragon's spine. It's the family motto my father put together, "Fight with me, fight with my family."
I didn't want the natural color of the chamois, so I had to color it and darken it. I turned to coffee! A can of grounds later and 24 hours of soaking gave a nice color to the leather (and smelled great!).
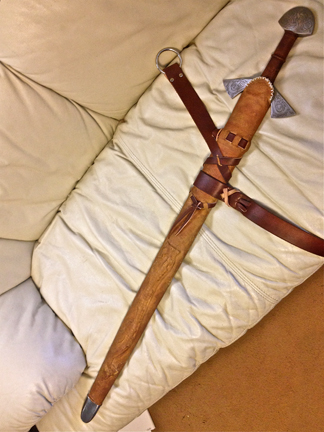
Then came the long and hard part. I had to glue and form the chamois over the dragon. I had to keep the leather damp so it would stretch, but chamois doesn't have the weight to hold a shape on its own when dry, requiring that it be glued to the dragon form immediately. It was a long day of applying glue to the scabbard, stretching the damp chamois over it, and repeatedly stretching it into the crisp lines as it dried and as the glue cured.
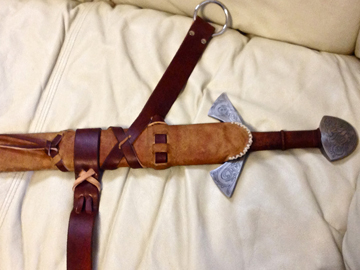
Finally, I stitched it up the back and got ready to strap it. I browsed
Brian's site for inspiration. To support the chamois, I put a patch of suede under the throat of the scabbard where the lacing would be. With this done, I cut the pattern, cut the belt and laced it all together. I used a Windlass chape that I had laying about for the end, and I think it all worked out well.