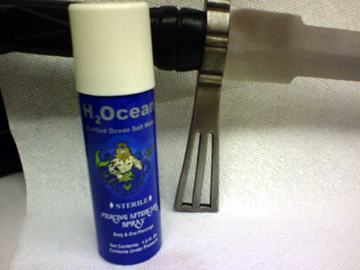
Patination in a Can
The other day, I discovered something that can put a nice patina on steel without the all-or-nothing approach required by some chemical applications. It’s a body piercing after care product called H2Ocean, and it's a mixture of purified water and sea salt. I applied it to the cross of my "chopped and channeled" Del Tin 5155, and it looks exactly right. Application is as follows:

--Degrease part to be patinated.
--Prep with green Scotchbrite-pad-the mixture tends to bead and roll off unless it has something with “tooth” to catch it.
--Apply H2Ocean liberally to paper towel wrapped around fingertip (or Q-tip for those hard to reach areas) and wipe across part in either a swirling or straight across motion (alternate for best results). If it spots, keep wiping until the spots blend in. After a few applications, the mixture will stay even and wet longer and evaporate uniformly. (It’s best to practice on a piece of scrap steel first).
--Let dry and repeat until the desired depth is achieved. You may have to do this a dozen or more times, but that’s the beauty of the product-the reaction per application is very light and so it’s easy to get the precise depth of color desired. Don’t overdo it, however, or it will start to look artificial (Another good reason to test the process on a piece of scrap steel). A good way to see how far you’ve come is to look at the part against a white wall as it reflects direct sunlight-the diffusion will give you an accurate impression of the color without excess light causing uneven glare. Other options are to look at it outside on an overcast day, or under fluorescent light with a paper towel as a filter. Wipe off the part with water and degrease again, and you’re done!
Note:The first picture is a before shot-
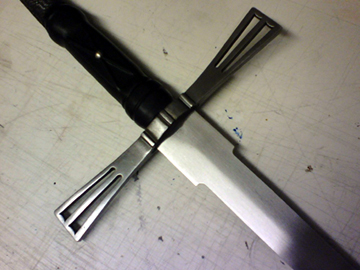
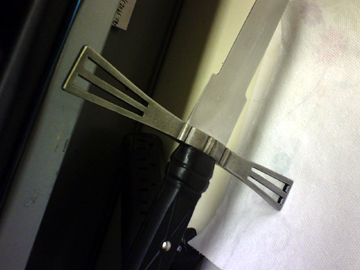
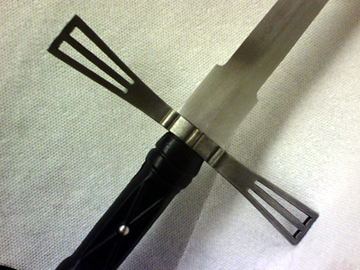
 Attachment: 121.08 KB
Cross Before.jpg


 Attachment: 113.14 KB
Cross.jpg


 Attachment: 143.24 KB
Cross 2.jpg


 Attachment: 125.63 KB
Cross 3.jpg


Last edited by Bill Love on Wed 23 Jul, 2008 8:02 am; edited 1 time in total
Hi Bill...

Thanks for the tip. I'll give it a try.

I have been looking for something that would give the salt gray patina with out the big pits.

ks
Hi Kirk,
It really does work-at least it did for me, anyway. I initially was going to just spray it on, but I was afraid it might get away from me both mess and reaction-wise, so that's why I applied it with the paper towels and Q-tips. One other thing: if you do it on a humid day like I did, it takes a while to evaporate. Don't know if this is why it came out so evenly, but it's something to think about. Good luck!
Bill Love wrote:
Hi Kirk,
It really does work-at least it did for me, anyway. I initially was going to just spray it on, but I was afraid it might get away from me both mess and reaction-wise, so that's why I applied it with the paper towels and Q-tips. One other thing: if you do it on a humid day like I did, it takes a while to evaporate. Don't know if this is why it came out so evenly, but it's something to think about. Good luck!


How about using a tea kettle and use the steam coming out the spout to heat the metal a bit and add a little humidity ?

Might turn out splotchy but in a good way: Test first on some junk carbon steel.

Sound like water and sea salt bought at a pharmacy might work just as well as using purified water might just be adding to the cost for no useful reason with the use you are putting the product to ? For a body piercing after care product purity is an issue you don't have giving a sword some patina.

The spray can may be giving you a more even application than using a spray bottle ? Just thinking out loud about variants and options. ;) :D
All of these ideas will probably give good results-I just used the H2Ocean because I had it lying around. I'm guessing that one advantage to purified water is that regular water might have trace metals that could interact with the sea salt after sitting in the can long enough. At about $12.00, it won't break the bank, and my can still worked despite having sat in a drawer for 4 years. For me at least, consistency is key-I'll leave the home brewing to the experts.
Very cool, Bill. I'm thinking of using it now on the MRL Viking helm I just picked up on eBay. It seems to be in good condition, but if not I'll definitely scrub off the rust and then add a nice patina to it, actually I'll probably do it no matter what, it'll give it a nice "just rowed across the north sea" look to it.

Thanks for the tip!
Sounds great, Tim. Funny thing, removing rust is what gave me the idea in the first place, because after I cut the ends off the cross the finished edges were too bright, which meant that I had to scrub the rust off the rest of the part to match, which then meant that I had to re-patinate it if I wanted it to still match the pommel.

If you are going to prep your helm with a Scotchbrite pad, you might want to try it on a small spot first, and if it's too abrasive you can scrub something metal with it (I've used a 6" steel pipe nipple, including the threaded ends) until some of the fresh "tooth" is gone. That way, when you prep the part, you end up with a pattern of varying roughness on the overall surface so that it doesn't look manufactured. Random swirls, as disorganized as you can make them, look the best, at least to my eyes. You can also dump a can of nuts and bolts over the helm beforehand if you want a little extra character.

I'm thinking of mixing the H2Ocean with a little cold bluing solution for my next experiment-?

Page 1 of 1

Jump to:  
You cannot post new topics in this forum
You cannot reply to topics in this forum
You cannot edit your posts in this forum
You cannot delete your posts in this forum
You cannot vote in polls in this forum
You cannot attach files in this forum
You can download files in this forum


All contents © Copyright 2003-2006 myArmoury.com — All rights reserved
Discussion forums powered by phpBB © The phpBB Group
Switch to the Full-featured Version of the forum