Go to page 1, 2, 3, 4  Next

Greyson Brown's Projects
Since I have several projects that I am working on, or intend to do in the not too distant future, I thought it might be a good idea to start a general topic that covers all of them, rather like the one Russ Ellis has for updates to his site. Thus, I will be reviving this thread from time to time as I undertake new projects.

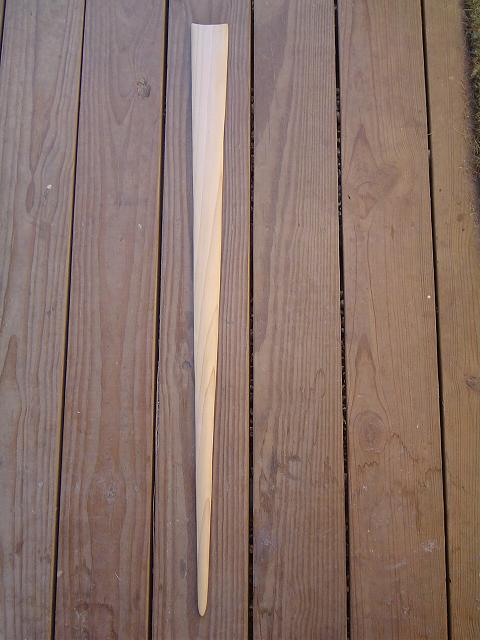
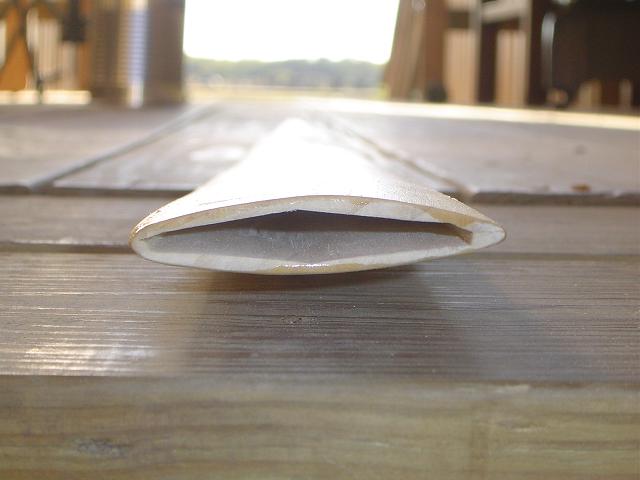
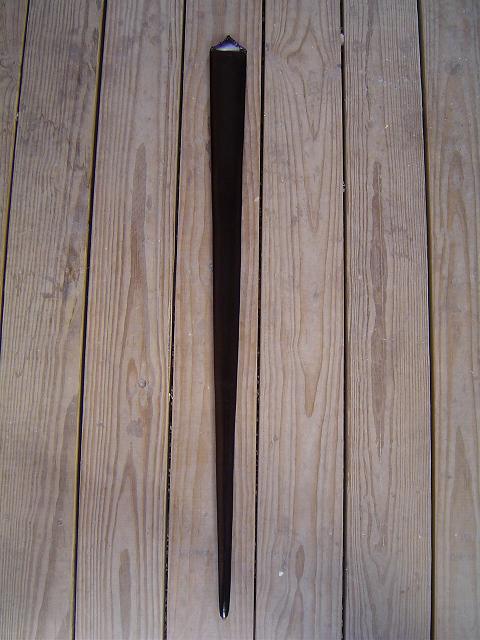
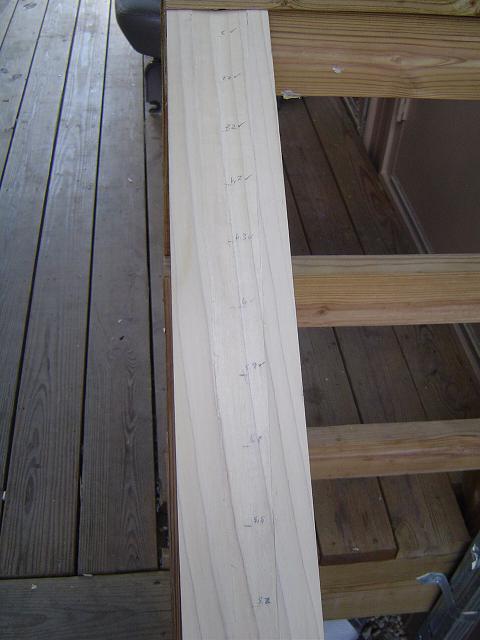
Most recently, I finished up another scabbard. This one is for my Albion NextGen Agincourt. I used the same wood and leather from my Poitiers scabbard project. The shaping on this one went a little faster because I got smarter about it. I carved the general outline for the interior of the scabbard, and then went back and marked the desired thickness on the core. That way I knew how much material I needed to remove. In the picture, the information written on the scabbard is the total thickness of the blade in millimeters (the spots with check marks have been carved to the desired depth). It was easier to use total thickness, as I had recorded it that way previously, and that allowed me to reference my notes more easily.

As I mentioned in the Poitiers scabbard thread, I have to have a safety class before I can use the on-post wood shop, and that class is not offered again for a couple of weeks, so the outside of this piece was shaped entirely with hand tools. I used my 1 inch chisel, a bastard cut file, and some sandpaper in order to do all of the shaping. The scabbard ended up a little thicker than it really needs to be (the scabbard walls are .1 - .125 inches thick), but not too terrible.

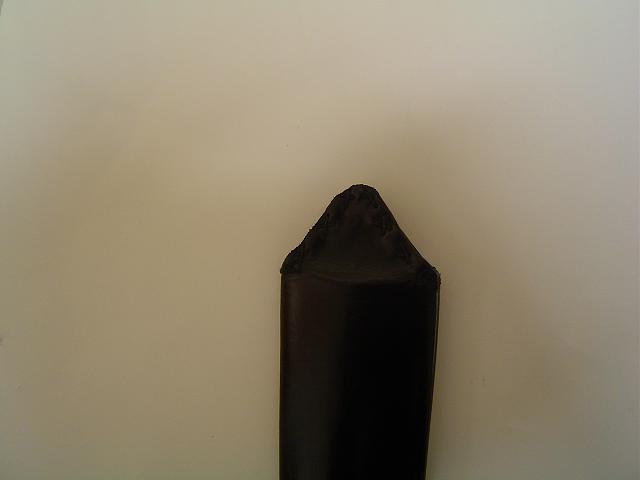
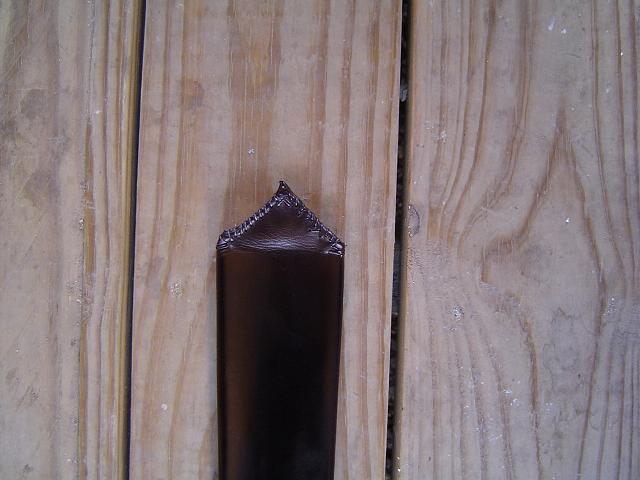
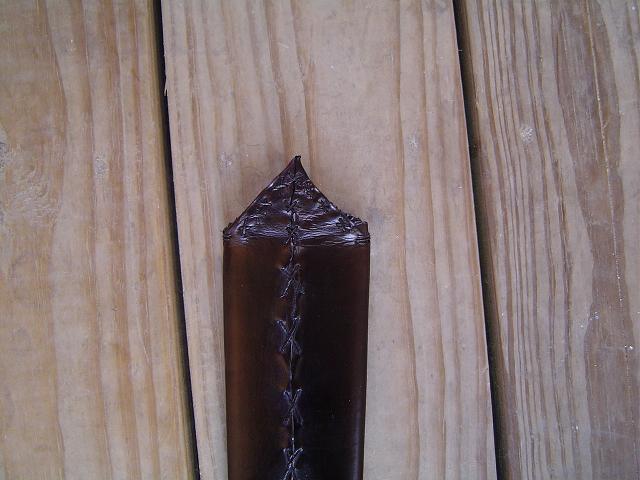
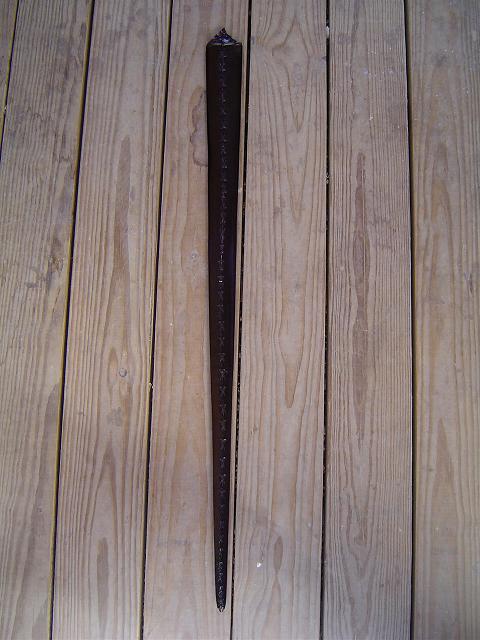
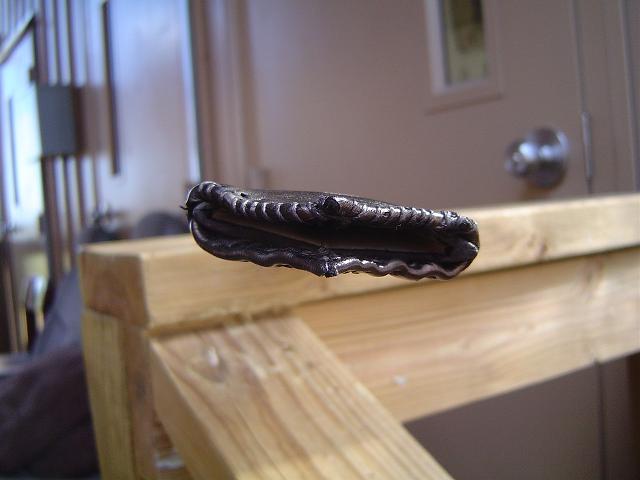
The leather work went fairly well. I did a two needle stitch so that the stitches form an X. I wanted to continue that motif around the front on the flap at the mouth of the scabbard, but I failed to lay out my stitching well enough, and had some trouble with the leather (because of the way I had to lay this one out, the leather at the mouth is just a bit thinner than the rest). The result was hideous! I ended up redoing the flap, and went with a single X in the top middle of the flap, and simply looped the stitching over the edges like on my other scabbard. I did not change the back to match, and am still undecided as to whether or not I will. Also, I slit the sides just a bit too much and the corners of the wood core show. At this point that is the thing that irritates me the most.

The work isn't the greatest, but one of the guys who looked at it was impressed enough that he might have me make a scabbard for him. I guess I can't complain about that.

-Grey

 Attachment: 40.43 KB
slat.JPG


 Attachment: 47.41 KB
core.JPG


 Attachment: 34.98 KB
core_throat.JPG


 Attachment: 14.26 KB
hideous.JPG
Leather work gone terribly awry!

 Attachment: 43.68 KB
scabbard_fixed.JPG
That looks much better.

 Attachment: 46.05 KB
scabbard_back_flap.JPG
But now things don't match. Argh!
 Attachment: 53.8 KB
scabbard_front.JPG


 Attachment: 53.81 KB
scabbard_back.JPG

Getting rather good at this aren't you! Have you decided on a chape?
Geoff
The entire Agincourt sword reminds me of the one on Sir Reginald Cobham's effigy (they are both Type XVa's and that is about all they really have in common, but I still find myself associating the two), so I will probably do something similar to the chape on that one. It is also a chape style that seems to be pretty common for these pointier swords. What I want to do is essentially a variation on the U shaped chape where the bend is tighter and the sides of the bottom half of the chape touch, but there is space at the top. I might weld the touching bits together, or I might just be content with letting them touch. It will kind of depend on what the material wants to do, the tools available when I get to that point, and what is required to get a good fit.

As for getting good, that kind of depends on how you look at things. Getting different might be more accurate. I am reminded of the line from Jurassic Park: The Lost World. Mr. Hammond says, "We won't make the same mistakes this time," and Jeff Goldbloom's character responds by saying, "No; you're making all new ones." I guess I should take some solice in the fact that I screwed up different things.

-Grey

P.S. Looks like one of my pictures didn't post.


 Attachment: 31.85 KB
scabbard_throat.JPG

It does look like a real one indeed, do not worry.

:)
Re: Greyson Brown's Projects
Greyson Brown wrote:
...The scabbard ended up a little thicker than it really needs to be (the scabbard walls are .1 - .125 inches thick), but not too terrible....

I think that your core thickness looks good. What were you going for?

Quote:
...The leather work went fairly well. I did a two needle stitch so that the stitches form an X. I wanted to continue that motif around the front on the flap at the mouth ... I ended up redoing the flap, and went with a single X in the top middle of the flap, and simply looped the stitching over the edges like on my other scabbard. I did not change the back to match, and am still undecided as to whether or not I will...

I like the back stitching exactly as you have it.
What material did you use for thread?
Also, did you glue the leather to the core in this example?

Quote:
...Also, I slit the sides just a bit too much and the corners of the wood core show. At this point that is the thing that irritates me the most.

I can't tell what you are complaining about here, since I don't see it in the photos.

All in all, Grey, it looks like you did a fabulous job! And, I find your post very informative. Please continue.
I like that back stitch too, Grey, it is a nice looking detail that adds character;

May I ask you how you did it?
Steve Grisetti wrote:
Greyson Brown wrote:
...The scabbard ended up a little thicker than it really needs to be (the scabbard walls are .1 - .125 inches thick), but not too terrible....


I think that your core thickness looks good. What were you going for?


I was trying for something in the .1 inches or less range. I have changed my mind on that, however. I got to see Patrick Kelly's Big Johnsson yesterday, and the scabbard coe for it is slightly thicker than I had thought. In fact, the walls on my core are thinner than Big Johnsson's. That said, the blade on the Agincourt seems to be thicker, and is certainly narrower, so I think I have just about the right thickness on my scabbard to keep the proportions visually pleasing.

Steve Grisetti wrote:
Quote:

...The leather work went fairly well. I did a two needle stitch so that the stitches form an X. I wanted to continue that motif around the front on the flap at the mouth ... I ended up redoing the flap, and went with a single X in the top middle of the flap, and simply looped the stitching over the edges like on my other scabbard. I did not change the back to match, and am still undecided as to whether or not I will...


I like the back stitching exactly as you have it.
What material did you use for thread?
Also, did you glue the leather to the core in this example?


I used some natural waxed thread from Tandy Leather Factory. I have realized that I should have used some finer thread. I don't know the diameter of my stuff, though, so I don't really know what size to recomend. There is no glue on this scabbard except the glue used to hold the two slats together. Using some glue on the triangular flap might have been helpful, but I think I am going to try a completely different way of doing that, anyhow.

Steve Grisetti wrote:
Quote:

...Also, I slit the sides just a bit too much and the corners of the wood core show. At this point that is the thing that irritates me the most.


I can't tell what you are complaining about here, since I don't see it in the photos.


If you look at the photo of the back of the triangular flap (the one captioned, "But now things don't match. Argh!") you can see, especially on the right side, the top corner of the scabbard sticks up further than leather so that it peeks out from the side of the triangular flap. I ended up fixing this. I cut a small groove in sides of the scabbard mouth, and ran some thread through the front and back of the scabbard so that it passed over the core (and in those grooves). This way, when I pulled the thread tight, the leather was raised a 1/4 inch or so, and the wood is now hidden. Unfortunately, one of the grooves was not deep enough to contain the thread, but I used some hide glue on it last night so it will not rub against the edge of the sword. The down side to this is that the leather now ends about 1/4 from the tip, but it should be well within the area covered by the chape.

I'm sorry if that doesn't make a whole lot of sense. I will try to take a picture or do a drawing that explains it better.

Bruno Giordan wrote:
I like that back stitch too, Grey, it is a nice looking detail that adds character;

May I ask you how you did it?


That's really not too hard, but it took awhile. I started my stiching from the inside out (so that the knot would be on the inside), then I went from the outside in on a diagonal (if done with both pieces of thread, this forms one X). The next stitch also went diagonally across the seam, and came from the inside out (again, if done with both, this will form a X, but on the inside of the leather this time). Then I just kept alternating so that I had and X on the outside followed by an X on the inside. I started at the tip of the scabbard (as recommended by Peter Johnsson in the drawing that Patrick Kelly has posted a few times), and I think that helps. It is easy to stitch from the inside out when you get to the triangular flap (there is no wood under that portion), but it could be a real pain to get your needle under the leather at the tip if you started from the other end.

-Grey
Having had the opportunity to see these two scabbards this weekend, I can say that Greyson did an extremely nice job on them both. Personally, I couldn't find anything about them that wasn't pleasing to the eye, both were that well done. I think you will be very pleased when you finally get to place the swords within the scabbards, Grey - it makes a world of difference.

I also want to say that Greyson is a super nice guy and was a pleasure to meet. I don't know how you put up with all of us "crazys". :lol: Be well and best of luck!

-Greg
Ditto on all of Gregs comments. It was a pleasure meeting Greyson and seeing his work.
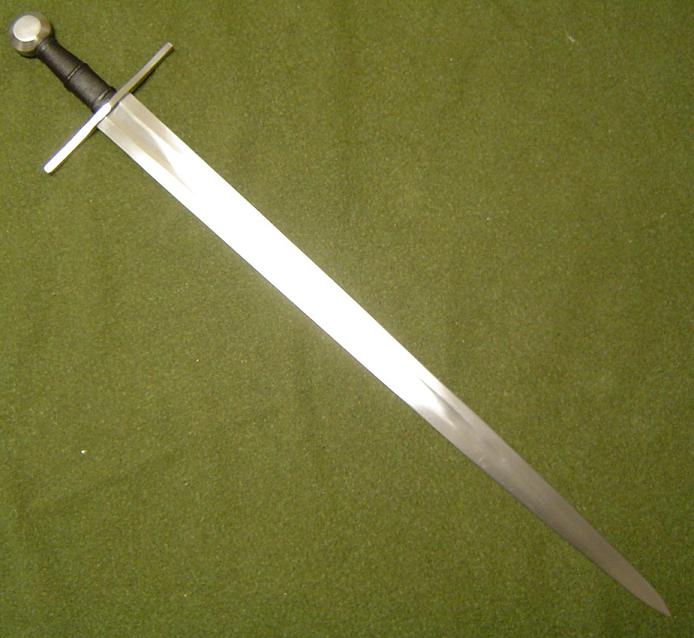
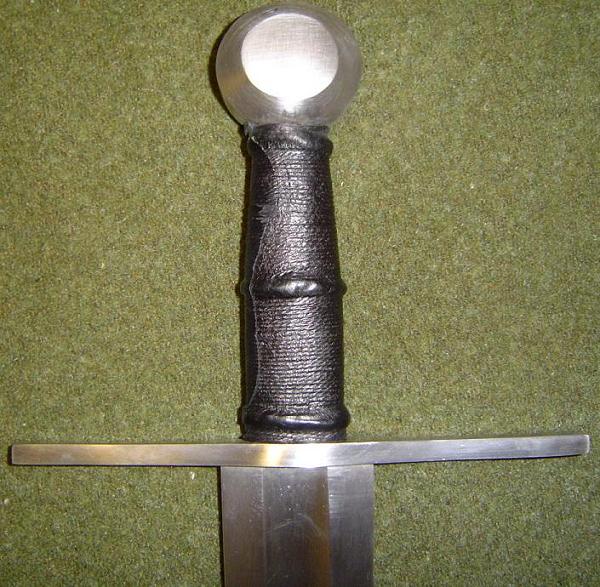
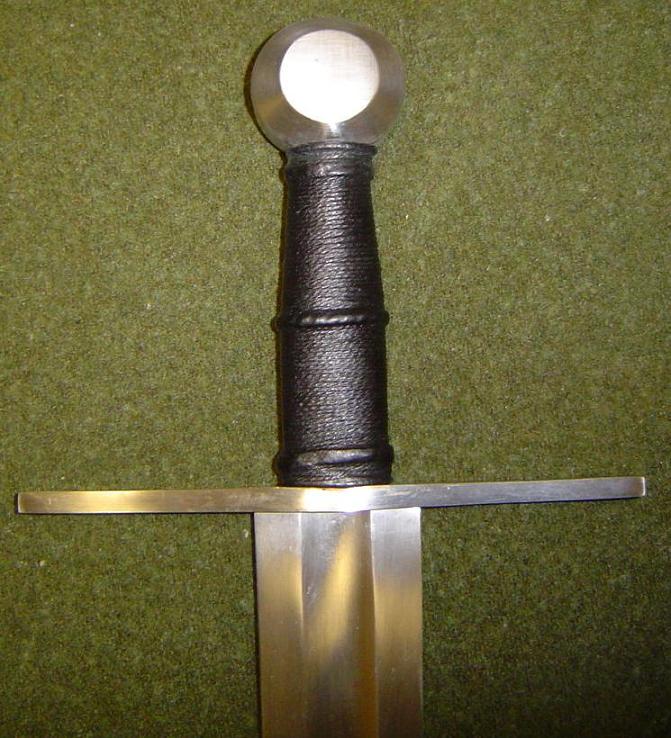
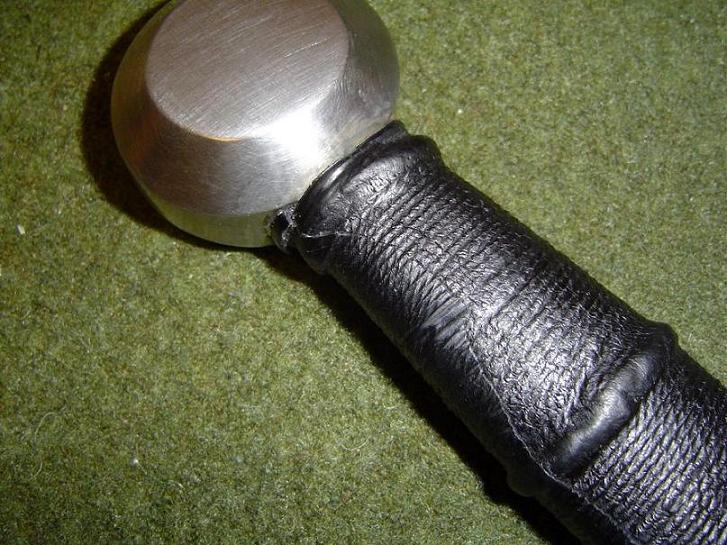
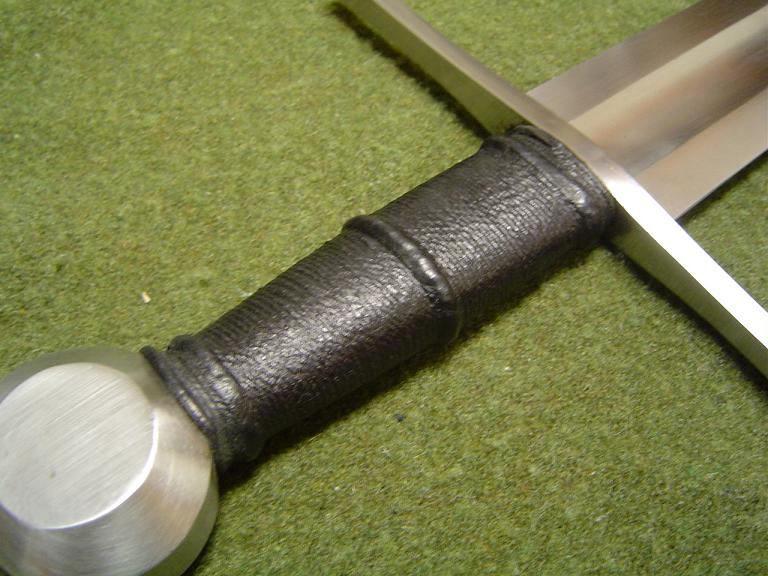
Well, it was a little painful to do, but I rewrapped the grip on my SL Knightly sword yesterday. I am fairly happy with the result, but it is not perfect. I had a slight bulge in the leather right at the seem which resulted in a bump which I ended up cutting off with a razor after the fact. I should have trimmed it before doing the external cord wrap. The seem is also highly visible because I did not thin down the edge of the leather enough. I also had one riser partially "collapse" on me where the twisted hemp cord I used for the risers decided it did not want to be twisted any longer. I might also have put just a touch too much beeswax on the leather. Still, it is very comfortable, and the pictures actually make it look a bit uglier than it truly is.

I think the argument could be made that, even when viewing the ugly side, this grip is still aesthetically on par with the original one. The stock grip on this sword was just fine, but a friend of mine noted that it certainly won't be flying out of ones hand with this new grip on it. I have some practicing to do if I intend to rewrap the grip on my NG Sherriff (I'm seriously considering it, but I am still very hesitant), but this was a satisfactory effort.

One interesting discovery; when I took off the original leather, I discovered the word "Knight" written on the grip core. I'm not sure why I've found this surprising. I have draw lines and notes on nearly every grip core that I have done, and I have wondered what one might find under the leather on other swords. I am curious, though, whether this indicates that the SL Knightly sword and the NG Knight use the same grip core (entirely plausible), or if it was simply an abbreviation for Knightly. It doesn't really make a difference, it is just one of those interesting little side notes.

Anyhow, the pictures are below.

-Grey


 Attachment: 60.29 KB
SLK_OV.JPG


 Attachment: 78.1 KB
SLK_Hilt3.JPG


 Attachment: 86.45 KB
SLK_Hilt2.JPG
The ugly side

 Attachment: 95.18 KB
SLK_Hilt.JPG

Changes the character of the piece, much to my suprise.

Nicely done! :)
Hi Grey,

Very nice, as usual. :)

What type of leather do you use? Where do you get it? You mentioned thinning the edge of the leather, how do you do that?

Thank you for the help and inspiration!
Joe Fults wrote:
Changes the character of the piece, much to my suprise.

Nicely done!


Thanks. I think it looks just a little nicer, and it also changes handling a touch. The original grip was not at all insecure, but now my hand feels "locked in" just a little more. I think it now handles just a tick quicker. Of course, it could just be my imagination.

Pamela Muir wrote:
Hi Grey,

Very nice, as usual. :)

What type of leather do you use? Where do you get it? You mentioned thinning the edge of the leather, how do you do that?

Thank you for the help and inspiration!


I used some 1-1.5 oz pigskin from Tandy Leather (I think it was listed under the lining leather section). They have it in several colors or undyed. I went with the undyed stuff, so that I can do other grips as well. Since Tandy sells stuff mostly by the hide, I have enough leather to do a good number of grips. This stuff has a distinctive texture that kind of shows through the cord texture, though.

I thinned the edge slightly by scraping the back side with a razor blade. It is probably possible to cut it carefully, but scraping, while less effective, is easier to do without making mistakes.

I wasn't content with the results of this grip so, after I posted my pictures last night, I used my wooden leather compression tool (read: a bit of scrap wood from my first scabbard project), and worked on the "bald" spot where I had trimmed off the leather. I was able to continue the cord grooves through that patch so that the general texture was not interupted. While I was at it, I also worked down the spot where the seem didn't meet well by the pommel. I am now about 92% happy with this grip.

-Grey


 Attachment: 91.35 KB
SLK_Improved.JPG
My improvements to the ugly side
Greyson Brown wrote:
Pamela Muir wrote:
You mentioned thinning the edge of the leather, how do you do that?

I thinned the edge slightly by scraping the back side with a razor blade. It is probably possible to cut it carefully, but scraping, while less effective, is easier to do without making mistakes.


Technical term: skiving. There is a half-moon-shaped knife that is excellent for this, but they are quite spendy. Tandy has them in their catalog.

Greyson Brown wrote:
I wasn't content with the results of this grip so, after I posted my pictures last night, I used my wooden leather compression tool (read: a bit of scrap wood from my first scabbard project), and worked on the "bald" spot where I had trimmed off the leather. I was able to continue the cord grooves through that patch so that the general texture was not interupted. While I was at it, I also worked down the spot where the seem didn't meet well by the pommel. I am now about 92% happy with this grip.


... and it looks pretty nice, brother! I'm not at all surprised about the change in feel and look of the sword - dressed it up a bit.

The wood tool worked, obviously. Bone and hard plastic (like cutting board material) also make great tools for applications such as this... ;) Bone can be shaped with sandpaper, but stinks like the deepest pits of hell, and is toxic, so be careful (and seriously consider a dust mask - outside).
Aaron Schnatterly wrote:

Technical term: skiving. There is a half-moon-shaped knife that is excellent for this, but they are quite spendy. Tandy has them in their catalog.


You can skive with a round knife but they're a bit of a pain for really thin stuff.

Tandy sell a thing they call a "saftey beveller" for about five bucks which is what I use when I need to skive edges. Having a stock of spare blades on hand is good because these puppies need to be sharp. I've never tried skiving down sub-millimetre leather though, the thinnest I've done is about 1.5mm but that worked just fine.

http://www.tandyleather.com/products.asp?number=3001-00

They also sell a thing called a "Super Skiver" for about ten bucks that does the same job, but I find it more awkward to use on long edges.

http://www.tandyleather.com/products.asp?number=3025-00

Professional bootmakers use a thing called a "tina knife" to skive leather edges. Here's a link to a thread on a bootmakers forum discussing skiving knives.

http://www.thehcc.org/discus/messages/4/3977.html#POST17359

You can see pictures of the kind of knife here:
http://apps.webcreate.com/ecom/catalog/produc...ctID=18112
Thanks for the links, Al. I think I'll pick up a "saftey beveller" from Tandy and see how it works for narrow, long edges. I've been using a knife very similear to the "French" knife shown in your last link. They work very, very well.

I also like the half-round skiving knives but the ones Tandy sells are too thick, in my person experience. You can spend time grinding and sharpening the heck out of it and it will work better.
Nathan Robinson wrote:
Thanks for the links, Al. I think I'll pick up a "saftey beveller" from Tandy and see how it works for narrow, long edges. I've been using a knife very similear to the "French" knife shown in your last link. They work very, very well.

I also like the half-round skiving knives but the ones Tandy sells are too thick, in my person experience. You can spend time grinding and sharpening the heck out of it and it will work better.


You're welcome. I imagine the French knife does a great job well sharpened, I doubt you'll get better service out of the safety beveller, but hey, they're cheap :-)

I find the round knives are great for cutting things out but not so good for things like skiving, but I've never been properly taught how, so that may well be my technique.
Not a specialized leather working knife but the new Spyderco Captain might be a good knife to use for this as the point shape looks as if it could do the job.

http://www.knifecenter.com/knifecenter/spyderc/images/111n.jpg

I've already sent an e-mail to a Canadian Knife dealer I've been buying from for more than 10 years to find out about price and availability. srknives@rogers.com

Just mentioning them as they have given me good service and prices. ( A little bit of haggling or being a repeat customer can mean a better price. ;) But their customer service is good and they will order stuff for you: I purchased my first Albion though them " Gaddhjalt " in 2002 or 2003. )

Sorry for the semi off THE topic post: But it's a really cute knife and I also have a collection of Spydercos and other Quality brands of folders. Hopefully the fact that it might be a useful knife for leather work makes it semi ON topic. ;) :lol:
Jean Thibodeau wrote:
Not a specialized leather working knife but the new Spyderco Captain might be a good knife to use for this as the point shape looks as if it could do the job.


:D

It's an interesting looking knife, I must say.

The thing about those skiving knives is that they are chisel-ground so they're completely flat on one side, which means you have to be sure to buy the right shaped one for the hand you'll be using it with.

You can skive with a double-bevelled knife but it's harder because the body of the knife gets in the way.
Al Muckart wrote:
I find the round knives are great for cutting things out but not so good for things like skiving, but I've never been properly taught how, so that may well be my technique.

I was never very good at it, either, which is why I use the squared off type like the "French" example above. But then I visited Albion a few years back while Peter Johnsson was there and he gave a good demo. The knive he was using was one from Albion, I believe, and was part of a few that Eric McHugh had made in-shop. It really showed how important it was to have them be thin and sharp. Technique is important, too, but can be learned when not fighting against the tool. My Tandy-issue knife was just too thick and I had put it away long ago. After my visit with Albion, I went home and ground it down and sharpened it. Now I'm not very good with a grinder, but even my messed up skills were able to get a half-round skiving knife that worked well when all was said and done.
cheers!
Go to page 1, 2, 3, 4  Next

Page 1 of 4

Jump to:  
You cannot post new topics in this forum
You cannot reply to topics in this forum
You cannot edit your posts in this forum
You cannot delete your posts in this forum
You cannot vote in polls in this forum
You cannot attach files in this forum
You can download files in this forum


All contents © Copyright 2003-2006 myArmoury.com — All rights reserved
Discussion forums powered by phpBB © The phpBB Group
Switch to the Full-featured Version of the forum