Hi All,
So here is a new experience for me and that is making a zweihander - have never made a sword this large before, though I did make a reproduction of the guard a few years ago.
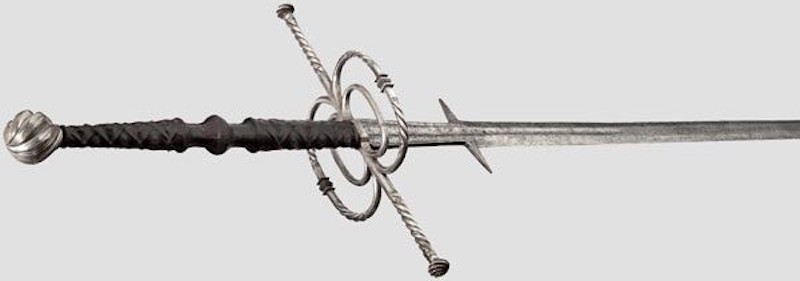
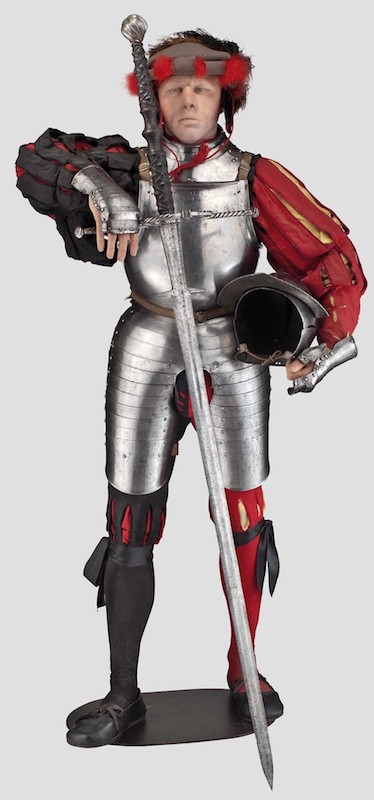
The sword is based on a piece sold by Hermann Historica a few years ago. There are a few basic stats on the piece, but much of the information I would like is unavailable, so I have had to extrapolate a little from what I do know and approached Toby Capwell and Peter Johnsson for any information they could give on likely blade dimensions.
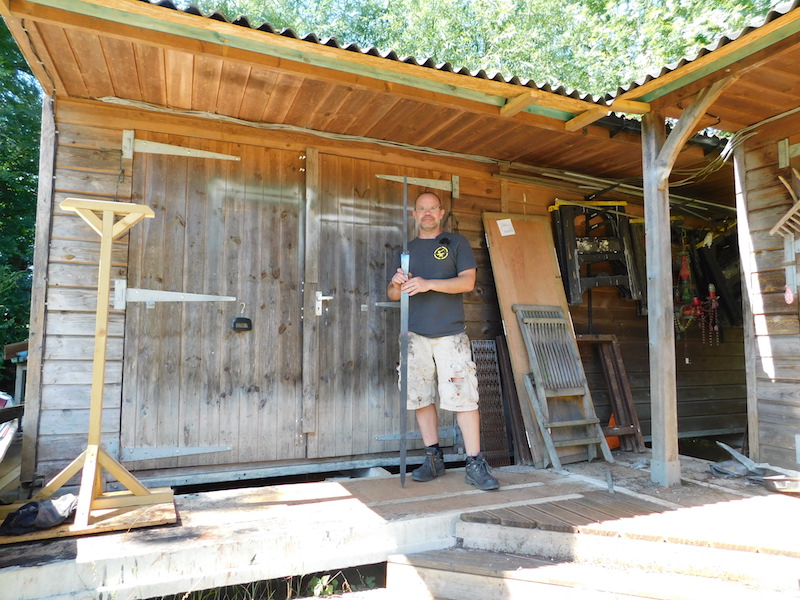
I am making a video diary of the piece and that will appear on You Tube in due course, mainly because this is an interesting piece for a few reasons. The blade is very long at 132cm and the whole sword is 180cm/6ft overall and I thought it wouldn't fit in my grind room, so that was the first spect and then the next is the grip which will be quite a challenge, mainly because right now I still don't know how I am going to handle it. Other than that, it is going to be a stunning piece (I hope), so worthy of me making a an effort to document it.
The blade length is 132cm, the grip is 40cm long and the overall length is 180cm
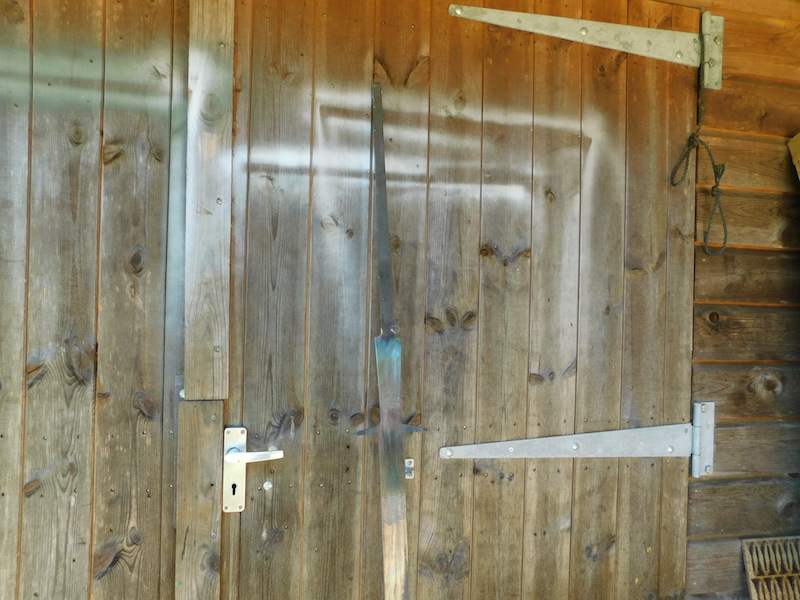
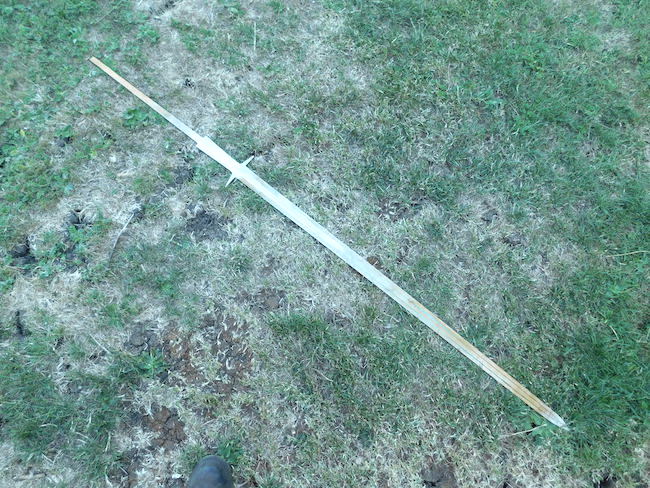
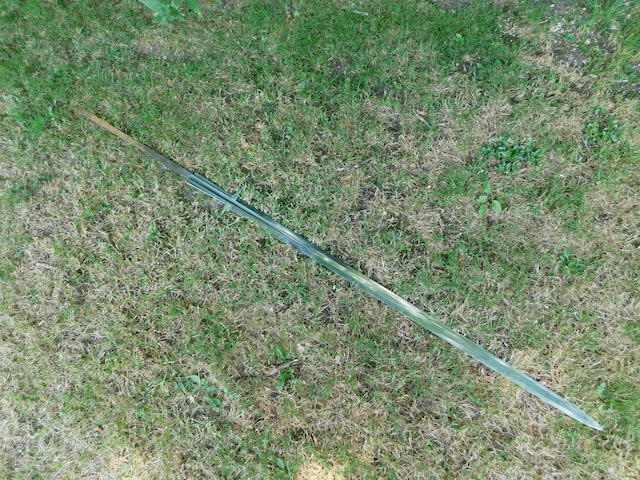
I started with a strip of 8mm thick EN45 spring steel and forged out the lugs and finished the profiling. At this length, I decided warping in the heat treat could be a real issue, so I had it heat treated with no taper and then ground in the taper after treatment and it is has remained dead straight.
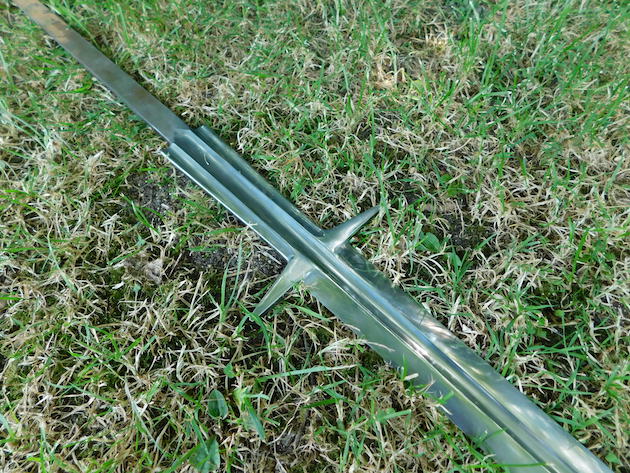
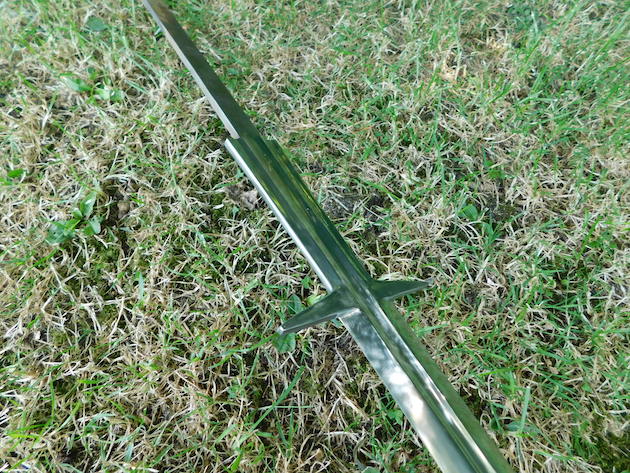
The blade is 8mm thick at the guard, it drops to 6.5mm at the lugs, 5.5 at the end of the fuller, 4mm thick at 45cm from the tip and 1.5mm thick just up from the tip and the blade is hexagonal in form.
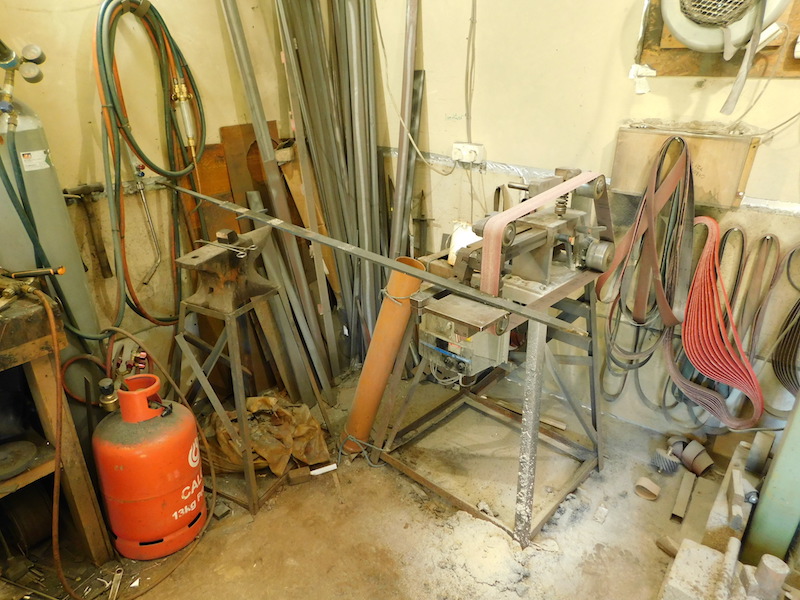
As it happened, with moving the grinder around, I just managed to fit the blade in the grind shop and I managed to shape it pretty much in the normal way, so I thinned it down to put the distal taper in and then ground the fuller in. The lower part of the fuller was done with a single wheel and then as the fuller widens, I used a further 3 wheels and then blended the transitions by hand. The ricasso area of the blade has further fullers on each side and they were straight forward enough to grind in, but the transition into the parrying lugs also had to hand blended.
The next stage was to grind the bevels into the blade and I was quite confident that this would be fine. I was wrong.
The blade is, stating the obvious, very long and this means that reaching out to steady and hold the blade is quite difficult and near the lugs it was fine. Toward the tip, it all became a bit flexible and unwieldy and so rather than repeating each move to establish crisp and neat flats for the bevels, I was wandering around a bit and there was no way I was going to get a good result, so I managed to set the edges, but not make it neat. This was unexpected.
So I went back to basics and clamped the blade to a plank and got the angle grinder out with sanding discs and carefully ground to the scribed lines with a medium disc and then a fine disc and it all looked good. I then went back to the grinder using a flexible platten and this has the advantage of giving a slight apple seed edge and also softens the transitions allowing for problem blades to still look good.
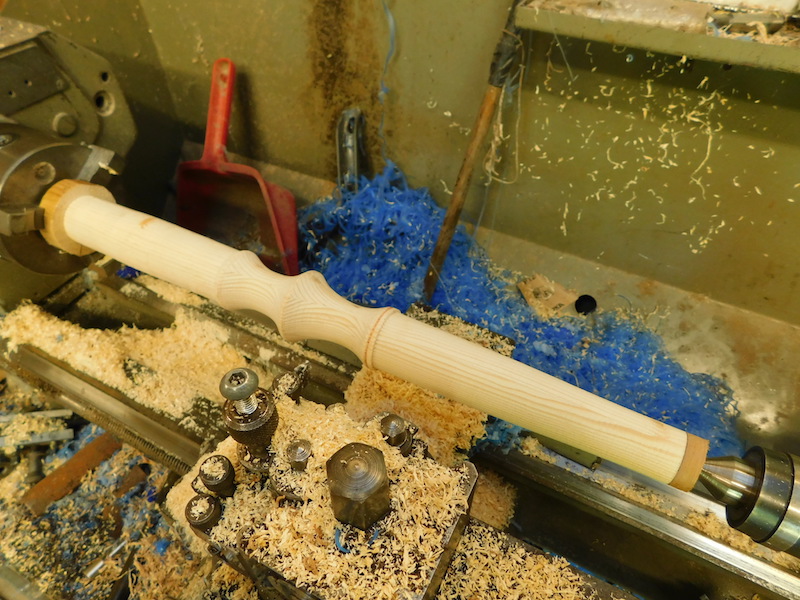
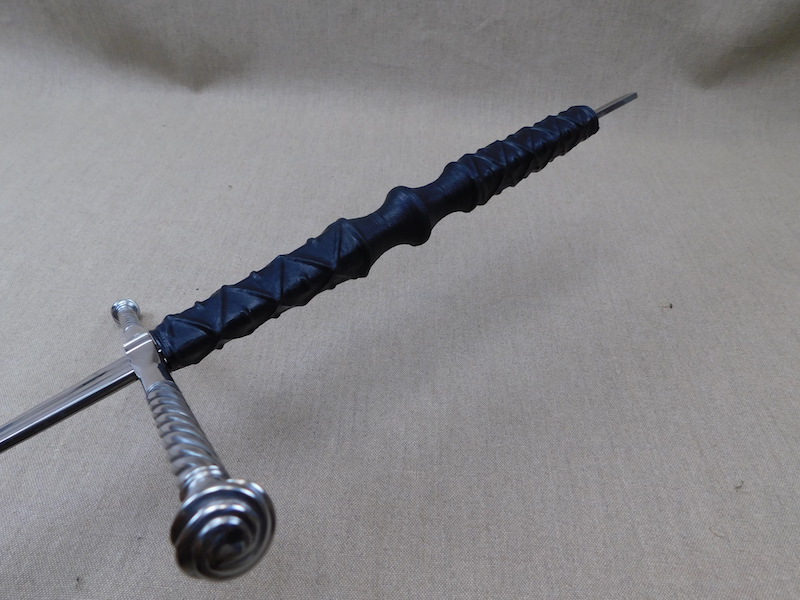
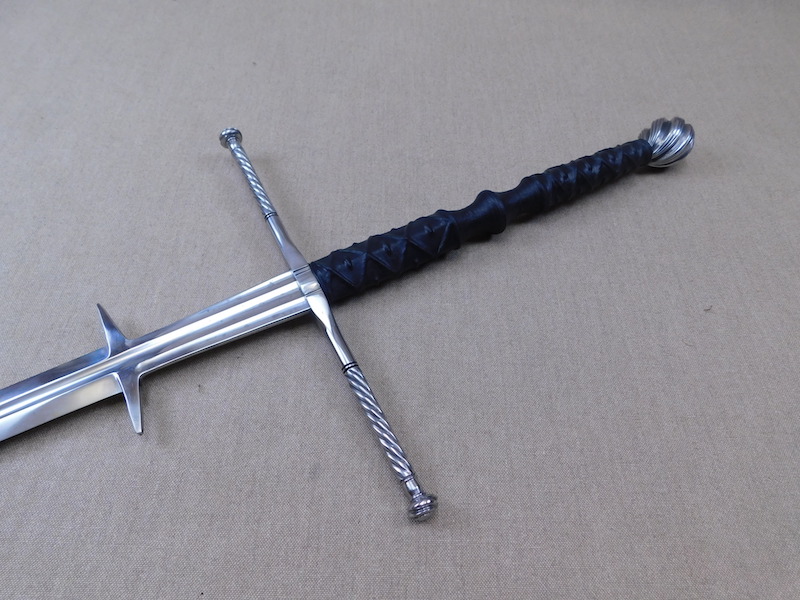
Now the blade is polished I am pleased with the result and so went on to making the grip. The grip is very sculptural with lots of cord work under the leather, and sports very prominent central turnings. I took a round billet of wood and sawed it into two halves and then cut out the recesses for the tang. The grip core was then glued back together to give an almost round result. This round core was the turned to make it round and the central turned section was cut in.
And that is far as I got so far...............
I hope you like to so far and let me know if you have any questions or comments.
Tod
Attachment: 56.53 KB
Attachment: 21.93 KB
Attachment: 210.11 KB
Attachment: 166.55 KB
Attachment: 184.19 KB
Attachment: 117.52 KB
Attachment: 113.57 KB
Attachment: 130.06 KB
Attachment: 127.45 KB
Attachment: 201.03 KB
That's gonna be a monster...a sweet, sweet monster. I wish my Hanwei Lowlander had a tang that good...almost, but not quite. Excellent work! :D .........McM
Tod,
A lovely piece. Thank you for bringing us along on the journey! I will go subscribe to your channel to see the videos.
After the blade is finished, the next job is to make the guard.
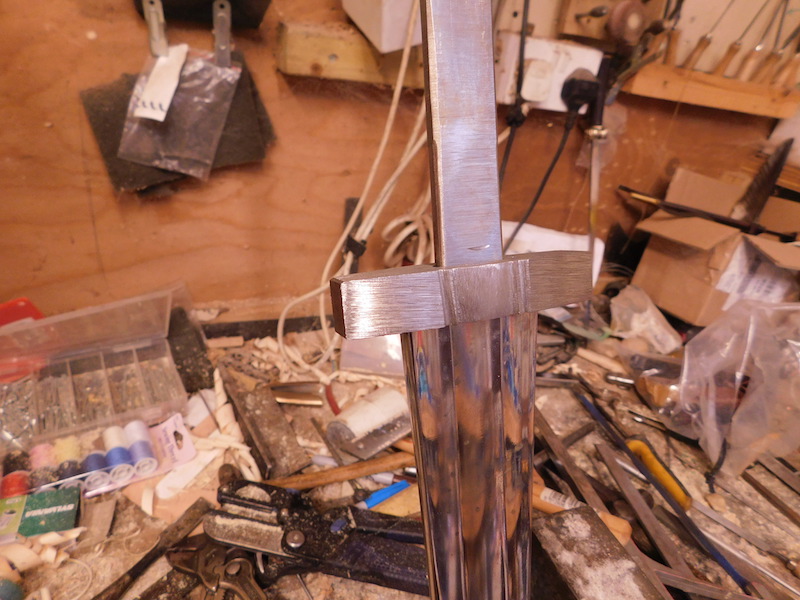
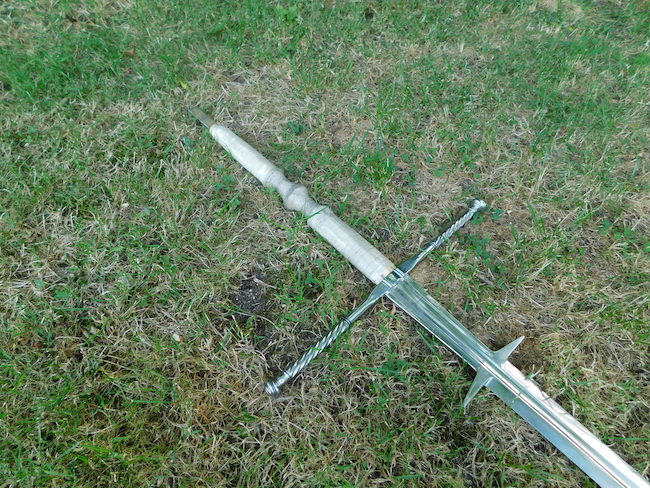
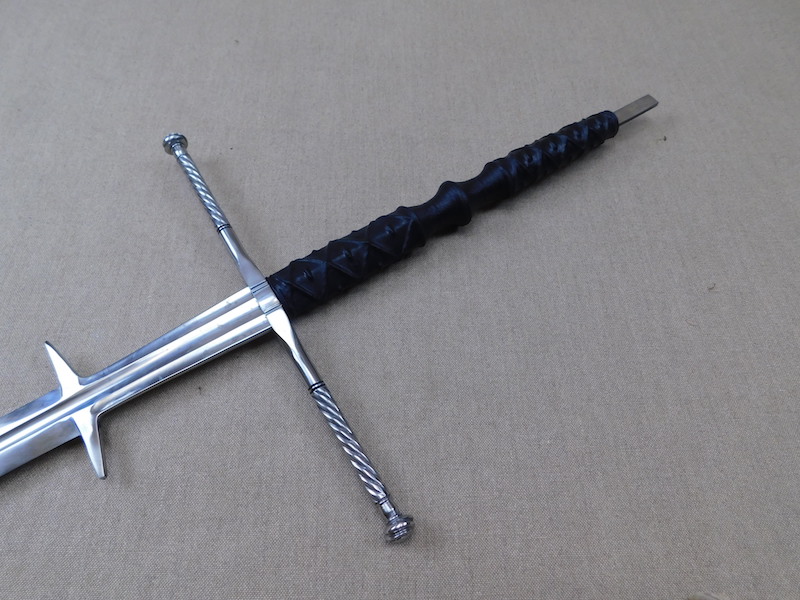
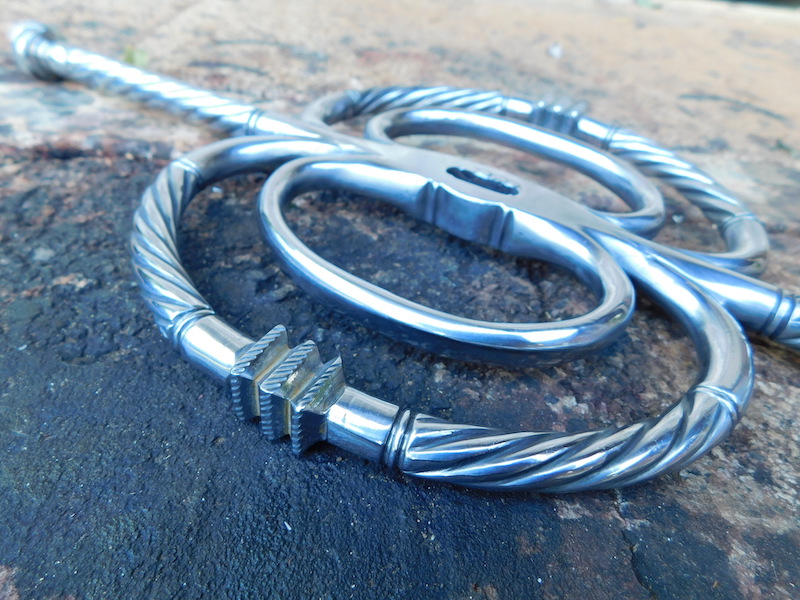
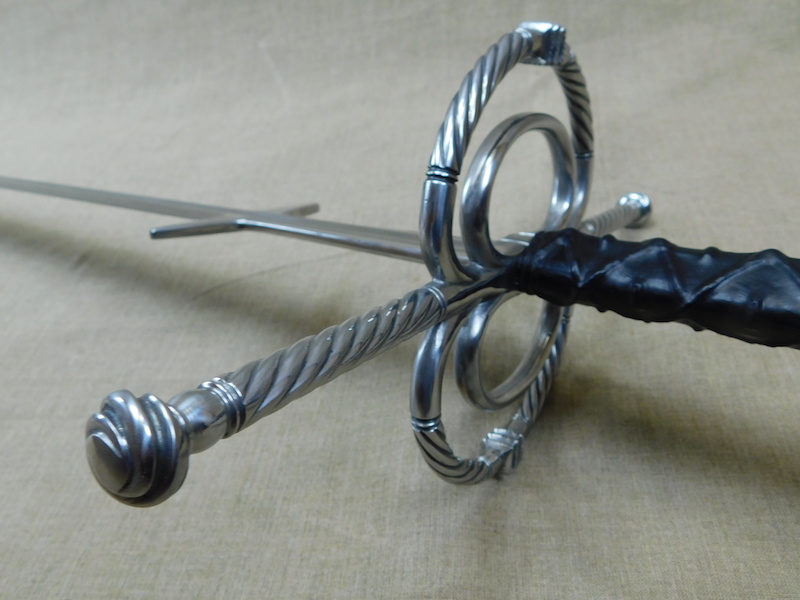
Historically I would guess that the quillon block and arms would be forged from one piece; I opted to fabricate from 3 pieces because a deal of the decoration is turned and so it would give me a head start with those. I welded the arms in place having pre-heated the parts to give a really deep weld and then filed and filed and there is no power tool substitute for hand marking, sawing in the spirals and filing.
Filing.
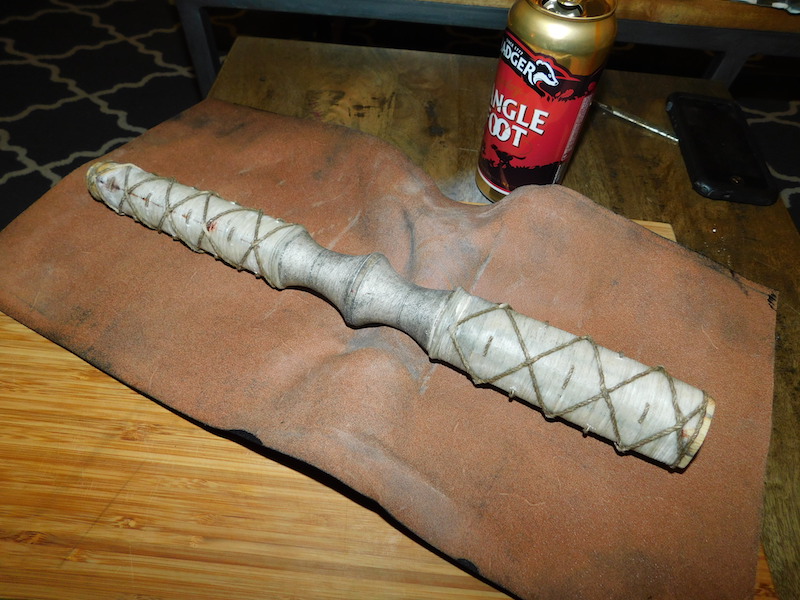
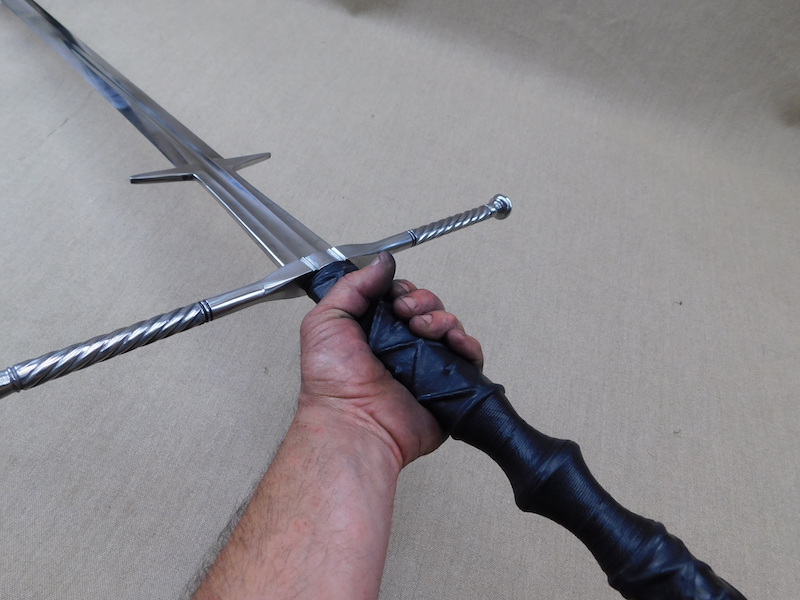
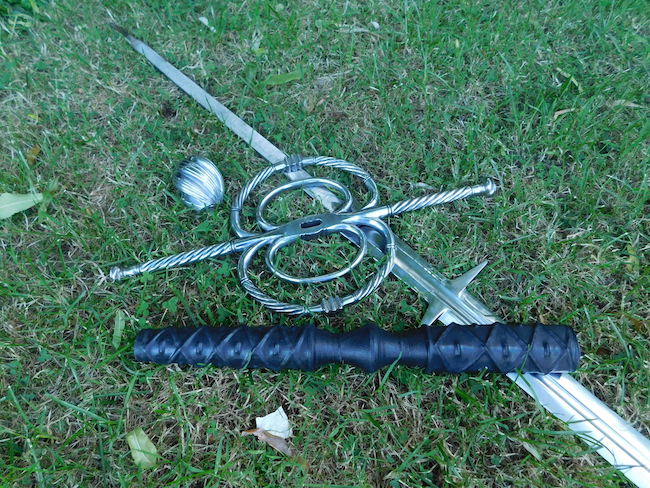
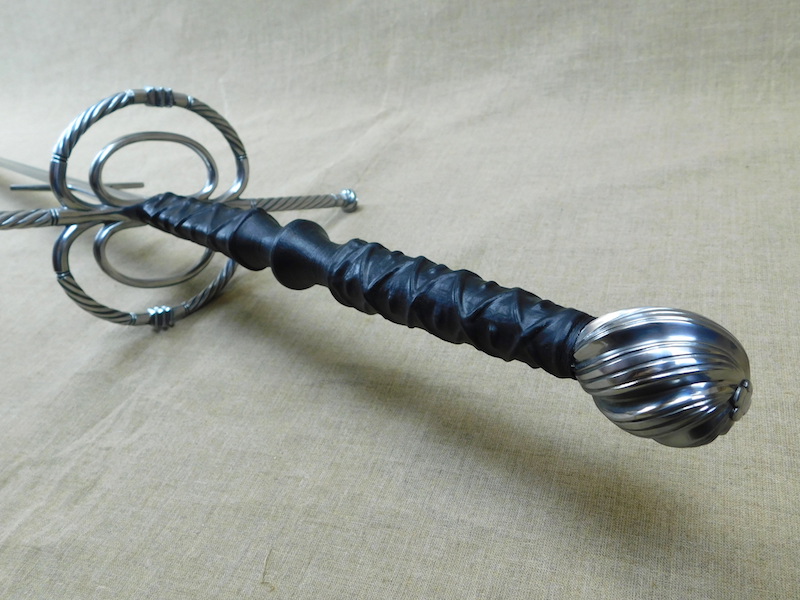
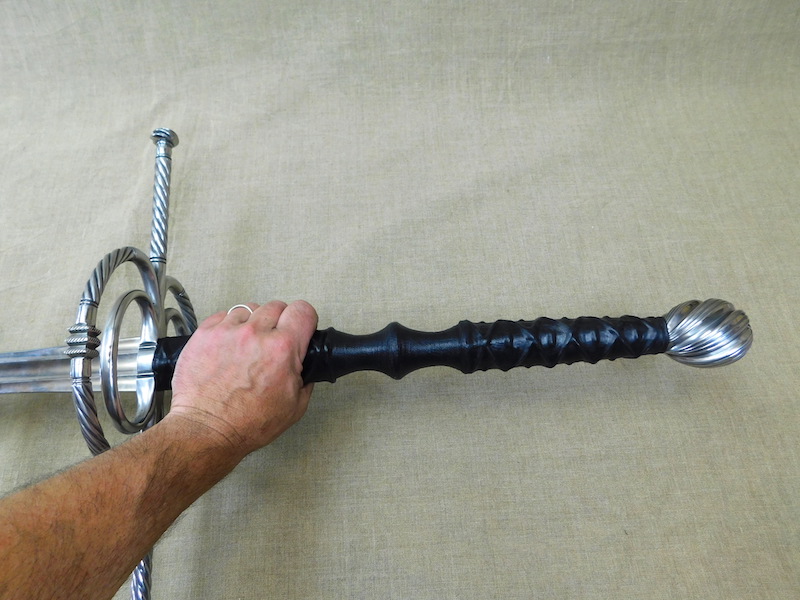
I have been wondering how to make the grip for a while and so was eager to get onto it and in fact it turned out to be quite straightforward. I took the wooden grip, wound it with cord and glue and left it to dry. I then added the larger cord twists and the small cord sections in the middle of the diamonds. The leather was brushed with glue and pressed into place over a couple of hours, paying attention to pressing the leather tight into the edges of the cord and rubbing the seams down.
After this it was the turn of the pommel.
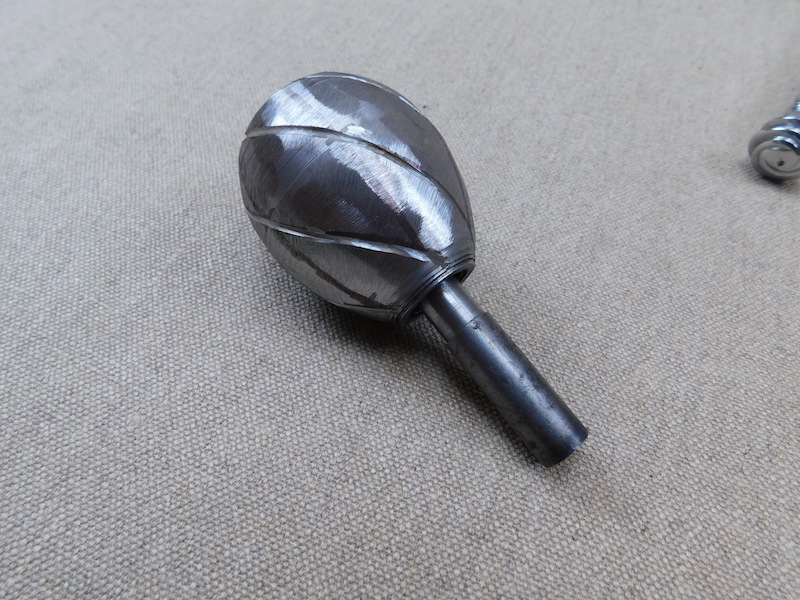
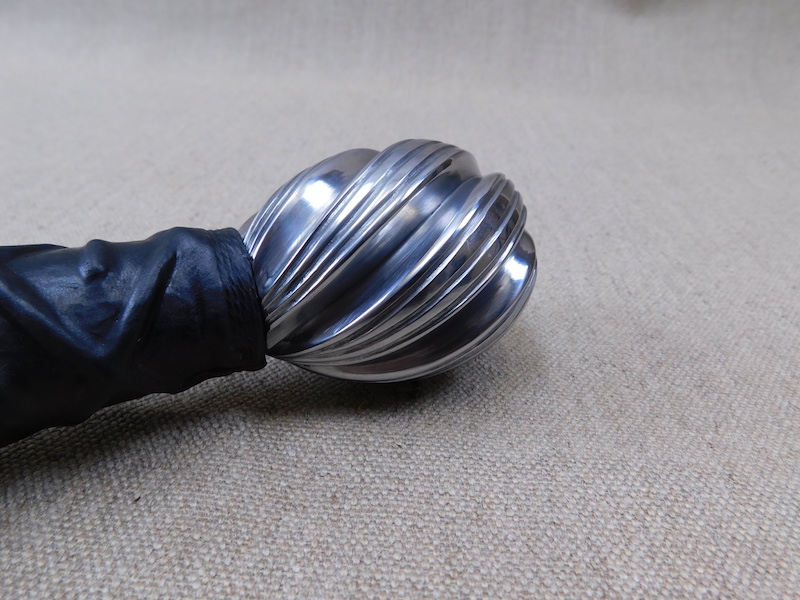
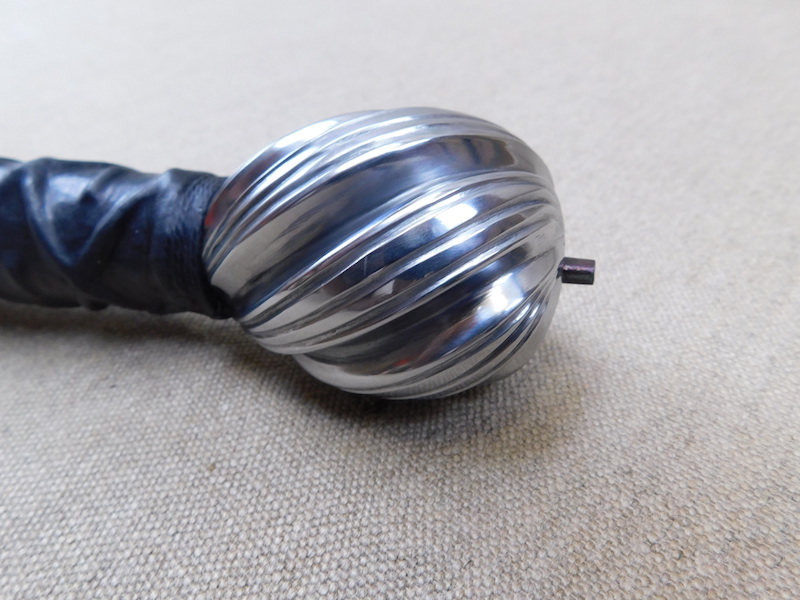
I started with a round billet and turned it down to the external form and marked the spirals and cut them in with a small grinder to permanently mark them. Then it was the turn of the files again as I spent a day cutting in the spirals and grooves and here we are......
Personally I loved the result I got with the grip and I like it as an object, and am really looking forward to finishing the rings and looking at a complete sword.
The next session should see the side rings applied.
I hope you like it.
Tod
Attachment: 160.32 KB
Attachment: 145.33 KB
Attachment: 157.48 KB
Attachment: 134.64 KB
Attachment: 137.21 KB
Attachment: 137.36 KB
Attachment: 191.18 KB
Attachment: 146.3 KB
Attachment: 172.17 KB
Attachment: 154.94 KB
Wow. Just incredible work, Leo. I own 5 of pieces now, and your attention to detail always leaves me breathless.
Incredible work when one just looks at the results, but actually maneuvering this huge blade to grind it into shape without bad bevels or wandering fullers must have been " Hellish ".
In your shop it must have been like working on a 10 foot pole in a 7 foot high phone booth ...... If people still remember what a 1970's phone booth looked like ...... :eek:
Another couple of days have passed and sorry I missed some pics out.
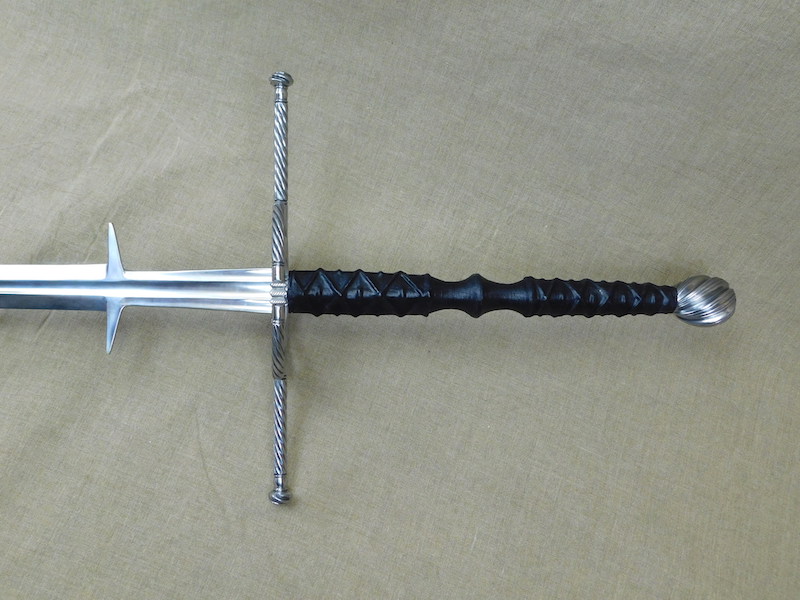
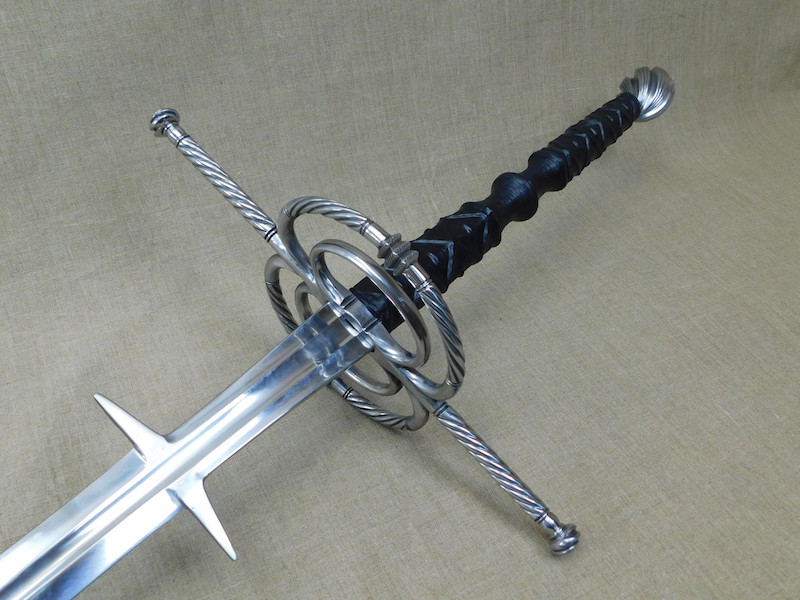
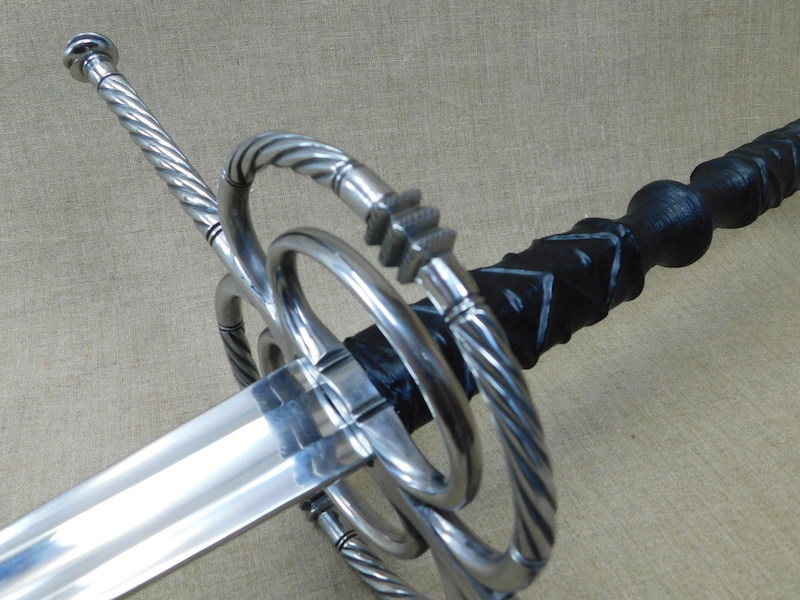
The next stage was to carry on with the guard, making and fitting the rings.
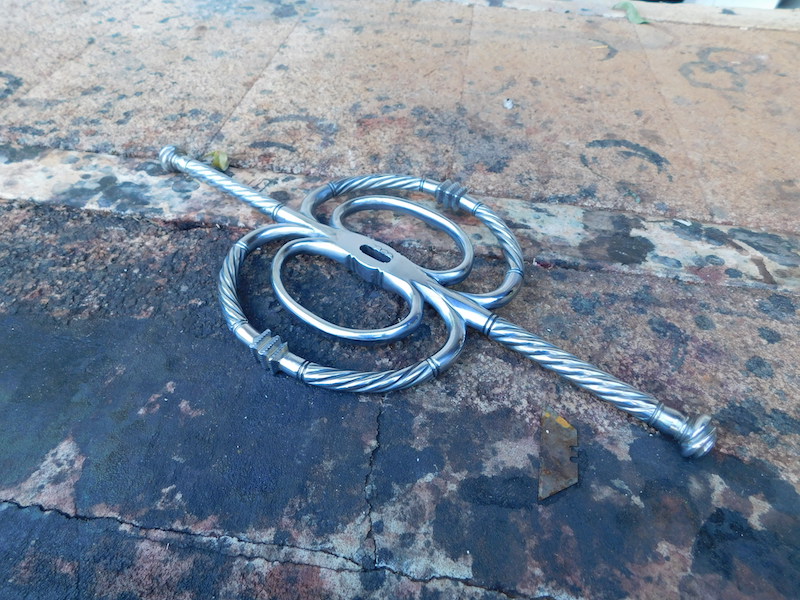
The inner rings are a simple oval section with no decoration, so the rods were shaped and hot curved around a former. The intersection where they met the guard was shaped and then the were tacked welded into place to make sure all fitted well. The pieces were then removed and fully cleaned and then welded into place. Before welding I heat the parts to get a good and deep bite to the weld. The sweep in and all the other forms are then filed and polished.
The reason I polish between steps is because some areas on complex guards are hard to reach after assembly, so I like to keep it clean as I go along.
The next job is to start on the outer rings. These are marked out and filed as straight pieces and then hot curved around a former. Again the intersections are shaped and test fitted before removing and cleaning fully and then welded back into place. The final stage is then file in all the intersections and polish.
So nearly there, but not quite, so the final steps in the next day or two.
I hope you like the progress.
Tod
Attachment: 182.21 KB
Attachment: 193.93 KB
Attachment: 130.05 KB
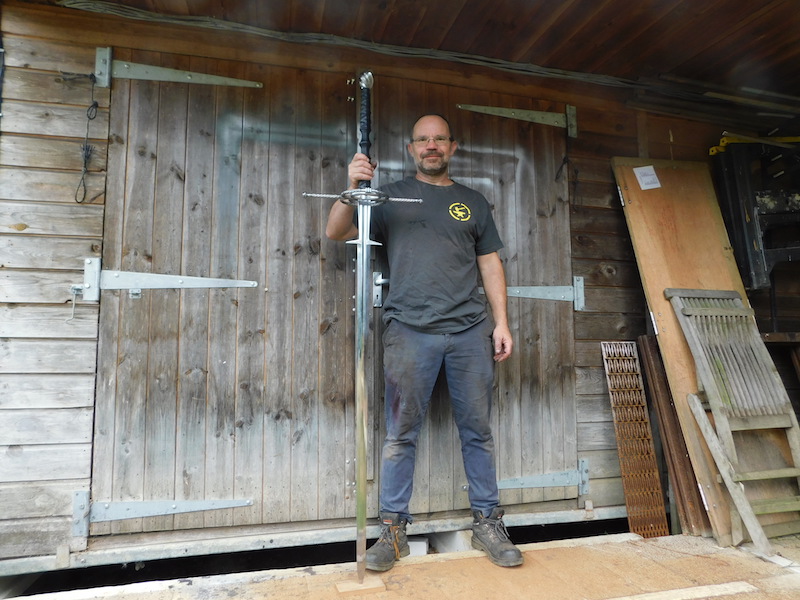
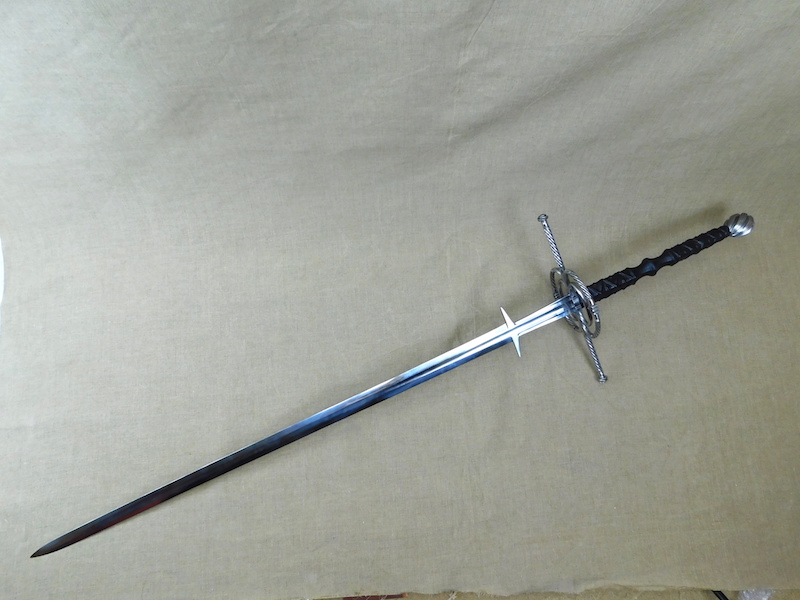
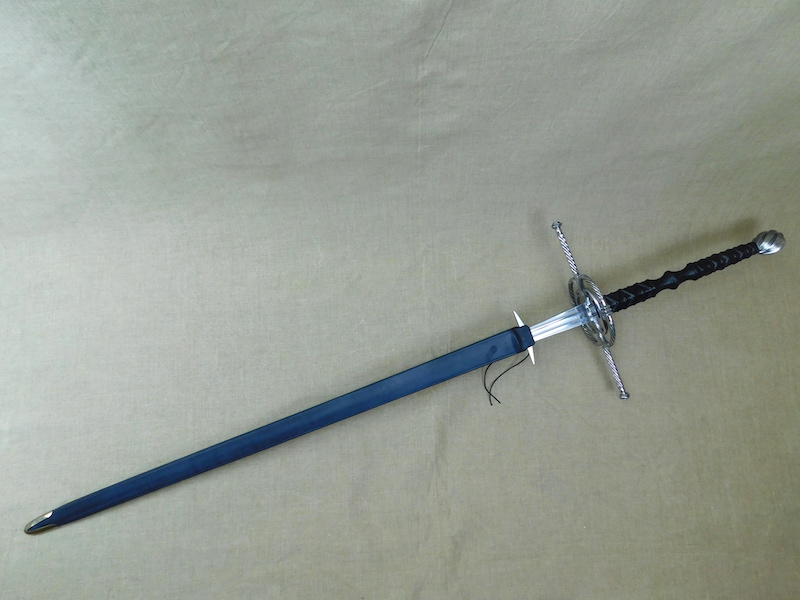
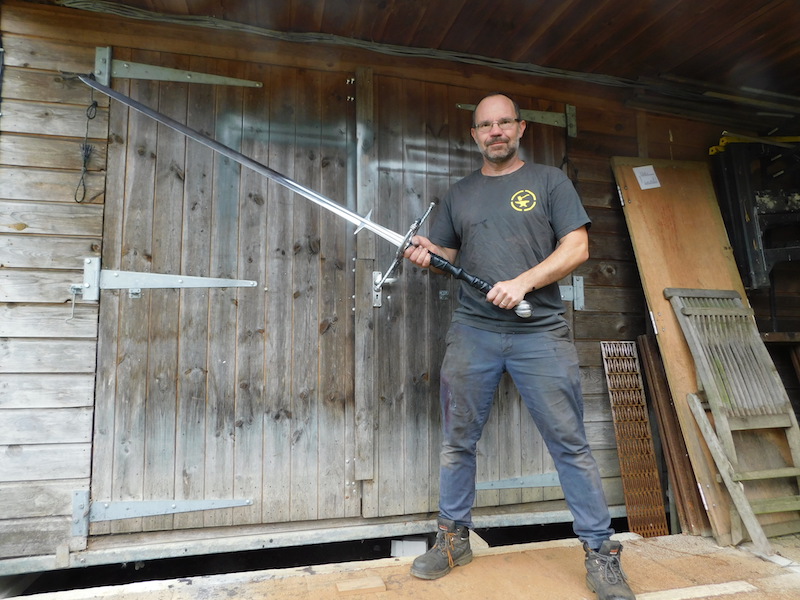
Finally, after many days the sword is finished. It was long and tiring but in fact in the end relatively straightforward; which was a big relief.
Generally they didn't have scabbards, but I made one for this piece to keep it safe and it is simply lashed into place with the integral cord.
If you have any questions or comments, please fire away, but in the mean time here are the stats.
Overall length 180cm/71"
blade length to lugs 116cm/46"
grip length 40cm/16"
weight 4040g/8.9lbs
POB 50mm/2" in front of guard
Thanks for looking
Tod
Attachment: 168.39 KB
Attachment: 139.99 KB
Attachment: 113.38 KB
Attachment: 134.84 KB
Attachment: 136.22 KB
Attachment: 151.81 KB
Attachment: 128.46 KB
Attachment: 144.39 KB
Attachment: 144.94 KB
Attachment: 170.78 KB
Fantastic! With a blade that big, do you have a forge big enough to heat the blade evenly for heat treating? Or do you use a molten salts bath?
That is phenomenal workmanship and a very unique project. I can't believe the size of the hilt components seen relative to your hand. Truly an intimidating artifact.
-Adair
-Adair
Well, damn, I've never really wanted one of those things until now. Great job, Tod.
Truly a masterpiece! The detail work on the guard alone is phenomenal. The blade is amazing. As a whole this looks to be a monster. Between this sword and the dagger their would be a few happy warriors if they had owned both of these.
Page 1 of 1
You cannot post new topics in this forumYou cannot reply to topics in this forum
You cannot edit your posts in this forum
You cannot delete your posts in this forum
You cannot vote in polls in this forum
You cannot attach files in this forum
You can download files in this forum
All contents © Copyright 2003-2006 myArmoury.com All rights reserved
Discussion forums powered by phpBB © The phpBB Group
Switch to the Full-featured Version of the forum
Discussion forums powered by phpBB © The phpBB Group
Switch to the Full-featured Version of the forum