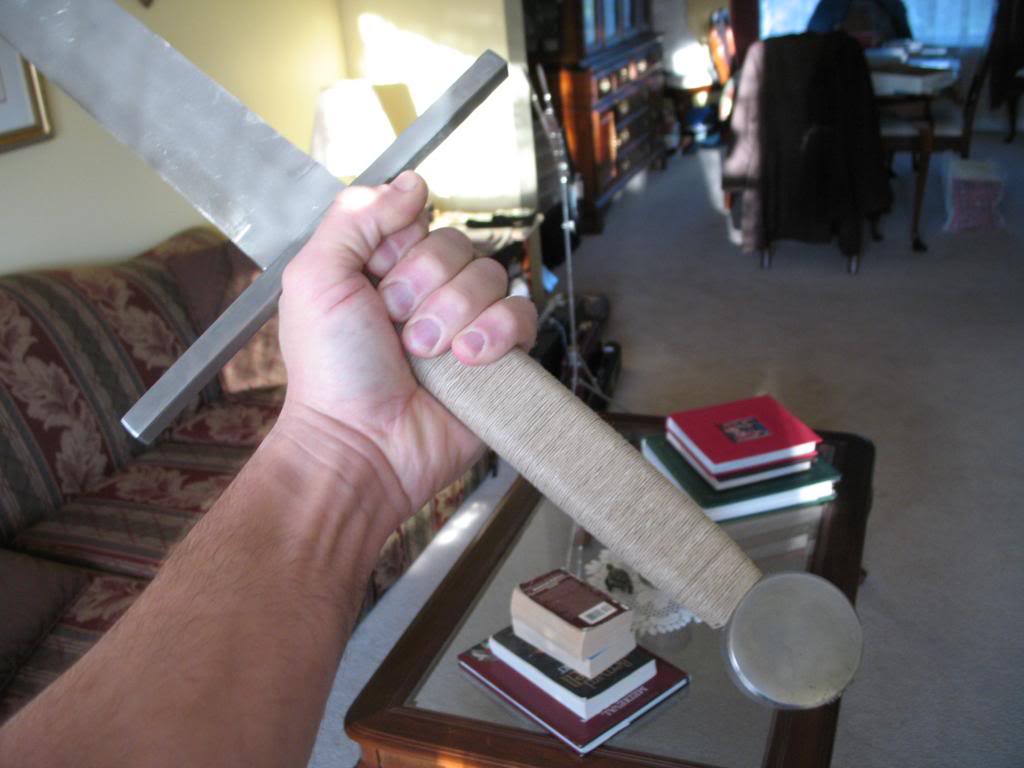
So this is my first try at something like this, hopefully it does not end in a wreck, but, so far so good.
Here is the original sword, bought from MRL years ago. Big and heavy, handle is twisted (carved) wood that I covered in leather. Handle was always too fat, and round so it felt extremely uncomfortable. Blade is a bit rough, always was...has some wavy hammer marks, not perfect looking down the edge...but overall it is nice and symmetrical and most important to me, NOT whippy in the least. Quite a stiff blade. And I always like the near parallel blade profile, very little profile taper. The thing was heavy overall and blade heavy in particular.
I took it apart, hack sawed almost 3 inches off the shoulder of the blade and cut off the crappy threaded rat tail.
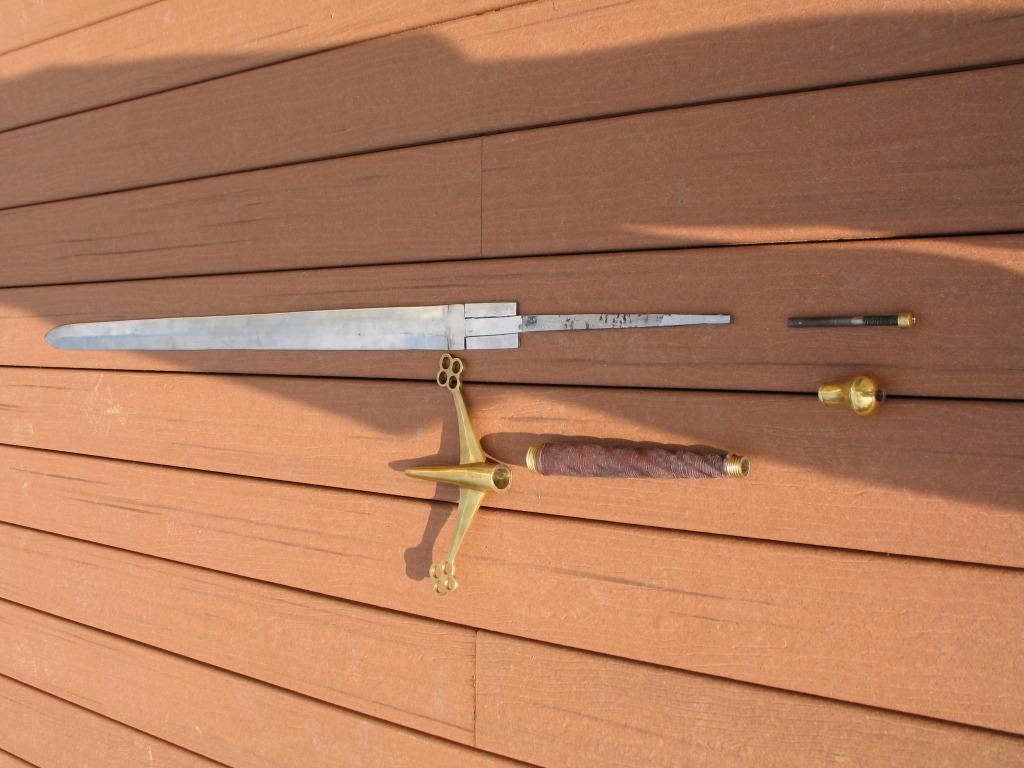
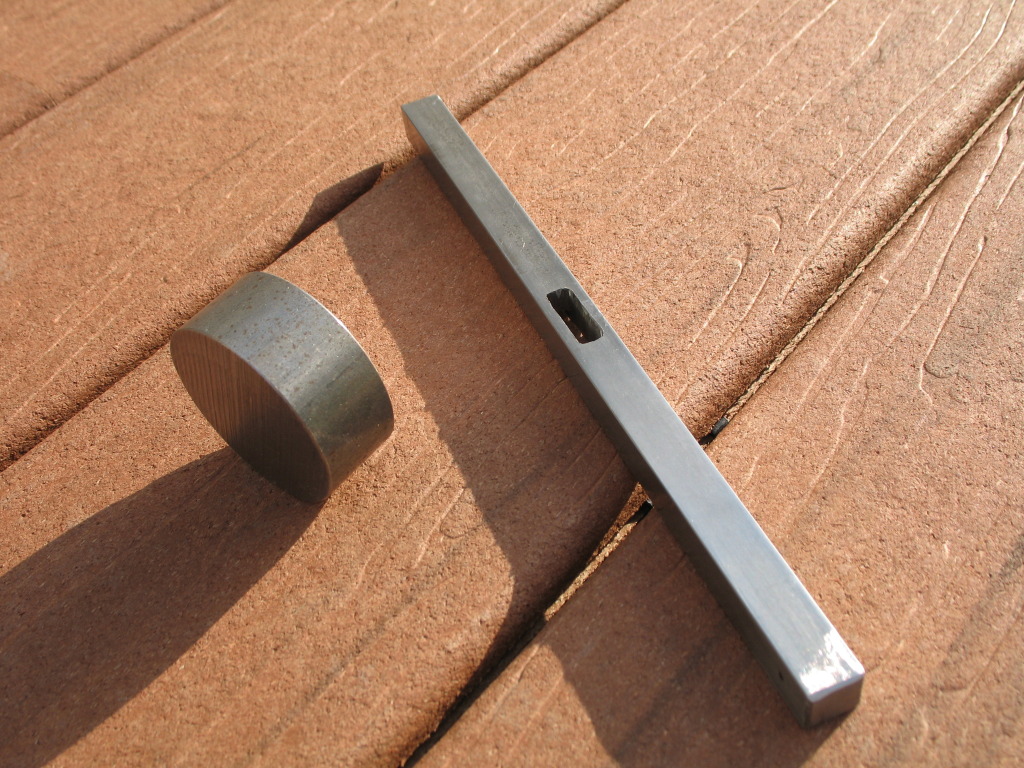
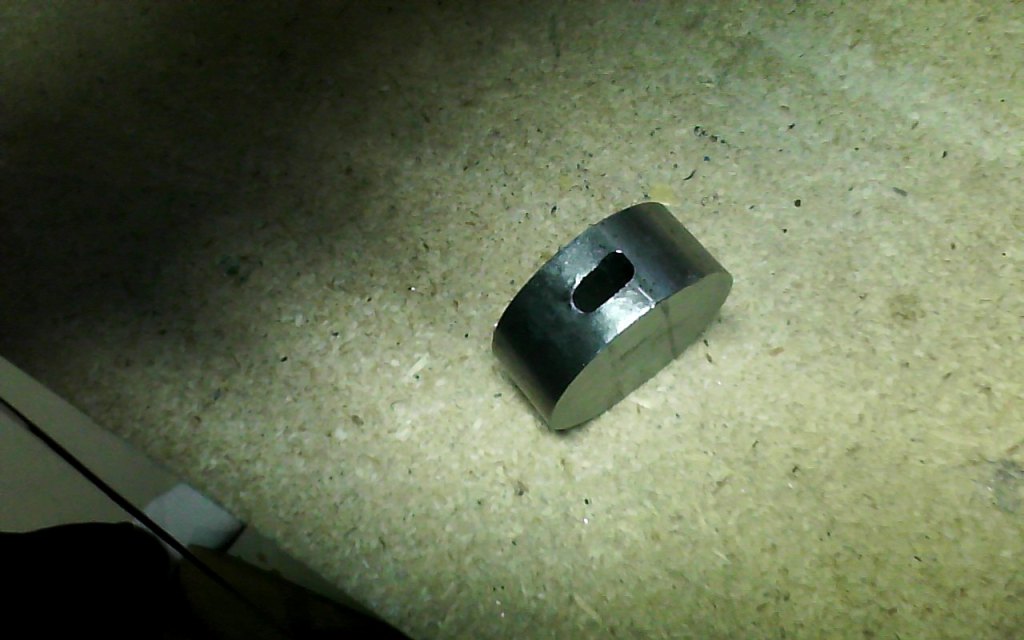
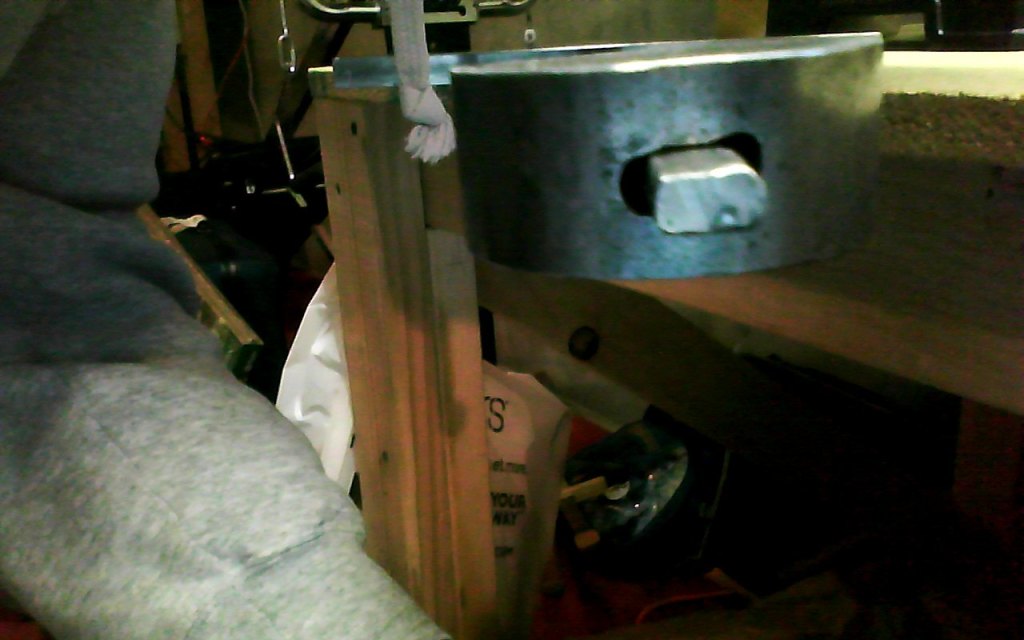
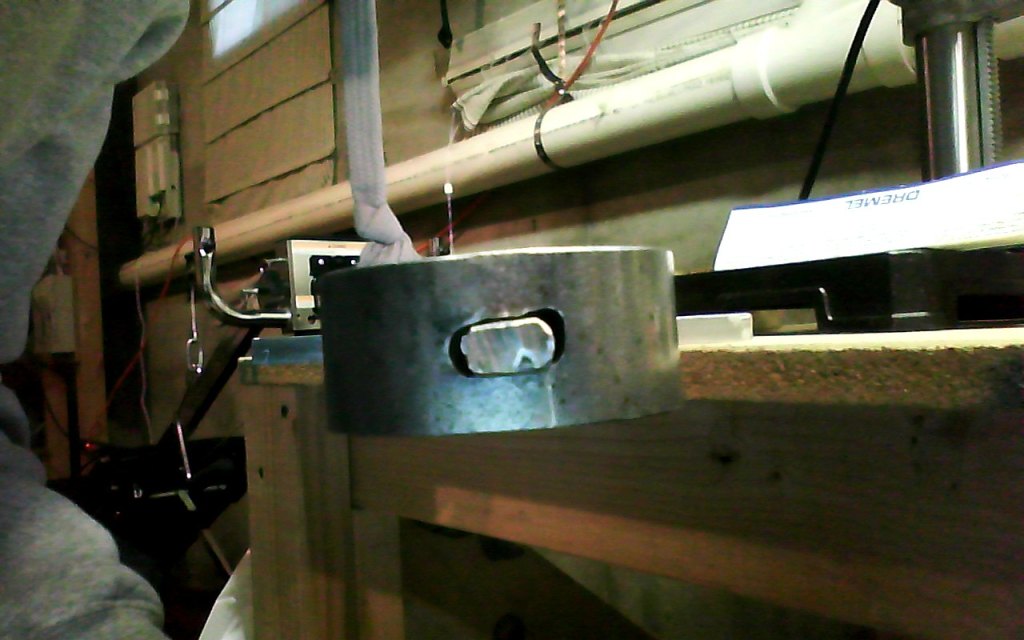
Then I purchased some mild steel from an online vendor in order to "machine" the cross guard and pommel, 1/2 inch square bar (9" long) and round bar 2" by 3/4" thick. I drilled holes through it to rough out the slot and then used a dremel and hand files to finish it off. Its not the greatest machine job, but the rougher areas are inside the slot and will be hidden by the blade when it is seated, so I don't care that much, the important thing for me so far is its tight and fits good.
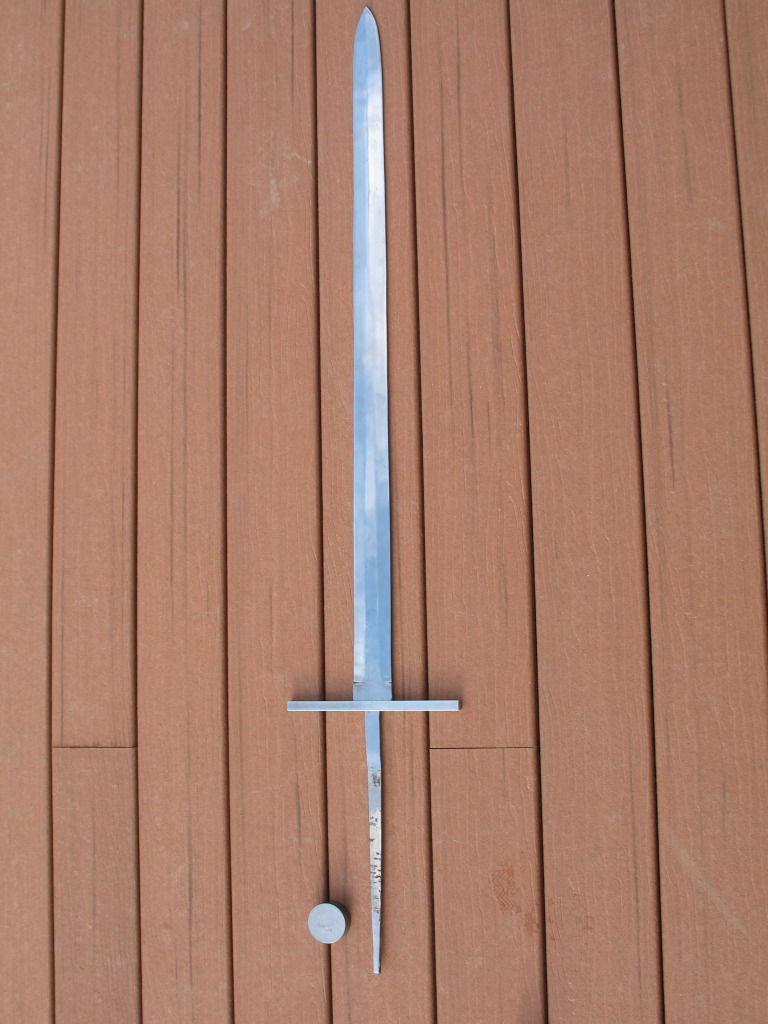
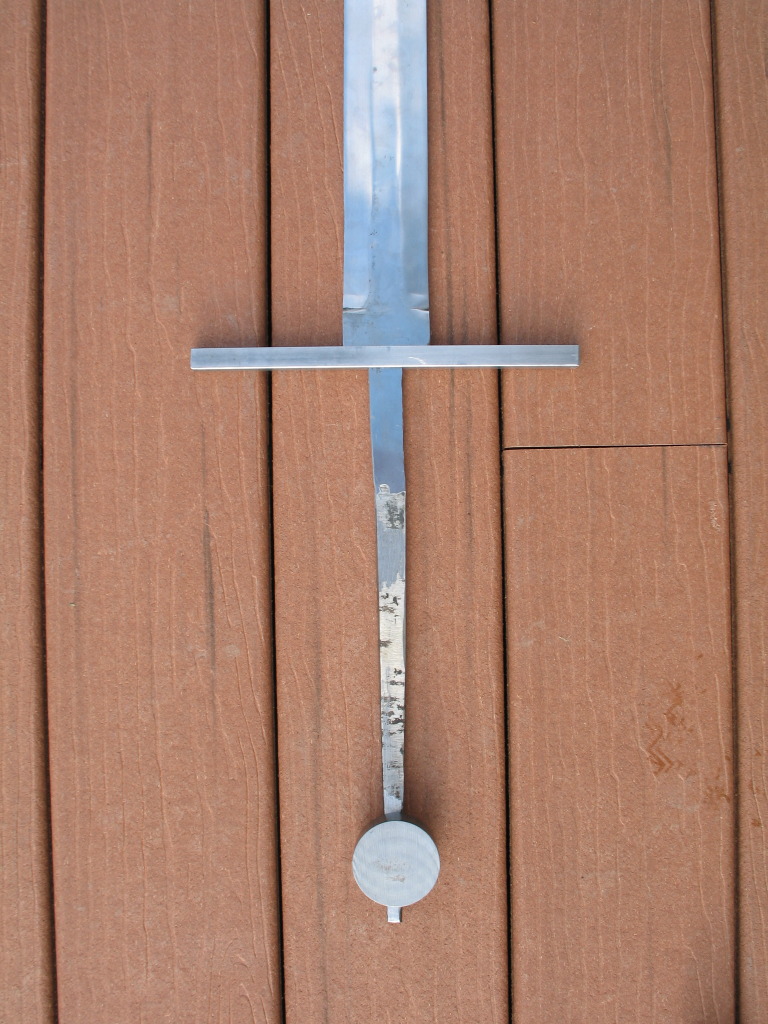
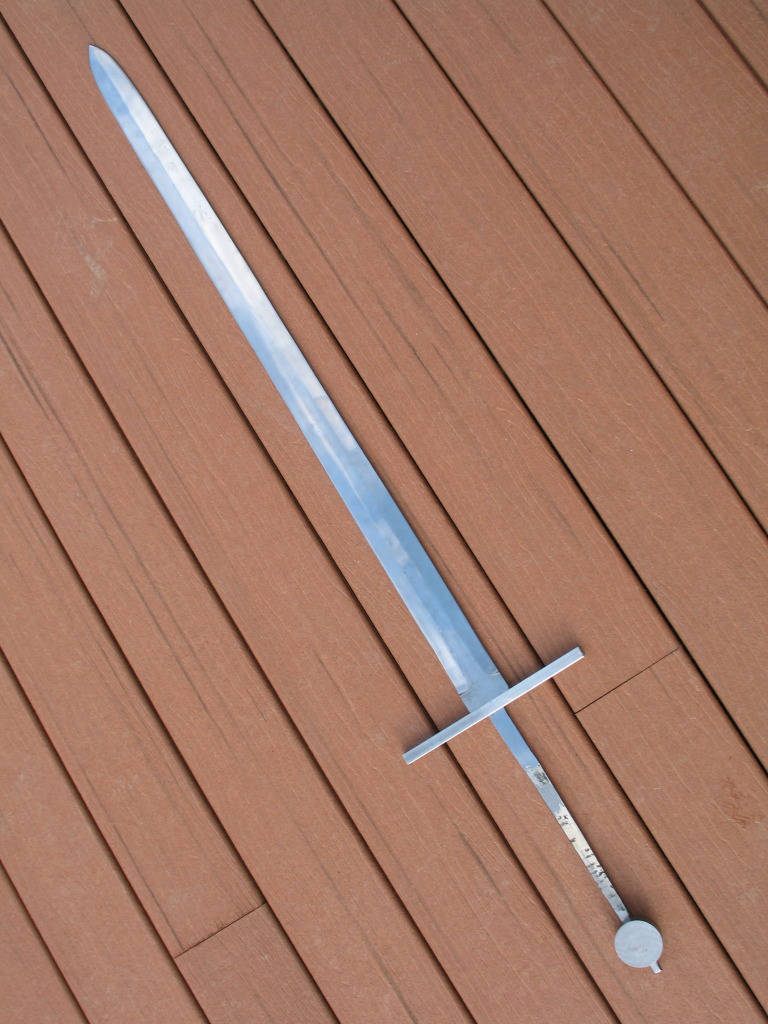
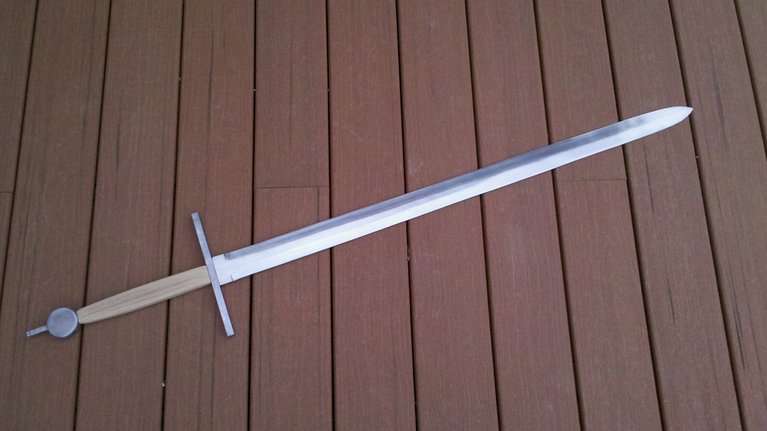
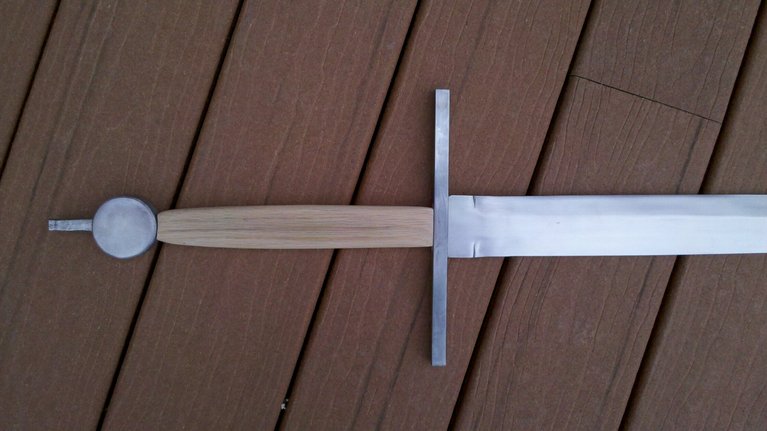
Here is a roughed out idea of what I will end up with. I am going for a no nonsense great sword, straight guard and wheel pommel, I wish the blade was fullered but what can you do? Have yet to decide on the final handle length, its pretty long now, I may keep it approximately this length but I might shorten it some, if I do it won't be by a lot. Next step is to key the pommel, that will be super tough. I have at me disposal a drill press and the aforementioned dremel and hand files. We will see. This is all new territory for me, working with steel like this in order to rebuild a sword, so its a learning experience but one that so far has been rewarding. Wish me luck!
Looks challenging with minimal use of power tools and lots of hard work, sweat and tiring work needing lots of determination and patience. ;) :D :cool:
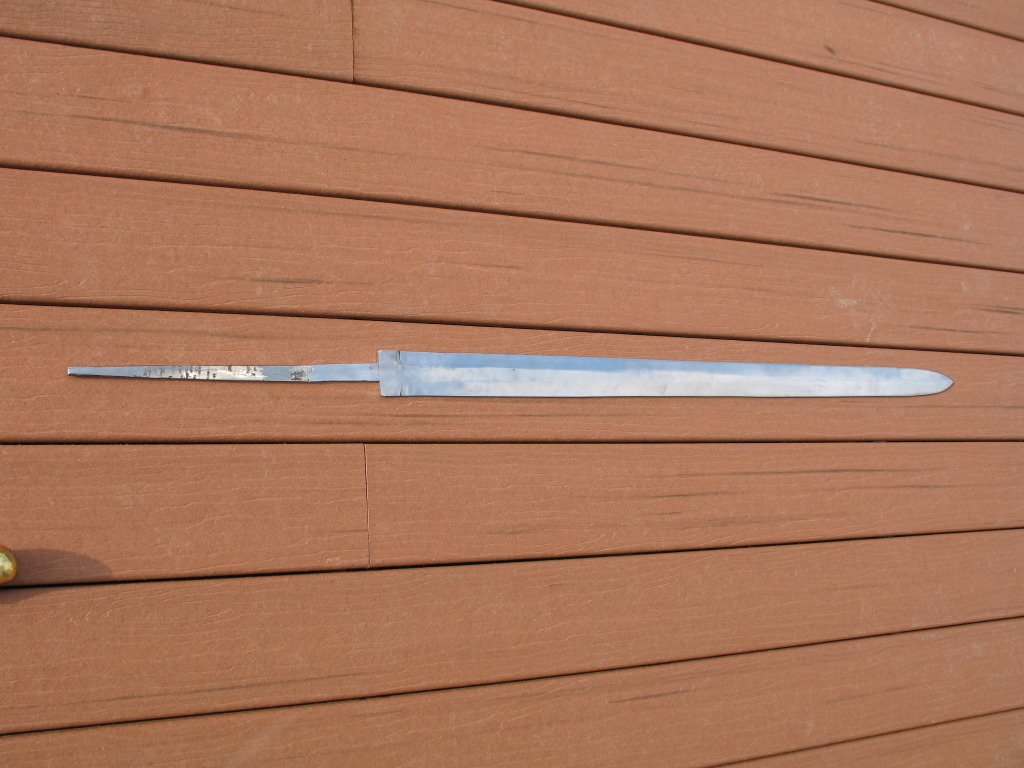
Nice work overall but I'm a little concerned about the shoulder/tang area being cut very square as having a radius there would avoid creating a stress riser where the blade could snap at the tang: Even a tiny radius is better than a square corner.
Since the blade seems to have a somewhat wavy surface I would finish it to a brushed finish and then do a bit of patination using the vinegar or the lemon juice or yellow mustard treatment.
You could then leave it patinated or polish it back to a brushed finish with a little surface activity giving the impression of a weathered sword well maintained.
I find that this sort of treatment can get rid of modern machine marks and hide any deeper scratches or minor flaws by the random pattern of light pitting and surface activity.
Just suggestions you might find useful or not. ;) :D :cool:
Last edited by Jean Thibodeau on Sun 21 Oct, 2012 5:41 am; edited 1 time in total
Thanks for the radius tip. I was planning on doing it at one point and then I ruled it out for some reason...thinking it wasn't all that important.. I will put it back on the to do list - grind in a small radius in both corners and then blend that radius into the rest of the tang, basically amounts to some additional filing and grinding so not too big of a deal..
As far as the finish of the blade, thanks for the additional ideas, they are most welcome. I honestly don't know what I will do at the end to finish everything off. Some sort of satin finish will be the goal for starters, if/when I conquer the build part of the project I will start putting some thought into the final steps.
Bryan Heff wrote: |
Thanks for the radius tip. I was planning on doing it at one point and then I ruled it out for some reason...thinking it wasn't all that important.. I will put it back on the to do list - grind in a small radius in both corners and then blend that radius into the rest of the tang, basically amounts to some additional filing and grinding so not too big of a deal..
As far as the finish of the blade, thanks for the additional ideas, they are most welcome. I honestly don't know what I will do at the end to finish everything off. Some sort of satin finish will be the goal for starters, if/when I conquer the build part of the project I will start putting some thought into the final steps. |
Radius and then push the shoulders back a little more like you originally did lengthening the tang i.e. lengthen the tang by the diameter of the radius: Avoid making the tang narrower by having the radius ' bitting into the tang.
A radiuses corner will remove the weakness/stress riser but if you reduce the width of the tang you would cause another kind of weakness. ( This may be obvious to you already, but better my mentioning it before you start cutting into the steel. ;) :D :cool: ).
In other words the shoulder lines/cuts and the tang lines/cuts should be tangential to the radiused corner, and most importantly not cut into the tang.
Do as search here for Topics about re-finishing or antiquing, vinegar, lemon juice, mustard as " Key search words " and you should be able to find multiple articles dealing with finishing blades and or hilt furniture.
Or start with this feature article: http://www.myArmoury.com/feature_antique.html
Within the article here is a pic showing various degrees of the effect:
http://www.myArmoury.com/view.html?features/pic_antique04.jpg
You can do this very subtly for a well maintained in period look during decades of field use, or go for the museum artifact look with heavier patination and pitting.
What you probably don't want to do is make it look like a dug up find heavily corroded if you want it as a using sword, or a sword as it would have looked in period after 20 years of use can carry in the field.
Looks good, how long is the blade now?
Jean - Thank you for all the information. I understand completely what you are describing with the radius.
Luka - The blade right now is just under 37". I am planning on a 9.5" handle length approximately, so the current tang length shown in the pictures above will be shortened.
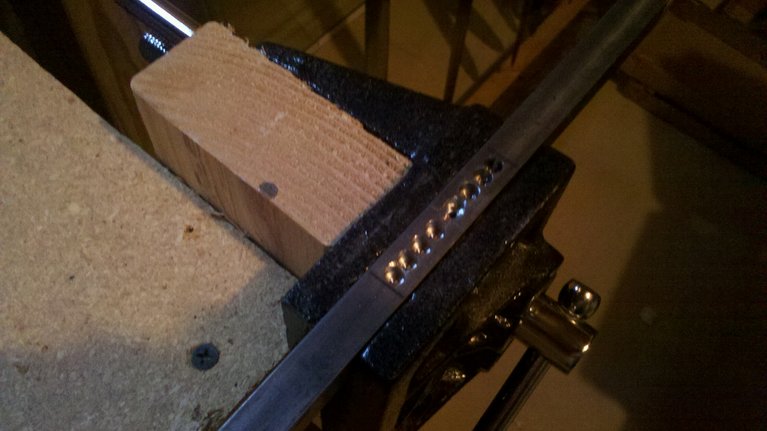
I "keyed" the pommel and it was NOT fun. Drilled 3 holes in a line and then used a dremel and hand tools to remove the remaining steel, and it was not easy. If not for the carbide cutting tip on the dremel, I would not have been able to do it. I wish I had better tools, but what can you do.
It came out OK, I am not done yet though. Its still not seated as far down on the tang as I want, so I will need to file some more. Also, when I drilled the 3 holes, using a drill press, the started out in line and centered at the top of the pommel, but by the time the drill made its way out the bottom, the holes were not longer lined up...in fact the one was quite off center.
You will notice when looking at the picture the one corner which is too wide, too open...sloppy looking, that's the third drilled hole. So its keyed, but its definitely not perfect, far from it. I am hoping that when I peen it, using a bit more tang perhaps then I need, I can cover it up entirely. Any suggestions would be greatly appreciated.
Top right corner is the third out of line hole...note, the pommel is not fully seated, so more tang should fill in these gaps as the pommel sits further down on the tang.
Add a peen block. It will cover up the blemish on the pommel and give your sword a different look than most DIY projects I have seen.
I essentially finalized the cross and pommel. Sanded them down, cleaned them up, was able to get the pommel key hole large enough to seat it at the approx. distance from the guard, it ended up being 9" as opposed to 9.5" but that is fine. The key hole is still a bit larger at the end opening than the tang, but down inside it must be thinner b/c when in place, the pommel does not move, does not wiggle or turn.
I beveled the edges of the guard and the pommel to round things off just a bit, nothing major as that would have taken a lot more time, for now, I am happy with how it looks.
2 things I am considering and would like to get opinions.
1 - I was thinking of putting J-B weld in the cross guard slot as well as the pommel key how, then letting them set, prior to peening the pommel. Basically to fill in the space that exists in both. Now in both cases, once the handle is in place, I think there will be no movement. The guard, when I place pressure on it (the same way a handle would) has no movement. The pommel also has no movement when I seat it, but to be extra sure of a super tight fit, I am considering the J-B weld (epoxy basically) extra step. Bad idea?
2 - I purchased a torch and ball peen hammer and practiced a bit on the rat tail that I cut off of the tang. its slow going, but I think I am getting the feel for it. Will it matter much that my tang is rectangle in shape? Will it still peen down OK?
I started a peen block but gave up on it, I don't think I can get it clean and tight enough, so what I would end up with is an extra piece in the overall puzzle that could potentially come loose.
I think I am ready for final assembly. Here is what it looks like now.
I finalized both guard and pommel, I could continue to file and file and grind and grind to get more bevel and/or rounded edges to give either some more geometry, but I kinda like the austere look of a very straight and plain guard and a standard disk pommel, so I think I am leaving them alone. I polished them both up, as well as the blade and when I was done, I noticed that both blade and furniture were exactly the same finish. I did not like that very much so I very very lightly gun blued the furniture to just darken it a tiny bit, so it would contrast a bit with the blade. I like the way it turned out.
I built a handle from oak and shaped it and tapered it. I think it will do just fine.
The pommel has about an 1/8" - 1/16" gap between the handle, which should disappear when I hammer the pommel down, wedging it into place on the tang. So I think I am good there.
Next step will be to epoxy fill the guard slot and fit it into place on the blade, its really close fitting now but I want zero movement, then I will epoxy the handle in place. Then the final pommel assembly will follow.
I was going to J-B Weld the pommel then peen it down, but now I am thinking just epoxy then peen. Any thoughts on either? I think I want to stay away from the J-B weld in case things don't work out for some reason and I have to break the sword down again, I think regular clear epoxy would be easier. Never used J-B weld and am leary.
Very cool! Can't wait to see it completed!
Very nice. I would suggest that you not rely on the grip to keep the cross solid, a little epoxy may be a good idea. Wooden wedges are a good period technique that I have found works quite well. Brass shims were sometimes used to tighen things up when needed too. The rectangular tang should not be a problem when it comes to peening. I have found that the steel from which the old Windlass blades are made peens a lot easier and more smoothly than some of the newer blades of 5160 and such, which have a tendency to air-harden and crack.
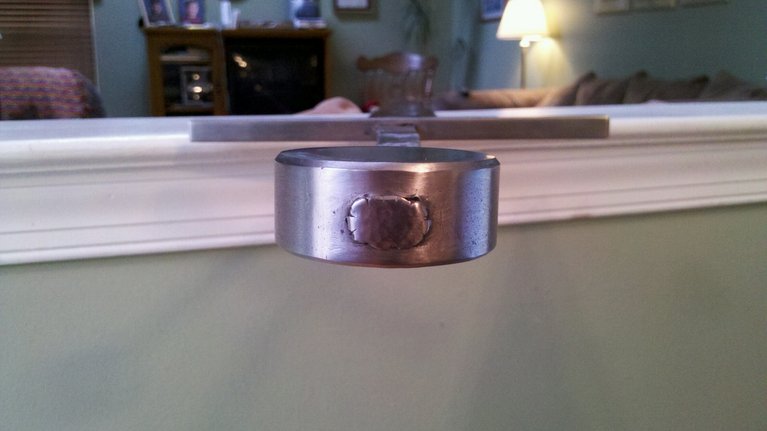
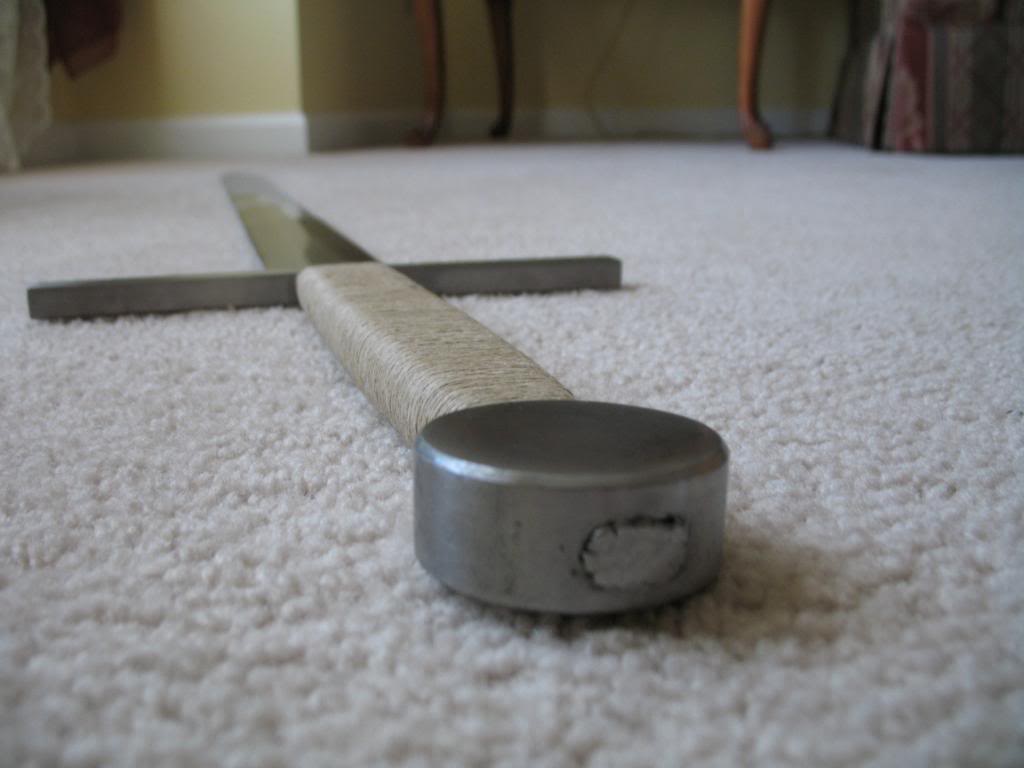
I peened it. It took about 3 hours of near constant hammering, even with a propane torch which I am not sure actually did much of anything. As others have reported I found out the hard way...the pommel will steal the heat away from the tang.
I knew the peen would be difficult, it was more difficult than I thought though. My biggest mistake was starting with too much tang. I mushroomed the peen nicely but due to too much tang material, it was too far away from the pommel, leaving a gap between pommel and and of tang (where the peened mushroom shape had developed). Then the edges started breaking off and before long I was left with essentially a non peened tang, just shorter. So in a way I peened it twice. You live and learn.
The pommel took some hammer shots :cry: ...so it needs to be cleaned up. There was a time during the 3 hours were I was pretty much losing my mind and got sloppy. It looks pretty rough in the picture, it honestly doesn't look as bad in real life - I hope I can clean it up. It has been a good learning experience for sure..and I am still happy with the results, not as perfect as I wanted, but considering what I was working with and what I was trying to do and I made the pommel and guard basically from scratch, I feel pretty good.
I ripped off the wooden handle as during the peening I must have shattered the epoxy inside, it was creaking and was making noises....didn't like that so I took it off and will make another. This time I won't be assaulting the handle end of the sword with a hammer for three hours, so I expect it will remain clean and tight once epoxied in place and clamped.
The original claymore was 5 1/2 lbs, this sword now weighs 4 1/2 lbs. It is still blade heavy, not the most balanced sword in the world but considering its an old Windlass, not too bad. Since I am not planning on cutting with it or even sharpening it, its not a big problem for me, that it is blade heavy. One thing I would do different would to go an extra 1/4" in the pommel diameter. It is currently 2" and I think would balance better and look better with a slightly larger pommel. Thanks for the comments.
Next steps are to redo a wood handle and cord and leather wrap it.
It took about 3 hours of near constant hammering, even with a propane torch which I am not sure actually did much of anything.
I think you'd have better results and a much easier time with an oxy acetylene setup. Propane simply doesn't get hot enough for what you're doing. If I'm not mistaken, you're looking to turn that tang red or orange red, before you hammer.
I was able to clean up the pommel dings with some hand files and sandpaper.
Looks very good! It cleaned up nicely. Did it take long?
Nice work man!
Rehilting a sword is hard work hey!
Looks like it was a fun, learning, and rewarding experience!! I love to tinker with my weapons also, so seeing someone else doing it (with the same limited tools and resources I have) and going through similar trials and tribulations makes me smile. When it's all done, it's nice to sit back, look at it, and think, "I did that"! It's great exercise for the mind and body to overcome some of the obstacles, seen and some unforeseen, to create something new from something old. Congratulations! It looks great!!
Josh Wilson wrote: |
Looks very good! It cleaned up nicely. Did it take long? |
Hardly any time at all actually. I have some some small detail type files. Worked over the dings with those and they basically "rubbed" out, then ran over it with sandpaper and they basically disappeared.
Tools I used (for the most part)..
Sword is in the vice, new poplar wood core has been made and is ready for expoxy in place. It was one of those 3 part core numbers.
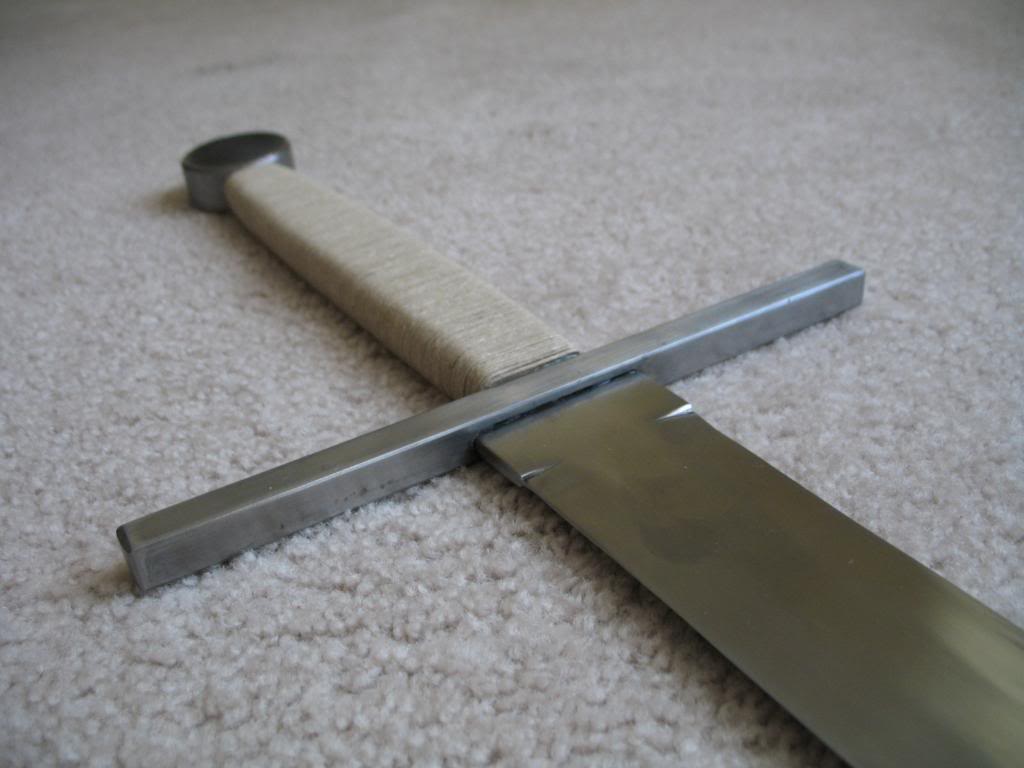
I had epoxied/a tiny bit of J-B welded the cross guard in place, ready to then do the grip when to my dismay I noticed the cross had not seated properly on the shoulders, had a bit of crooked to it, not perfectly perpendicular to the blade, so I had to break that free, slide it down and file the shoulders a bit more to gain a better seat. That worked nicely. I then filled the cross guard slot with epoxy and seated it, applied a very small bead of JB weld epoxy on the bottom of the cross (wear the handle meets the cross) for added security and let that dry. Then I carved the new poplar core (first attempt was oak, poplar as many have attested is better, I agree) and once complete I epoxied that to the handle. Note, at this point the pommel had been peened and wedged and is rock solid, the guard seated and epoxied and tight. The grip core was snug on both ends, pommel and guard. Last night I purchased from an arts and crafts store really small diameter cord and wrapped the core. I will make a leather wrap next, maybe this weekend.
Right before final epoxy of the grip
Here is what it looks like now. Aside from the grip wrap and some additional polishing etc, I am nearly done.
Next to my 33" bladed Windlass CYO
In hand
The Good -
1 - Hilt components are super tight, zero movement.
2 - Everything is lined up. Guard is at a 100% "T" to the blade, totally perpendicular. The pommel is ever so slightly out of line, but its no worse then some production swords I have had in that regard, in fact its better. You really have to study it to see it.
3 - Grip is comfortable and secure
4 - Blade rings like a bell, so I think my peen etc is good
The Bad -
1 - The original claymore blade is what it is. No fuller, no distal taper, a bit wavy with hammer marks etc. I did nothing to the blade except shorten it and polish it. It is still heavy, its a tank.
2 - POB is 7 1/2" out, definetly not ideal. A bigger heavier pommel would have helped
3 - I should have went with a 2 1/4 or 2 1/2 inch diameter piece of round to make my pommel. Still looks OK but bigger in this case I think would have been better.
4 - Sword is heavy, too heavy by 1/2 to 3/4 of a pound I would say I could attempt to reprofile the blade with sander, but have no plans for that right now, perhaps in the future.
Stats -
weight - 4lb 7oz (originally 5 1/2 lbs)
overall length - 49 1/4" (original was around 58-59" I think)
blade length - 38 " (original about 41-42")
grip length= 8 3/4"
pob = 7 1/2"
I am thinking a dark brown leather grip with multiple risers, evenly spaced along the length of the handle, like 6-7 or so, but we will see.
Page 1 of 2
You cannot post new topics in this forumYou cannot reply to topics in this forum
You cannot edit your posts in this forum
You cannot delete your posts in this forum
You cannot vote in polls in this forum
You cannot attach files in this forum
You can download files in this forum
All contents © Copyright 2003-2006 myArmoury.com All rights reserved
Discussion forums powered by phpBB © The phpBB Group
Switch to the Full-featured Version of the forum
Discussion forums powered by phpBB © The phpBB Group
Switch to the Full-featured Version of the forum